Last Updated: February 14th, 2020
Answering the question of “how do I get started with photography?” begins by taking a step back. Let’s treat this post more like a casual class in school for a second instead of yet another boring book of text to read through on the subject of photography for beginners (let’s face it: there’s a freakin’ lot of those around!).
I want you to think about another personal thing you’ve taken on in the past. It could be a hobby. It could be a pursuit of a college degree or a new job. What was the process like for getting involved in that thing?
When people are looking to get into photography, they often get really overwhelmed, really fast! It’s these little mental blockers that end up making getting into photography for real to be so difficult for most – not the actual photography itself.
As with anything new we decide to go after, there will absolutely be some tough parts (don’t get me wrong on that!). Early on, I struggled to grasp the core concepts around the Exposure Triangle – but came to view it as a mountain I had to climb. Once I got over it? Photography has honestly been more of a breeze!
Talking About Other Personal Challenges
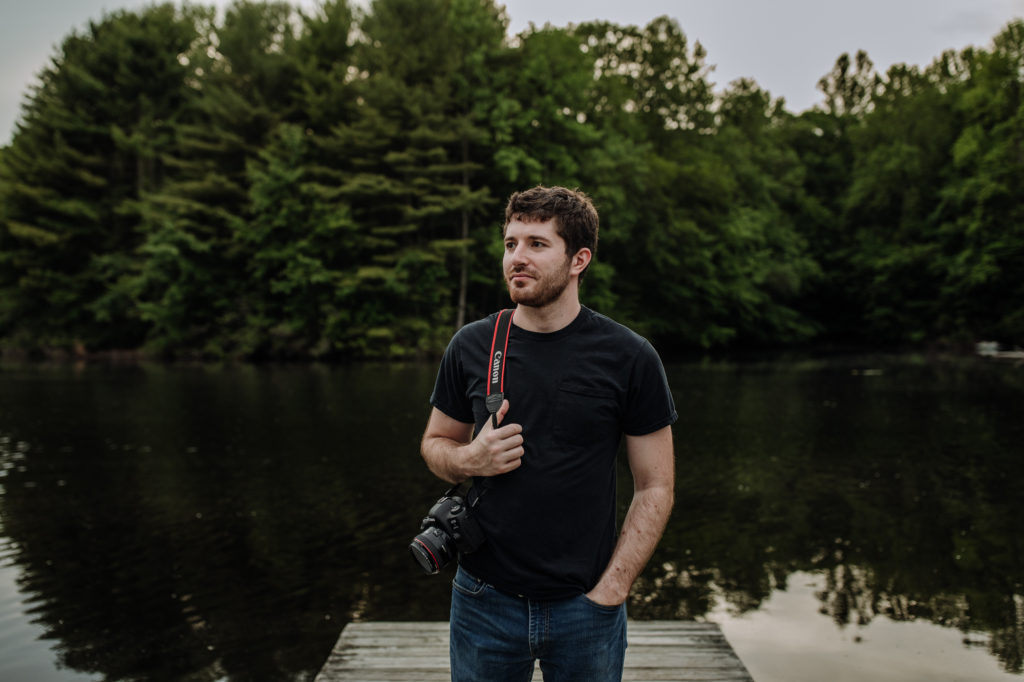 Before I do the deep dive and show you all the things you need to do and know to get started with photography, I want to illustrate the point of conquering new challenges with some personal stories.
I’m hoping that, even if you are new to photography, you may be able to connect with stories of facing a difficult situation in another area of your life and getting the best of it!
Challenge #1: Get a College Degree
One thing many people can relate with is going to school in pursuit of a college degree to (hopefully) help land in a better paying job. This was, at least, one of my goals when I went to college. About a semester in, it started to feel like a chore – and I definitely had my share of difficulties. It doesn’t help that I am fairly math illiterate and just got by in statistics 😊
This is a great example because a college degree is a long commitment. Just when you begin to grasp things in your 101 courses, you move ahead to the next class that builds on what you’ve learned and often makes it more complicated. Photography is a lot like this!
Status: Conquered!
Challenge #2: Fix Up the House
My wife and I recently bought a house (yay – us!). While it’s a place we love, it’s been rough around the edges and has needed a lot of TLC to make it feel like our own. On the surface, the changes we needed to make seemed easy enough – but in reality, it’s been a lot more time consuming and challenging at times than we expected.
Some of the things I’ve had to learn to help move this process along has included…
- electrical work to swap out lights around the house (check)
- how to fix up holes in walls (check)
- what to do to rip up molding and subflooring (check)
…the list goes on…
Photography is a lot like fixing up a house in the sense that there are always new things to learn. You can figure out the settings on your camera, but will need to learn how to track the weather (to predict lighting outside), how to use light to your advantage, and so on.
Status: In Progress
Challenge #3: Getting Good at Skateboarding
Many of us are into sports or something similar – in my world, skateboarding has been a big passion since I was a kid. I grew up watching Tony Hawk, went to the X-Games, skated in the streets and joined petitions for skate parks to be built. These days, I’ve moved away from all the crazy and like to cruise most of the time, occasionally challenging myself to try new tricks.
Skateboarding, like any sport really, has a very large learning curve. It’s difficult at first, becomes easier, but then you can find things to really keep yourself challenged. I remember back in the day I’d go and jump down stairs – I started off with a 4 stair, and over time came to jump down an 8 and 12 stair. That’s probably my limit (and I’m past my prime for that sort of thing) – yet I’m watching videos of others out there going and jumping down 25 stairs – it’s pretty insane.
Photography is a lot like this, too. You can learn enough to get to a point where you can be satisfied every time you go out. With my skateboard, just cruising around and doing basic tricks these days is enough for me. But – there is always room to expand.
Status: In Progress (and probably never going to fully master it!)
Photography is the type of thing that, even if you feel you’ve conquered it, you will always be met with another new curve ball to keep you on your toes.
Photography 101: Introducing the Basic Concepts for Beginners
 For the rest of this post, I want to guide you through some of the things you’ll want to learn as a beginner photographer. These things will form the foundation as you explore photography in different ways.
Topics:
- The Importance of Personal Expression in Photography
- Getting a Good Composition is Easier Than You Think!
- Camera Modes and What is Best for Beginners
- The Exposure Triangle – Understanding ISO, Aperture, and Shutter Speed
- How to Challenge Yourself to Maximize Your Abilities
- Resources for Continued Learning
The Importance of Personal Expression in Photography
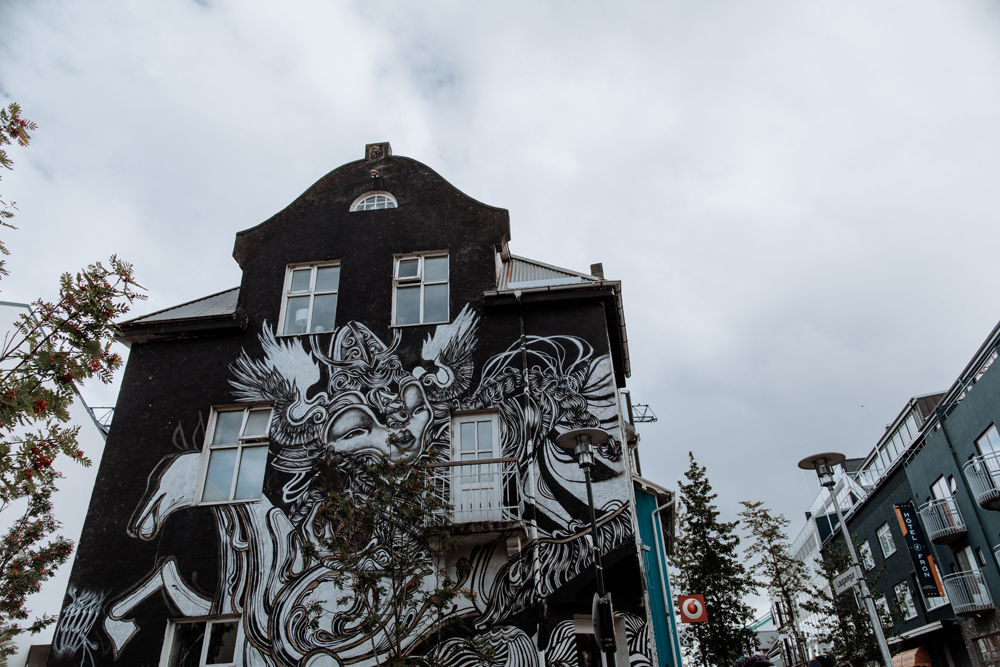 The most common mistake first time photographers make is starting off with obsessing over their camera gear and settings. These things contribute to a great photo – but aren’t the only things that matter.
I think the driving force behind a photographer’s passion is being able to have personal expression through the art form. You can take pictures of anything – so find subjects that you connect with!!
This is so important because it will help hold your interest in photography over time. Yes, even when you are having a tough time dialing in those settings.
The sky really is the limit here, but if you’re struggling to figure out what subject matter is important to you – let me talk a bit about what matters to me.
When I started taking pictures “back in the day” during my teens, the things I liked taking pictures of were really simple. Flowers, trees, my girlfriend’s dog. It was never all that serious in the beginning – and looking back, I think that’s why I was able to find it fun. Photography is a great hobby after all.
As I grew up and matured, my tastes changed along with me.
This is completely normal.
It’s a great thing about photography, too, because as you evolve as a person – so to can your photographic interests.
It was just a couple years ago where I hit a point with photography where I really went another direction. I found my niche photographing weddings and portraits. I’m one of the people who took photography from a fun hobby to an actual career doing something I enjoy.
What’s maybe most interesting about this change in my life is how I’ve started to compartmentalize my photography interests. I get paid by people to photography weddings and take their pictures – and I really enjoy it!
But – I still enjoy photography on a personal level, too.
When I’m not really pushing my skill and technique with a camera for paying clients, my passion is for landscape photography. The subject matter is totally different, and so is the creative process. Heck, even the end result goes to different places – instead of a gallery of photos sent off to my clients, I’ll save photos as a desktop screensaver, and the best of them end up blown up into wall art hanging in my house!
Your choice of subject matter is your own – and it is one of the things that will make photography fun and memorable for you. So – what do you like photographing? What keeps you interested?
Getting a Good Composition is Easier Than You Think!
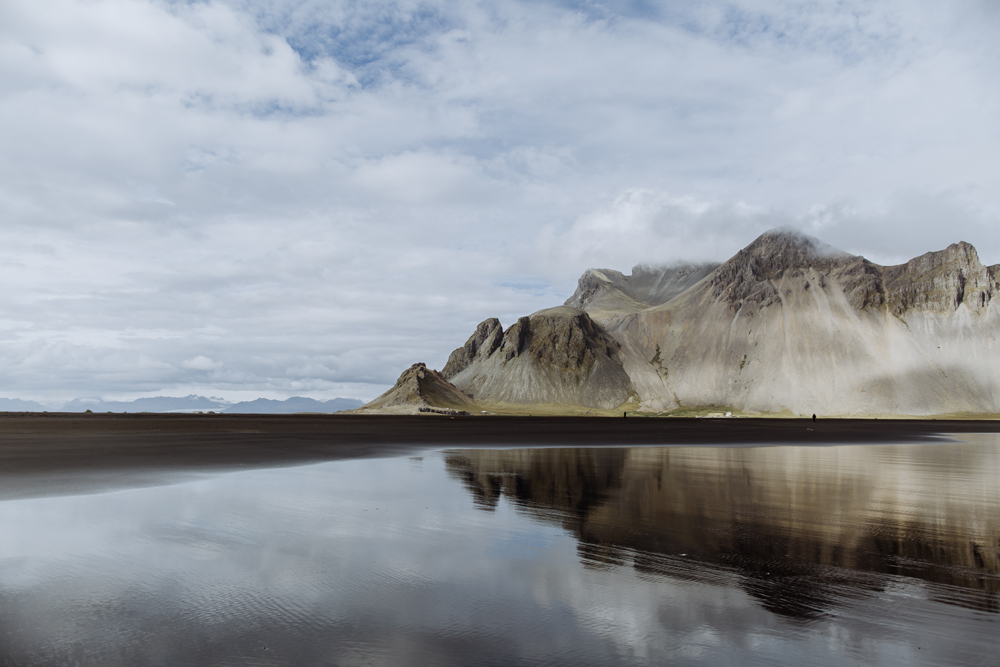 “Composition” is your way of seeing the world as a photographer.
Photography is a form of visual language. The way you frame a shot is one way of using it to communicate.
Interestingly enough – this is another area where new photographers tend to get really hung up.
I’d speculate that one of the reasons why people get worked up about this is because they compare themselves to a lot of great photographers they see all the time. Even just browsing through Instagram casually I sometimes am amazed and a little jealous by the work I see others putting out.
The fundamentals of photography composition really boil down to just a few “rules” you should know about. These are:
The Rule of Thirds
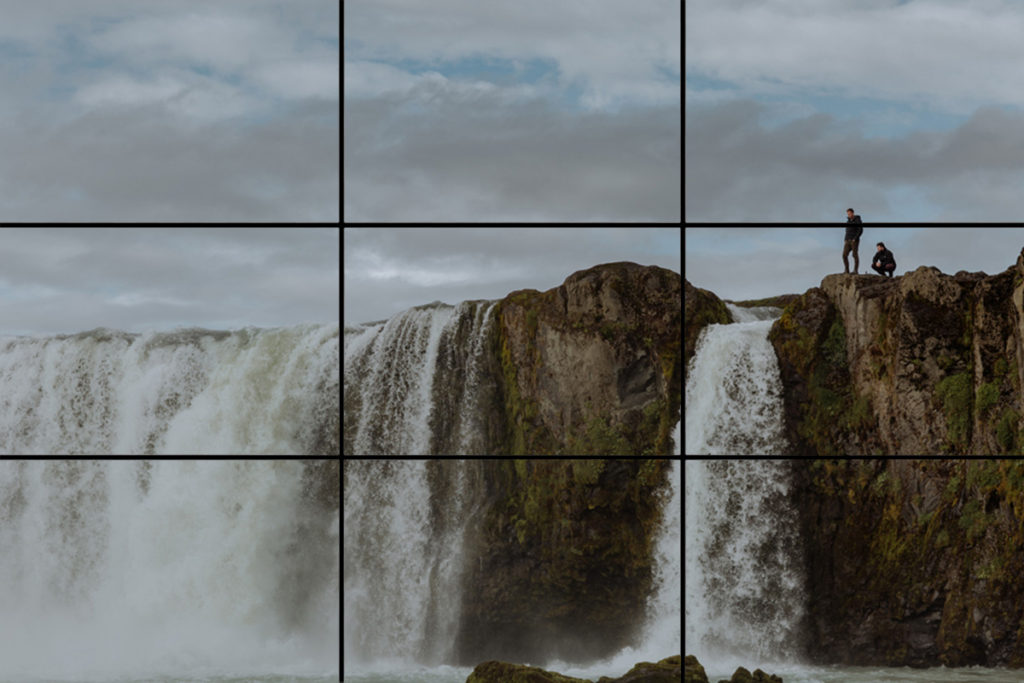 The Rule of Thirds is a simple photography rule that is one of first things that people learn about.
It goes like this: picture your scene like a 9 block grid. Your image will be more interesting when you have interesting things in the frame where the lines intersect.
This is not a hard-and-fast rule, but it’s something to think about while crafting your shot.
Use Leading Lines
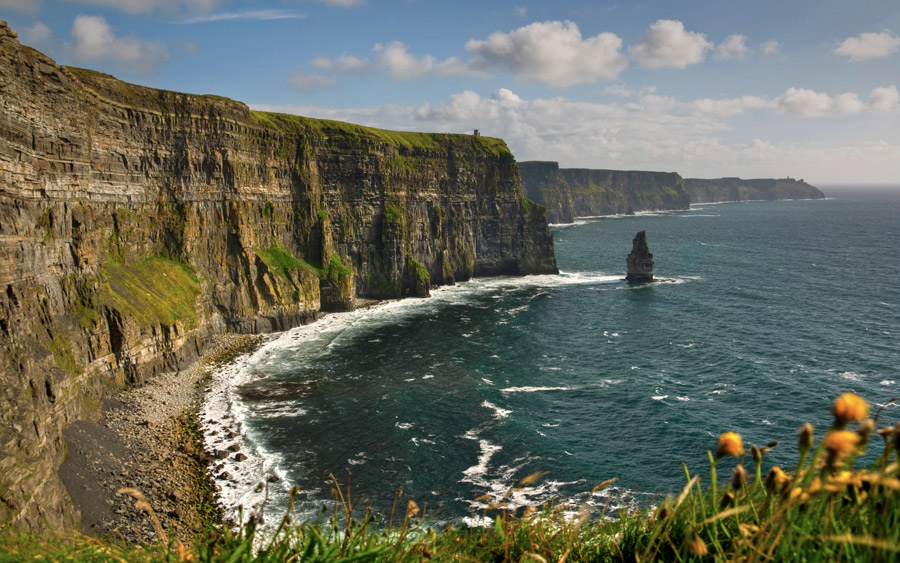 Leading lines are one of my favorite composition tools available.
You can find naturally occurring lines in the environment that “lead” your eye through the photo. This is so important to photography because a picture is a 2-dimensional representation of a 3-dimensional space.
In the image above, when you are looking at this view in real life, you don’t think about how your eyes are led through the scene – it just happens naturally. In a photograph, a good composition allows this to happen seamlessly for a viewer as well.
This particular image has a strong leading line – the white ocean waves breaking on the shore. It forms a little C-curve and leads your eye from the foreground into the background.
In general, leading lines should actually lead somewhere interesting. In this image, there is a little point of interest in the form of the rock formation in the ocean that is disconnected from the rest of the land mass.
Often – great compositions utilize leading lines like this. You can also find more complex compositions that have multiple lines and even dissecting lines.
Experiment With Filling the Frame & Negative Space
Sometimes photos should make you feel like you can breath, and other times they should make you feel claustrophobic.
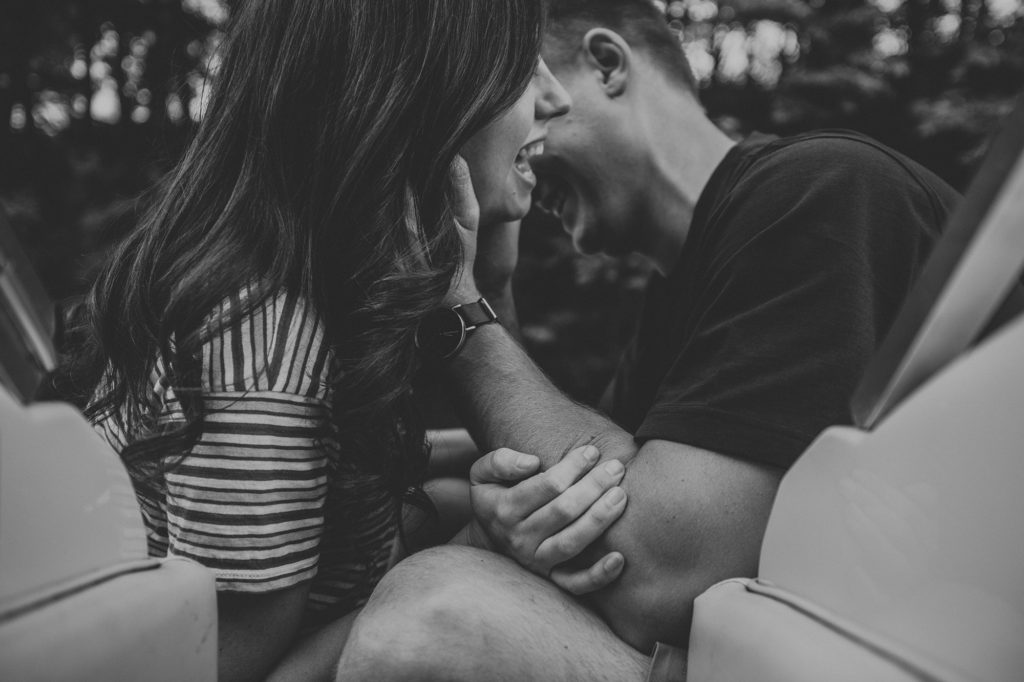
Pull the slider below to check out two images taken within minutes of each other in the same location – how do these two shots make you feel?
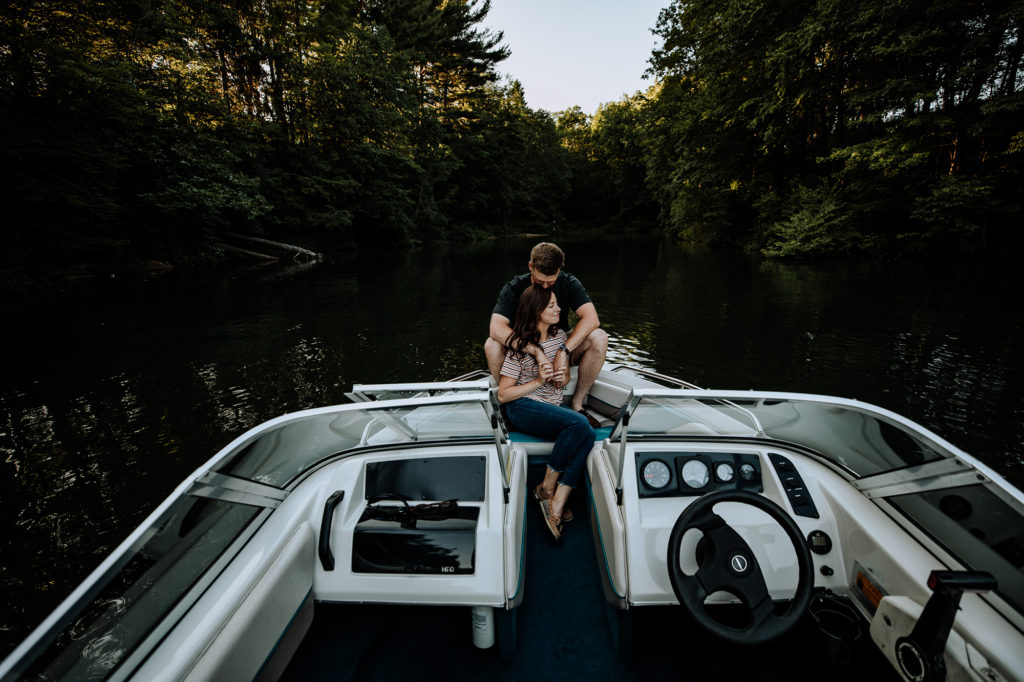
I love the first wide shot because it shows off this couple in the context of their environment. It’s their boat and their choice of location. All of the negative space surrounding them allows them room to breath.
In the second shot (taken with a tighter 85mm lens), the image brings us much closer to them. It’s a great shot because it helps us to connect with their emotions – in this case organic laughter.
I would consider both images beautiful in their own rights – but they both use different techniques and bring something different to the table. As a new photographer, you should take into consideration how you are framing things (with or without space). In truth, there isn’t always a right or wrong answer – and sometimes it will come down to your personal preference.
Showcase the Nature of Your Subject Authentically
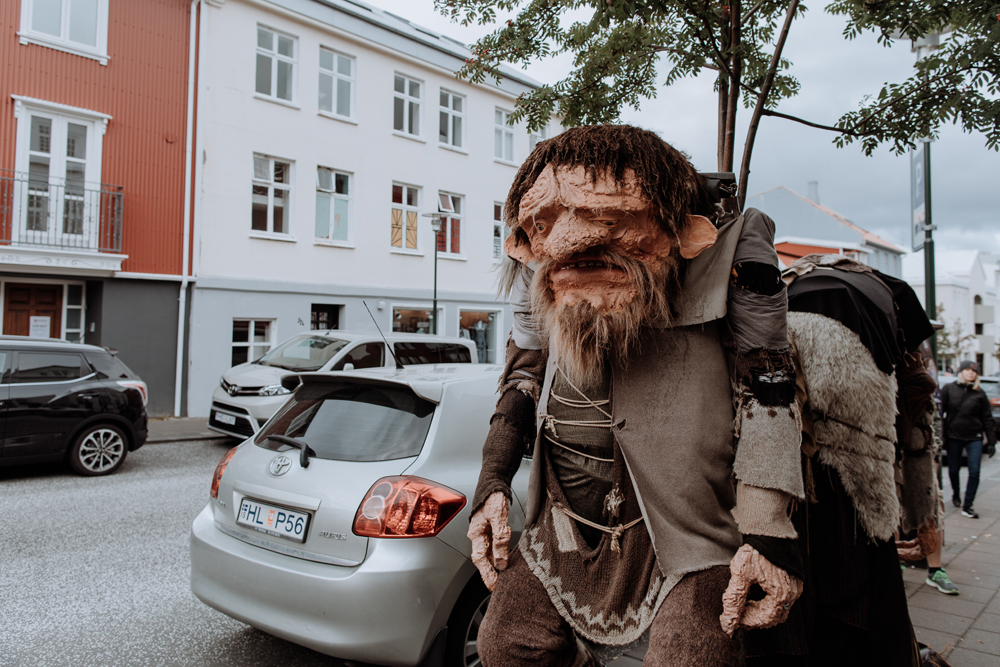
Authenticity is even important for trolls 🙂
Okay – the first 3 topics I just went over are pretty much the “standard” advice you’ll find on any photography blog for beginners. To round things out thanks to my weird personality – I’m going to leave you with a more abstract approach to composition.
For this photography composition exercise – I want you to close your eyes and really think about the subject(s) you are photographing. There are a couple questions you should think over…
- What do you think about?
- What do you think your subject is thinking about?
- How would your subject like to be portrayed?
- How do you want to portray your subject?
This is maybe easiest (in a sense of the word…) with couples photography – something I do frequently and really enjoy since there is normally a romantic connection that makes it easier to help guide people to portray their affection for each other in front of a camera naturally. Using posing prompts, it’s easy enough with some practice to coax authentic reactions from two people interacting with each other who really like each other.
When it comes to photographing solo portraits or a shot of a landscape (which – last I checked – isn’t going to talk back), I find this to be something that is more difficult. But – by putting our thinking caps on for a second – we can go back to those questions we listed out above and approach them with a little empathy (for other people and even animals we might photograph) and a little anthropomorphizing (…that is a big word I’ll define in bold below):
Anthropomorphize – it means – to attribute human characteristics or behavior to an animal or object.
Taking this into consideration – let’s look at a few photos I took with intention and talk about how I addressed these questions myself…
Example #1: Couples Photograph
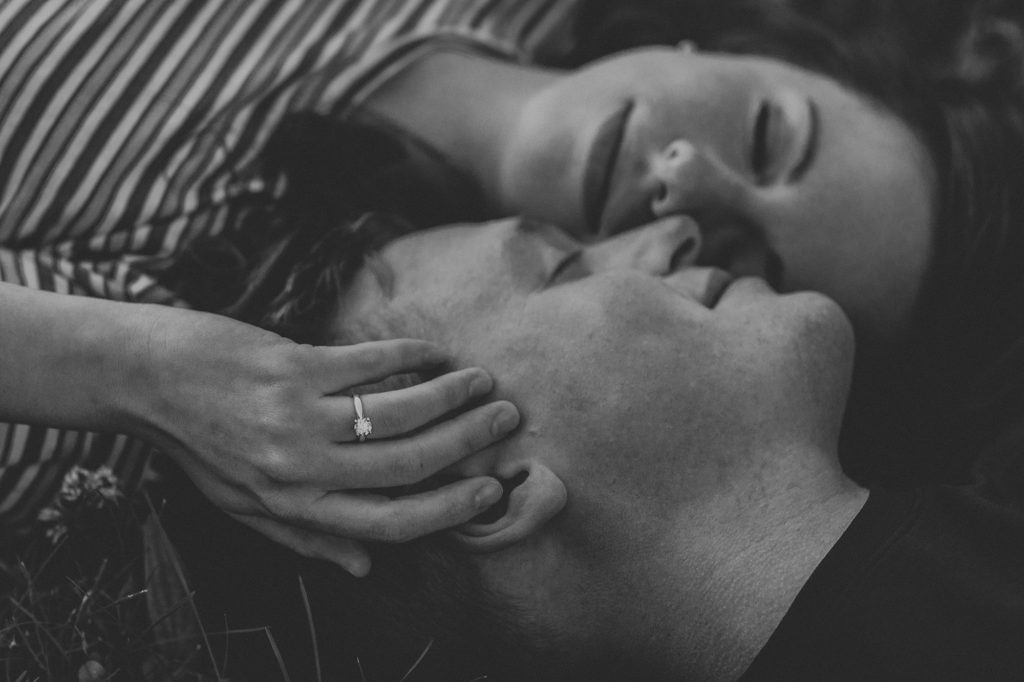 Background: I took this photo during an engagement shoot. These are two of my clients that happened to be really into each other and really receptive of all the crazy, fun, and romantic ideas for them.
- What do you think about? In the lead up to this specific shot, there wasn’t a whole lot of thinking going on. Funnily enough, I had my wife up on my shoulders so she could get a top down view with her 35mm lens – a great perspective in its own right. With my tighter 50mm lens, I snapped a couple shots, not really expecting much to come of the photos. With this said – the couple’s attitude during the whole sessions was overwhelmingly positive and their affection for each other really showed – so this seemed to just be my natural response. Remember how I said photography is a language?
- What do you think your subject is thinking about? Truth be told – it’s probably a number of things. I can tell from the image in their gentle smiles and the way they are positioned next to each other that they like being together and around each other – so it’s easy to imagine they are thinking about each other in this moment. Of course – they might be pairing that with how funny it is to have a guy and his wife photographing them like a paparazzi while doing circus tricks. There were a lot of laughs to be had here between us all!
- How would your subject like to be portrayed? For couples – the goal is always to portray people in a way that is flattering. We choose to shoot around Golden Hour for this reason because the light helps contribute to this. But, our approach to this type of photography is designed around allowing for people to be themselves – and that is a hugely important thing people are looking for in their own portrayal.
- How do you want to portray your subject? In the case of this photo – I love capturing moodier and romantic shots. Throughout their entire gallery of images that was delivered, there is a lot of diversity as they share many emotions with each other. We have crazy laughs, a few standard “look-at-the-camera” shots, and some of these more intimate and romantic images. This balance helps bring out the authenticity. In this particular case, a beautiful photo can stand on it’s own – but is given more legs to stand on when provided with some context. Ultimately – while I share this photo here, it is a shot that was taken not for me, not for you, but for them 🙂
Example #2: Landscape Photograph
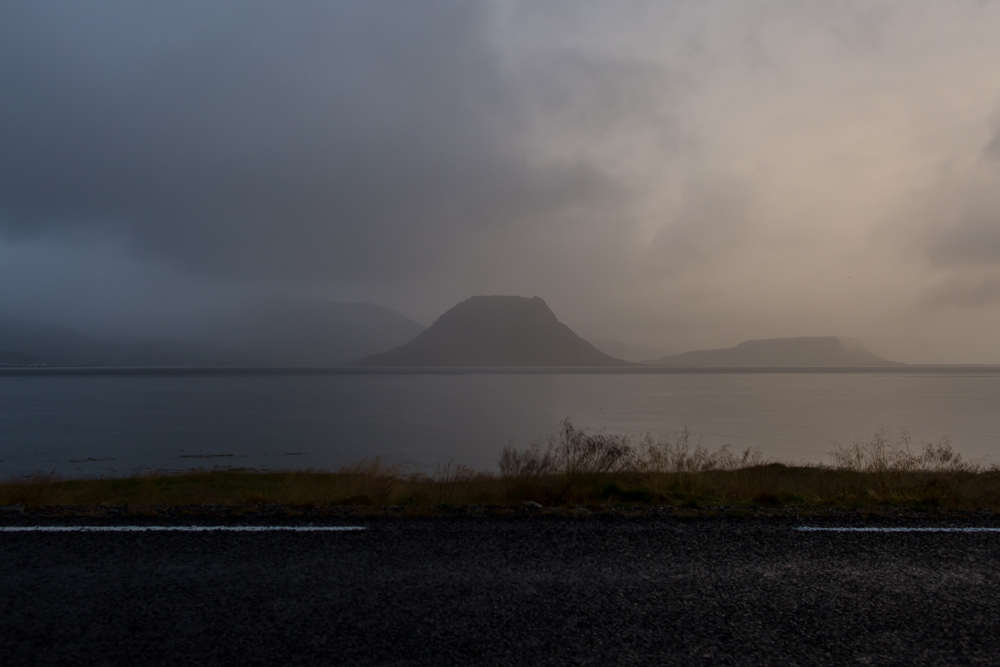 Background: I took this photo at the end of a long day of traveling around the Snaefellsnes Peninsula in Iceland (highly recommend). This particular day was pretty rough thanks to a lot of bad weather. The mountain in the background is a quite popular one for photographers named Kirkjufell – having been featured in Game of Thrones and a load of Iceland landscape photography.
- What do you think about? I was dead tired from driving and hiking all day. This photo was taken right next to a little campground where I had parked our campervan for the night. My wife and I were actually the only people there. The weather relaxed and gave way to a beautiful sunset with striking colors – blues on the left and warmer tones on the right. I wasn’t expecting to take any pictures – but after seeing this I was forced to go grab a few shots. It’s the beauty of the landscape that I just couldn’t ignore.
- What do you think your subject is thinking about? Okay – so I don’t think the mountain, sky, body of water, or paved road in front of me was having thoughts. But, like I mentioned earlier, if I anthropomorphize here a little bit – I can give it some. Given this is a mountain in Game of Thrones, I started referring to this shot as “The Battle Between Good & Evil” – yes I know it is corny. Like the show, there are a lot of beautiful and poignant moments, and plenty of dark and sinister ones. It’s this conflict of colors on the dramatic landscape that really spoke to me. The choice of composition was influenced by this because if I had faced the camera more left – the scene would have been totally different as it was mostly blue with some ambient light from the town nearby. If I faced the camera more right, it would have been more like empty ocean and road with the warm tones of the sky. Totally different – and probably boring – photos.
- How would your subject like to be portrayed? I was under the impression that this mountain would appreciate a different perspective. Pretty much every photo of Kirkjufell I have seen feature an ultra wide angle lens from a similar perspective.
- How do you want to portray your subject? I took one of the expected shots of this mountain, and didn’t care for it. Chalk this up to poor weather conditions at the time. My goal, especially when photographing popular subjects, is to always try and find at least one unique perspective. This composition is so simple – it’s dead center in the frame – but I like it for this reason. While I think it is a good photo in on it’s own merits, it is also one I hold dear because of the personal memories it contains for me – and no one other than my wife can share those with me.
Example #3: Animal Photograph
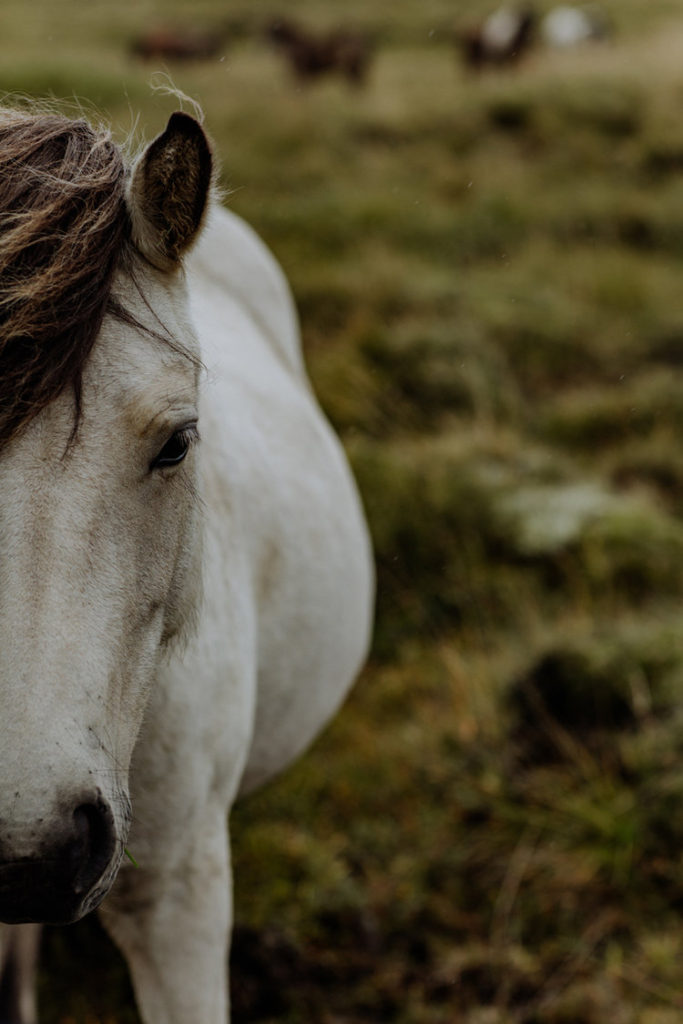 Background: I spent some time photographing Icelandic horses during my travels. These are very photogenic animals.
- What do you think about? It was a little rainy and rough on this particular day when we saw a herd of Icelandic horses from the road. I pulled over and got out of the car. My initial reaction was one of amazement – these really are beautiful creatures. I’ve seen horses before, but these just feel otherworldly – it’s probably enhanced by being in a country that literally feels like another planet.
- What do you think your subject is thinking about? Most of the horses were around each other and difficult to photograph. This particular horse was off on its own, just standing there and eating some grass. With the little emo hair flip, intense eyes, and stillness – I’d imagine there was a sense of “leave me alone but actually love me” in it’s mind.
- How would your subject like to be portrayed? This horse was going solo – at least for the time I saw it. Being represented as being on it’s own would be authentic to the experience.
- How do you want to portray your subject? I wanted to maintain the authenticity of the animal doing its thing away from all the others. In truth, I connected with it given I am pretty introverted myself. In this shot, the choice of photographing half of the horse in this was is quite dramatic a representation, but gave some breathing room for empty space in the grass around it and created space at the top of the image for some background horses to be in the scene.
Camera Modes and What is Best for Beginners
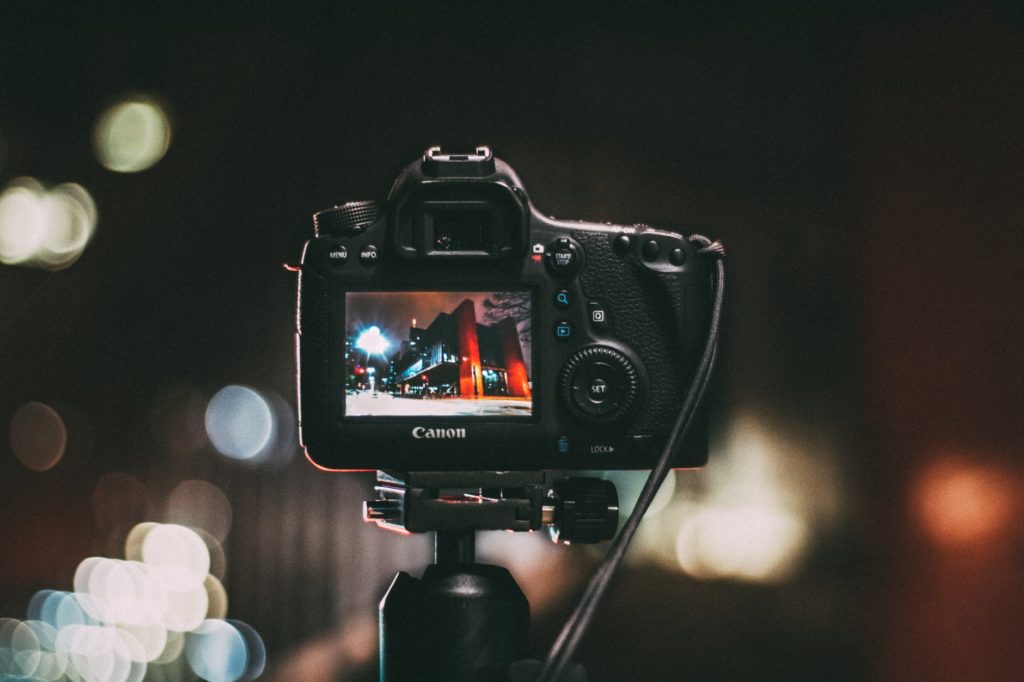 Most digital cameras will give you the option to select your shooting mode. These range from fully automatic (where the camera makes ALL the decisions) to fully manual (where you have total control over your exposure).
A full list of common camera modes you will find are:
- Auto Mode
- Portrait Mode
- Macro Mode
- Landscape Mode
- Sports Mode
- Night Portrait Mode
- Aperture Priority Mode
- TV Mode (ie: Shutter Priority Mode)
- Manual Mode
For beginner photographers, it can be easy to think that shooting in auto mode will be the best bet. While this is easier, it’s not actually helpful for you as you learn – unless you are wanting to dedicate some time strictly to focusing on your compositions.
If you’re feeling ambitious – try shooting in Manual Mode. Following the advice in the next section about The Exposure Triangle will help you make sense of this. This really is the best way to learn – even though it can be frustrating if you’re a total photography newb.
With both of these extremes squared away – I do want to say that I feel Aperture Priority is the best camera mode for beginners.
Aperture Priority is a semi-auto camera mode that allows you to select the aperture (f/stop value), and the camera determines the ISO and Shutter Speed itself. I find that understanding how your aperture setting impacts your photo is difficult to grasp without hands on experience – and by getting familiar with setting the aperture to get the depth of field you want in your shot, it will make your continued success that much easier.
The Exposure Triangle – Understanding ISO, Aperture, and Shutter Speed
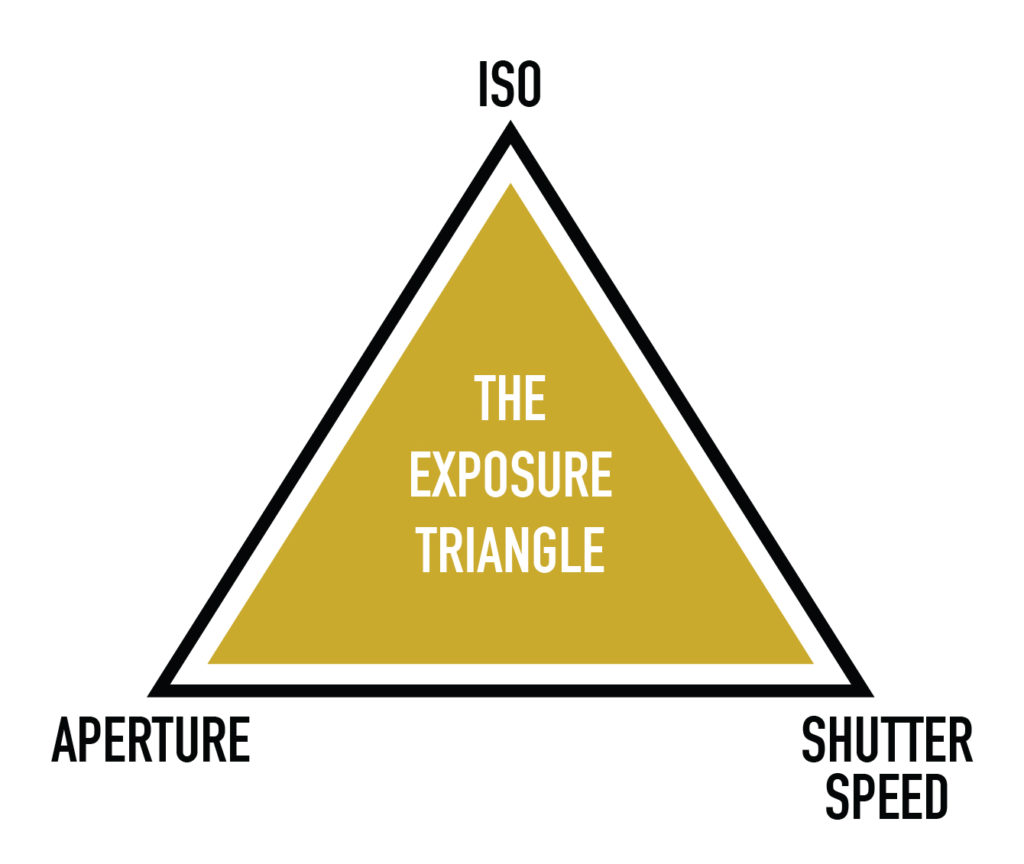 I will be honest here – The Exposure Triangle is one of the more tedious principals to get down in photography for beginners. While your composition and choice of subject play big roles in the end result of your photos – your camera setting selections will dictate whether your photo objectively looks good.
A quick note on ‘exposure’ – exposure is a measurement of how much light reaches your camera’s sensor. Your camera settings play a huge role in this. The goal is often to achieve a balanced exposure where the image is an accurate reflection of your subject and surrounding environment. In some cases, photographers may also desire to under-expose or over-expose images for different effects.
The key takeaway when dialing in your exposure is realizing this: there isn’t always a “good” exposure, but there are bad exposures.
So how do I get a good exposure?
You begin by learning about the 3 staple ingredients that make up your photo. These are:
- Aperture
- Shutter Speed
- ISO
Aperture
Your aperture setting, measured in f/stops, determines two things:
- How much light reaches the camera sensor
- The depth of field of your image
When using a wide aperture (a low f/stop like 2.8), you will allow in a lot of light. This type of setting will also result in separation of the subject from the background – which means your subject will be in focus, and the background blurred out. This is often preferred by portrait photographers.
A narrow aperture (a high f/stop like f/16) will let less light in. This type of setting will keep more of the scene sharp and in focus. This is usually preferred by landscape photographers.
Shutter Speed
The shutter speed setting, measured in seconds & fractions of a second, is used for two purposes:
- To freeze motion (or in unique cases – to blurred movement)
- To illuminate or darken the exposure
For most photography purposes, moderate shutters speeds in the range of 200 – 600 will suite still and lightly moving subjects that you want to freeze in your photo. Higher shutters speeds like 3600 will help you to capture movement of faster moving objects like people running, race cars going around a track, and so on. Really low shutter speeds let you produce a long exposure images – which intentionally blurs out moving things in the scene.
Naturally, the longer the shutter speed, the longer the camera shutter will take to close. Because of this – you allow more light to reach the sensor through the aperture hole in longer exposures.
ISO
In the Exposure Triangle, ISO is often one of the more challenging pieces to understand on it’s own. The base ISO setting of 100 is ideal – and increasing the ISO should only be done when you need to brighten up an image. The downside of increases in ISO is that it also results in an increase of noise – or the look of grain on your image.
Most modern DSLR cameras can handle some level of this, but it’s one big area where beginner camera gear starts to struggle. On professional equipment, photos can be taken upwards of 6400 (in my experience) before they start to become unusable.
Mix & Match
Ultimately – the Exposure Triangle is about finding the balance of these 3 elements. This can be tough to do at first because a change to one setting will result in the need to make changes to the others.
This topic is covered in more details in the post: Photography Basics – The Exposure Triangle.
How to Challenge Yourself to Maximize Your Abilities
 Don’t fall asleep – this section contains your homework assignment!!
I know this post has been rather extensive, and probably a bit exhausting, but I believe it covers all of the key things you need to know. Photography for beginners is challenging – and writing this takes me back to when I was just learning myself. It’s easy as a professional photographer to feel confident in my abilities, yet I know this confidence is the result of hard work and diligence as I learned (and continue to learn) how to capture great pictures.
It’s now your turn!
With all the information provided here, I want to challenge you to grow in your photography abilities.
If you’ve never picked up a camera in your life – you now have the fundamentals to get started. If you’re reading this and don’t even have a proper camera, I suggest checking out the Recommended Gear pages for advice on that!
If you’ve been a beginner experimenting with photography for a little while, but don’t feel like your progressing – you can advance your skills through structured practice. Let me explain…
Structured Practice – The Key to Success
Practice makes perfect
Right?
This is one of the first cliche quotes we hear in our lives – and it’s misleading.
The best kind of practice you can apply to any area of your life, and especially photography, is structured.
You only need to do a few simple things to make your practice time more valuable:
- Set a start and end time (“time restraints”)
- Concentrate 1 or 2 areas of focus per session
- Isolate a single subject (or set of subjects)
- Start in relaxed environments & expand to environments where you are less comfortable
What caused the most growth in my own photography skills was in the form of the “trial by fire” – this is when I began shooting for paying clients in environments I was uncomfortable. I don’t mean some back alley in Philly (though I’ve done shoots in those) – but rather a place I wasn’t used to and that have their own challenges to figure out.
While I know that not everyone aspires to make photography a career – it is possible to find shooting circumstances that make you work outside of the box. By pushing your own boundaries, you will be forced to adapt your knowledge of photography to a new situation – even a change to a new lighting scenario could change the game.
Mental Practice – The Photography Mind Gym
In addition to the hands on practice, which I can admit is the best kind, educating yourself through reading books and blog posts is a way to continue expanding your knowledge of photography.
I would bookmark blog posts I found very helpful to refer back to – knowing full well I might forget some of the information and have to return. If you feel this blog post has that potential for you, bookmark it and return in between your regular practice sessions to revisit these key fundamentals!
More than likely you work a lot like me – so mixing up the way you are educating yourself is also a great solution. A few things you can do:
- Pick up photography education books and read in bed, by the fire, during a work break, etc.
- Check out photography videos on YouTube – the audio/visual elements helps you learn in a different way
- Try to replicate photos you’ve seen before
- Buddy up – get into photography with a friend, or join a local photography group to give-and-receive knowledge from others
Conclusion (+ Photography Resources for Continued Learning)
 To wrap up this post – I want to leave you with some excellent resources for continued reading to help you expand your knowledge and skills in photography. I hope you were able to have some fun while reading this post, and learn a thing or two that you can take with you. Let me know your thoughts on this post in the comment section at the end!
Photography Articles
Q&A Series:
- How Can I Learn Photography on My Own?
- How Do You Take Amazing Pictures?
- How Do You Shoot Night Time Photos?
- What is the Best Camera Setting for Outdoor Portraits? (WITH EXAMPLES!)
- What’s Your Best Tip for Taking a Good Photo?
- How Can I Be a Good Wedding Photographer?
- What Hobbies Do I Need to Start Photography?
- What MM Lens is Best for Landscape Photography?
- What is the Best Aperture and Focal Length for Portraits?
- When is the Best Time to Shoot Photos Outside?
- Case Study: What Do Viewers Find Interesting in a Photograph?
Regular Education:
- 26 Tips to Improve Your Landscape Photography (PRO INSIGHT!)
- 135 Wedding Photography Tips for Beginners – Go From Novice to Expert Quick!
- How to Take Tack Sharp Portraits – 21 Ways to Easily Fix This Problem!
- How Can I Take My Own Family Portraits? (Step-by-Step Guide Inside!)
- 17 Reasons Why Photography is a Good Hobby for You
- 10 Photography Ideas at Home for Beginners
- How to Take Good Landscape Photos
- 101 Digital Photography Tips – A Guide to Taking Great Photos
In Depth Guides:
Recommendations
For photography education books, camera gear, and more – check out my Recommended Gear pages. I write curated posts designed to help you find the best things based on my active research and personal experience using them.
Oh, and for even more – join the Formed From Light mailing list to get the latest articles and extras sent right to your inbox!
[mc4wp_form id=”1188″]