26 Tips to Improve Your Landscape Photography (PRO INSIGHT!)
Last Updated: August 28th, 2025
While I have devoted much of my time spent behind a camera to photographing people as a wedding and portrait photographer, my ultimate guilty pleasure has always been landscape photography. It’s always appealed to me – even since I picked up my first camera at a young age. It has always enabled me to take a step back and really take in the nature around me – and over the years has even breathed fresh air into parks and nature trails I’ve visited hundreds of times in my life.
At it’s core, landscapes are a simple subject – and the best images are often the result of things outside of the camera like the lighting, weather, and just being in the right place at the right time. It’s this simplicity that I love – the lack of a need for staging or window dressing.
As I’ve explored landscape photography as a passionate hobby, it’s led me to some interested places around the world. I’ve learned that it really is about more than just “taking pictures” – and I’m sure if you’re wanting to better hone your skills, you likely feel the same way.
In this post, I’ve put together a collection of tips for getting the best possible landscape photos on your own. Some things you may already know, but quite a few come directly from my own experiences. If you learn something by the end of it, let me know in the comments!
A Change of Perspective
Have a Plan
If you’ve normally taken landscape shots on a whim before, the first thing I’d suggest is actually planning out your shots.
While you will never have full control – as mother nature will always do what it wants in the end – a certain level of planning can help you maximize your control.
I always do some planning to make sure I will arrive at a location at a reasonable time and be in the position I want to be before the light turns bad (or goes completely out). You may also want to prepare some mental images of your composition – so once you arrive, you can immediately look for the shot you are picturing.
Your planning can be as simple as this, or more complex depending on the specifics of the shot you’re looking for.
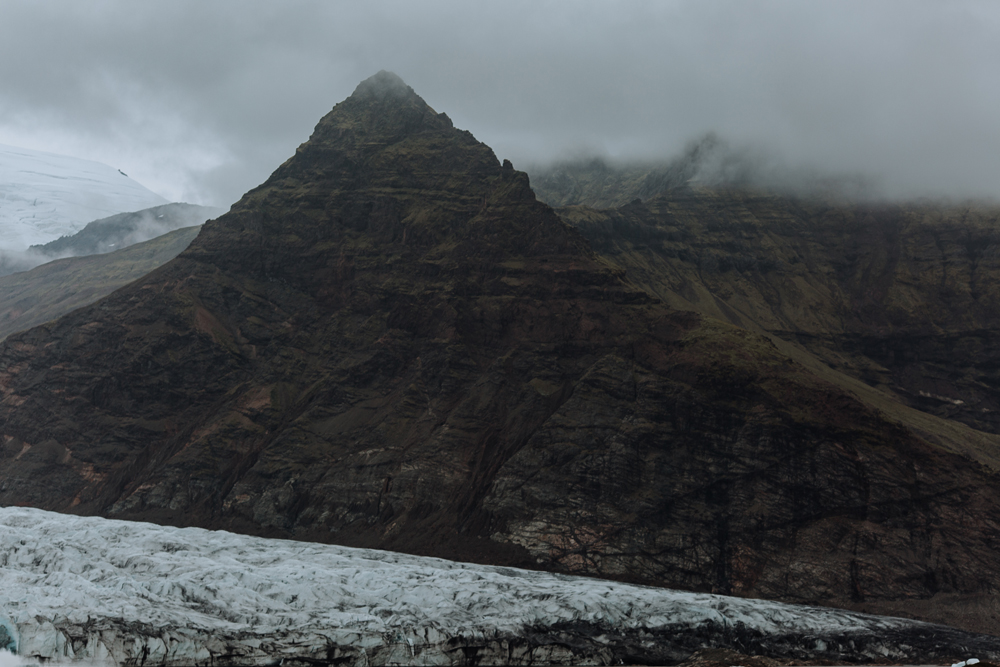
Inevitably, if you’re wanting to take photos at a more exotic location like in the middle of a glacier, you’ll probably need some extra planning – even support from others – to make those shots a reality.
Go to New & Inspiring Places
My passion for landscape photography has been fueled by my other passion for travel.
These two things go hand-in-hand, as is shown off time-and-again by landscapers visible on social media.
My most incredible landscape/travel photography experience has been when I took a 10 day campervan trip around Iceland with my wife – probably the most photogenic place on the planet.
In a unique twist, I also found myself in Death Valley National Park last year, a place I wouldn’t have been too interested in if I hadn’t seen the photographic potential thanks to the photographers Mads Peter Iverson and his YouTube video on Death Valley Photography (see below):
These days, I have additional travel plans in the works to visit places like New Zealand, Thailand, Ireland, Greece…and more…You can bet my camera will be on hand!
Ultimately – you should choose locations that inspire you!!
This will help you to boost your landscape photographs almost instantly – trust me when I say this.
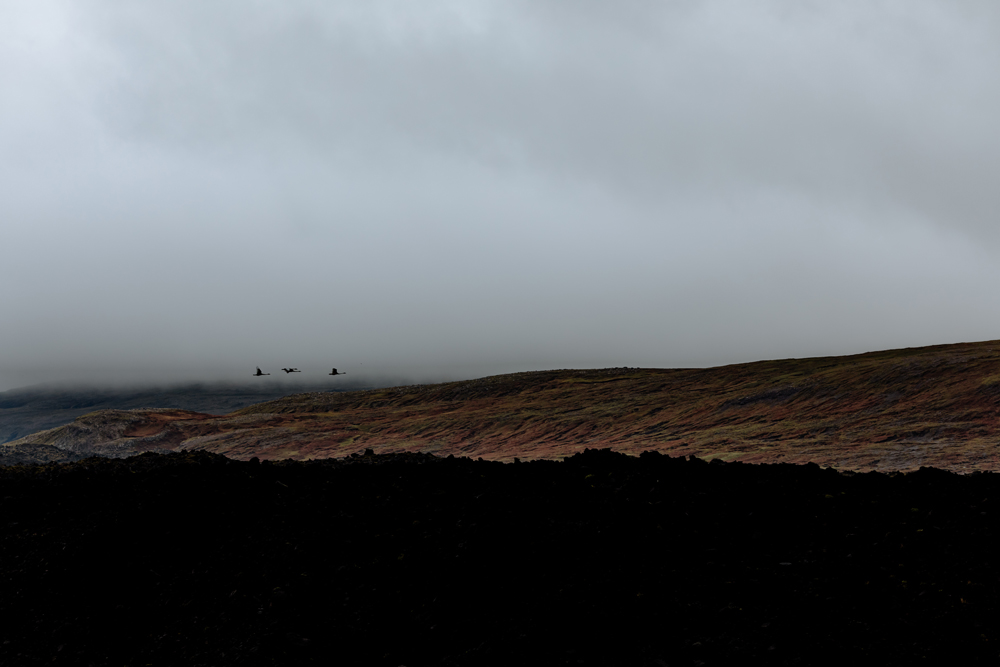
And some locations are so photogenic that you could literally put away the fancy DSLR and whip out a point-and-shoot camera and be 100% satisfied with the shots. That was basically my impression when I visited Berserkjahraun – a lava field in Iceland.
Change Your POV
“The most affordable zoom is moving 2 feet ahead”
This is a quote I read online some time ago in some random photography article comment section, and it’s stuck with me.
Your point of view will impact your images in huge ways.
A lot of times when I review the work of beginner landscape photographers, this is the most jarring problem. Landscapes that look like they were just shot by someone who walked onto their patio are often pretty weak – not necessarily because the landscape is unappealing (I’ve seen some damn nice backyards), but because the effort put in is so minimal and the perspective offers nothing to make it interesting.
As with many things in photography, there is no one size fits all solution though.
A few easy ways to change your perspective, though:
- Get low
- Get high
- Move around
- Shoot in landscape and portrait orientations
- Shoot through things
- Switch up your lenses
Remember the Small Landscapes, Too
 Macro landscape photography is highly underrated.
I occasionally like to think of what things would look like if I wasn’t a human being, but instead an ant. Photography has given us the power to actually visualize this – first with the matter of changing perspectives (as we mentioned in the tip above this one), and next by utilizing specialty camera lenses to get in on the details.
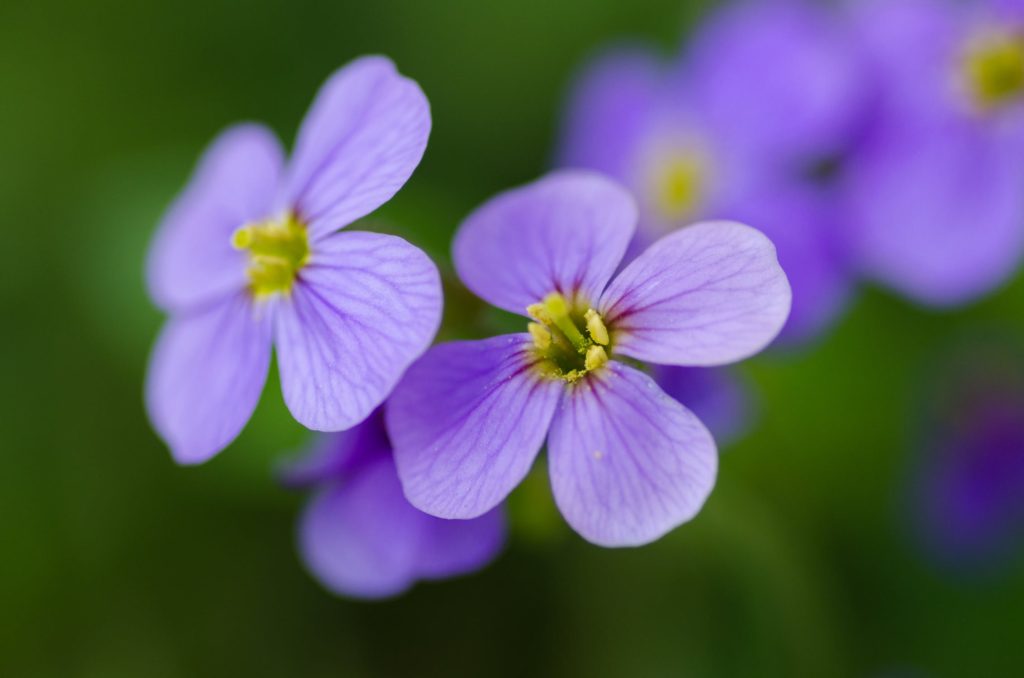
Since I bought the Canon 100mm f/2.8 macro lens about 2 years ago, I’ve had much fun exploring the little things. It has given new perspective to even just photographing a simple flower in my backyard – a subject that would traditionally get clumped in with a lot of other landscape subjects, but in this case isolated and photographed in beautiful detail.
Try Focusing on the Little Things
While macro photography actually involves taking pictures of the smaller world around us, even if you are capturing an immense vista with a wide lens – “little things” in a scene can add depth and intrigue.
Don’t take this to mean every photo you take should focus on these little subjects, but it can help add diversity to your images in your full image galleries.
Giving an example – while taking a picture of a mountain range, consider highlighting a small plant or even a person in the foreground of your scene. This type of approach will draw the eye of a viewer through the image. They probably won’t say it out loud, but they’ll be thinking…”Wow, that is a really nice flower…and WOW, what a mountain!”
Your photo has the ability to really build up the viewer as the image unfolds itself to them.
Experiment with Different Landscape Photography Techniques
Landscape photography can either be an accurate representation of what you see or provide an alternative and surreal version of the world around us.
I can actually appreciate both approaches!!
I’ve met photographers who won’t retouch a picture because it feels inauthentic to them – they want to photograph the world as it is, not some idealized and fantasy landscape.
I also know plenty of landscape photographers who are totally cool with going the opposite direction – they see photography as a means to enhance the (already beautiful) landscapes before their eyes.
While I will discuss photo editing later in this post, there are techniques that can be done in camera to communicate. A few of my favorites:
- Long exposure photography
- Wide aperture landscape photography
- Using wide angle and ultra-wide angle lenses
I’ll talk about each of these through the rest of this article.
Learn from the Landscape Photography Greats
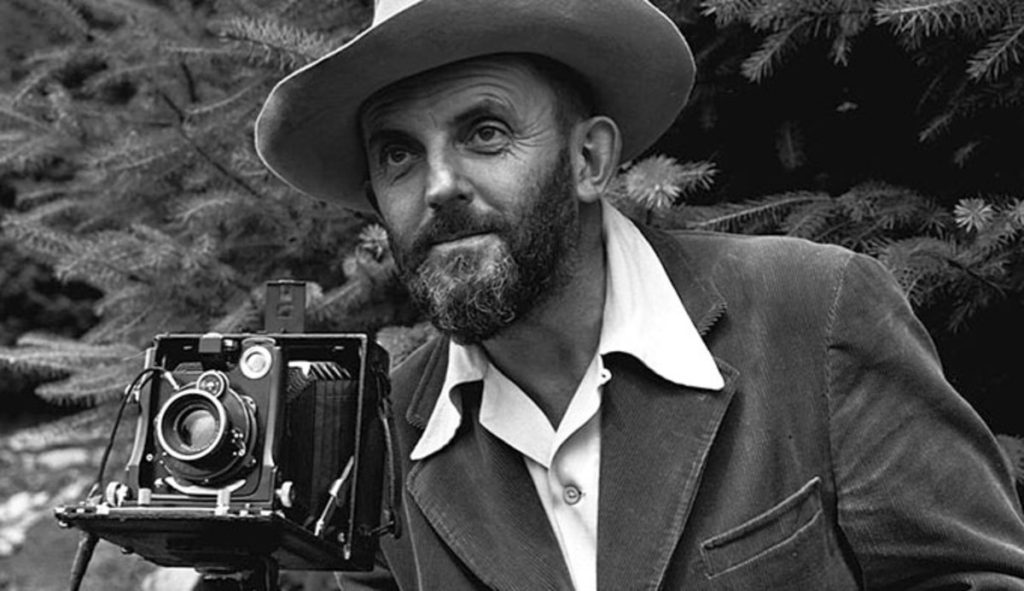 There is a reason why some people like Ansel Adams became really well known and respected for their landscape photography work. Not only do they bring good technical knowledge on operating a camera, but their outlook on life often enables more beautiful photography as a result of their deep rooted appreciation for nature.
A great book that pairs photography as a technical exploration and as a philosophical one is Examples: The Making of 40 Photographs by Ansel Adams.
Landscape Photography Composition Tips
Look for Foreground Intrigue and Background Interest
Start by thinking about some of your favorite landscape photos? What makes them so great?
I’d expect your selection would fall into one of two camps:
- Minimalistic with limited subject matter
- Busy with a lot of detail
Whatever the image contains – it is most likely impressive because it can hold your interest well. Any really great photo (no matter what the subject is) will utilize a layer of interesting subjects to create a solid end result.
Often, this may translate into choosing a subject to fill the foreground (a person, rock, animal, flower, etc.) while having a background that is interesting in its own right. In minimalist photography, there may not be so many “subjects” as there are things of visual interest – a field of grass, a road or walkway, etc. The presence of these actual subjects or just things in the environment help to reveal a more impressive image than just taking a picture of a nice sky or a cool mountain on its own.
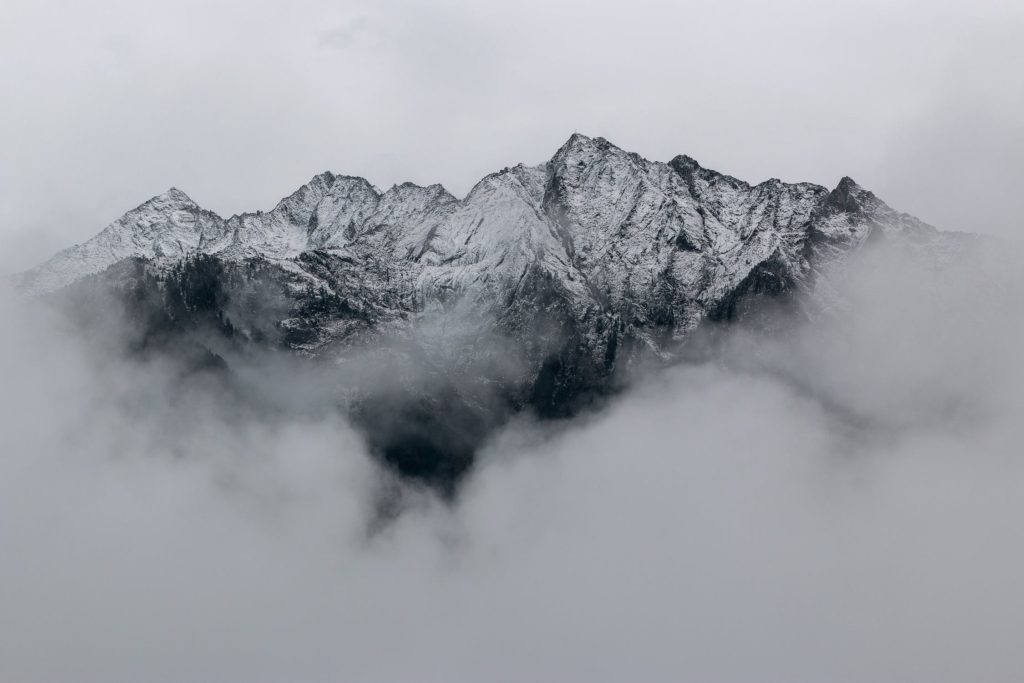
Below are two examples of landscape photos I’ve found to be really great:
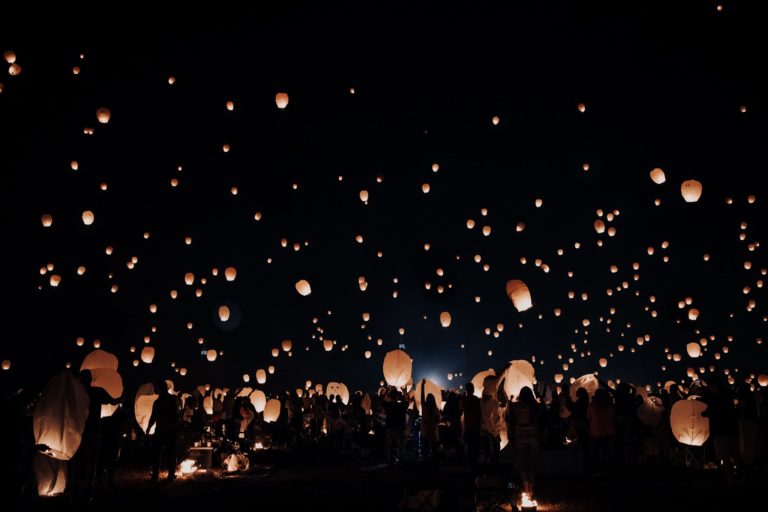
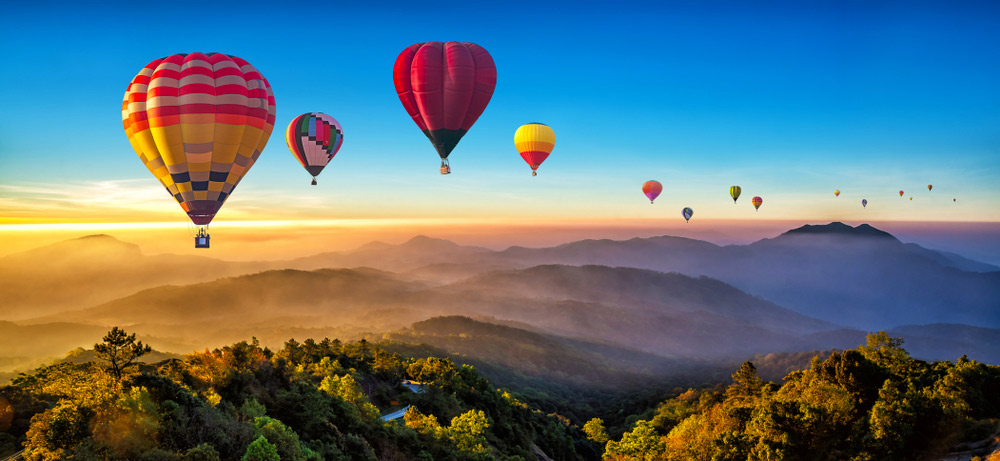 My thoughts: In this shot, there is a whole lot to love. First – the natural landscape is stunning. There are layers of color thanks to the sunrise, and the low lying fog adds a little sense of mystery to the background. The silhouettes of the mountains as you go further back in the image are also really cool – and something I love looking at in general. There is also a nice contrast in color – with warmer tones on the left (closer to the sun), and cooler tones on the right (in the shadows). I’d like this image if it was just the landscape – but it wouldn’t standout as much because that would be an “easy” shot to take. What adds an extra layer of depth is the hot air balloons. And not just one – but many of them that draw the attention from the foreground (balloon on the far left) and gradually receding into the background. It’s a stunning and interesting photo for sure.
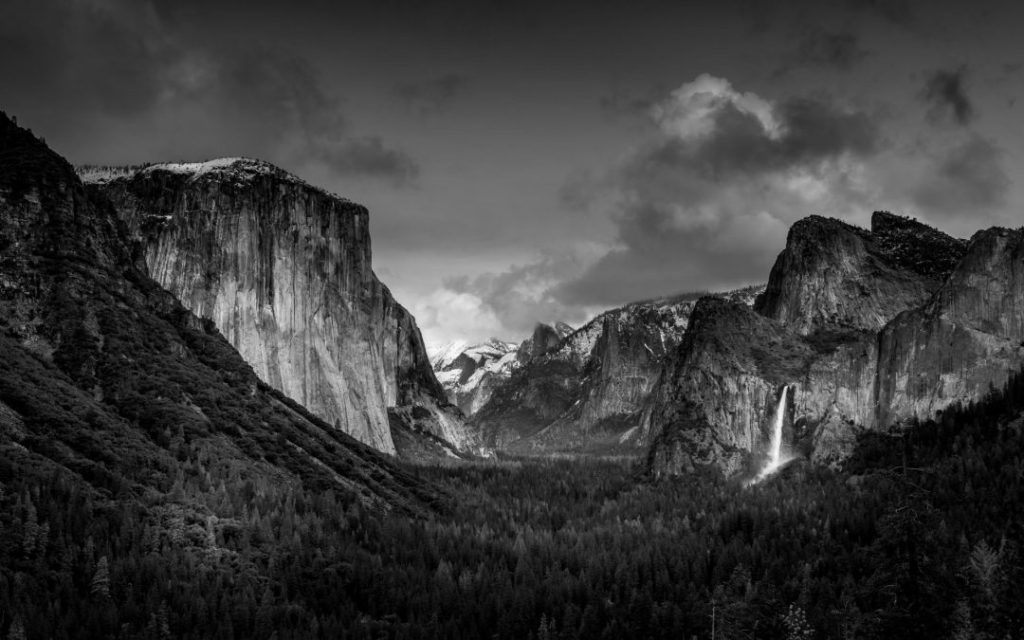 My thoughts: Unlike the prior image, this photo by Ansel Adams is remarkable in different ways. If you’ve ever looked at photos of Yosemite, you’ve likely seen this one at least once. First off – the black and white photography on display here sets it apart. The lack of color, when used well, can create depth and intensity that’s not possible to reproduce in color. What gets me most is how well it showcases Half Dome – the beautiful mountain feature on the left side of the image. As you can see, the foreground is simple – a thicket of trees. This ends up working well for this composition because, if you look closer, you’ll notice that the trees are a little darker closer to the foreground, and the color lightens up as you draw your eye into the photo. The mountain and waterfall serve as the highlights of the image – and this is complimented by their stark contrast with the rest of the scene. It’s simple, but effective landscape photography!
Use Leading Lines
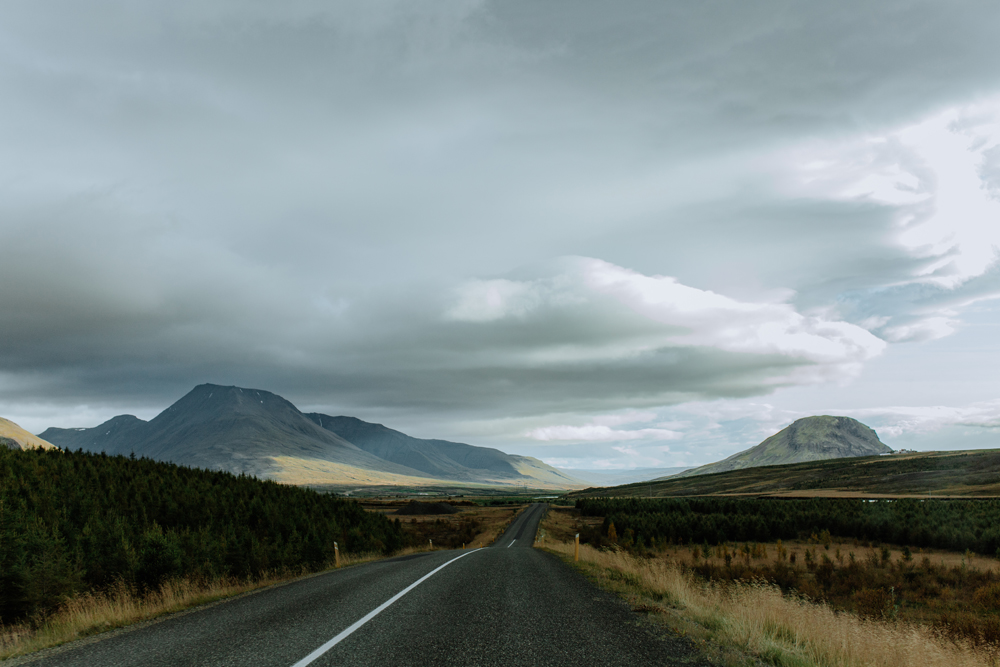
The best way to understand how leading lines work is to think of a windy road going up a hill. If you’re standing at the bottom and looking up, you can see how the road curves until it reaches the summit. Our natural tendency is to follow the road until we reach the peak. In photography, leading lines work just like this. They are lines, sometimes straight, sometimes windy, that take our eyes through an image.
When used well, leading lines can add depth to a photo and give a viewer a way to engage with the shot.
Remember: photographs are 2D representations of a 3D space.
So…what can be a leading line?
Really anything!
If you go back to our windy road analogy – if you stood at the base of that hill and took a picture, it would be a great shot because that road is a leading line.
A few other things that also commonly serve as leading lines include:
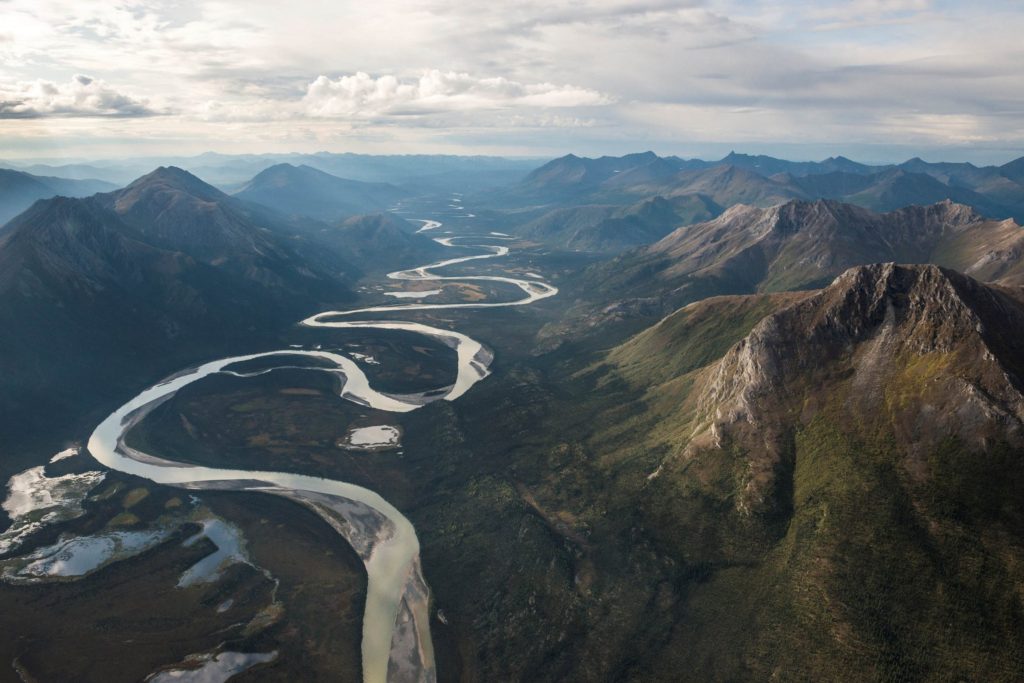
- Rivers
- Ripples in the ocean
- Low lying walls and fences
- People lined up
Finding leading lines is sometimes easy and sometimes more challenging. It all depends on the environment you’re shooting in.
Pro tip: your image can include multiple leading lines. You can also use a leading line to lead to no where interesting in an image – forming a sort of deception. Most of the time, your leading line(s) should lead somewhere interesting – to a landmark of a scene or another subject (like a person) you’ve specifically placed in the shot to be a point of interest.
Apply the Rule of Thirds
Another one of the most common rules in photography is yet so critical for taking a great shot – especially if you are just starting out.
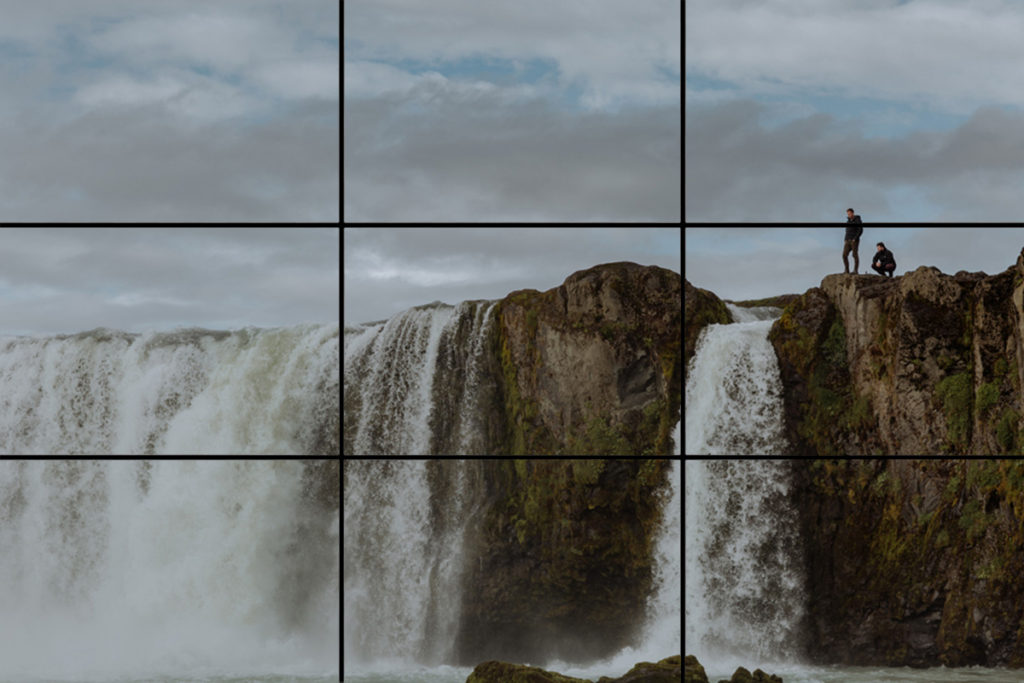
The Rule of Thirds is all about setting up your composition with the idea that everything in the frame is in a grid. Normally, the grid is set up so there are 9 squares. These squares intersect each other and create 3 main sections of the image. When applying the Rule of Thirds, the idea is that the areas of most importance are where these intersections occur – so placing interesting things on at least one of them will create a more visually engaging shot.
If that description is leaving you in shambles, check out this illustration below:
 In my own landscape photography pursuits, I’ve always treated the Rule of Thirds as a guideline – but it’s not a hard and fast rule.
It doesn’t work for every situation, but it’s nice to have something in mind to fall back on. When I have the opportunity to slow down and really think about my composition, I will at least ask myself, “Would this look better if I made adjustments to align with the Rule of Thirds?”
Use Water as a Mirror
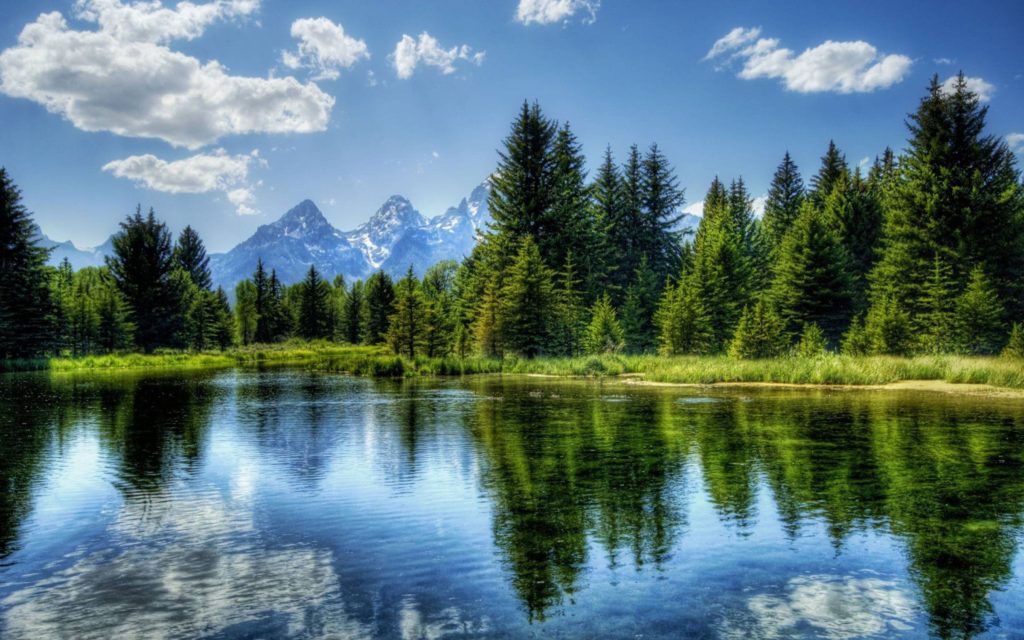
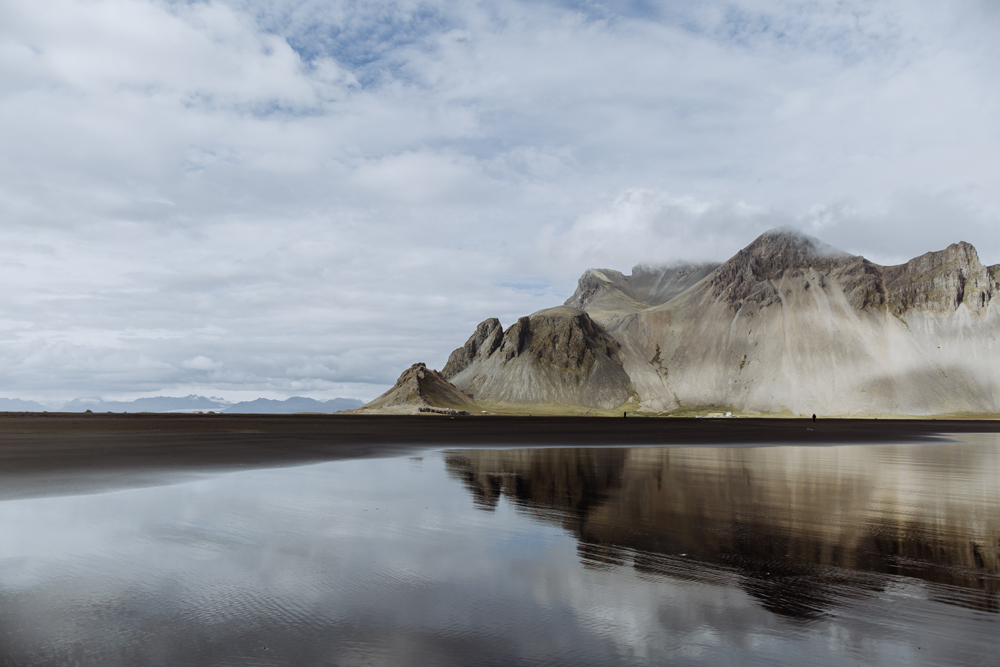 Capturing the reflection of a mountain or some other natural feature in the water is one of the most beautiful composition tricks a landscape photographer can utilize. Not only does it create depth, but it duplicates a subject that is likely already beautiful.
This mirror image also brings balance and symmetry to your photograph – which might otherwise be lacking.
It’s a very simple technique – but powerful. But that’s great landscape photography for you!
Landscape Photography Camera Setup Tips
Control Your Exposure
If you are just getting started with landscape photography, you are likely relying on your camera’s automatic exposure mode. On one hand, this is a simple solution and can take away a lot of guess work and frustrating to get a good looking picture – freeing you up to focus more on composition. On the other hand, auto exposure modes are not always consistent, and give you no control over how your photo will look.
If you are really wanting to advance your landscape photography, one of the first things you will want to do is start shooting in Manual mode.
If that feels too daunting, try a semi-manual mode like Aperture Priority or Shutter Priority – where you pick your aperture/shutter speed, and your camera does the rest.
We cover all the basics of dialing in a good exposure in our post The Exposure Triangle – but the key takeaways:
- Keep your ISO low for cleaner images
- Use a low shutter speed if there is no movement, use a high shutter speed if there is
- Use a wide aperture (low f-stop) if you want to blur out the background, use a narrow aperture (high f-stop) if you want everything in the image to be in focus
Set Your White Balance Manually
The idea behind getting a good exposure is to have an image that is not too bright and not too dark. The ISO, shutter speed, and aperture settings directly impact this. White balance, on the other hand, is another camera setting that can be set automatically by the camera or manually by the operator.
The reason I talk about white balance separately is because it controls the color of an image.
At extremes, white balance can make an image very blue or very orange in tone. For most purposes, you will want to set a white balance that is an accurate reflection of what the landscape looks like in real life.
In order to properly set your white balance, you will need to get acquainted with the Kelvin scale – the unit of measurement that will help you to get the color of your images right depending on the lighting and environment.
To make this easy – refer to the following chart:
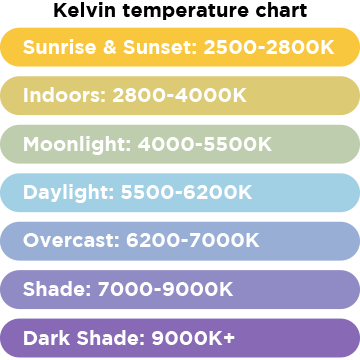
Extra thoughts: if you are just taking a one off shot, using auto white balance may work just fine. The issue with auto white balance, though, is consistency across images. I’ve seen this at extremes when reviewing thousands of images taken at a wedding and finding small differences in color throughout those taken at the same location in the same lighting. This was particularly problematic for me because it led to inconsistencies when applying photo editing presets – which caused a lot of time to be spent fixing the color inaccuracies.
Use a Great Depth of Field
Great (aka: Maximum, Deep, Large, Narrow) depth of field is the result of using a high f-stop like f/16 – f/22 on your camera. This setting limits artificial separation of objects in your image, and thus allows everything to be in focus.
While this doesn’t need to be applied to every shot (and shouldn’t be), it’s a standard piece of advice passed on from landscape photographer to landscape photographer.
Get Tack Sharp Images
One of the goals of many landscape photographers is to capture beautiful images that are crystal clear. I think this is even more important to landscape photographers than most other styles.
Getting sharp images is fortunately pretty easy once you know what to do:
- Use a narrow aperture (high f-stop). This will allow everything in your frame to be in focus – the first component of getting image clarity.
- Stabilize your camera. Reducing camera shake is a HUGE part of getting crystal clear images. The most obvious way to do this is through the use of a tripod or monopod – literal pieces of equipment designed to stabilize a camera. In addition, some lenses include image stabilization options like the Canon 70-200mm f/2.8 lens. If you’re hand holding the camera, pay attention to your own movements as well, as you could inadvertently be contributing.
- Get a camera lens that is well known for its image quality. More than anything, your camera lens will determine how sharp a photo turns out. Most kit lenses will be a little soft, while more expensive lenses will be sharper. In this area – you get what you pay for.
Landscape Photography Gear Tips

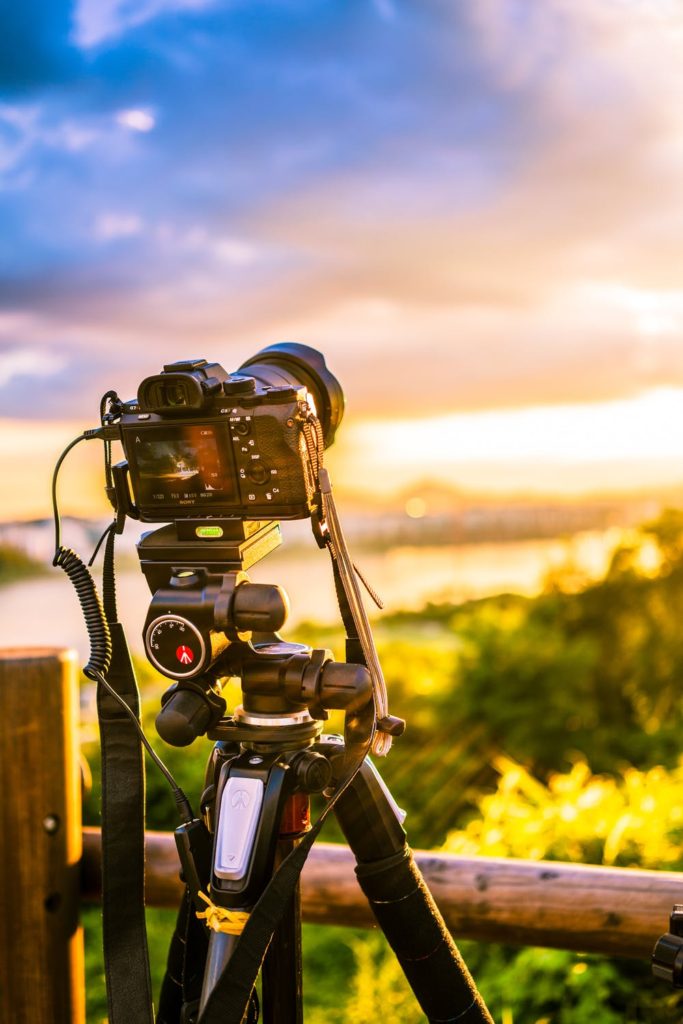
Use a Tripod
One of the most valuable landscape photography tools is a tripod.
Unlike most pieces of photography gear, tripods are simple to understand (even for a total novice). But – I will spare no expense and explain it like you’re five in case you’re wondering it’s value.
A tripod is designed to hold your camera in place and keep it steady. The same effect could be achieved by placing it on the ground, on a pile of bricks, etc. – but those other options will give you very limited range of motion and limited compositional choices. Most tripods can be adjusted – making them a preferred way to stabilize the camera without having to sacrifice getting the shot you want. By stabilizing your camera, it will also allow you to get clear long exposure photographs and utilize camera settings (like low shutter speed and low ISO combos) that would otherwise be impossible to get if you were holding the camera in your hands.
For a super simple (and super cheap) tripod, I recommend the AmazonBasics 60-Inch Lightweight Tripod. This is one I use and it is suitable for most landscape photography situations. For a tripod that is a little more durable (and stylish – if that matters), the Tarion Camera Tripod/Monopod 61-Inch with Panorama Ball Head Aluminium Tripod is a great choice too. It would be better suited for more rugged and poor weather environments.
Use a Circular Polarizing Filter
I will be honest, most lens filters are a waste of money.
The biggest exception to this rule is the polarizing filter (or polarizer for short).
In short, a polarizing filter does a few things for your images:
- Reduces glare
- Reduce reflections
- Increase contrast and saturation
- Positively effect blue skies
Polarizing filters really are an ideal compliment to a camera lens for landscape photographers. Honestly, it doesn’t have much use outside of this niche.
This video from B&H Photo showcases the value of polarizer filters well:
Because of how infrequently I use these types of filters, it made total sense for me to just pick up some AmazonBasic’s polarizing filters. They are actually very high quality especially when considering the cost when compared to other options on the market. It’s definitely a great starting point.
Use a Neutral Density Filter
Okay – the only other lens filter I care to use is the neutral density filter (or ND filter for short).
This type of filter will darken a scene so that you can use shorter shutter speeds even during the middle of the day. Normally, you will find ND filters sold at different “stops” like 2-stop, 4-stop, 6-stop and even 16-stop.
The situations where you would want to use a ND filter would include:
- Darkening an image in camera (without having to adjust your desired settings)
- Blurring water motion
- Increasing depth of field in bright light conditions
- Long exposure photography
In a sense, I see ND filters much like sunglasses. Funnily enough – somebody else had the same idea and made a guide for converting sunglasses into a cheap ND alternative (I guess just don’t use your pricey Ray-Bans?).
Check out Ranger’s 8 piece ND filter kit on Amazon – an excellent entry level pack that is super affordable and contains ND2, ND4, ND8, and ND16 filters along with some extra goodies.
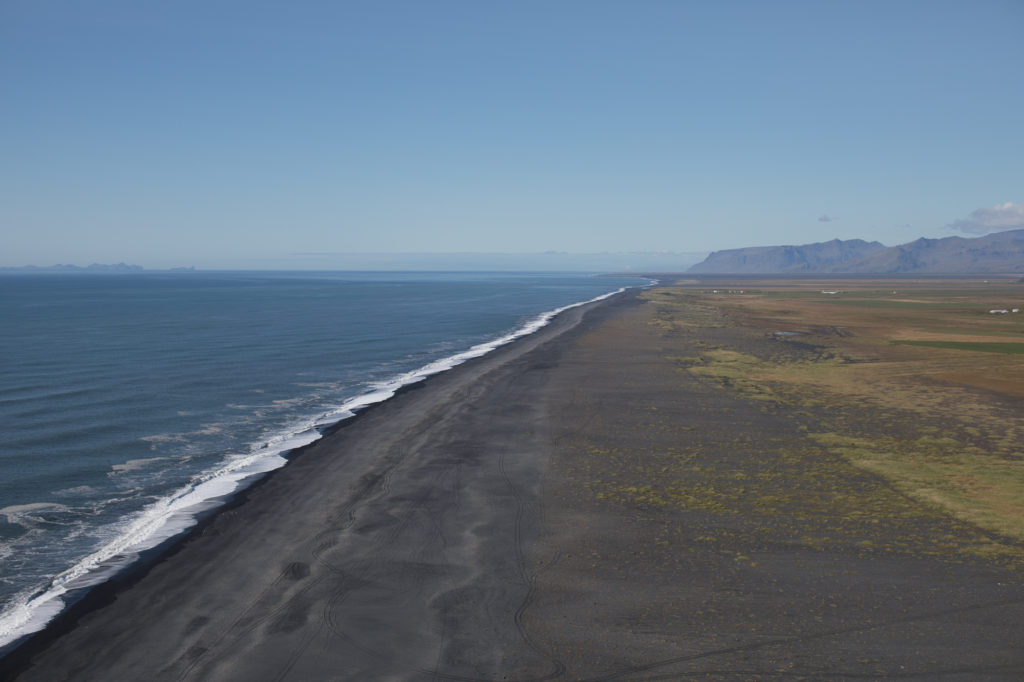
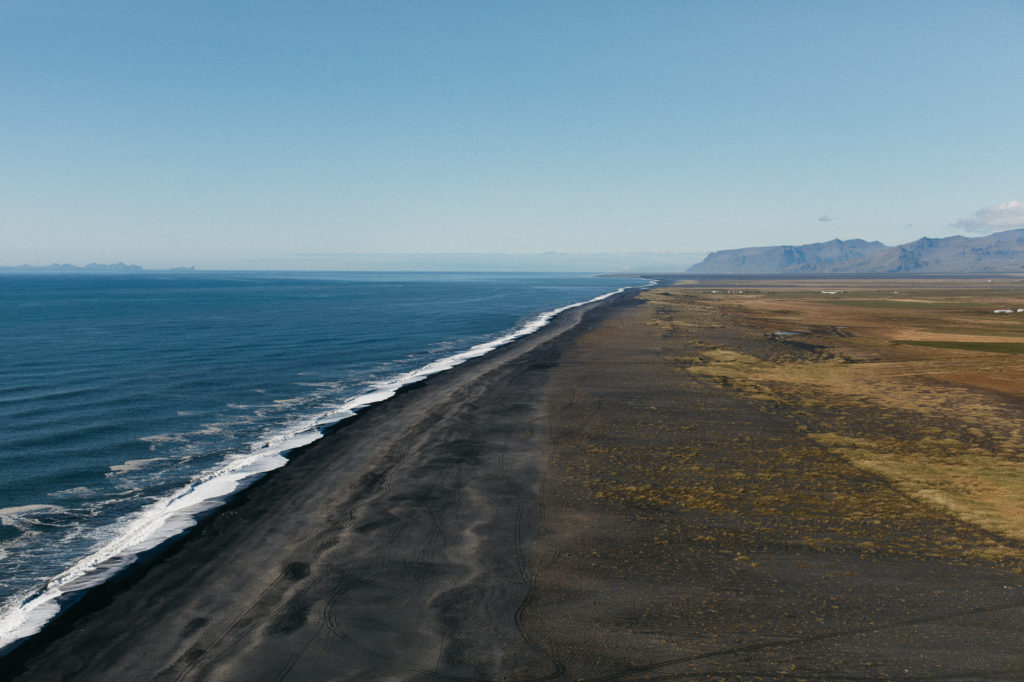
Use a Telephoto Lens to Capture Far Off Details
When you close your eyes and imagine a picture of a landscape, what do you see?
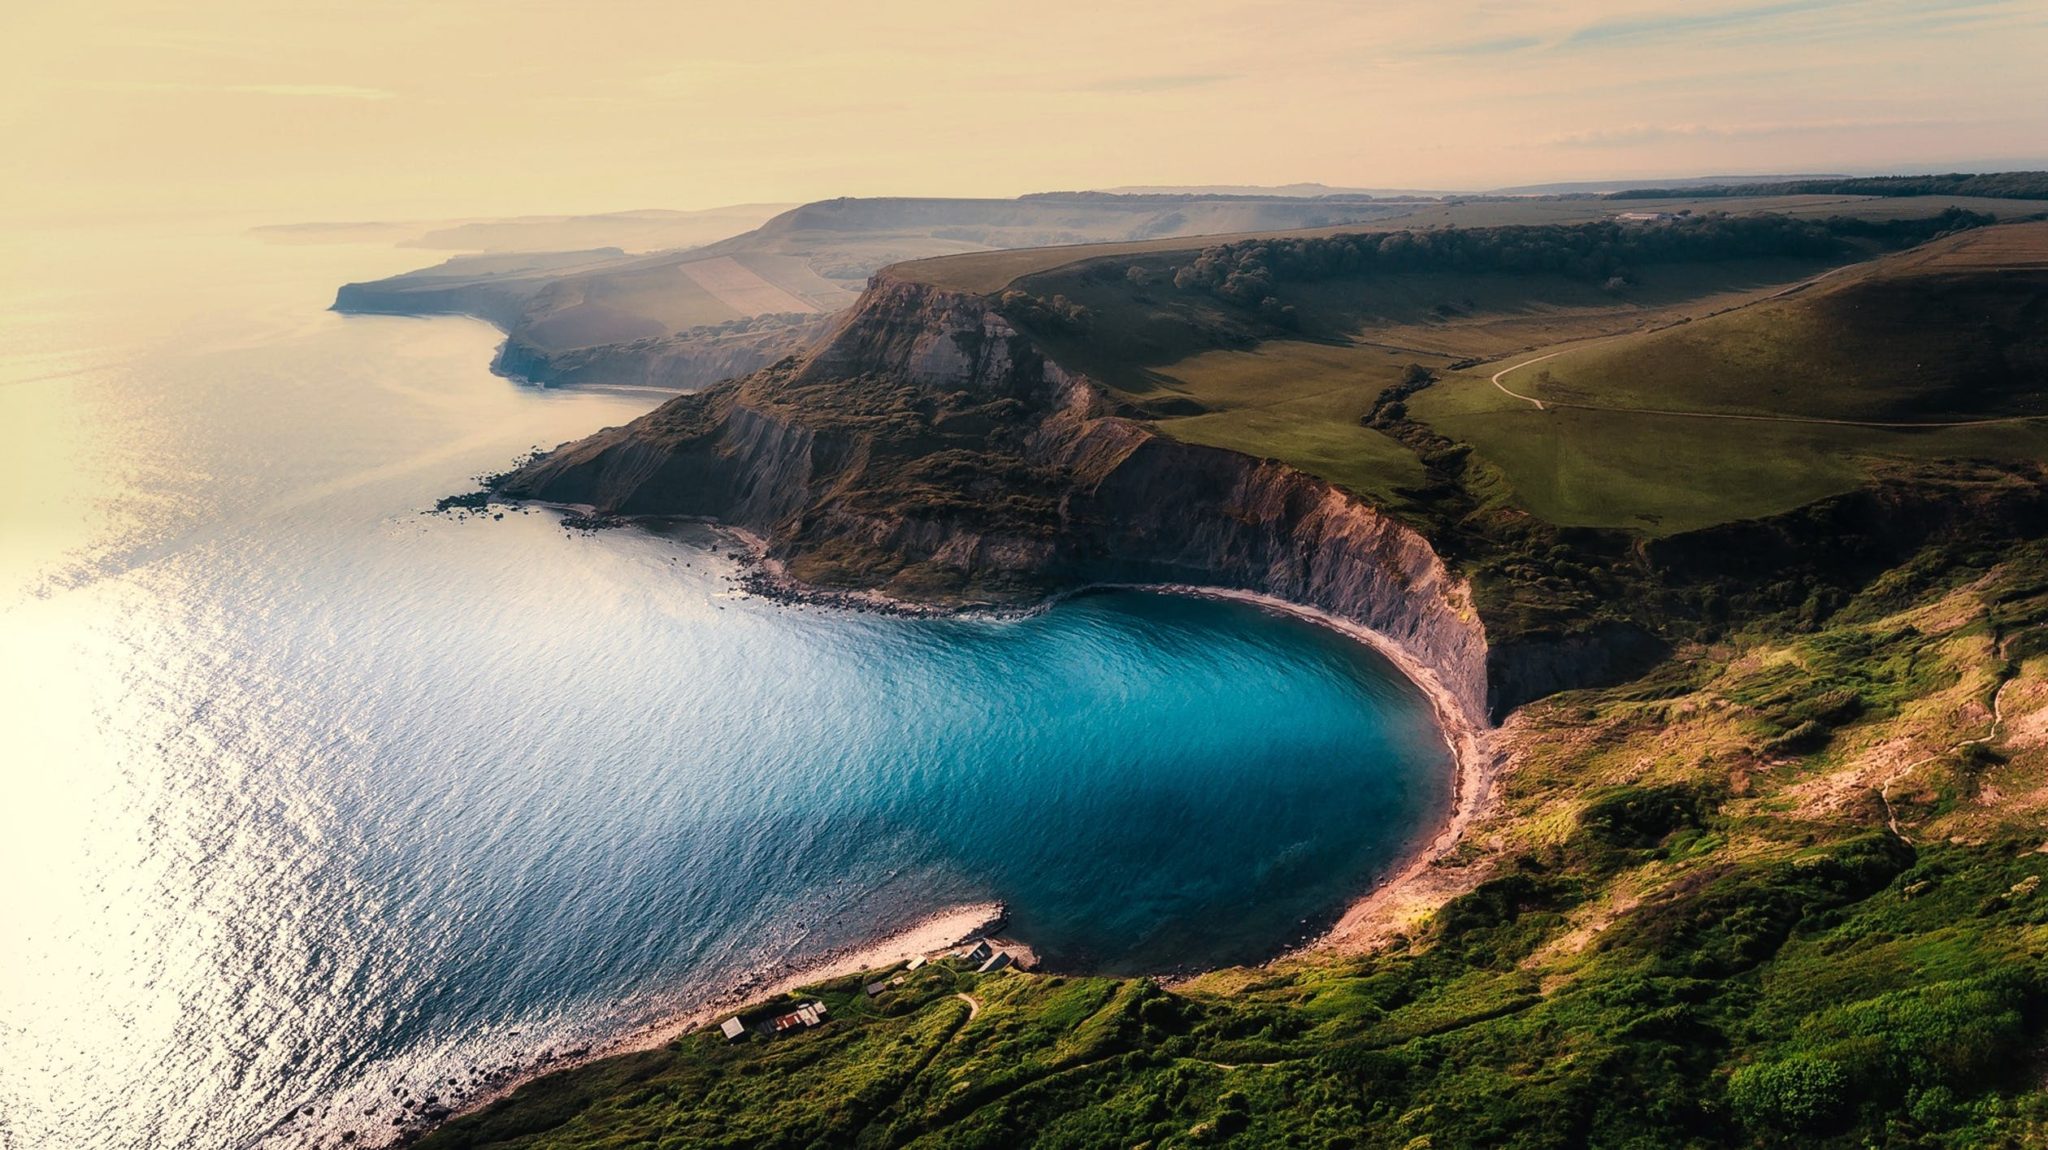
More than likely – you picture an image of a wide sweeping space like this shot I took in Iceland:
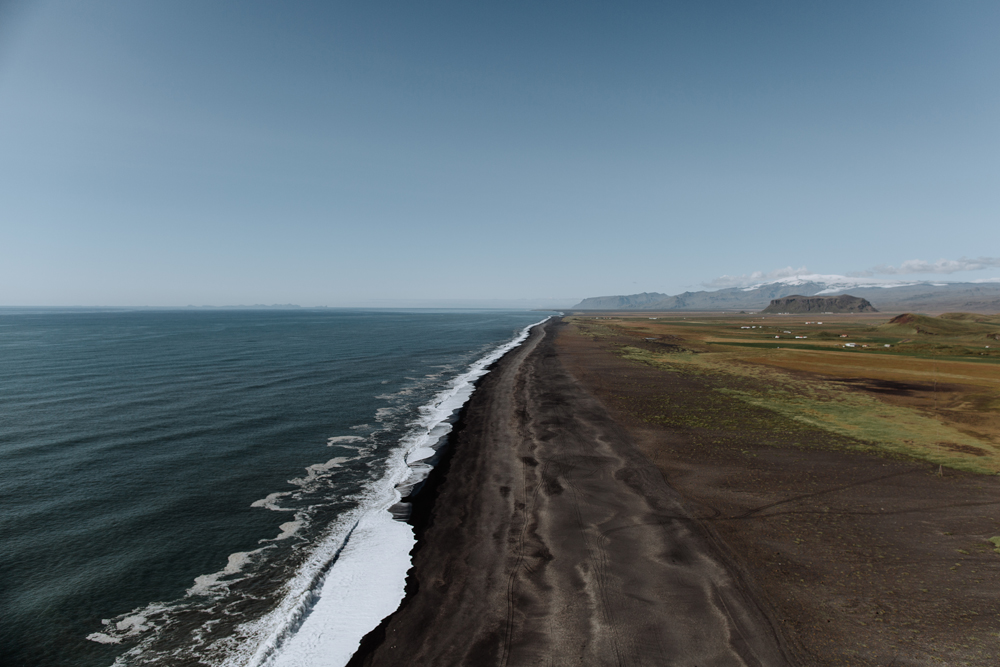
In my humble opinion, it’s a beautiful picture. The location is incredibly scenic, and it showcases this section of Iceland’s southern coast beautifully.
But – landscape photography can be so much more than these types of wide shots. Trust me – I’m not bashing them either!
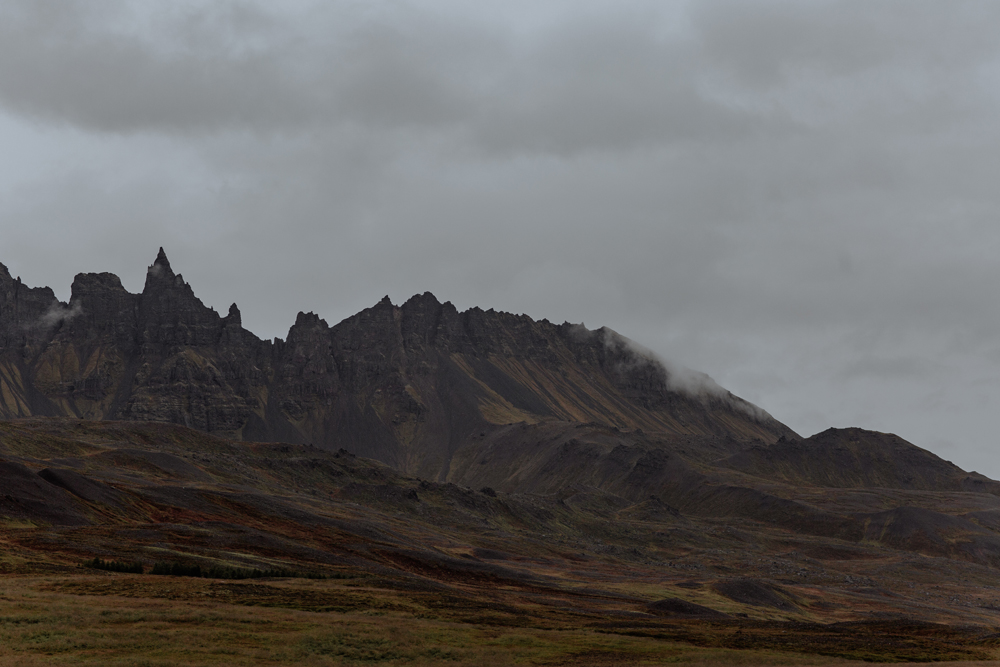
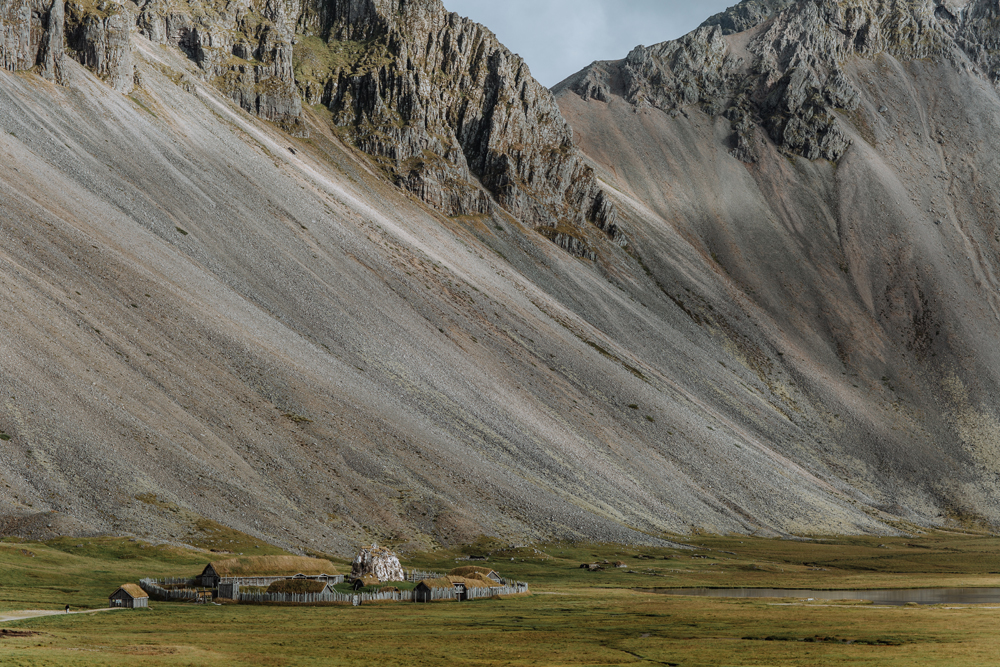
You can equip a telephoto lens to get real close to details in the environment. In my mind, this ends up resulting in isolated portions of a larger thing and, at the most extreme, pure abstractions (ie: where you can’t tell what exactly the thing is you are photographing).
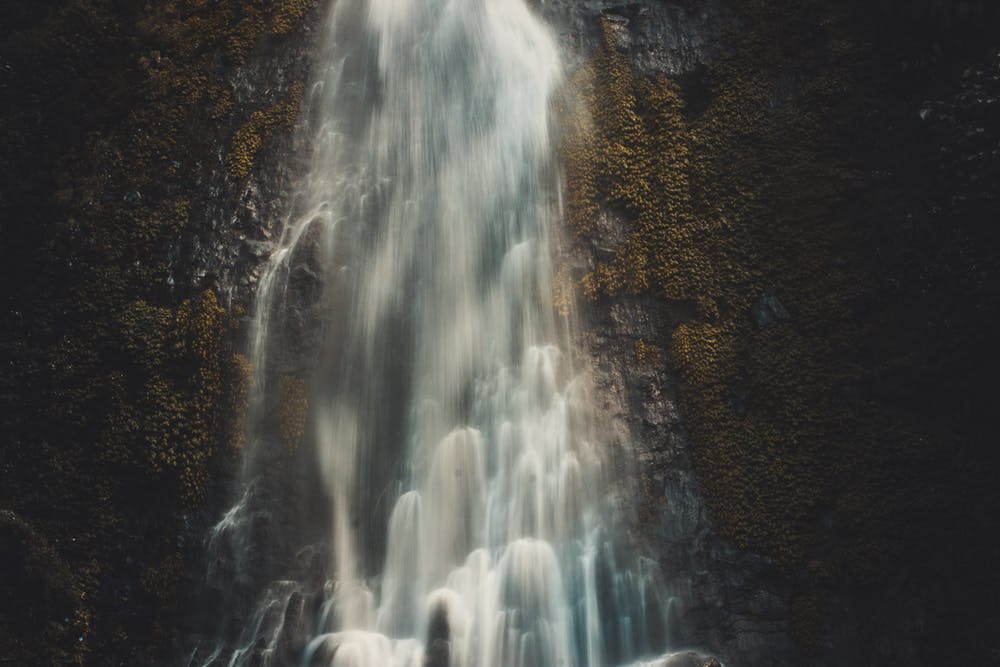
Below are a couple other shots from my trip to Iceland where I used a longer focal length lens to effectively capture the landscapes there:
Use a Wide Angle Lens to Capture the WHOLE Landscape
When you aren’t just interested in highlighting details in the environment, a trusted wide angle lens is the way to go for a landscape photographer.
I still remember the first time I used a 16mm lens (the Canon 16-35mm f/2.8 if it matters to you). It was so life changing as a photographer as I had been so accustomed to pretty standard focal lengths around 50mm – which is similar to the human eye. Seeing the world through a wide lens, though, totally changed the way I viewed my own compositions.
The images ultimately speak for themselves, so have a look at some landscape photos I’ve taken with wide angle lenses below:
For anything else related to camera gear, check out our Gear section for the latest gear lists, reviews, product tests, and more. You can also browse the pages of our Recommended Gear section where we talk about our specific recommendations in a more structured format.
In Another Life, You’re A Meteorologist
Monitor the Weather Forecast
Since landscape photography takes place in the great outdoors – your shots are often at the whim of Mother Nature. Even a great plan can go south if unwanted weather shows up.
As a wedding photographer, I’ve gotten used to checking the hourly weather forecast to get an idea of what I should expect from cloud coverage and precipitation. This has rolled over into my personal landscape photography shoots too – always checking a weather app to make sure conditions will be just right for the shots I have in mind.
While many people (in the United States anyways) will turn to the National Weather Service (NOAA) – I’d actually recommend the free app WeatherBug. In my experience, it’s been pretty rock solid in it’s forecasts. The only times I’ve had some inaccuracies was while I was in Iceland (but that is island weather for you!) and during a recent period of odd weather patterns in my local area. Otherwise, I’d say it’s accurate about 95% of the time – especially when looking at the forecast up to 2 days in advance.
Bad Weather = Image Dynamics
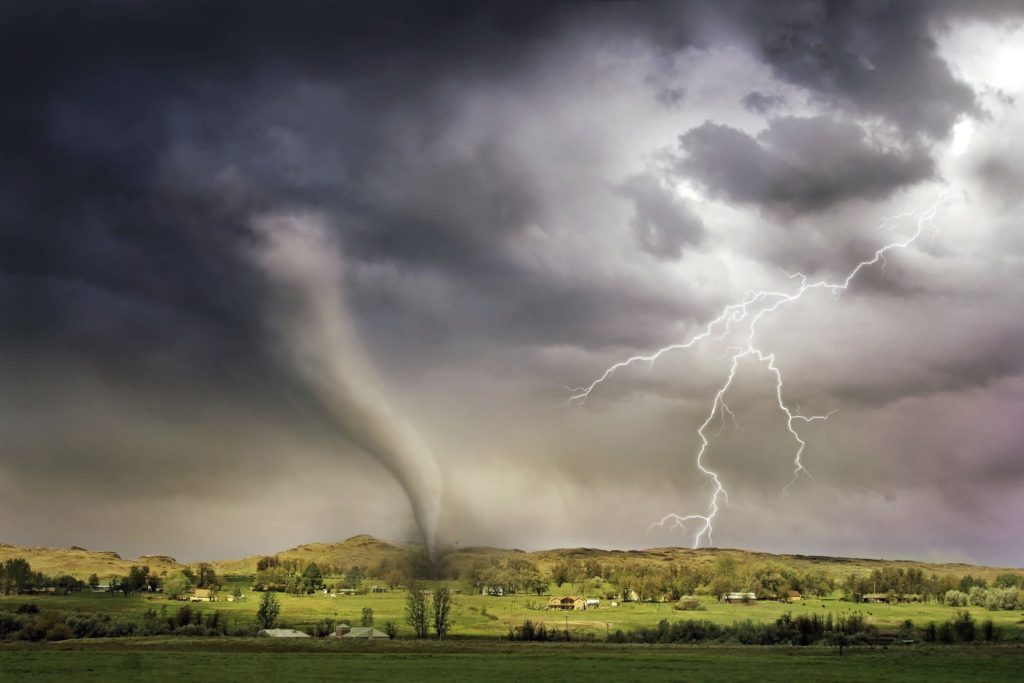
While it’s easy to think that you should always hold out for “perfect” weather conditions, there is a good case to be made for showcasing “bad weather” too!
Rain, snow, sleet, hurricanes, lightening, tornadoes…all of these things and more showcase the power of the natural world in ways that a happy go-lucky perfect sunset lit landscape can ever do. That is all a bit tongue in cheek – as I absolutely love sunsets and the range of color to bring to our little planet, but the point remains…
If you are just starting out, then absolutely shoot in ideal conditions.
But, as you grow your skills and want to experiment more, bad weather elements can really add an extra layer to your photographs.
The way the light works through rain or bounces around snow is stunning. If you happen to capture a more rare phenomenon like a tornado, lightening strikes, the Northern lights, etc. – you’ll have an extra special shot on your hands.
Know When to Find the Best Light
 The best light for landscape photographers happens during Golden Hour – the hour before sunset, and the hour after sunrise.
Golden Hour is when the sun is lowest on the horizon – which causes the light to be naturally diffused. As you already know, this time of day is especially magical because of the vibrant colors in the sky.
Note: Even if you have a cloudy day and thus not a colorful sunset, the light will still be better than you’d have in the mid-day sun. This is important to keep in mind!!
Landscape Photography Post Production
Make Adjustments to Exposure and Colors to Taste
Landscape photo editing can be as simple or complex as you want it to be.
Some of you may just want to brighten up an image, and that is very easy to do (just bring up the exposure setting).
Others will want to be more involved – tweaking colors, shadows, highlights, and many other components of their photos. We often fall into this camp as we look to enhance our own photos – adding a bit of a cinematic quality to them that doesn’t appear naturally.
Pro tip: the biggest beginner mistake you can make is going too far with your edits. Bumping the saturation up to 11 is one example of this – and it almost never looks good. The biggest impacts you can make come by creating depth by playing with the shadow and highlight sliders. Adjustments made to colors are totally fine – but remember to not go overboard.
Use Editing Presets to Achieve the Best Look
The best thing I’ve done to improve my photo editing workflow has been to get Lightroom presets. These presets help me to apply edits that are…
- More consistent
- Look great
- Not wasting my time…
While most photo editing suites will include some free presets, these are not usually all that great. The best option here is to purchase well received presets that will help you get the look you are going for.
Going beyond Lightroom presets, these days you can also check out AI editing tools like Aftershoot, Imagen AI, and others to explore other ways of approaching editing your photos.
Below you can see some examples of before (RAW) and after (edited) images I took on my Iceland trip!
Convert Photos to Black and White
 Black and white photography is one of my favorite styles. This look in images manages to showcase the environment in a way no one is seeing (unless maybe colorblind people among us). I’ve always liked it because it manages to be minimalistic, moody, dark, romantic…all of these adjectives that just suite my personal energy.
While you can absolutely shoot directly into black & white using digital camera settings or choosing to shoot on a film camera and being forced to make the decision definitively – one solution most modern photographers will go with is to convert images to B&W in post production.
There are so many things that go into a successful black and white photo edit, so I have to recommend the post we put together – Tutorial: Black and White Photography Edits Made Easy. In that article, we discuss in depth how you can achieve a great looking edit with plenty of before-and-after examples.
How Can I Improve My Landscape Photography?
To wrap this post up, I wanted to share my condensed thoughts on how you can improve your landscape photography.
Look – I could probably keep writing hundreds of landscape photography tips and tricks.
I could walk you through dozens of concepts in pictures and video tutorials. All of these educational things I can relay in language do not compare to just going outside and learning through experience.
If you read this post in any detail (instead of just skimming), you will be well equipped to go take a great picture.
Absolutely – you’ll make some mistakes in tweaking your settings or not nailing composition your first time out. But, whether you’re a total beginner or already used to taking landscape photos, experience is everything.
As I mentioned in this article earlier, the most impactful thing to my landscape photography was getting out of my comfort zone and going somewhere new that inspired me.
You don’t necessarily have to travel across the world like I have done – but this was, no doubt, a way that I used to fuel my creativity.
If at all possible, I recommend you give it a shot yourself – go to a place like Iceland and stay a few days, see what kind of photos you come back home with.
But don’t forget the beauty right within traveling distance from where you are. I just got home from the New England states, a place I’ve never been, and only a 3 hour drive away. A lot of great landscapes are right out your door if you will put out a little effort to get there.
So what do you think? Are you ready to improve your landscape photography?