How to Take Good Landscape Photos
Learning how to take good landscape photos is not too difficult with the right resource. Unlike some other styles of photography, like wedding photography, where you might experience a lot of stress even your first time out – landscape photographers often are lured to this type of photography because it’s quieter.
In our experience, we love shooting landscapes because we get some alone time with nature and our camera. We don’t shoot landscapes professionally, but instead shoot them for fun. It is really an essential aspect of our personal traveling adventures, and we love returning to the places we’ve visited again and again through pictures.
Today, we’re going to teach you how to take good landscape photos yourself. Some of these tips will be common sense, while others might give you more to mull over. If you have any questions by the end, feel free to ask away in the comment section!
How to Take Good Landscape Photos in 15 Easy Steps
1). Find the right location
For landscape photographers, getting a good landscape photo really begins with finding the right place to take pictures of. If you are just looking to practice, really anywhere will do – but if you are looking for a more memorable photo that would be more suitable for putting up on social media, you will need to find the best locations out there.
Of course, what defines the “right” location can be subjective. Your photography style and choice of subjects will ultimately help to define your landscape photography. While many professional landscape photographers opt to travel to foreign and remote places, you can manage just as well in your own neighborhood. You just need to keep an open eye!
2). Be patient
Landscape photography is a lot like bird watching. Sometimes, you just need to sit, wait, and be prepared for when something more compelling happens. The best shots will often come when you least expect it.
In landscape photography, it is often small things that make a huge impact. For example, you can sit and take photos of the same shot over and over again – getting basically the same shot. But, a slow moving cloud can provide a layer of shadow in one area of the scene to make it more visually interesting. Or some birds in flight come into the scene, and add another layer to it – these animals help to show scale.
3). Get in shape and hike
A lot of the best landscape photography locations aren’t readily available right on the side of the road. Sometimes, the best shots require a bit of work to get to. You’re likely to get more out of landscape photography if you accept the journey aspect of it.
4). Travel to new environments
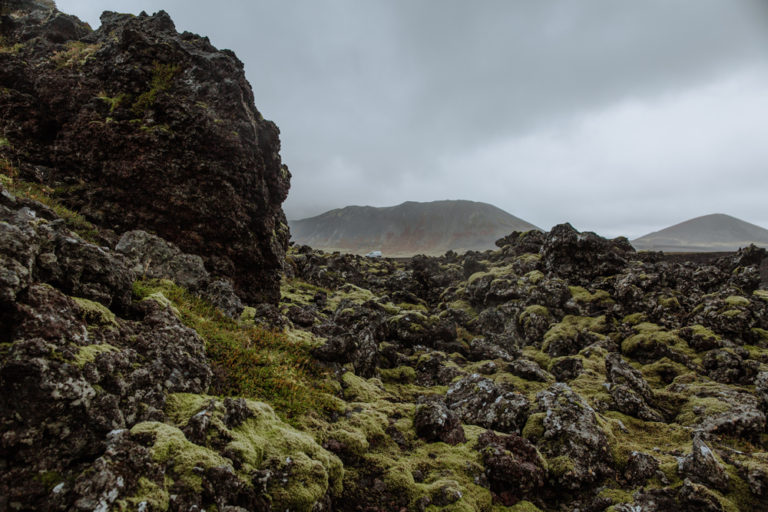
While landscapers can take photos in any location, often a source of inspiration for many photographers is going to new places entirely. Some places on this beautiful world of ours are just ripe for photography.
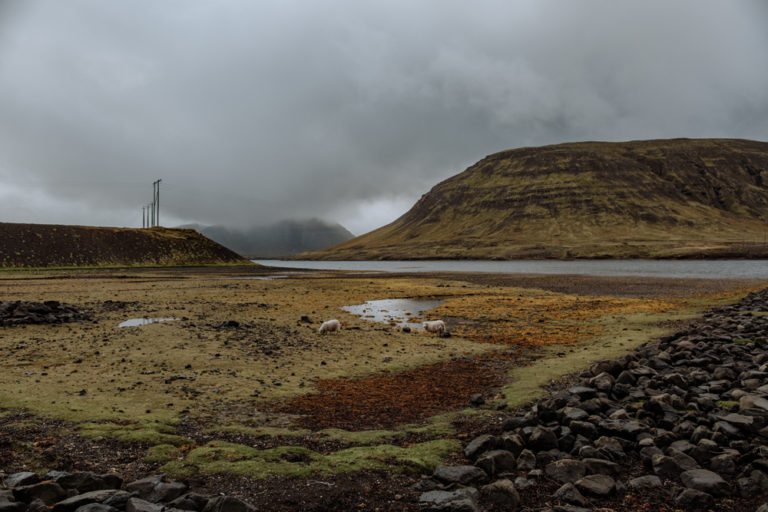
When we traveled to Iceland, landscape photography was something we wanted to engage in while we were there. All the reading in the world would suggest it’s a place perfect for landscape photography, but actually being there showed us just how perfect it was. The amount of times we found ourselves stopping on the side of the road to take in a view and grab a shot was staggering. Some places just beckon landscape photographers to come to them!
5). Know when the best light is
Many of the greatest landscape photographs are taken during Golden Hour. This is basically the sunset and sunrise times of the day. The light tends to be softest and the most interesting. Often, filled with a lot of gorgeous color, which adds a substantial amount of depth even to an otherwise bland scene.
One of the best cases of this we experienced was while photographing the sand dunes in Death Valley National Park:
Death Valley during the day (near high noon):
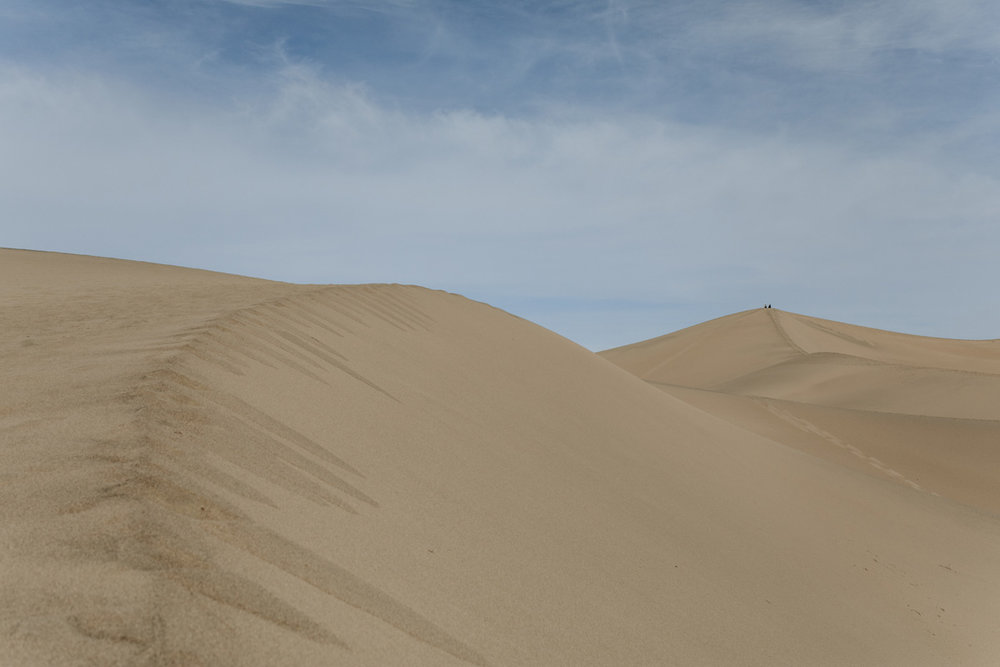 Death Valley during Golden Hour:

As you can see, both are representative of how to take good landscape photos. However, the one taken during Golden Hour is more visually interesting. The colors and contrasts play a significant role in the image.
This reflects real life too – we much preferred the look of this Californian desert during the evening sunset as opposed to mid-day.
6). Use a shallow depth of field
Unlike portrait photography, landscape photography tends to be best when shot at large depths of field. This means moving your camera’s aperture f-stop to around f/8 or greater.
By doing this, you will get more of the environment you are shooting in focus.
7). Bring a tripod
Outside of the camera itself, one of the most essential pieces of photography equipment you should have is a tripod. This can help you with framing your environment, remote controlling the shutter, and stabilize the shot to maximize clarity. While you may not need it for every shot you want to take, it is a big help in some situations – especially in low light.
Additionally, tripods make it possible for you to experiment with your landscape photography. Using the long exposure technique, for example, to blur out water or clouds, requires the use of one.
If you need a new camera tripod, we recommend the Neewer Carbon Fiber tripod.
8). Think about the composition
The actual composition of your photograph is probably the most important element. Composition can make a relatively boring location in real life look absolutely stunning. If done wrong, it can also somehow manage to make a really beautiful place look flat and boring.
While there are books worth of information to discuss on composition alone as a topic, two of the key starting points that should really be practiced by any landscape photographers are the following:
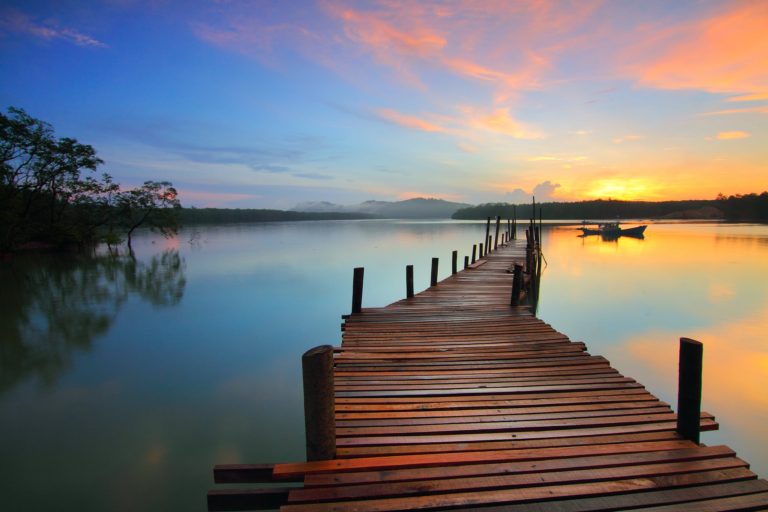
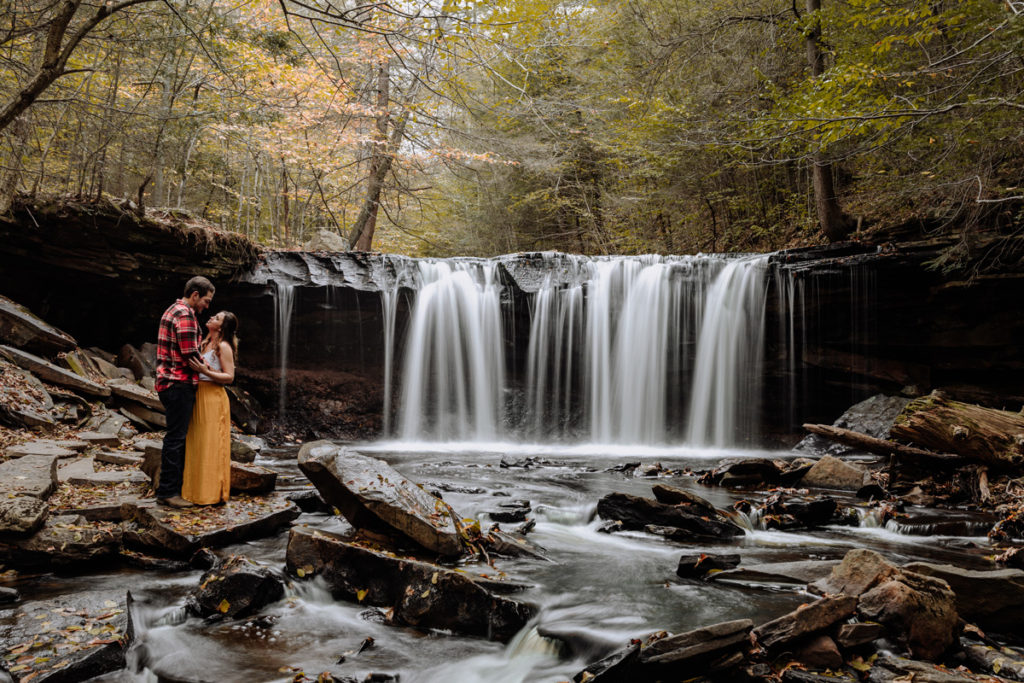
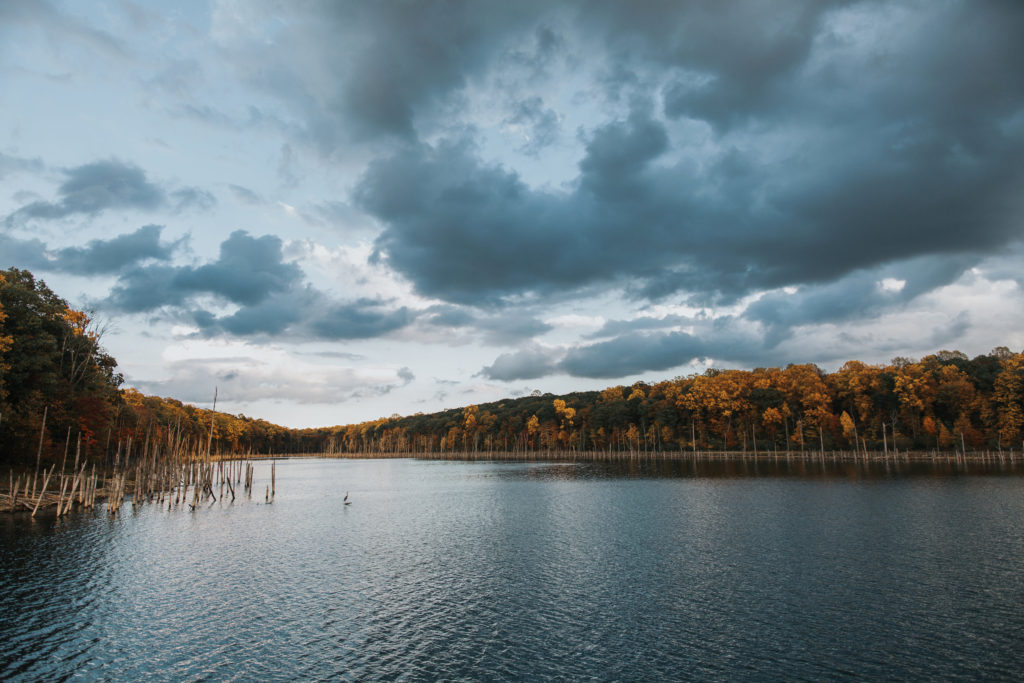
Use leading lines
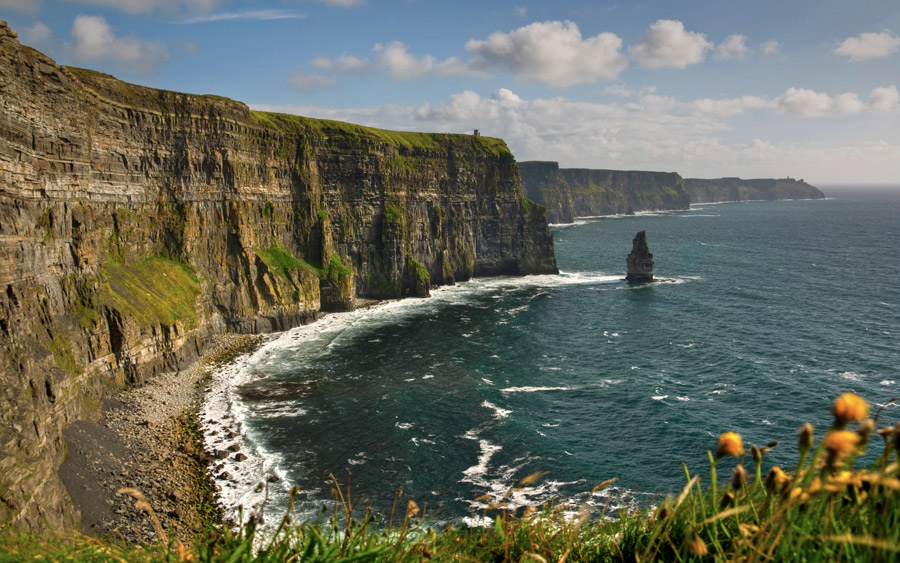 Leading lines lead the viewers eye through the image. In the above photograph, there are several lines created in the composition. The strongest of which is the shoreline that draws the eye from the lower left of the scene, into the upper/center. It’s a visual trick that creates depth and intrigue.
Often, the general rule of thumb is that the leading line should take you somewhere. It should lead to something interesting. In some landscape compositions, photographers use human subjects because our brains can relate to seeing another person in a frame. Of course, there are many, many things that can be an interesting point for the line to end on. And while this is a “rule of thumb”, it’s not true in all images – and there are times to break the rules!
Use the rule of thirds
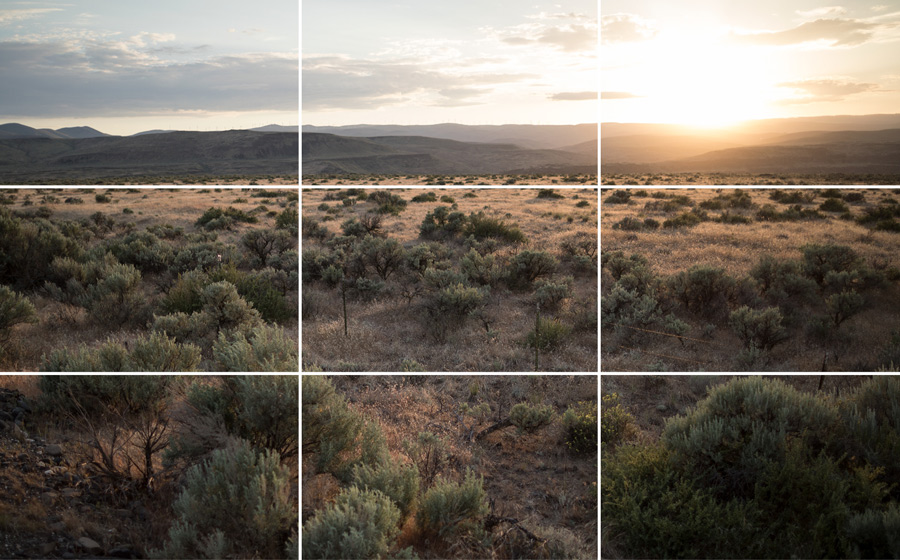 Like leading lines, the rule of thirds is another staple photographic principal landscape photographers work with. Put simply, the rule of thirds suggests that interesting points of focus should be placed on the intersecting lines in your composition. By doing this, you create an off-center composition, which is more pleasing to the eye than a center composed image.
As you can imagine, this is a rule meant to be broken. We do quite often ourselves. But there are also moments where we shoot with it in mind, and it allows us to re-frame a shot in our heads. By doing this – we see the world a little differently. As a result, this rule serves it’s purpose as long as you learn to not rely on it 100%.
If you want to learn more about how to take landscape photos with composition in mind, we suggest checking out the following video from Mads Peter Iverson:
9). Bring the right lenses
While the “right” camera lenses will certainly be subjective, and some really unique landscape photographers might even make use of some legitimately weird lenses, there are some lens recommendations for different types of landscape applications we can give you.
- Ultra-wide angle lenses. These are the lowest focal length lenses you will find such as 6mm – some even considered to be fish eye lenses. In landscape photography, they are most commonly used to capture huge scenes in one image.
- Wide angle lenses. These are less dramatic that ultra-wide angle lenses, and operate in the range of 16mm – 35mm. These lenses have more practical applications, but do well to capture relatively large scenes.
- Mid-range lenses. Lenses from 35mm – 70mm operate in what we would consider to be the “mid-range.” These are focal lengths that are most similar to what you would expect to see with your own eyes. As such, you’re able to get a solid amount of information into a single shot – or can start to get more details depending on the specific scene.
- Long range lenses. Anything from 70mm and up are meant for longer range shooting. Often, we use lenses like this to get details and create abstractions. Depending on your distance from the subject, it may be one way to take a reasonable photo of something if you’re not close at all.
Our favorite lenses for landscape photography have been the Canon EF 16-35mm f/2.8 III USM lens (review) and the Canon EF 70-200mm f/2.8 II USM lens.
10). Use neutral density (ND) filters when appropriate
Neutral density filters are, essentially, sunglasses for your camera lens. ND filters come in different forms such as a 4-stop ND filter, 6-stop ND filter, and so on. Each stop of a neutral density filter reduces the brightness (or highlights) of a scene. This means it is much easier to shoot landscape photos during mid-day without having glare, white highlight spots, and so on.
In more practical use, it allows you to use a wide aperture and/or lower your shutter speed without necessarily needing to make adjustments to the other. For example:
Say you are shooting a landscape during mid-day.
Your normal camera settings might look like this –
- ISO – 100
- Shutter Speed – 200
- Aperture – f/8
But, maybe you want to smooth out the effect of water or the look of clouds to create something more dream-like.
Your settings may want to look something more like this:
- ISO – 100
- Shutter Speed – 1/3 second
- Aperture – f/8
If the initial camera settings were ideal for this shooting scenario, by reducing your shutter speed – you will end up with an overexposed and blown out image. Now, this won’t work!
To compensate for the change to the shutter speed, you have two options:
- Increase the aperture several stops OR
- Add a ND filter
As you may see, a ND filter is not 100% required – but if you want to maximize the control you have over your settings, it can make getting the shot you want much easier. In raw daylight, it may be the only way to make a more usable image that does not feel flat, too.
If you are interested in getting a neutral density filter, there are a wide range of them available online.
11). Shoot in camera RAW
If you aren’t already, taking photos in RAW file format is going to enable you to get better shots. The reason for this is because camera RAW is a file type that essentially functions as a “digital negative.” It retains the maximum amount of information. These files can be edited to great effect and exported to other file types such as JPEG later.
When shooting in RAW, the one thing you will notice is a drastic increase in the file size. Our shots tend to run around 20mb – 30mb easily per photo. As a result of this, you may need to upgrade your SD card(s) to larger volume ones. We recommend SanDisk Extreme Pro 128GB’s. As a point of reference, we can use a 128GB card and shoot an entire wedding day (basically non-stop shooting for upwards of 10 hours).
12). Find interesting foreground objects
 The first thing that comes to our mind when we thinking about landscape photography are huge, sweeping scenes. Showcasing mountain ranges, field, lakes…the list goes on…While these shots are beautiful, and maybe not even exclusive from our next topic – we want to talk a little bit about how to take good landscape photos by including interesting foreground subjects.
A lot of landscapes really dominate the mid-ground and background of a scene. Often, this can mean we neglect the foreground – or the parts of a picture closest to the viewer. By using a good foreground subject, you can introduce more intrigue and even show scale of a place you are in.
Fortunately, this is not a difficult thing to do. There are a wealth of foreground objects you can use to add to your scene. Some of the most common things might include:
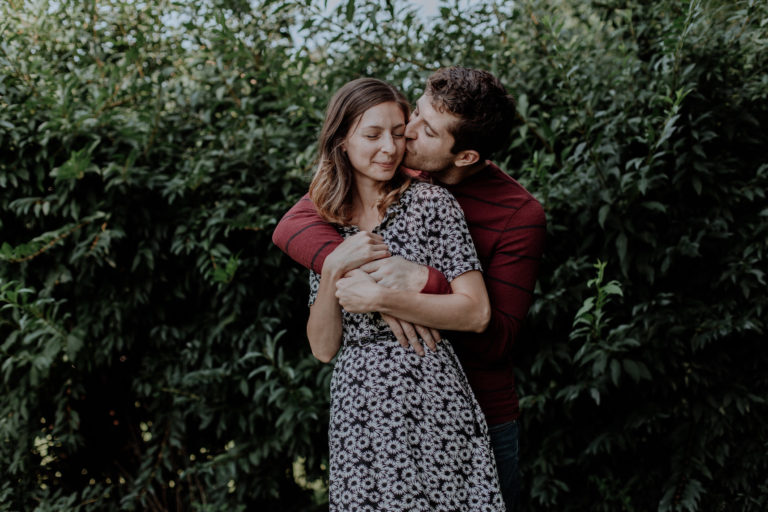
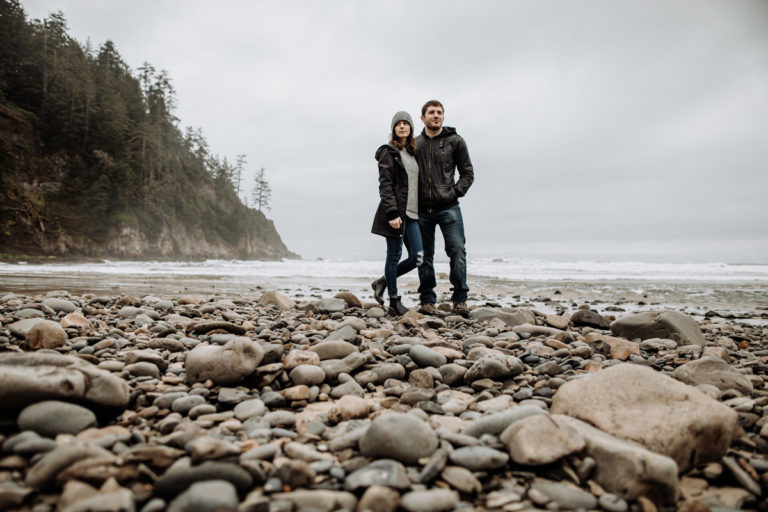
- People
- Flowers
- Insects/Animals
- Interesting rocks
- Cars
The list is, literally, endless.
13). Get the right exposure
The entire technical side of photography really boils down to one simple end goal: getting the right exposure.
The actual “right” exposure can, in some ways, be subjective. At it’s core, the goal is to have the right settings dialed for ISO, aperture, and shutter speed – though there are many ways to configure these settings and still have a good exposure. In more complex settings, you will also need to factor in external light sources such as off camera flashes, as the light introduced in this way also impacts the exposure.
In order to get the right exposure in your landscape photographs, you should begin by getting familiar with the histogram.
About the Histogram
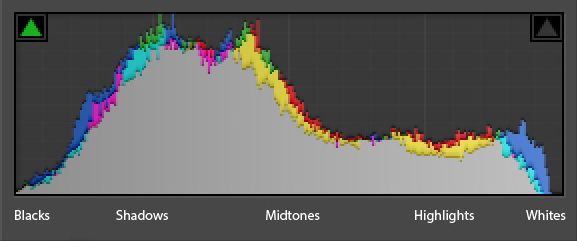
As seen in the image above, the histogram is a way to visualize the data in your photographs. Most cameras have these built into them. You can also use a histogram in editing software like Lightroom and Photoshop.
The main thing you will be looking for when it comes to getting a balanced and perfect exposure is to see that there are no areas of clipping. These are really high peaks on the histogram, often that go out of the graphs boundaries.
In our experience, some clipping is not the end of the world. It may not be visually noticeable to most people if it is in small quantities, or is used effectively within your photographic art style (more on this in a moment).
For the sake of learning landscape photography, knowing how to dial in a proper exposure is a great fundamental to know. As with pretty much everything, it can also be broken if you so choose.
Intentionally Underexposing or Overexposing
Now that you know how to get a technically good exposure, we’re going to tell you about how you can expose in different ways.
In our experience, underexposing shots tend to allow us to retain more detail and data in our images. This is especially true when retaining shadow and highlight details. For most shots we take, we often aim to underexpose – even if it’s just by a little.
In the same way, some photographers opt to overexpose images. While we don’t care to do this with landscape photography, if you are wanting more bright & airy photographs, this is one way to get that effect in camera.
Note: when under or over exposing, keep in mind we do these things with post processing in mind. In Lightroom, we are able to fix the exposure to suit our specific needs. An underexposed image will not likely be usable on it’s own. For example, we’re not likely going to want to have prints made of a shot right out of camera like this. The exposures we choose are intentional, but with the end image in mind – this being the fully edited shot.
14). Use post processing to enhance the shots
In the past, photo editing was quite frowned upon. It was (and still is in some circles) viewed as inauthentic. While there may be some truth to this, especially when referring to really dramatically altered images, in our world – editing allows us to perfect our exposures. While we do adjust colors to suite our style, which is pretty natural in its own right, more of our focus is concentrated on impacting the contrast in an image. This means changes to things like the shadows and highlights.
While photo editing is a huge subject for discussion, the best starting point is to get Lightroom (or another comparable editing software) and use some presets. Presets allow you to get your images closer to your desired endpoint with less effort. A few we have used in the past include:
15). Experiment
Lastly, the best way to learn how to take good landscape photos is to actually go outside and start shooting. While we have laid out some of the basics, and thrown in a few standard “rules” for you to consider, as you begin to apply these – you’ll start to find plenty of places where you want to break them.
The key to finding the most enjoyment in your photography is by simply doing what you want, despite having a lot of foundational knowledge that has been taught to you.
One of the driving forces behind our landscape photography isn’t some aspiration for fame or popularity, but rather just taking shots that we enjoy. Oddly enough, since we starting renovating our newly purchased home, one of the biggest driving forces has been to take cool shots we can hang up on the wall. It’s a silly thing really, but one of the reasons why we cared to learn how to take good landscape photos ourselves.
For more, check out 101 Digital Photography Tips – our huge resource for all the tips you could possibly need to get a great photograph!