The Ultimate Portrait Photography Guide
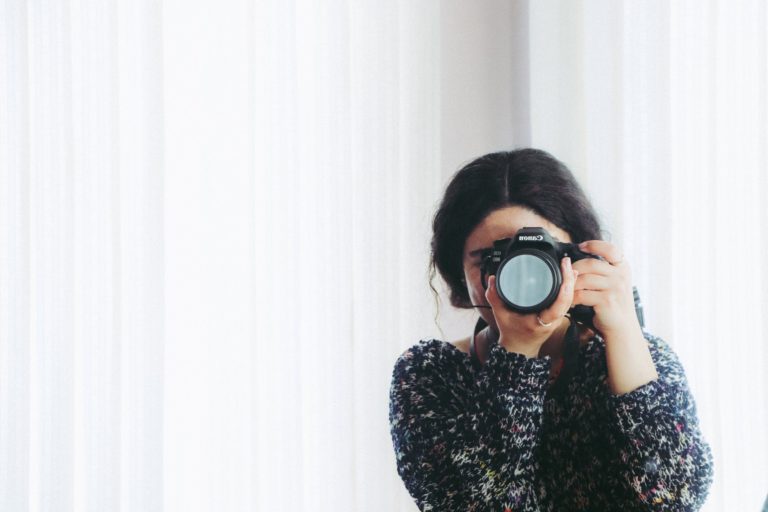
Portrait photography is the art of capturing a living subject. These types of photos are used for all types of purposes ranging from professional headshots to be used on company websites, pictures of a bride on her wedding day, or photos of your pet dog.
The real fun that comes from taking portraits is just how diverse they can be. Sometimes, you can get very artistic and draw on a lot of technical knowledge to make a very specific shot happen. Other times, a portrait can be taken just as simply with a point-and-shoot camera in a living room.
In this post, we are going to break down the different types of portrait photography. We will discuss each type in detail, and help you understand how you can create beautiful portraits in each style yourself.
Main Portrait Photography Categories
With the goal being to put together a useful portrait photography guide for you, we need to lay some initial groundwork.
We will be classifying all portraits into just a few simple categories.
We do this because it may help draw your attention to one specific area (if that is what you are most interested in). Not to mention, it allows us to give this article some well needed structure considering its length.
Portrait photography, like music, comes in many styles. There is genre-upon-genre, and so many sub-genres that have been created that it is impossible to track them all down. For both of our sakes, we decided to not go so deep down the rabbit hole that we’d never come out. In this guide, we will be covering all of the core portrait photography styles so you can have information that is both educational and practical to apply to your own photography.
If you feel we’re missing something, drop us a line or leave a comment, we’ll be updating this post from time to time!
- The Subject(s)
- The Number of Subject(s)
- The Type of Shot
When we’re finished covering these points, we’ll get into more detail that will show you how to capture great portraits every time!
Our Portrait Photography Guide to…The Subject(s)
1). Candid Portrait Photography
 One of the most accessible styles of portrait photography is that of the candid shot. In simple terms, these are portraits taken while people are going about their business. For travel photographers, these may be photos taken to capture a certain areas culture – including the people who live there.
This approach to photography often requires a lot of quick reaction times. You are just walking around, see something interesting happen, then snap a picture.
There has been a larger shift in the photography industry towards more candid portraiture as many people find it more accurately depicts the person in the frame.
One big tip: The key to candid portrait photography is to capture people in their natural state. If you’re photographing people who you don’t know, this is usually easy enough (though: some people may not like it if you don’t ask for permission) – just raise your camera and snap a shot of them in action. For candids of people you know (say: a client you’re photographing), you can create candid moments through the use of prompts. This is a staple of unposed photography and one of the ways we get natural looking portraits all the time!
2). Posed Portrait Photography
 When talking about portraits, most often people will think of these more heavily staged shots.
A couple of posed portrait styles/subjects that are super common include:
- Senior portraits
- Bridal portraits
- Model portraits
- Maternity portraits
- Newborn portraits
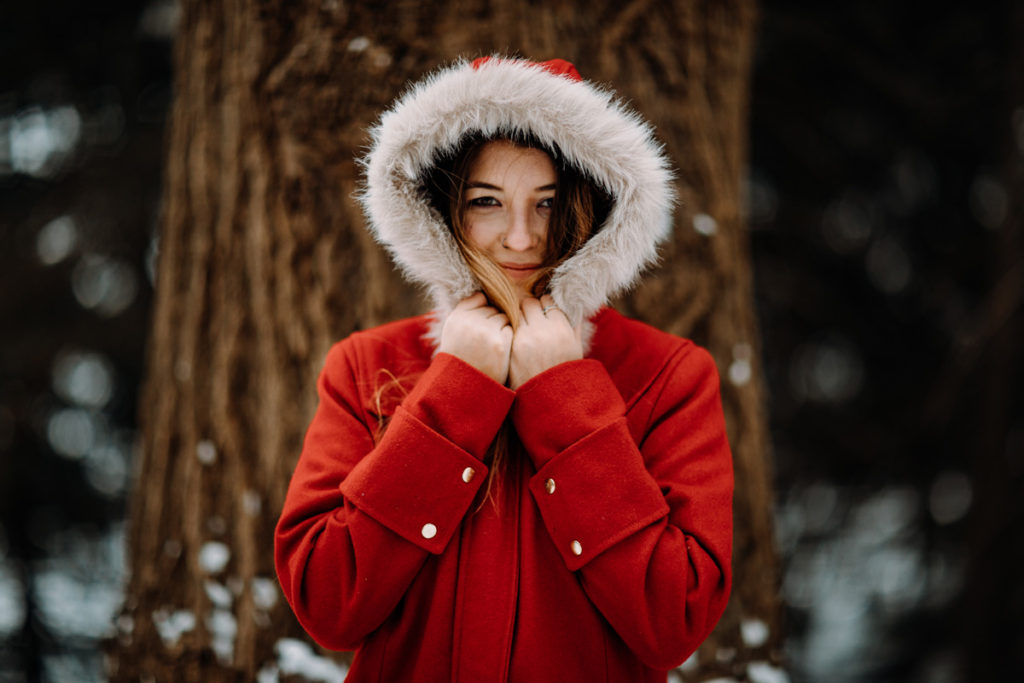
- Christmas portraits with Santa
You get the idea!
While some people may put down posed photography in general, we happen to believe that when done well, it can be very effective.
One big tip: Really think about the purpose of the portrait you are taking. It will impact how you go about your posing process (do you want your subject to look stiff or more natural?), what kind of lighting do you want to use?, and so on.
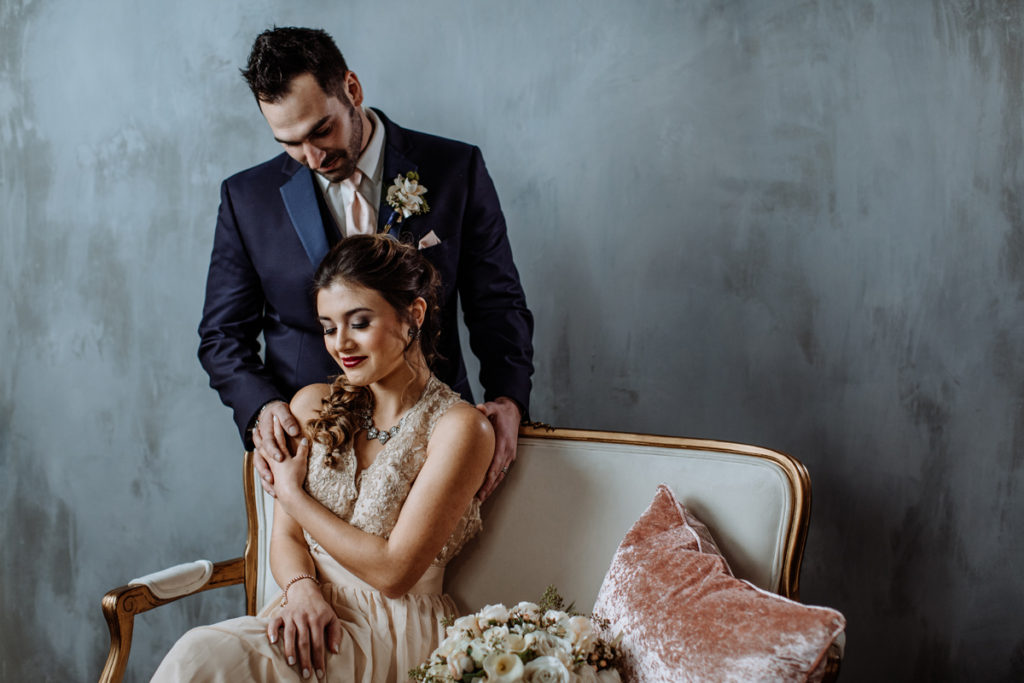
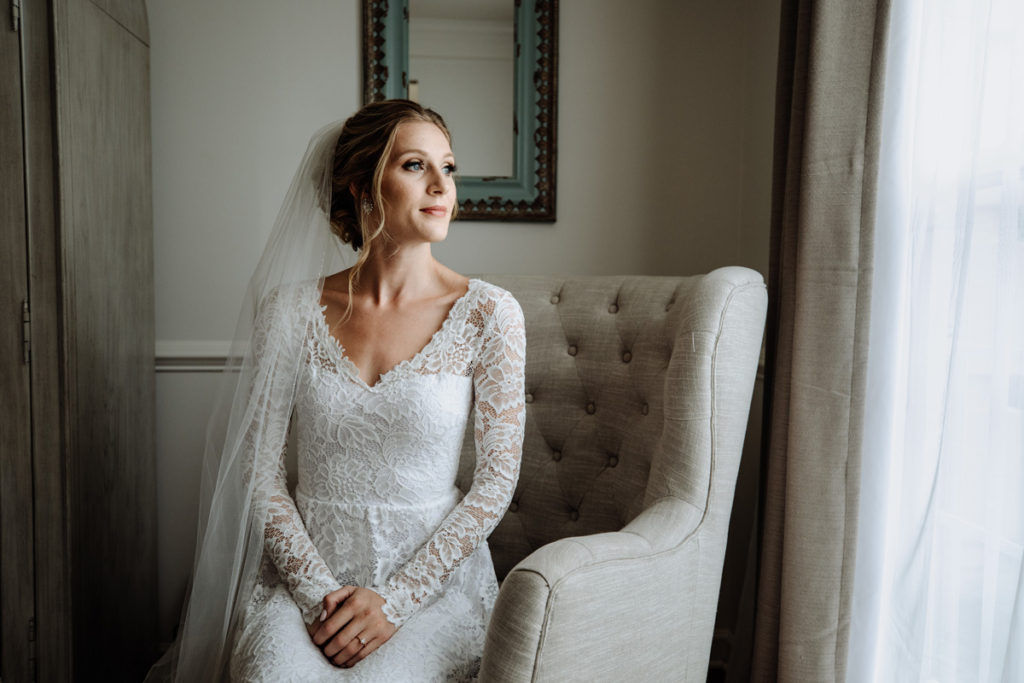
3). Formal Portrait Photography
 So formal portrait photography would fit nicely into the posed portrait photography category – but what we want to do here is highlight the intent of the pictures. The intent – ie: the reason a photo is being taken at all – is hugely important.
For formal portraits, these are often photos meant for a very specific purpose – such as a corporate headshot to be featured on a company website or LinkedIn profile.
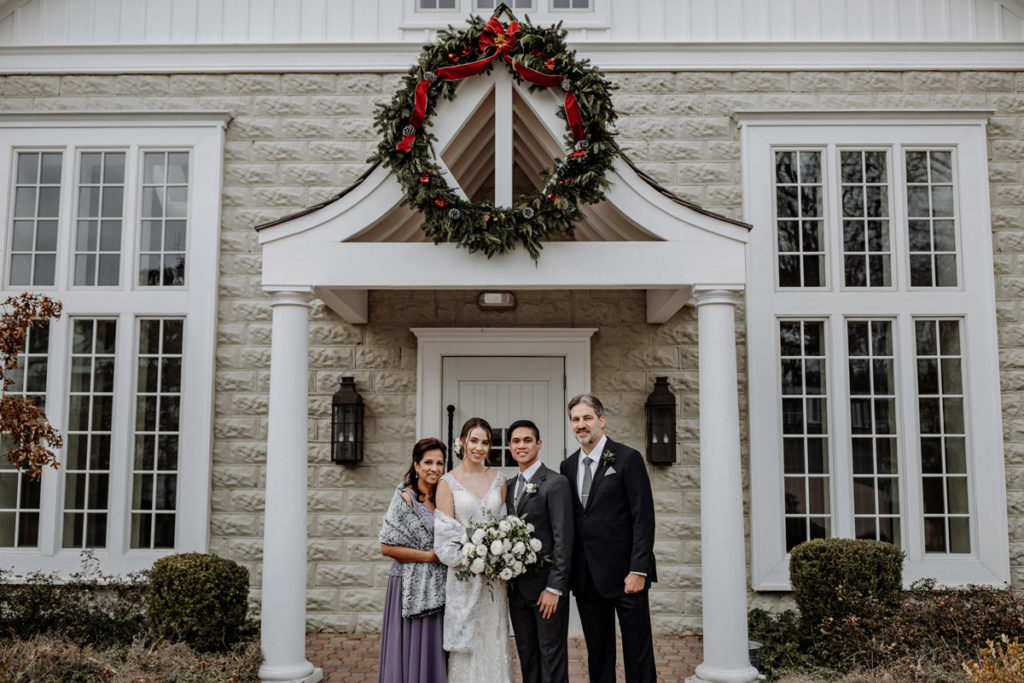
In wedding photography, “family formals” are generally photographed immediately after a marriage ceremony, and are meant to commemorate the wedding with the whole family getting their photos taken together. These images are often some of the few a whole family will get together, so they are often shared amongst generations.
These are just a few examples, but as you can see, formal portrait photography is a style all it’s own (even if we’d consider it a little plain!).
One big tip: The hardest part about family formal pictures, in our experience, is getting everyone together and on the same page. If you’re taking just one photo with a single family grouping – this will actually be pretty simple (…most of the time). If you’re shooting many family groupings with a larger family, this can be challenging and we highly suggest putting together a family formal shot list to make this easier. Pair that with a solid wedding photography timeline and you will be gold!
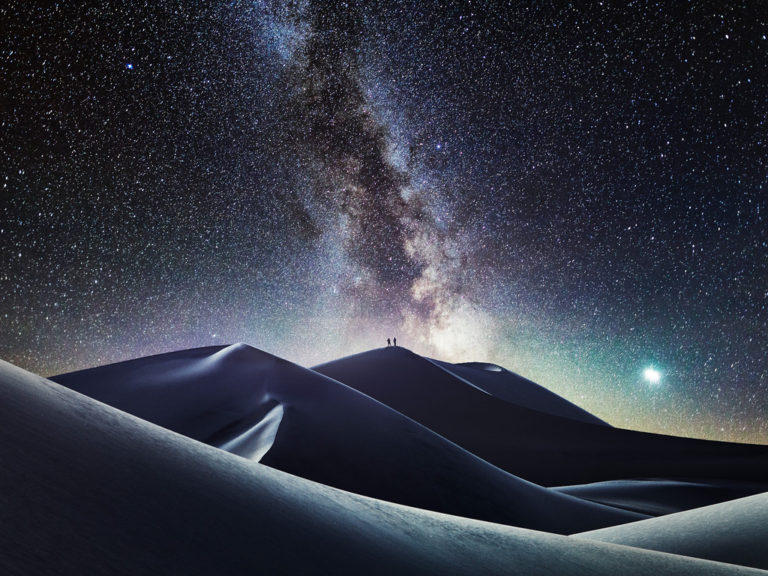
4). Environmental Portrait Photography
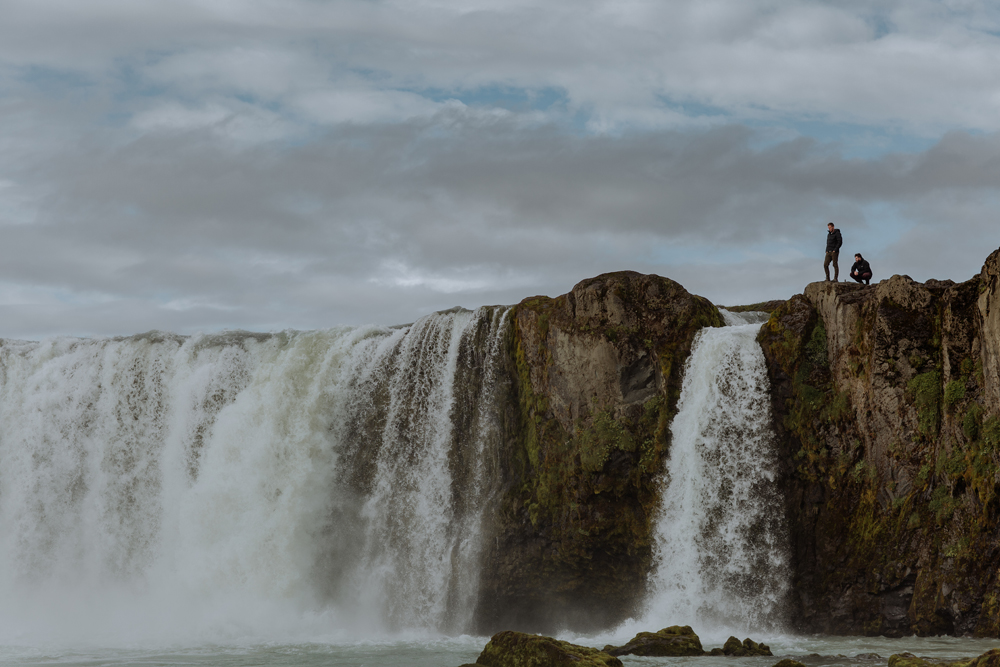 In the same vein as the formal portraits above, environment portrait photography can really overlap with posed or candid approaches. The main reason why this stands out as it’s own category is because of (you guessed it) – intent!
Usually, portraits aim to emphasize the human subject in the frame. They are traditionally all about them. In environmental portraits, the focus is shifted more heavily to the environment. Yes, it is a portrait because a person is in the frame – but the person is only a part of the story being told.
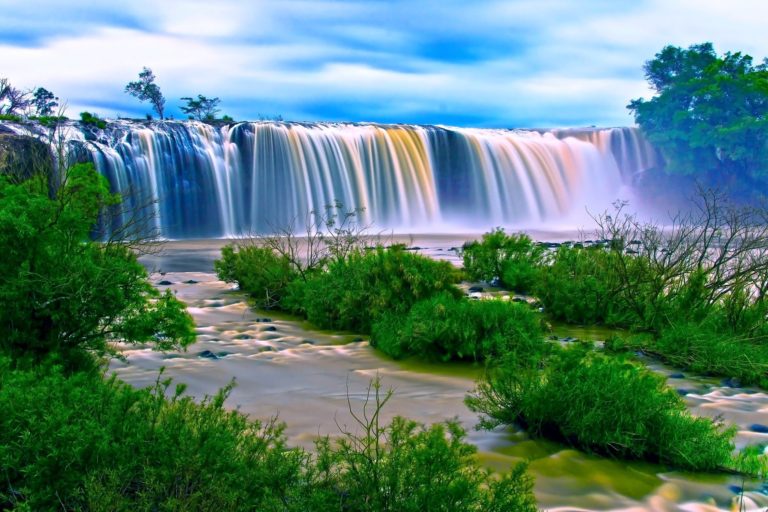
One big tip: You can use your portrait subject to show the scale of a place just about anywhere. While we often think of these types of photos happening in really adventurous places with mountains and waterfalls (such as Iceland – our personal favorite) setting the scene, you can just as easily use a wide shot in an open field nearby.
Our Portrait Photography Guide to…The Number of Subject(s)
1). Individual Portraits
 When taking photos of just a single subject. These photos can really happen for any number of purposes – just for fun, for work headshots, for social media profiles, for artistic reasons – the list goes on.
One big tip: Before taking the photos, have a quick chat so the person can feel at ease working with you. If they are comfortable before they get in front of your camera, the results are going to instantly be much better.
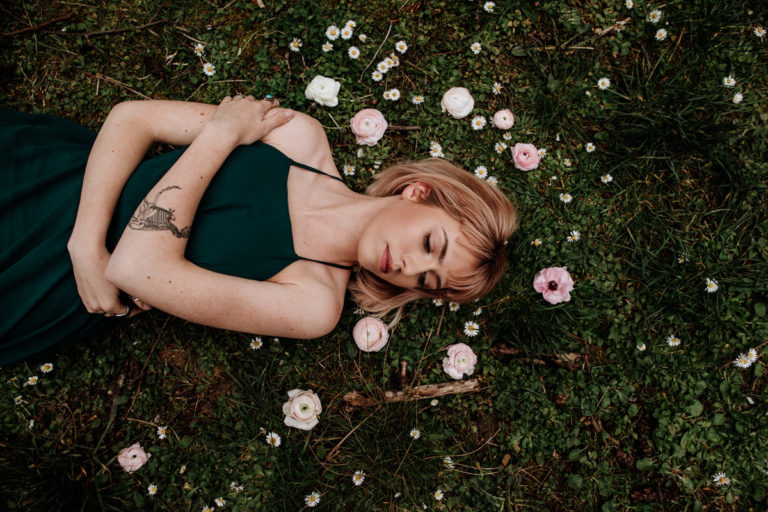
2). Couples Portraits
 Portraits of two people – whether actual couples in love, two close friends, or some other duo pairing.
The approach to couples portraits will often vary depending on the relationship, level of comfort the people have with each other (and the photographer), and what they are looking to get out of these photos.
In it’s simplest form, a lot of couples portraits happen candidly through phone photography. A quick selfie shared between two friends at a fun event. A couple who reached the top of the Eiffel Tower.
If you want a crash course into couples photography, we’re actually experts on this topic!
Check out our post The Ultimate Guide to Couples Portrait Photography for more.
One big tip: Really work on your approach to posing. While the technical aspects of operating a camera are important, they only matter if you can nail capturing a couple authentically. The Unposed Field Guide and Signature Edit’s Candid Couples Posing Guide are great resources to check out to help in this area!
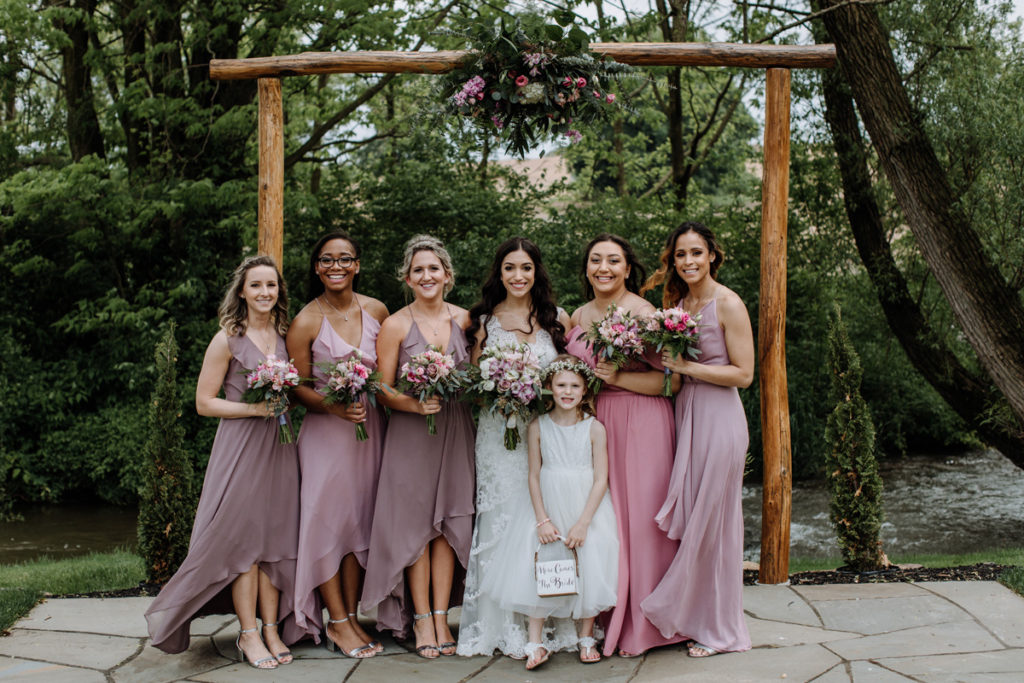
3). Group Portraits
 Portraits of groups involve 3+ subjects.
The most common would have to be family photography – a mom, dad, and child (or multiple children). Sometimes extended family slips in. This type of group portrait photography has been around virtually since the start of photography.
Of course, it’s not just limited to families.
We were at a wedding recently where one of just got up on the DJ table and photographed everyone in the reception hall at once – in one huge group shot. This was the bride & groom, their parents, extended family and friends – all in one. It’s a big undertaking – and a totally different requirement to get the shot (including: standing on the DJ table).
One big tip: We suggest shooting at f/4 or greater when photographing groups – and increase your f-stop gradually as more and more people are involved. Using a more narrow aperture will allow you to get everyone in focus.
Our Portrait Photography Guide to…The Type of Shot
1). Close-Up Portraits
 Close up portraits are unique because they emphasize one aspect of the subject. This can be achieved through selective framing or cropping in post production.
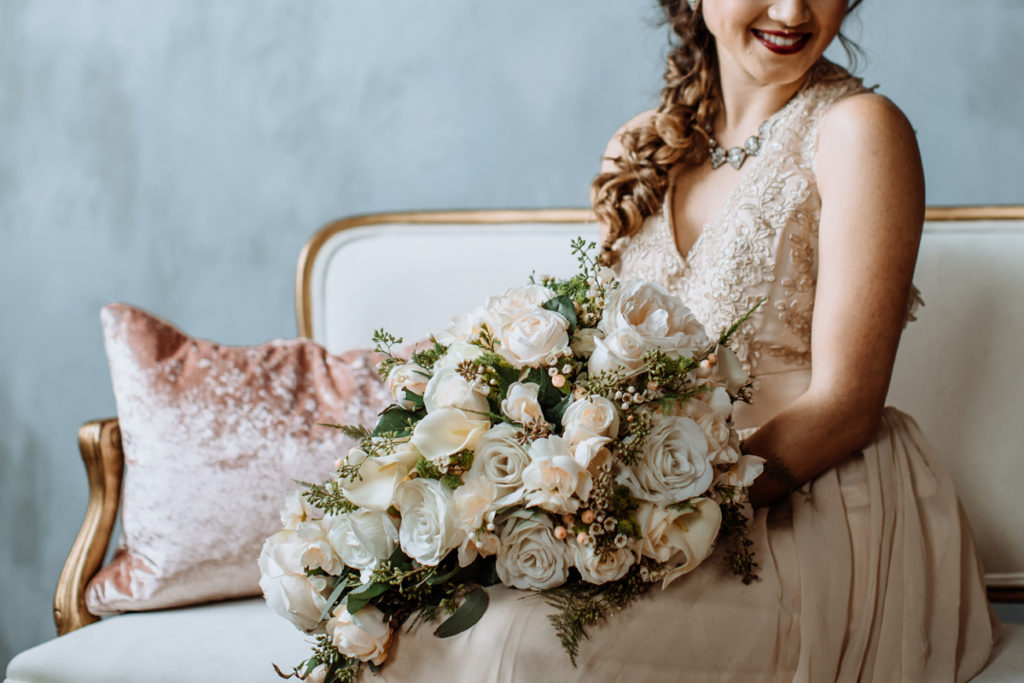
In our experience, we often approach these types of portraits by considering what is important to the subject. In the case of brides, emphasizing a bouquet or piece of jewelry, which becomes more of the subject yet still involves incorporation of the person’s body in some fashion in one approach.
Alternatively, your close-up can serve as an abstraction. Fill your frame with a subject’s eye, for example, and it still remains a portrait of the person – but in an abstracted fashion.
One big tip: Aim to emphasize things that are important to the person you are photographing. While close up shots seem easy, they can also be very intimate – at times even (unintentionally) highlighting parts of a person they may not feel totally comfortable with. A birth mark for example. When done effectively, they can be beautiful and really compliment a photo gallery. When done poorly, they can make no sense or even make someone uncomfortable.
2). Face Portraits
 Most of the time, capturing a person’s face is the gateway to getting a good portrait. There is nothing more distinct about a person than their face – so being able to bring this to the forefront where you can see all the facial features (eyes, nose, lips) is really powerful in a simple way.
One big tip: Focus on the eyes. While this is generally what is recommended for any portrait, this is especially true for close up face-centric portraits.
3). Upper Body Portraits
 If you don’t want to take a portrait that is very tight to a person’s face, a great alternative option is to focus on the upper body. This is a much more traditional (but still beautiful!) approach that allows some closeness without being a super tight shot.
One big tip: Be careful not to cut people off in awkward ways.
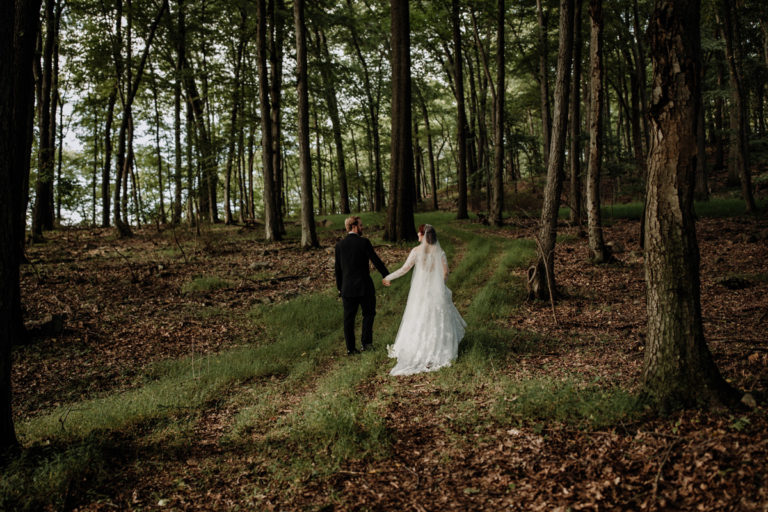
4). Full Body Portraits
 As we’ve shot more-and-more portraits over the years, we’ve come to notice that we don’t photograph people’s full bodies as much as we should. One of the reasons for this is because our style (more intimate) and subjects (usually couples) often rely on getting closer shots for us to feel like we’re capturing just what we want. From time to time when we do pull back, though, the results can be really stunning.
What is great about fully body portraits is that it can show a person (or multiple people) in their entirety. If you allow some breathing room around them, it can also make for a great environmental portrait approach as you can show scale and a sense of place very easily.
One big tip: If you have one available, a longer focal length lens can be great for these types of shots – even if it means you will have to step back further than normal. The reason for this is because you can create a larger depth of field when you set your focus on the subject, and separate them from the background using a wide aperture. You can see our recommended lenses over on our Resources page if that interests you!
Portrait Photography Tips So You Can Conquer Them All!
While we cover a lot of general photography tips in our other articles, we want to really walk you through how to capture a great portrait in any environment.
We will showcase a couple staple images we have taken, and guide you through exactly how you can capture a similar type of shot. To do this effectively, we’ll be looking at a few key things:
- Story
- Posing
- Lighting
- Editing
- Tips & Advice
If you are interested in knowing more about the camera equipment we are using to make these photos happen, check out our Resource page for more information. As a general rule, we almost always use the Canon 5D Mark IV body these days, and the Canon 85mm f/1.2L Lens is one of our preferred portrait lenses.
Portrait #1:
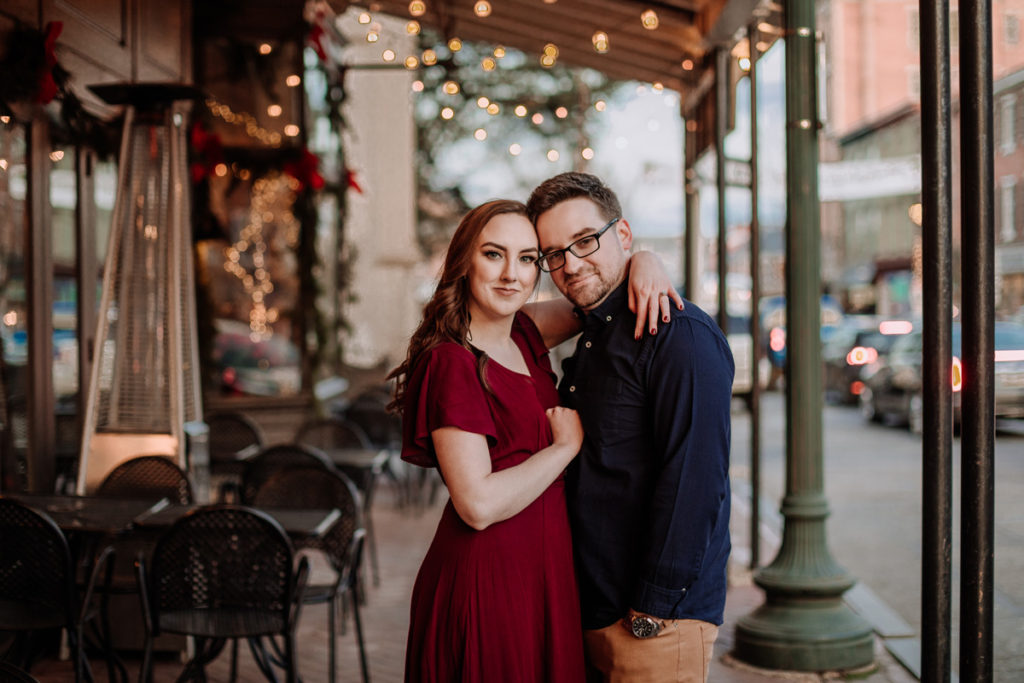
Story – This portrait was captured during a couple’s engagement session. They had requested some solo portraits so they could have pictures of each other to place on their desks at work. It’s as cute a reason as any, and we’re happy to oblige 🙂
Posing – While most of the time we do the instruction to get our portrait subjects into effective poses, sometimes things just unfold naturally. This particular shot is a great example because the “look” really came from her fiance suggesting they take photos that make it seem like they were freezing. Add to this that it was actually cold out on the day we took these photographs, and it was pretty easy to do.
Lighting – While we often have to be very aware of the light and make adjustments to get it to work in our favor, the light was absolutely perfect in this location. Our choice of shooting time to be around Golden Hour definitely helped us out. As did the direction of the light coming from right in front of her face – allowing her to be softly illuminated by the natural sunlight.
Editing – We use our own custom presets. The goal of our photography style is to create natural, yet dramatic, looking photos. We make some slight tweaks to colors where it’s necessary – here adding a little bit of warmth to the skin tone to help counteract the blue hour color casts. A lot of our adjustments for this image came in tweaks to the exposure, blacks, whites, highlights, and shadows.
Tips & Advice – Sometimes, pictures just take themselves. This is an example of a portrait image that required very little from us as photographers (other than just being there). The environment is beautiful, as is the girl in the image. While we have great quality equipment, this photo would be pretty close to achieve on a wide range of cameras (even budget equipment) because of the pretty perfect shooting conditions. So with this said, our biggest tip is this: learn when the best light is and how to find it, and you can take shots like this easily!
Portrait #2:
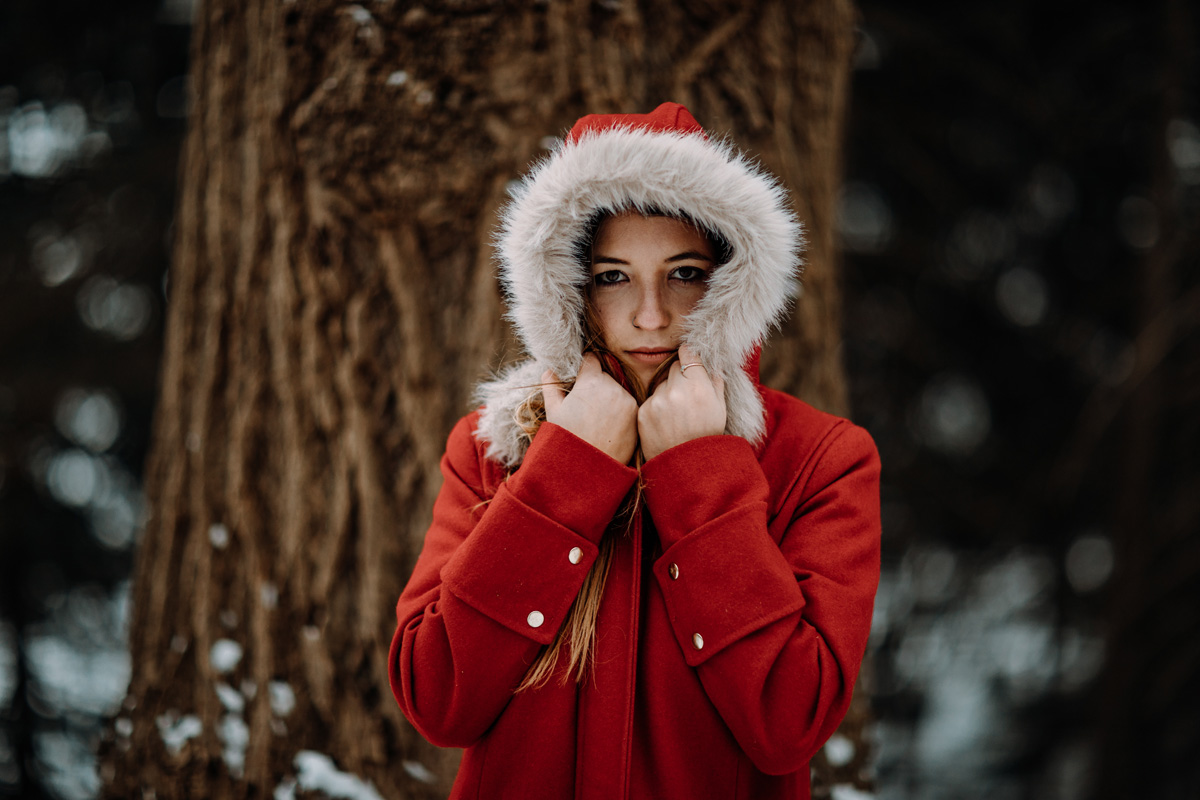
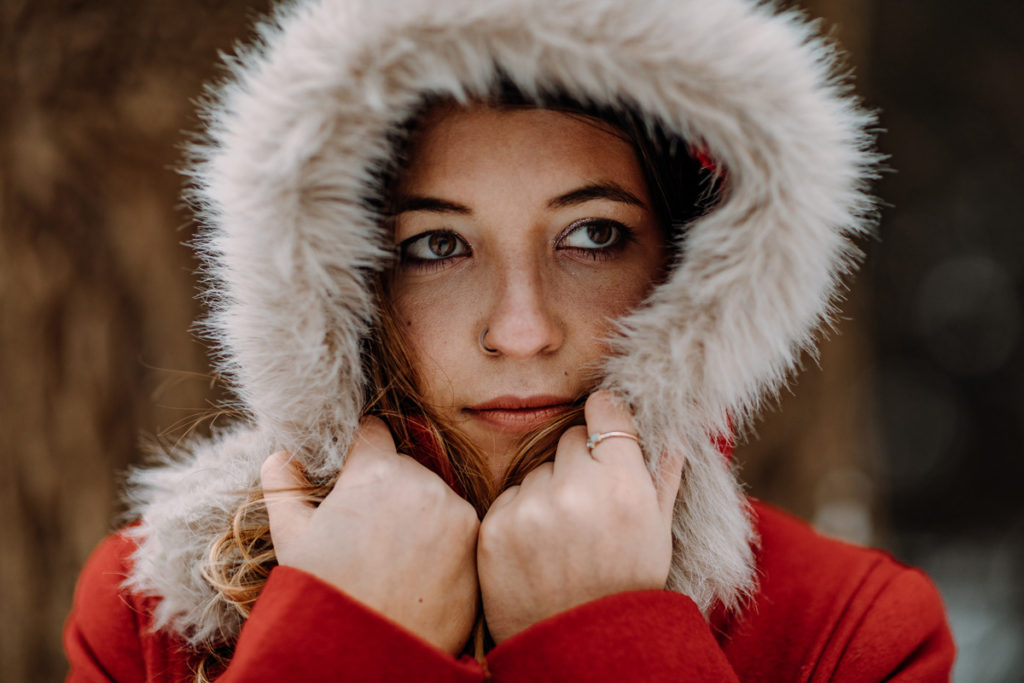
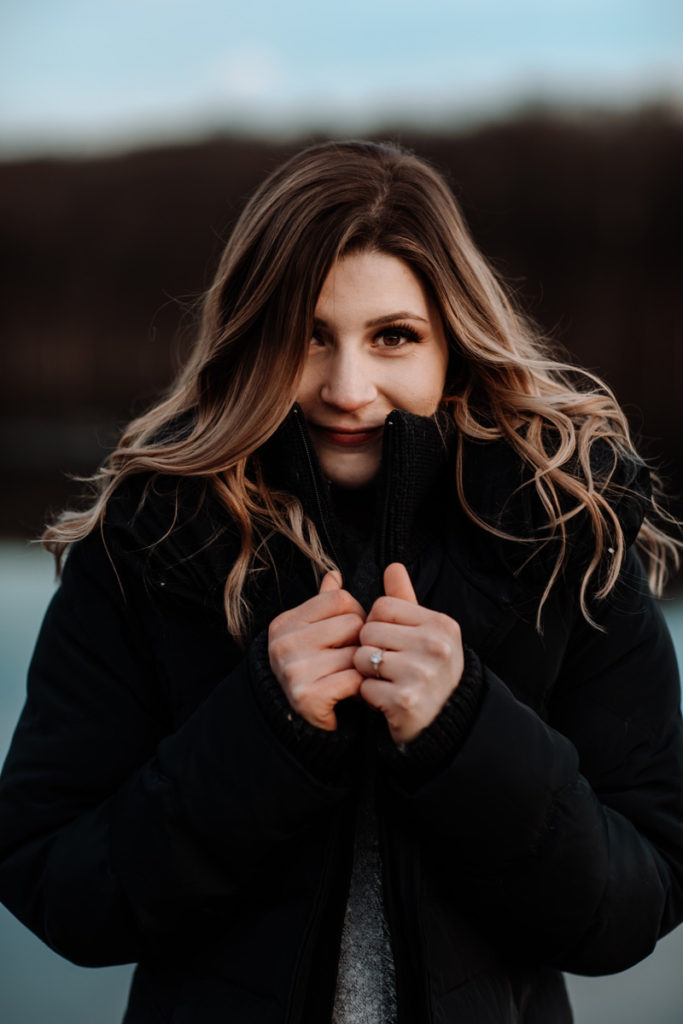
 Story – We like to have fun with friends from time to time. In this case, the lovely woman in this image is Chris’ sister. After a bout of snow, we decided to go out and take pictures together at one of our favorite places to hike near us. Our choice of this location was very intentional. We saw this cool tree that was wider than our bodies. While on the surface it wasn’t extraordinary, by playing around with the depth of field by using a wide aperture, we’re able to make it appear like a painting – and much further back than it actually is.
Posing – To get this shot, we were a little more hands on. Our first suggestion was to “grab the sides of your hood and pull down.” The hood seemed to have a mind of it’s own, so we worked together to make it look like it does in the photo. We also played around with the positioning of her hair to help add another dimension. The rest was up to her – including that great smile!
Lighting – While shooting during the winter can be rough because of the cold weather, on days like this – overcast and with snow on the ground – lighting was pretty easy. With her face directed towards the sun and well lit, taking this picture was easy from a lighting perspective.
Editing – The goal in this photo was to create natural contrast and add a little more vibrance to make the colors pop. A lot of our job was done just by great clothing selection – the bright red coat contrasts well with the more muted tones in the background. One thing we have learned in editing with snow is that the blue color casts can become really undesirable, so playing around with the split toning in Lightroom is key to getting a more balanced image.
Tips & Advice – As you take more portraits, it’s important to look at environments, even pretty bland ones, and see the potential. In this photo, you see a really great portrait, but not so much the dreary and relatively boring environment around it. The great thing about portraits is that shooting at a wide aperture is commonplace, and can be used to make even simple backgrounds wildly appealing.
Portrait #3:
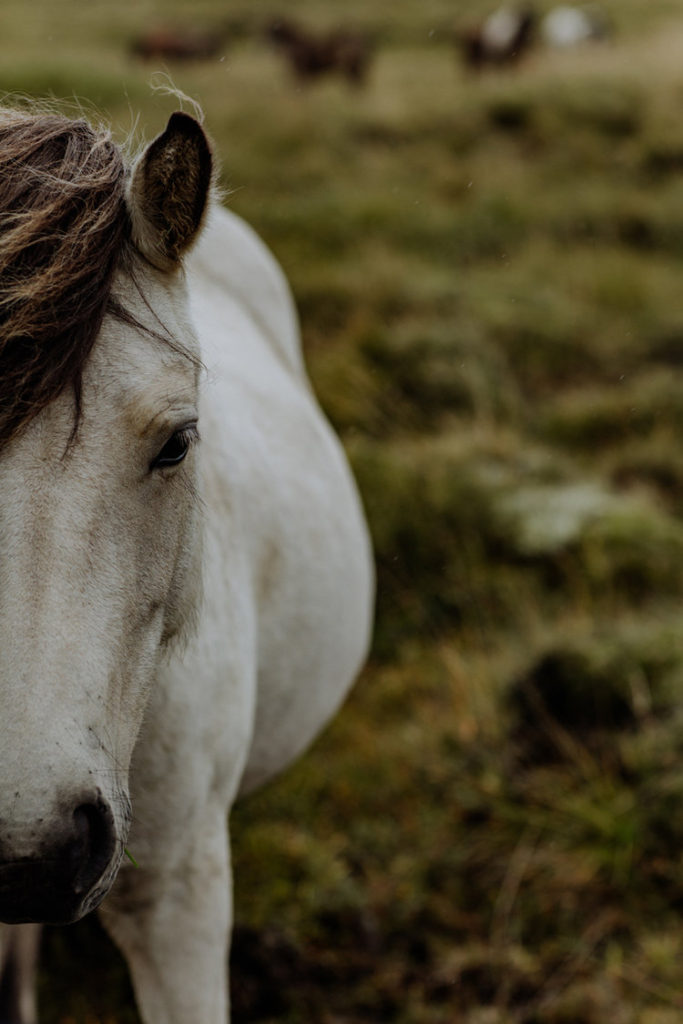
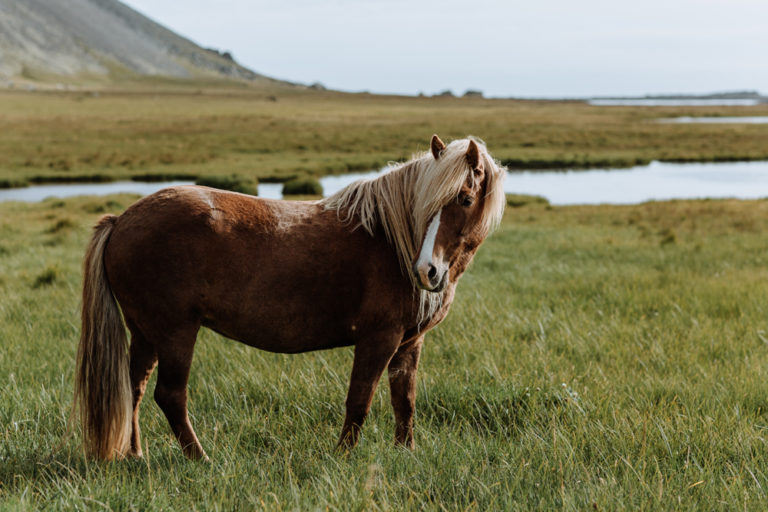
Story – During our trip to Iceland, we just had to take some pictures of the beautiful horses there. As we discovered, they are readily available for pets and photos all around the country. This particular white Icelandic horse really grabbed our attention because of the contrast, and its super stern look.
Posing – We won’t act like we have some horse whispering powers and could actively pose this animal. It was standing there, and seemed unphased by us taking pictures. 🙂
Lighting – It was overcast and rainy. If you look closely, you can even see some rain drops in the shot. While not always desirable, this type of lighting is great for portrait photography because it is even and soft.
Editing – This is a fairly minimalistic portrait, so we wanted our edits to reflect this. The editing is done in a simple and natural way, with most of the tweaks lightly warming up the green tones (making them a little more yellow to suit our style), and bringing up the shadows/blacks to make the shot less dark.
Tips & Advice – The strongest advice we could have is to just go to Iceland. The pictures basically take themselves. But seriously – consider your framing. We consider this to be a strong photograph because of the framing. The horses body also serves as a leading line to the top background where you can see a number of other blurred out horses grazing. It adds some simple storytelling to the shot – this horse is not on it’s own, but it is by itself (at least for the moment).
Portrait #4:
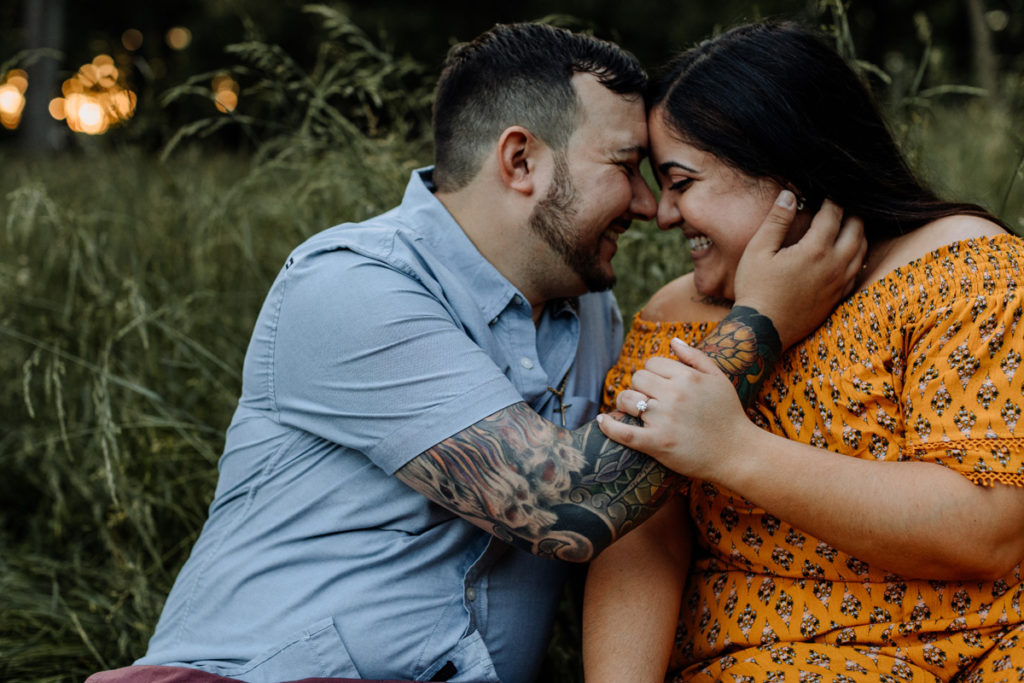
 Story – During engagement sessions, we like to slow things down and give a couple some moments to really connect. Little do they know, we are sometimes exploring to find interesting pictures that are not just the expected “look at the camera and smile” photos. While not a traditional portrait by any means, this is a picture that fully represents the couple – and compliments a larger gallery of images for sure. In this case, we highlight the engagement ring at the center of the frame. Moving out from there, we see their connection to each other through the holding of hands, and other details that make up their personalities including tattoos, clothing choice, etc.
Posing – Our approach to posing for shots like these is designed around being inconspicuous. We had the couple interact like we were photographing other types of images. We suggested holding hands in this fashion, and otherwise had them simply talk to one another for a few moments. In this time, we moved around and saw an opening to grab a quick shot like this.
Lighting – This was taken in a heavily wooded area. This allowed for the couple to be cast in decent light – though there was quite a bit of shadow being cast on them.
Editing – In the RAW image file, the couple was cast in a lot of shadows, so our initial editing decisions involved removing a lot of these shadows. Simply increasing the “shadows” slider in Lightroom can help with this throughout the entire image. Other minor tweaks to add some warmth by making alterations to the white balance.
Tips & Advice – Don’t be afraid to take little detail shots like this. While most people think of portraits as including people’s faces, it’s shots like this we most connect with because you can really feel something by looking at the image. There is a connection beyond just what the face can tell as, and that’s a powerful thing to snapshot as photographers!
Portrait #5:
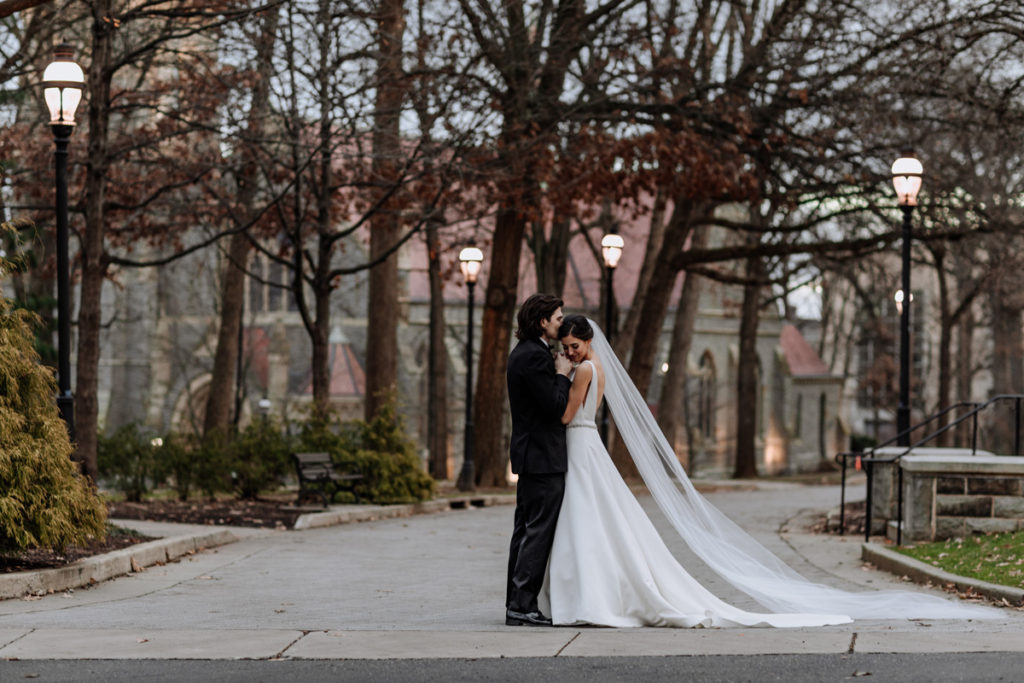
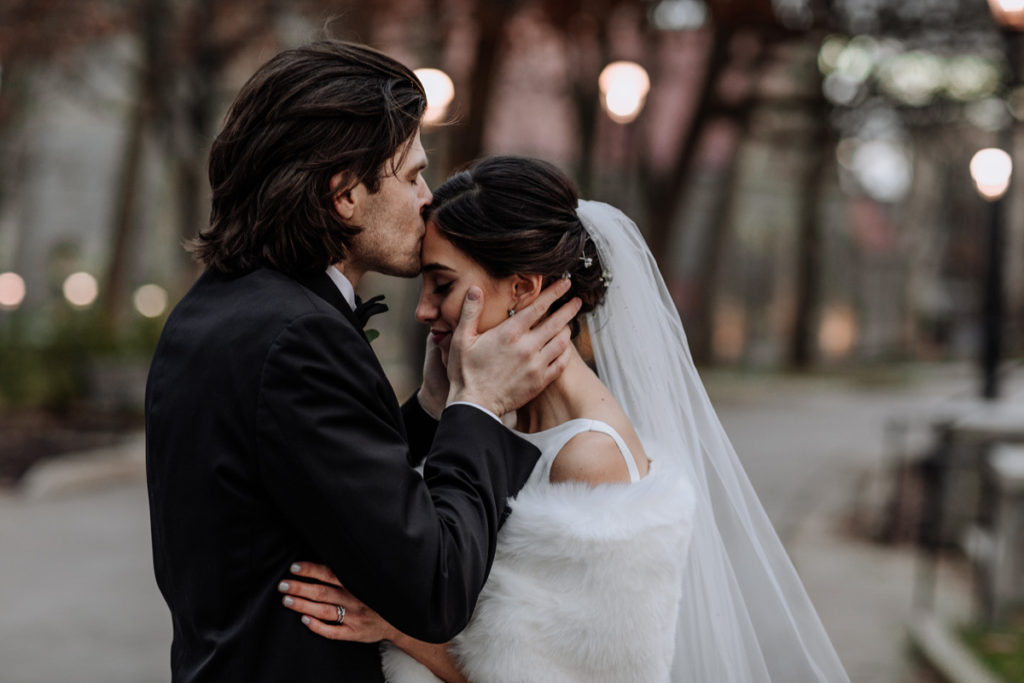 Story – We only had about 15 minutes for bride & groom portraits immediately following the church wedding ceremony. This was taken at a local college campus – where the church was on the grounds (it is actually visible in the background!). The goal of this photo was to just allow the couple to act as they would naturally after just getting married, and our direction was minimal.
Posing – Our posing was pulled right out of Signature Edit’s The Candid Couple’s Posing Guide. We made the suggestion to the groom to hold the bride’s face, then kiss “forehead, nose, lips” and repeat. This is one of the organic moments that came out of this. As tends to happen, couples also bring their own personalities to the mix as well – and sometimes do unexpected things that are also beautiful and candid. This is probably what contributed to having so many portrait photos to send over.
Lighting – This photo really highlights the beauty of Golden Hour. The light is very soft and romantic, making for perfect portrait lighting. This is complimented by the lamp posts in the background that lead your eye through the scene.
Editing – As most of our images, the goal is to create a warm yet natural look. What really brought this edit to life was having many different colors to balance in order to add contrast. The lush greens from the grass, the red/purple from the church roof, the bright orange lights on the walkway, and the sleek black suit and white dress all compliment each other well. We lifted the shadows/blacks to create some contrast, and went over the couple’s faces to selectively remove some unwanted shadows in Lightroom.
Tips & Advice – Sometimes, you need to just work with the time you have. We were on a time crunch because we needed to fit in photos quickly enough to get the couple to their reception on time. With some skill and a little bit of luck, we were able to capture all the shots we needed in a short time frame that are just stunning!
There is a lot that goes into taking a great portrait.
We hope our portrait photography guide has been a useful starting point to better understand this niche.
We will be continuing to expand this into the future, so if you have any suggestions for us to add – feel free to drop us a line!