What is the Best Camera Setting for Outdoor Portraits? (WITH EXAMPLES!)
The goal of this post is to answer the question: what is the best camera setting for outdoor portraits?
In the real world, there is no one size fits all camera setting that will just work for every photo you take. Instead, we are going to give you the outdoor portrait photography tips and tricks you need in order to find the best settings on your own.
To do this, we’ll be discussing the most important things you need to set to take a picture (ISO, aperture, shutter speed, white balance) to help you understand how these things work together to take a great photo.
From there, we’ll cover lighting and composition in a way that helps you start to see how these things have a HUGE impact on your portrait images.
Lastly – we’ll give you example camera settings with corresponding pictures we have taken to help you visualize what the result can look like.
With all of this information combined – you should feel empowered to go outside and shoot portraits the way you want. You will be able to get great looking portraits!!
If this post helps you – let us know in the comments at the end!!
Outdoor Portrait Photography 101: What Do All These Camera Settings do Anyways?
 Taking great outdoor portraits begins by learning how to get your camera settings right.
If you’re already knowledgeable and shooting in Manual mode with no problems, feel free to skip to the next section.
For the beginner portrait photographers here, though, you’ll want to stick around. In this section, we’re going to talk about the major camera settings you can control: ISO, aperture, shutter speed, and white balance.
These are the 4 components of your camera settings that will impact the end result.
ISO:
 ISO is the measurement of a camera sensors sensitivity to light. How this translates into your images is that it is a way to artificially introduce light into an exposure where little light (or none) is available.
Normally, you will want to take photos at a low ISO – between 100 and 400 if you can help it. On most cameras, these settings will produce the most clear and grain-free results.
When you are shooting later in the day or indoor where there is low light, it will become necessary to increase your ISO in order to get a well exposed image where you can actually see what is going on. By integrating flash into your photography, you can work around this to an extent.
The downside of increasing your ISO is that it will add grain into your picture. We’ve also seen impacts to the color and depth of our photos at well.
Control over ISO is one of the biggest flaws with beginner camera models as they often produce results that are unusable at fairly low ISO figures. It’s in this area that having a great low light photography camera can be a really valuable tool. We use the Canon 5D Mark IV, which has allowed us to keep usable portrait images upwards of 6400 ISO.
How does it apply to outdoor portrait photography? The overall image is impacted by the ISO. It’s best to keep it as close to 100 as possible for crisp and clear portraits.
Aperture:
 We consider aperture to be the most important individual camera setting as it relates to portrait photography.
On a technical level, the aperture of your camera lets light in to the camera setting. It also determines how far or close background objects look relative to the subject you are focusing on – referred to as depth of field.
The aperture setting is measured in f-stops.
Setting to a wide aperture like f/1.2 or f/2.8 – you will let more light into the sensor and create a narrow depth of field. A narrow DOF means that a small portion of the image will be in focus (such as the portrait subject), while the background will be blurred out.
On the other end, you can set a narrow aperture like f/8 which will – let in less light and create a large depth of field. A large DOF means that more of the image will be in focus – including the subject and the background.
How does it apply to outdoor portrait photography? Your choice of aperture will define your photo in many ways. There is no “right” or “wrong” approach – but you will also end up deciding on your portrait photography style based on the depth of field you are going for. Often, we shoot at wide open apertures in our portrait photography to blur out the background (creating the bokeh effect).
Shutter Speed:
 Shutter speed relates to how quickly the camera shutter closes and opens back up.
The most important component of shutter speed is understanding how it relates to movement.
For outdoor portraits, you will normally be able to set a relatively low shutter speed (around 200) since your subject will be standing still. If you interject some movement into your posing prompts, such as if you’re photographing a couple and having them hold hands and walk towards the camera, you will want to increase the shutter speed in order to capture them while moving without having motion blur or missed focus.
One side effect of bringing up your shutter speed is that it will darken the exposure. This means if you are photographing someone running, you may need to bring the shutter speed higher (say: 1000), but compensate with ISO in order to keep the photo well exposed.
How does it apply to outdoor portrait photography? For most portraits, you can use a relatively low shutter speed (we put ours around 200 – 400 when people are standing still). There is not often a lot of movement in portraits – with the exception given for walking shots if you are trying to add some motion into your images. Setting your shutter speed based on movement, and in some particularly bright conditions as you’ll find under harsh mid-day sun, is very important.
White Balance:
 The white balance setting is not often given the same level of importance as the above 3 camera functions, but it is extremely important. White balance determines to overall color of an image.
Many photographers decide to simply use auto white balance – allowing the camera to make it’s own judgment on the necessary coloration. This isn’t a bad approach by any means – but in our experience, it’s led to inconsistent results.
It is better for your photography to learn how to set this on your own. Some cameras allow you to actually select the Kelvin temperature of a shot (this is most common on higher level equipment), while virtually all cameras allow you to select based on some presets like cloudy, sunny, etc.
How does it apply to outdoor portrait photography? White balance impacts your portrait photography most heavily in the area of skin tones. For most photographers, you will want an image temperature that offers a natural and flattering skin tone. For us, this often means trying to get a white balance that is very accurate to how a person’s skin actually looks or a little warmer. Yes, some color corrections can be made through post processing, but getting things right in camera will help speed this process up.
For more on the fundamentals of portrait photography, read our Ultimate Portrait Photography Guide.
Outdoor Portrait Photography 102: How to Get Lighting Just Right
 The most important thing to understand about lighting is that it directly impacts your camera settings.
Sure, you’re not going to have some special switch on your camera where you can tweak the light (…at least…not the natural light available outside). But how you set your ISO, aperture, shutter speed, and white balance are all directly influenced by the light available.
For most photographers, outdoor portraits are best taken with natural light. “Natural light photography” has become a thing recently – and it’s based on the simple idea that you should use natural light at all times. While we don’t hold to that mindset entirely – there is a time and place for flash in our photography pursuits – we do think natural light is normally ideal.
A couple natural portrait photography lighting tips to get you started:
 1). Shoot with soft light when available. Most styles of outdoor portraiture will benefit from soft lighting. This is flattering to any subject. But when is light “soft”? The good news is during Golden Hour (the hour beginning from sunrise and hour before sunset) the sun is low on the horizon causing soft lighting. You can also find soft light on days that are cloudy or overcast (even rainy) since the clouds act like a natural diffuser/soft box.
2). Position the subject with soft light on their face. It’s not often that you would want to face a person with the sun beating down on their face, but when it’s during good lighting conditions, it won’t be blinding. Take advantage of this as the natural and soft light on their face will provide an easy target for focusing your camera and result in really high quality and crisp images. This type of approach also will often lead to a natural glow, which is especially flattering.
3). Position the subject with harsh light behind them. When shooting under less than ideal conditions like during the middle of the day, backlighting is a great approach. Interestingly enough – we’ve shot some seriously great images like this. Some portrait styles, especially by photographers who prefer a light and airy look, will actually even prefer this type of light.
These are the 3 primary approaches we take to lighting our portrait subjects naturally.
In some environments, such as a wooded area where light is streaky, we will actively seek out the best light to make our images look as good as possible. This may mean skipping an area that is really interesting (like the edge of a lake) where the result won’t be that great because of the light – but instead choosing a simpler location for better quality results.
It’s worth mentioning – there are many tools available to control the light more. For example, you can use a light reflector disk to fill in shadows on a person’s face naturally through the use of sunlight. This is an easy and cheap solution that create great looking results without having to go into the artificial looking flash territory.
And now…a word on flash photography for outdoor portraits:
Your decision to use flash or not will be up to personal preference and your artistic vision.
We have all seen flash photography portraits taken outside that look really fake and artificial – it’s a style that some people genuinely like (and all power to them). For us, we avoid flash outdoors unless it’s absolutely essential for a shot we have in mind.
With that said – it would be wrong of us to avoid the topic altogether, as we know how to take flash photos outside and, if done well, it can be flattering and even look pretty natural – especially true if you use a good quality flash like the Profoto A1.
The only rule we’d really want to offer up for outdoor portraits is to not shoot with full powered flashes. You can dial your settings back manually. Try to use the flash more to fill in shadows and provide just enough illumination on the subject, while still retaining the looks of the background and surrounding environment.
At its best, outdoor flash photography will be taken with an off camera flash and diffuser to disperse and soften the light. This will give you control over the light direction, and give you better looking results. You should also use High Speed Sync (HSS) mode on your flash, which will allow you to increase your shutter speed, which enables your image to capture more of the ambient light that is available.
To learn more about these flash photography techniques, the ebook Fast Flash for Portrait Perfection: The Ultimate How To Guide by Digital Photography School is a great one.
Outdoor Portrait Photography 103: Composition is Key
 For this section, we’re not going to talk specifically about how you should arrange your portrait subject in the frame (ie: center, left, right, etc.), but instead we’ll be looking at the parts of composition that are heavily impacted by your camera settings. We’ll talk about some of the decisions we have to make regularly to get a good shot no matter what.
Under perfect lighting conditions, your composition abilities will be a lot more open. What we mean by this is you will be able to take a picture that allows you to expose for both the subject and the sky – creating a beautiful, natural looking, and balanced image.
Outside of Golden Hour, most of the time this won’t be possible unless you’re using a flash. What you are left with instead is needing to decide if you want to expose for the portrait subject’s skin, or if you want to cast them in shadow so as to retain more of the sky – which will otherwise be blown out in bright white.
What causes the sky to be blown out anyways? When the sky is not darker than your subject, the sky is prone to getting blown out because your camera cannot expose for both at the same time. When you lock in your camera settings and refer to your exposure meter, you may find yourself deceived because you have a technically good exposure, yet the image might not look “good” (which is in quotes because this is subjective for many!). We are not the biggest fans of images that have ½ of the frame taken up by white, blown-out sky – but are well aware other natural light portrait photographers are totally cool with this!!
How to avoid blown out skies in your compositions? There are a few ways you can take control in this scenario.
The first is to simply find a backdrop that is darker than your subject. During wedding days, we’ll often look for the side of a building if the sky won’t be exposing correctly. This allows for a more even exposure.
The second is to frame your portrait selectively so there is minimal blown out sky. What bothers us most is when large portions of an image is lost due to blown out skies, but they can also be used to a good effect at times. Get in tight with a longer focal length lens – and there will be much less of the background on display.
The third is to under-expose your image in hopes of retaining more information on the sky. If you go this route, you will want to shoot to RAW photo files AND be prepared to tweak your image in post-production. We often do this. We are able to adjust the exposure in Lightroom as we get some of the sky back and remove the heavy shadowing on the portrait subject. It’s amazing how well this works at times!
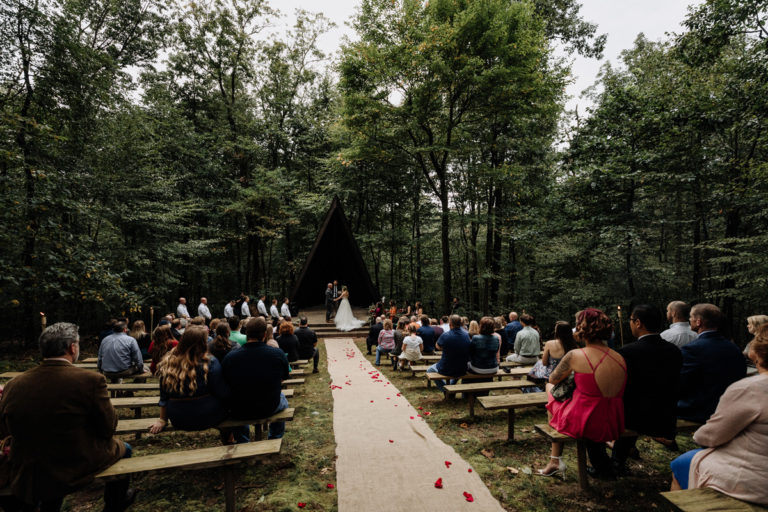
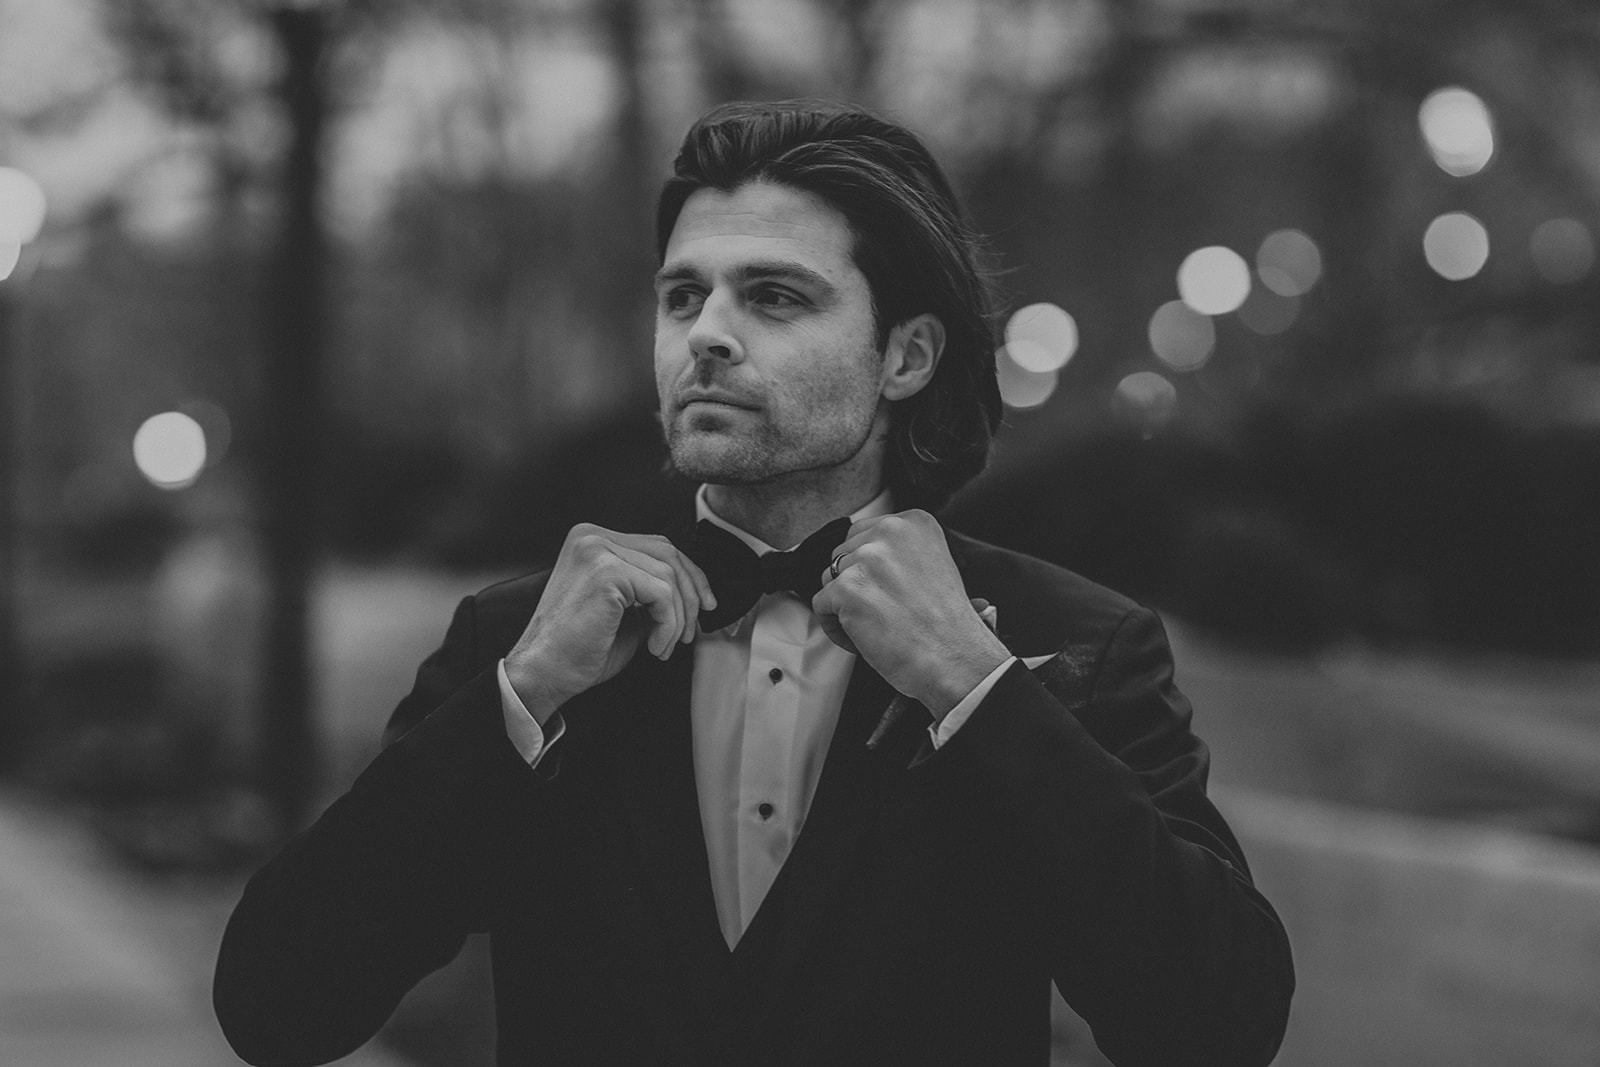
Outdoor Portrait Photography 104: Reference Photos with Camera Settings
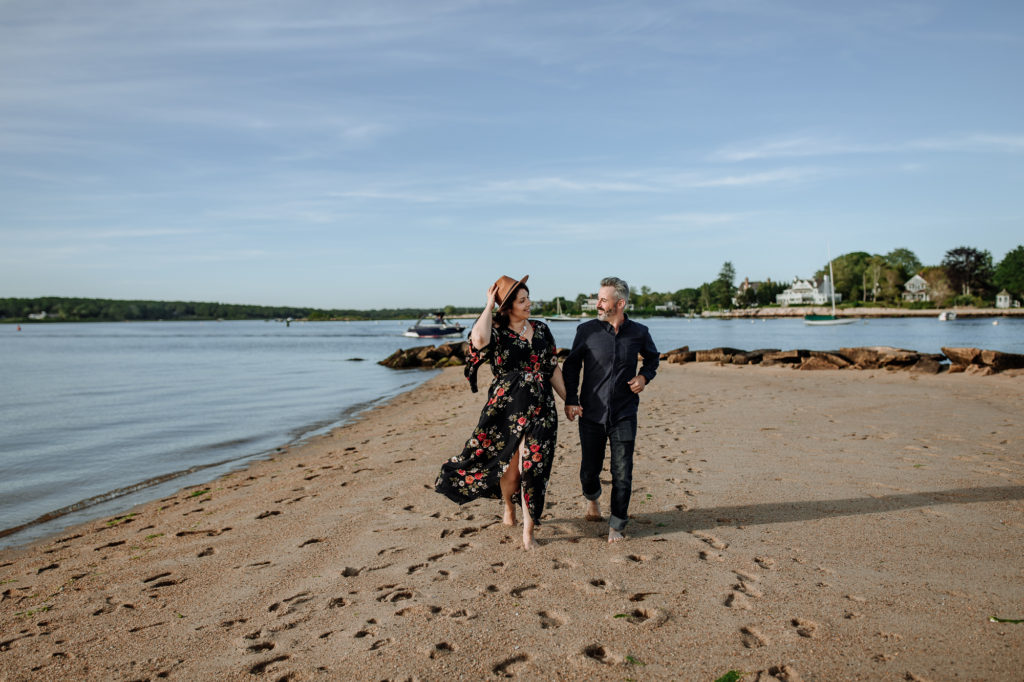
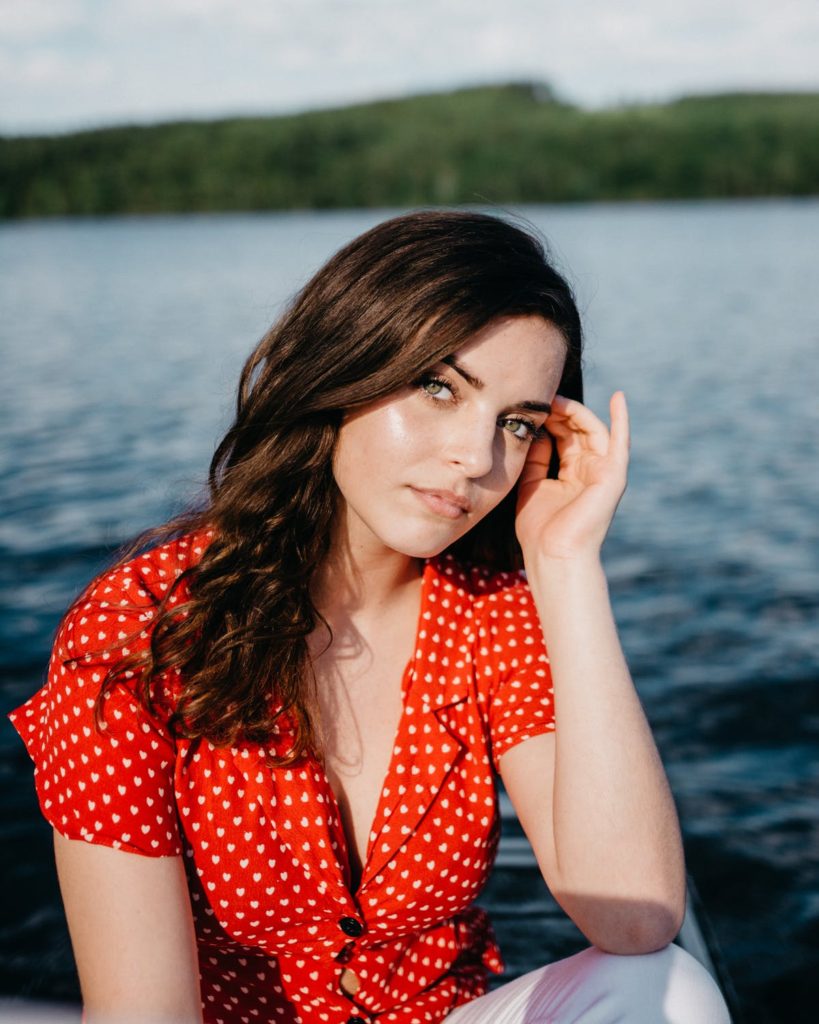
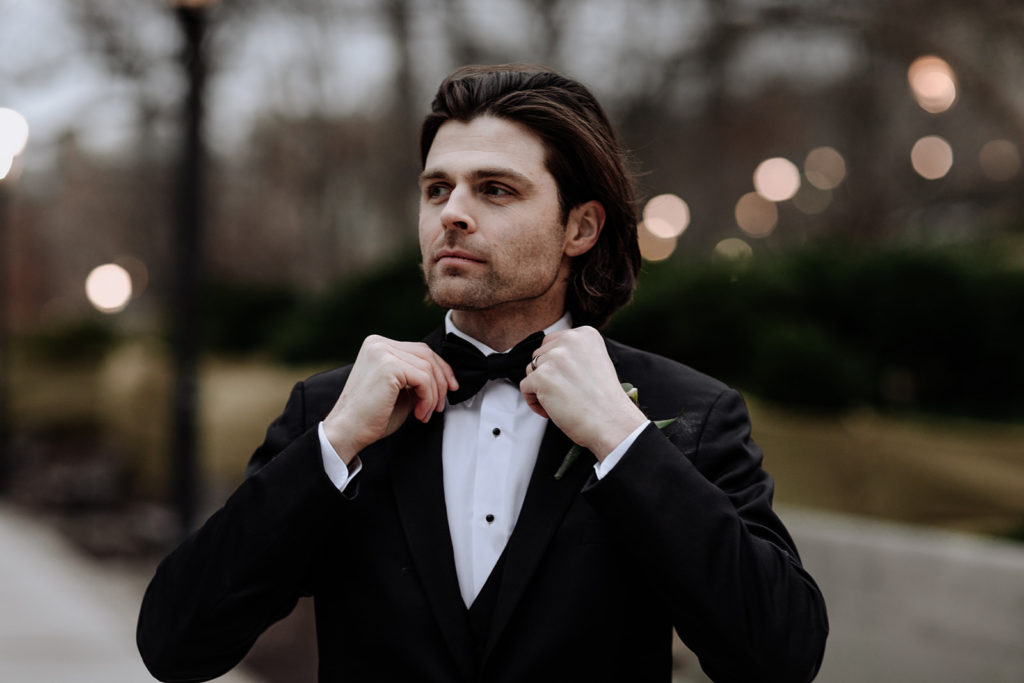
Sample Photo #1:
Settings:
- ISO: 300
- Aperture: f/2.5
- Shutter Speed: 400
This image was shot on a Canon 5D Mark IV with a Canon 85mm f/1.2 lens.
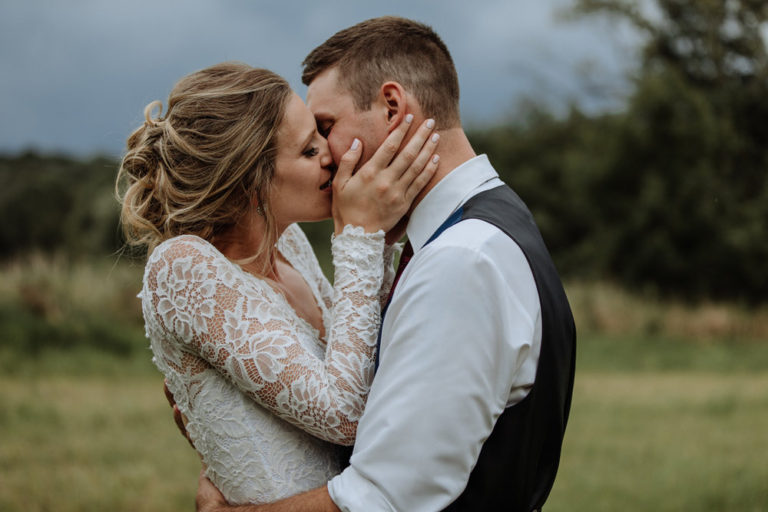
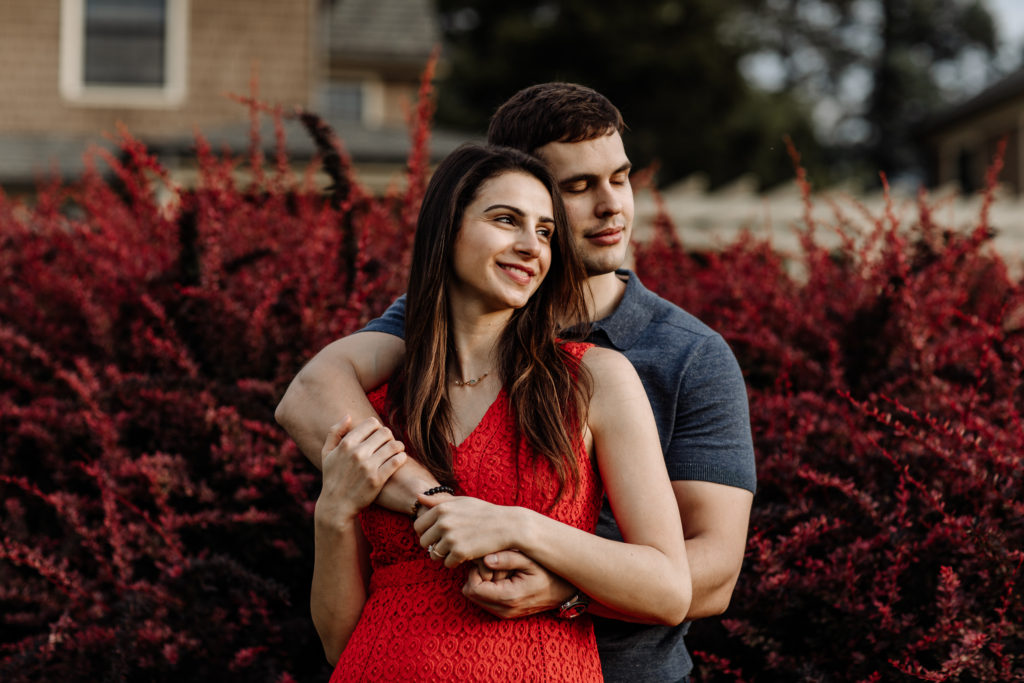
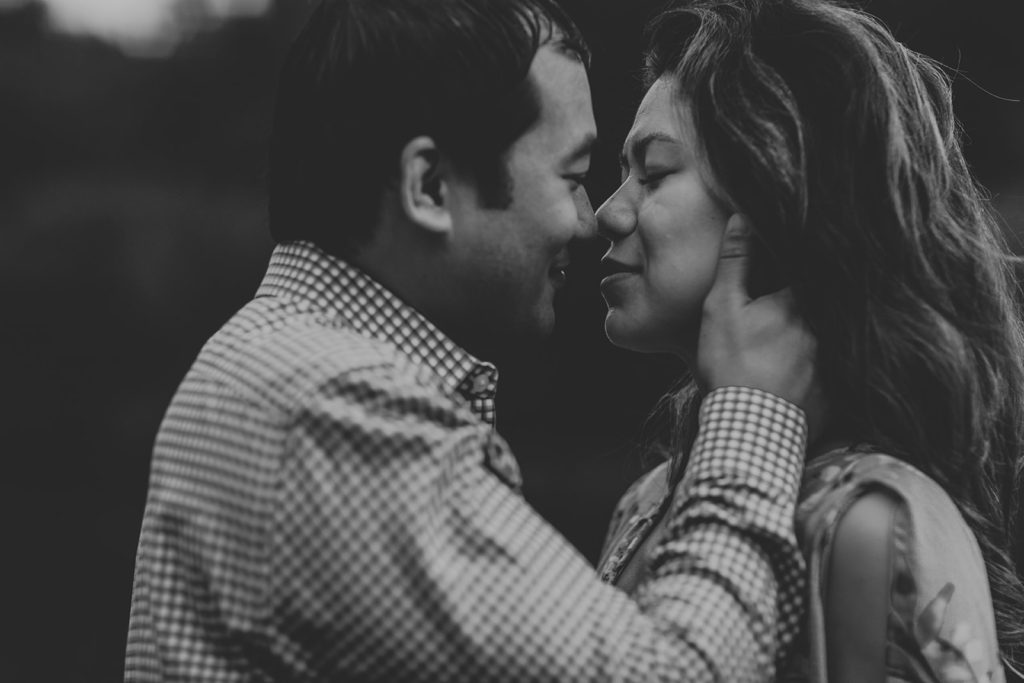
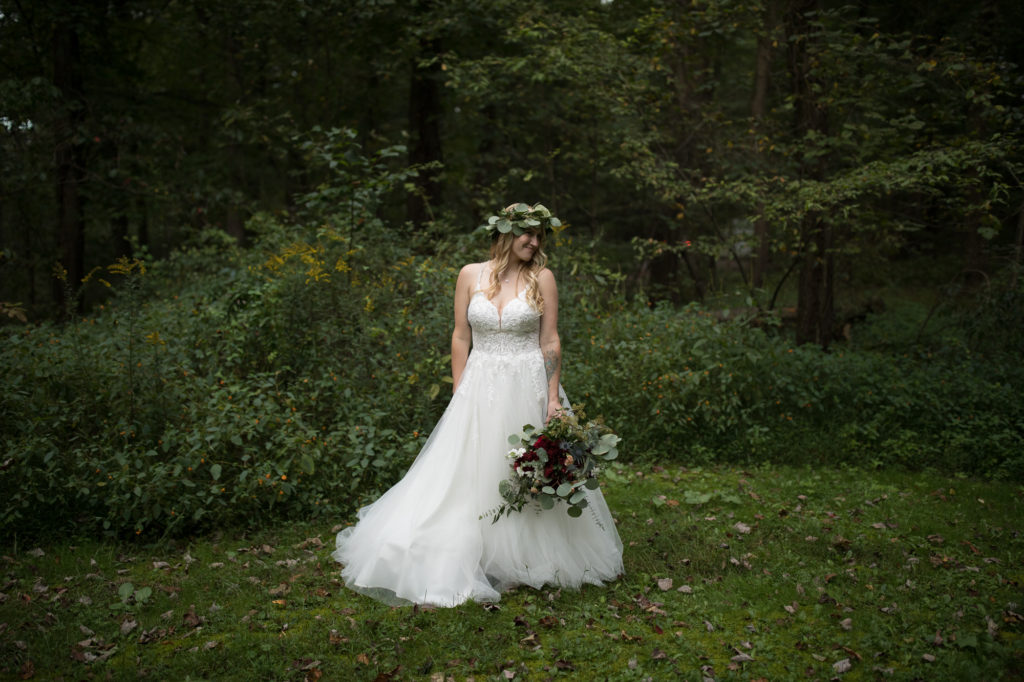
Sample Photo #2:
 Settings:
- ISO: 200
- Aperture: f/2.8
- Shutter Speed: 500
This image was shot on a Canon 5D Mark IV with a Canon 70-200mm f/2.8 lens.
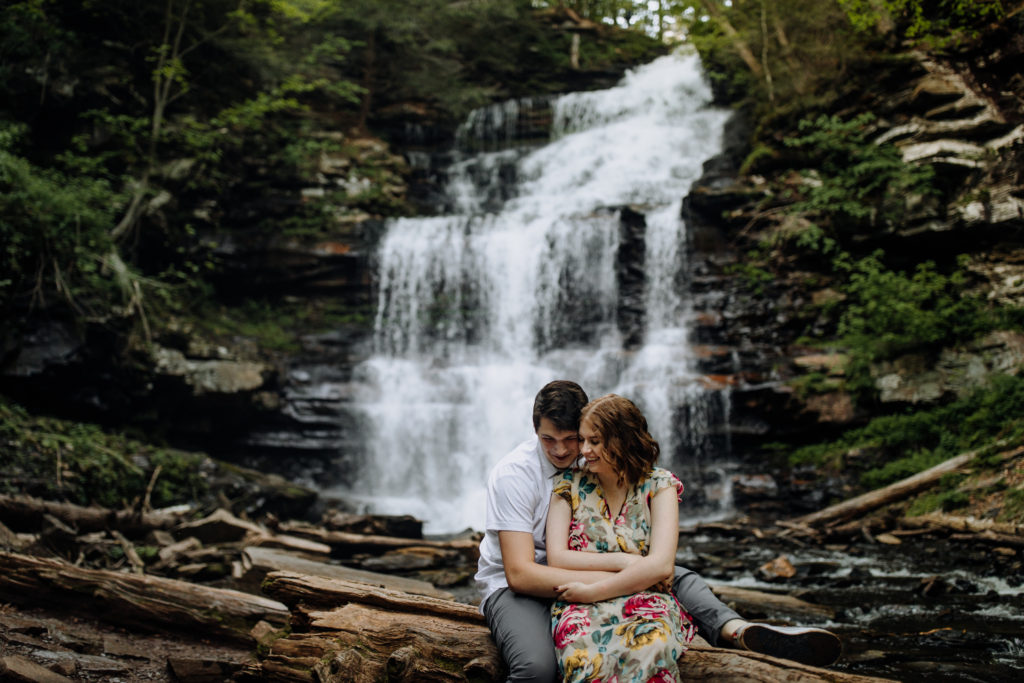
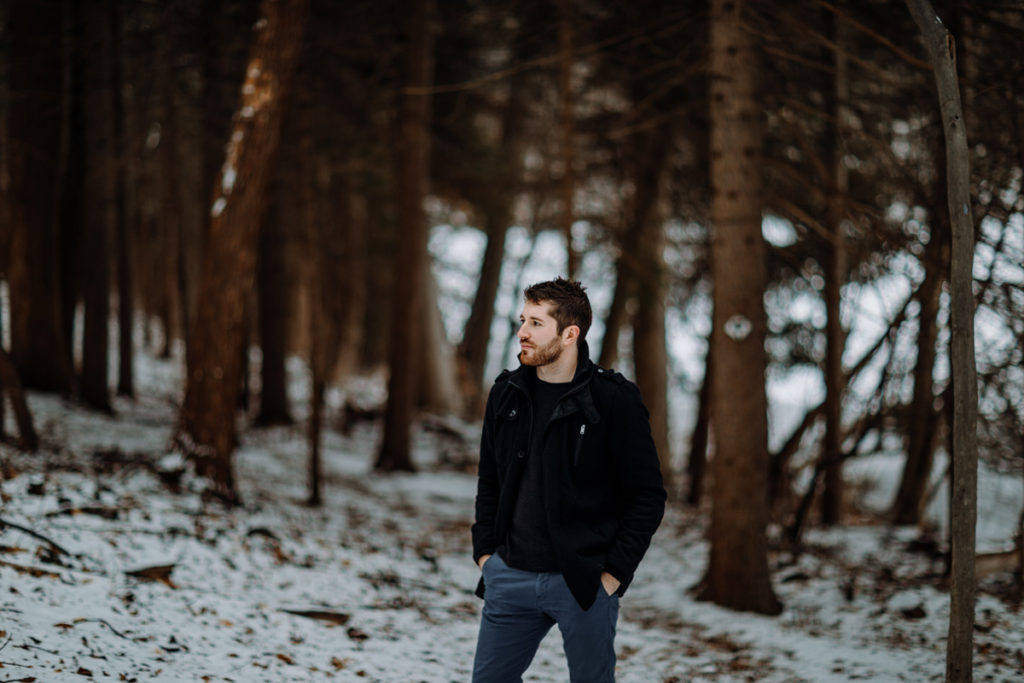
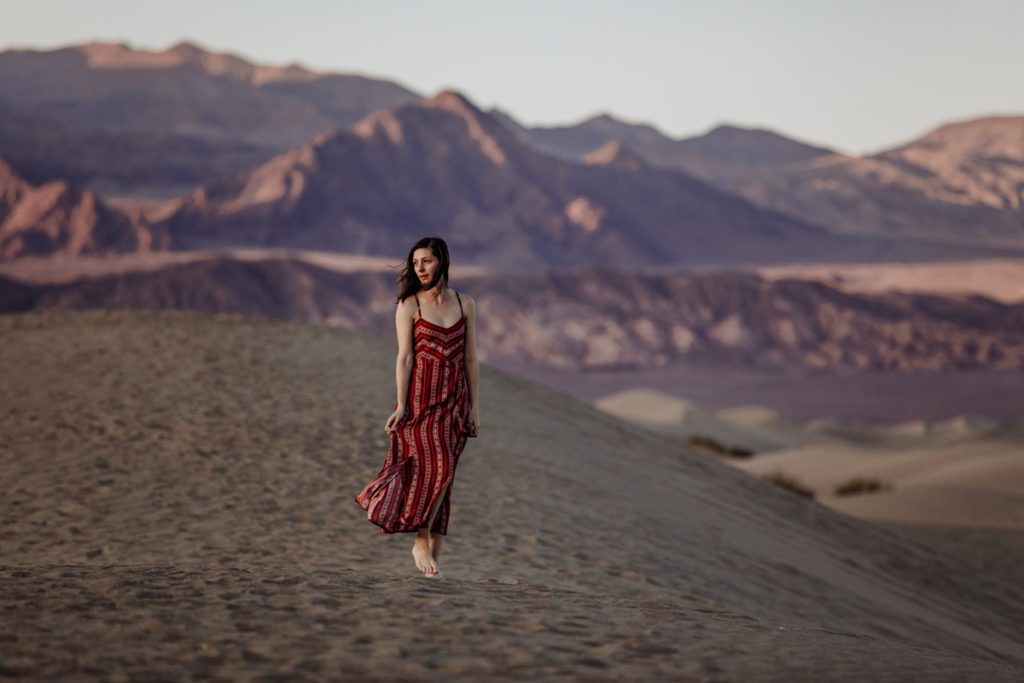
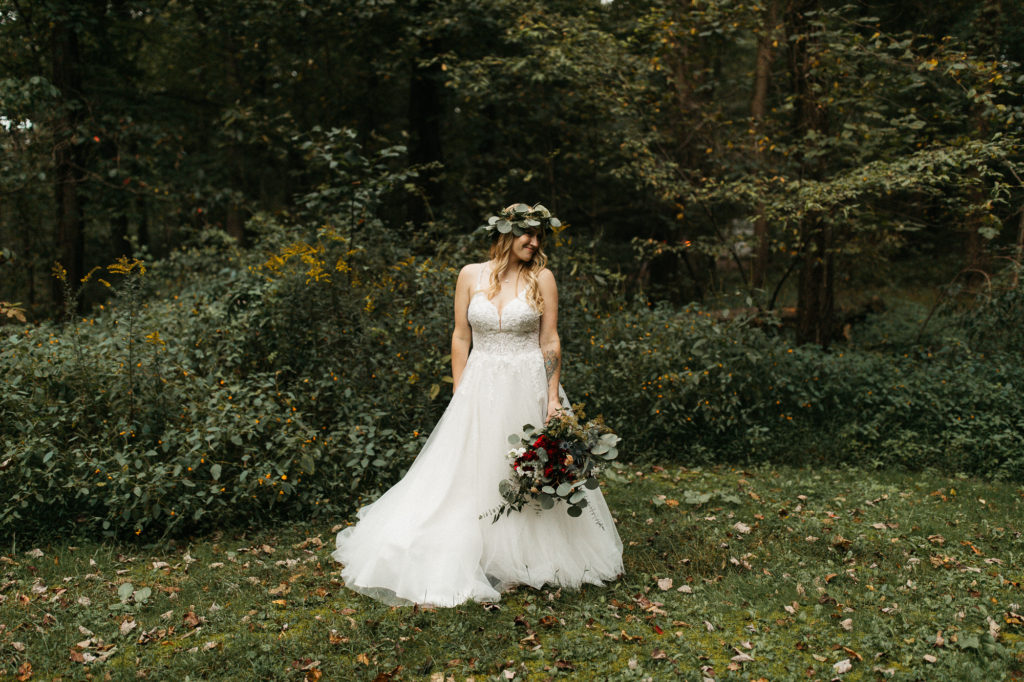
Sample Photo #3:
 Settings:
- ISO: 400
- Aperture: f/2.0
- Shutter Speed: 200
This image was shot on a Canon 5D Mark IV with a Canon 85mm f/1.2 lens.
Outdoor Portrait Photography 105: Enhancing Your Portraits
To close out this post, we just wanted to take a minute to talk about photo editing – and you can use this as an effective tool to make your portrait images even better.
At it’s most simple form, photo editing allows us to make corrections to our images when we didn’t dial in the settings just right. For example, if your image turned out too dark, you can make it brighter really quick in a program like Lightroom.
While you won’t really be able to fix a totally broken image – like if it’s a total blur – there are a lot of things you can correct. The list of things that can be tweaked is pretty much endless – but a few major things we are always making adjustments to in our outdoor portrait photography include:
- Colors
- Exposure
- Shadows
- Removal of unwanted background objects, acne, etc.
- Adding clarity and sharpness
- Experimenting with black and white photo edits & other cinematic styles
The end result of editing your portrait images can be as simple or complex as you want it to be.