101 Digital Photography Tips – A Guide to Taking Great Photos
Every photographer just starting out needs to learn how to get the most out of their camera. Whether you are using a brand new starter camera, or are more advanced and needing to optimize the photos you are taking – we have a lot of great insight to provide for all of you on this journey through the world of photography.
Our digital photography tips will highlight important things including:
-
what you should know before even taking a photo
-
how you can get better photos as you click the shutter button
-
help guide you along in taking your photos into the “digital darkroom” to make adjustments as a part of the post processing process
-
and talk about how you can get your photos seen in this modern world thanks to social media and other platforms.
101 Digital Photography Tips Article Guide Outline
Before we get started, we want to share with you the high level sections we’re going to be discussing in detail here. Our goal is to provide you a comprehensive resource to help you take great photos starting today!
Here is what you can expect to read about in this post:
-
Section #1: Digital Photography Tips to Know Before You Even Pick Up Your Camera
-
Section #2: Digital Photography Tips for When You Are Taking Photos
-
Section #3: Digital Photography Tips for a Smooth Post-Processing Experience
Quick Background on Who We Are & Why We Can Give These Tips
We have been professional photographers working in the industry for several years now.
Our experiences with cameras began from a very early age.
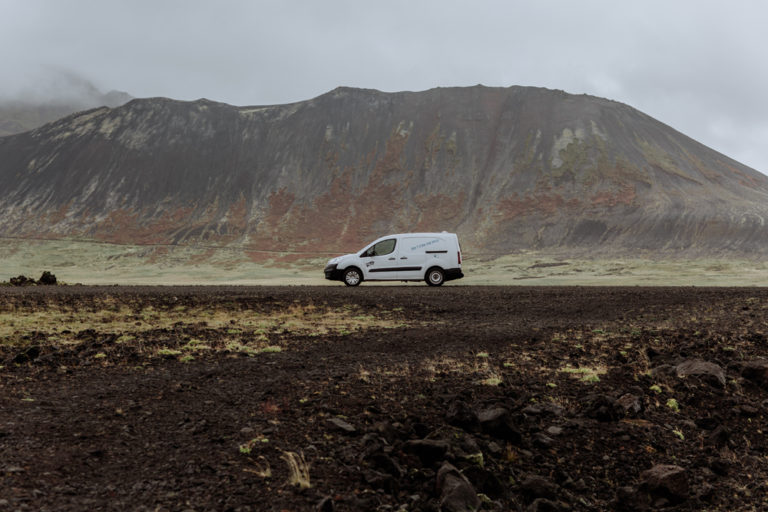
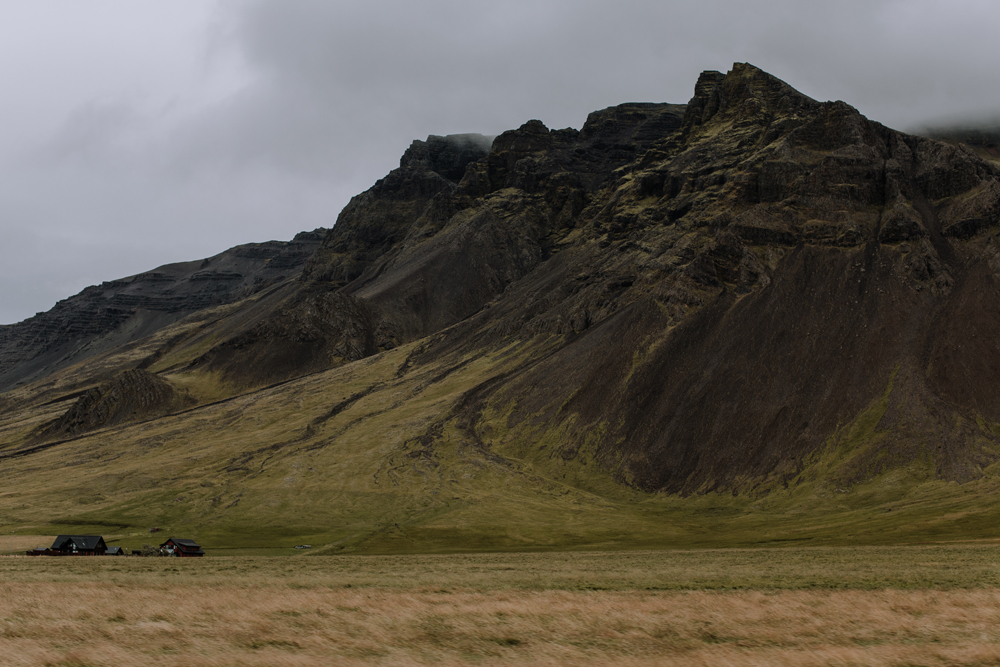
While we always seemed to have a good eye, our in depth study of photography began much later into our lives – and coincided with us picking up better equipment and seeing the potential of photography as a career path. Currently, it has led us to starting our own wedding photography business, though we certainly love to capture photos in different areas of life as well. As a personal passion, we enjoy traveling and landscape photography as a result – having documented recently our trip to Iceland (if you care to check that out).
Due to this background and diversity in the type of photos we take, as well as the diversity in reasons why we take photos (for business and for pleasure), we hope you can see our tips are seriously shaped from experience – and not just a copy/paste of what you would find on other websites out there.
But – of course – we couldn’t do this on our own given the quantity of tips, so we did some research to help us grow our list and would like to give credit where it’s due for some added inspiration:
Now, let’s get into it 🙂
Section #1: Digital Photography Tips to Know Before You Even Pick Up Your Camera
1). Have the Right Camera Equipment
All photographs have to start with the right gear.
All of the photography gear and equipment recommended in the various articles around our website can also be found consolidated on our resource page for quick and easy reference.
Of course, our recommendations are more oriented towards professional photographers or those wanting to upgrade to pro level equipment (as this is what we are using). As such, some of these items may not be within your budget range.
If you are just starting off with photography, getting an entry level DSLR camera is a great starting point, and won’t seriously break the bank.
2). Get a Lens Filter to Protect from Scratches
We never really saw the need for the UV filters that would come in various lens kits we have purchased over the years. In some ways, they are the “snake oil” of photography gear – often overpriced with limited visual impact on images. A lot of issues these filters are meant to correct such as lens flaring are pretty easily avoidable on it’s own.
With this said, the biggest reason to purchase a basic lens filter is because of their protective qualities. If you are shelling out a thousand dollars for a nice lens, you may as well spend an extra 50$ so as to protect it from scratches. Some even offer weatherproofing, which is a great addition if you like to shoot in the rain or in other harsh environments.
3). Push Your Gear to the Limits Before Buying More
Not every problem you are having can be solved by purchasing more expensive gear. An important approach to take is to begin by pushing the current equipment you have to it’s limits.
If you are doing this and still struggling to get the type of photo you are looking for, then a reasonable next step is making that upgrade.
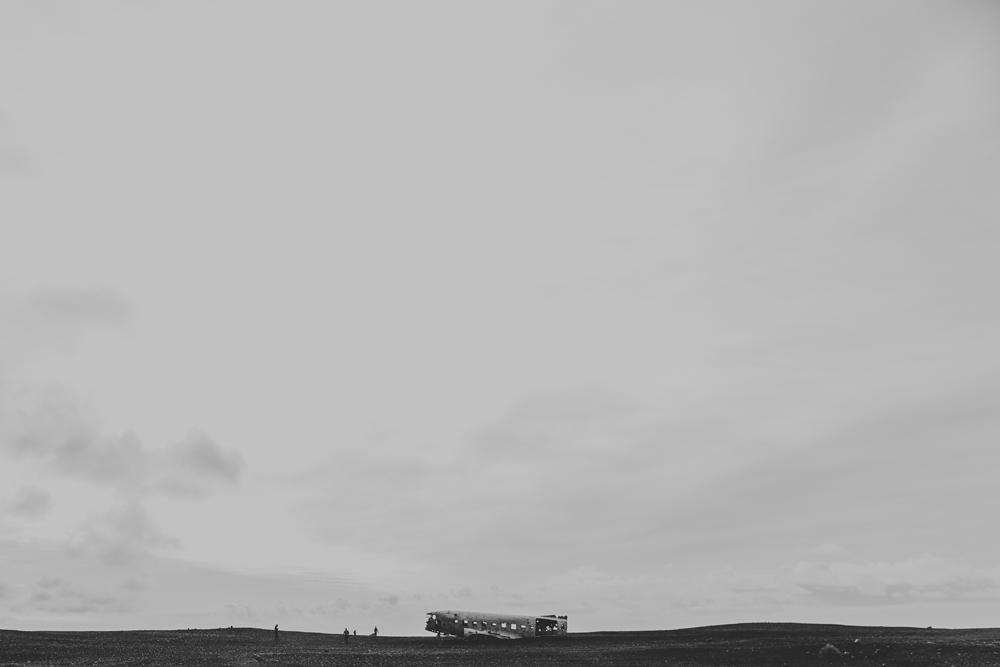
An example scenario you might find yourself in comes down to compensating for dark shooting environments with ISO. If your camera can only handle going up to 400 ISO before images become virtually unusable, and you really want shots in a space like this without using flash, an upgrade might be essential.
Still, if you can learn how to shoot in a place like this, you will be better prepared to make great images regardless of the camera being used.
4). Educate Yourself on The Exposure Triangle
One of the most fundamental things to understand about the technical side of photography is The Exposure Triangle. This is a simple illustration of how the primary trio of camera components work together to get the exposure you want. These 3 things being: aperture, shutter speed, and ISO.
Learning this will ultimately allow you to unlock shooting in the manual camera mode, and allow you to decide what your image will look like, instead of relying on your camera to make this decision for you (sometimes poorly) in an auto-shooting mode.
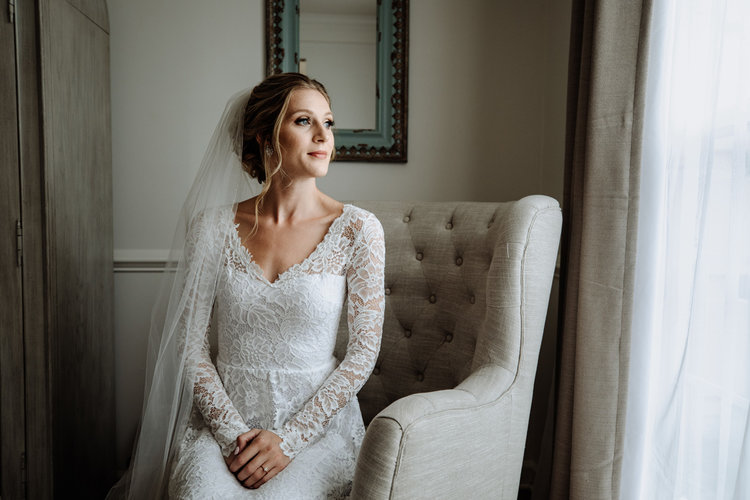
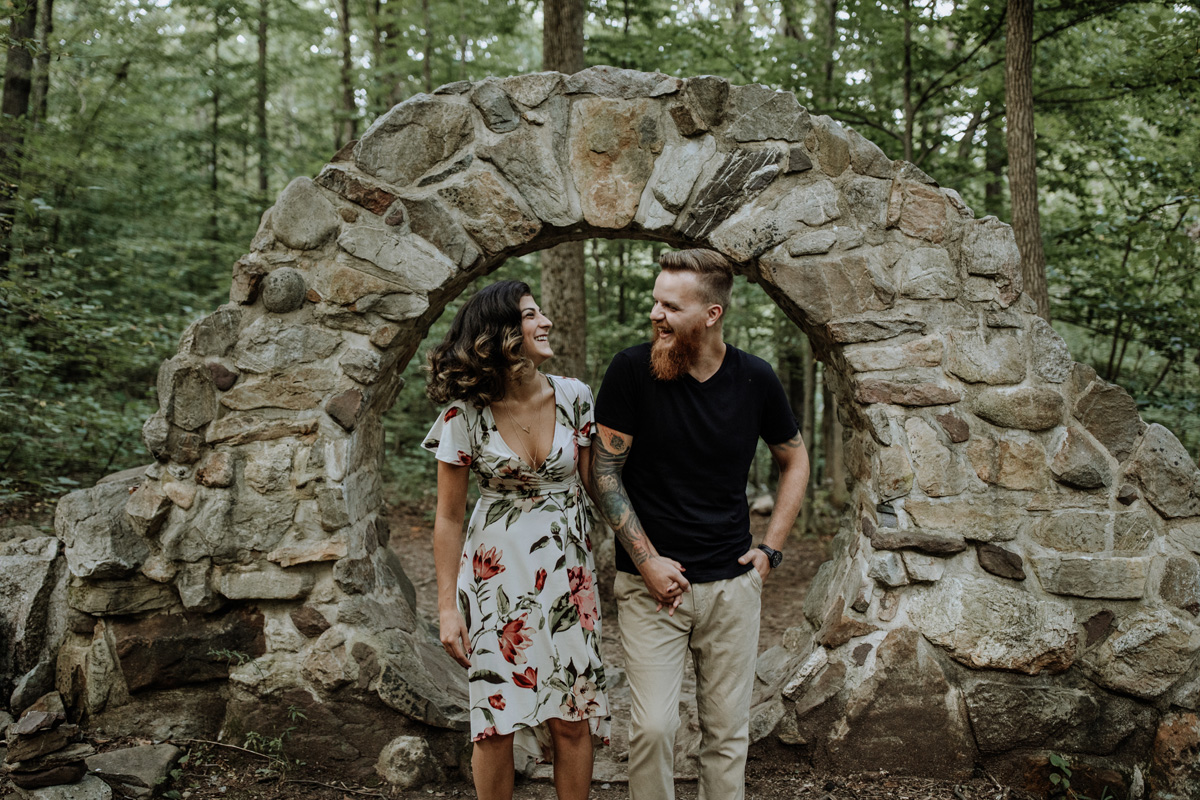
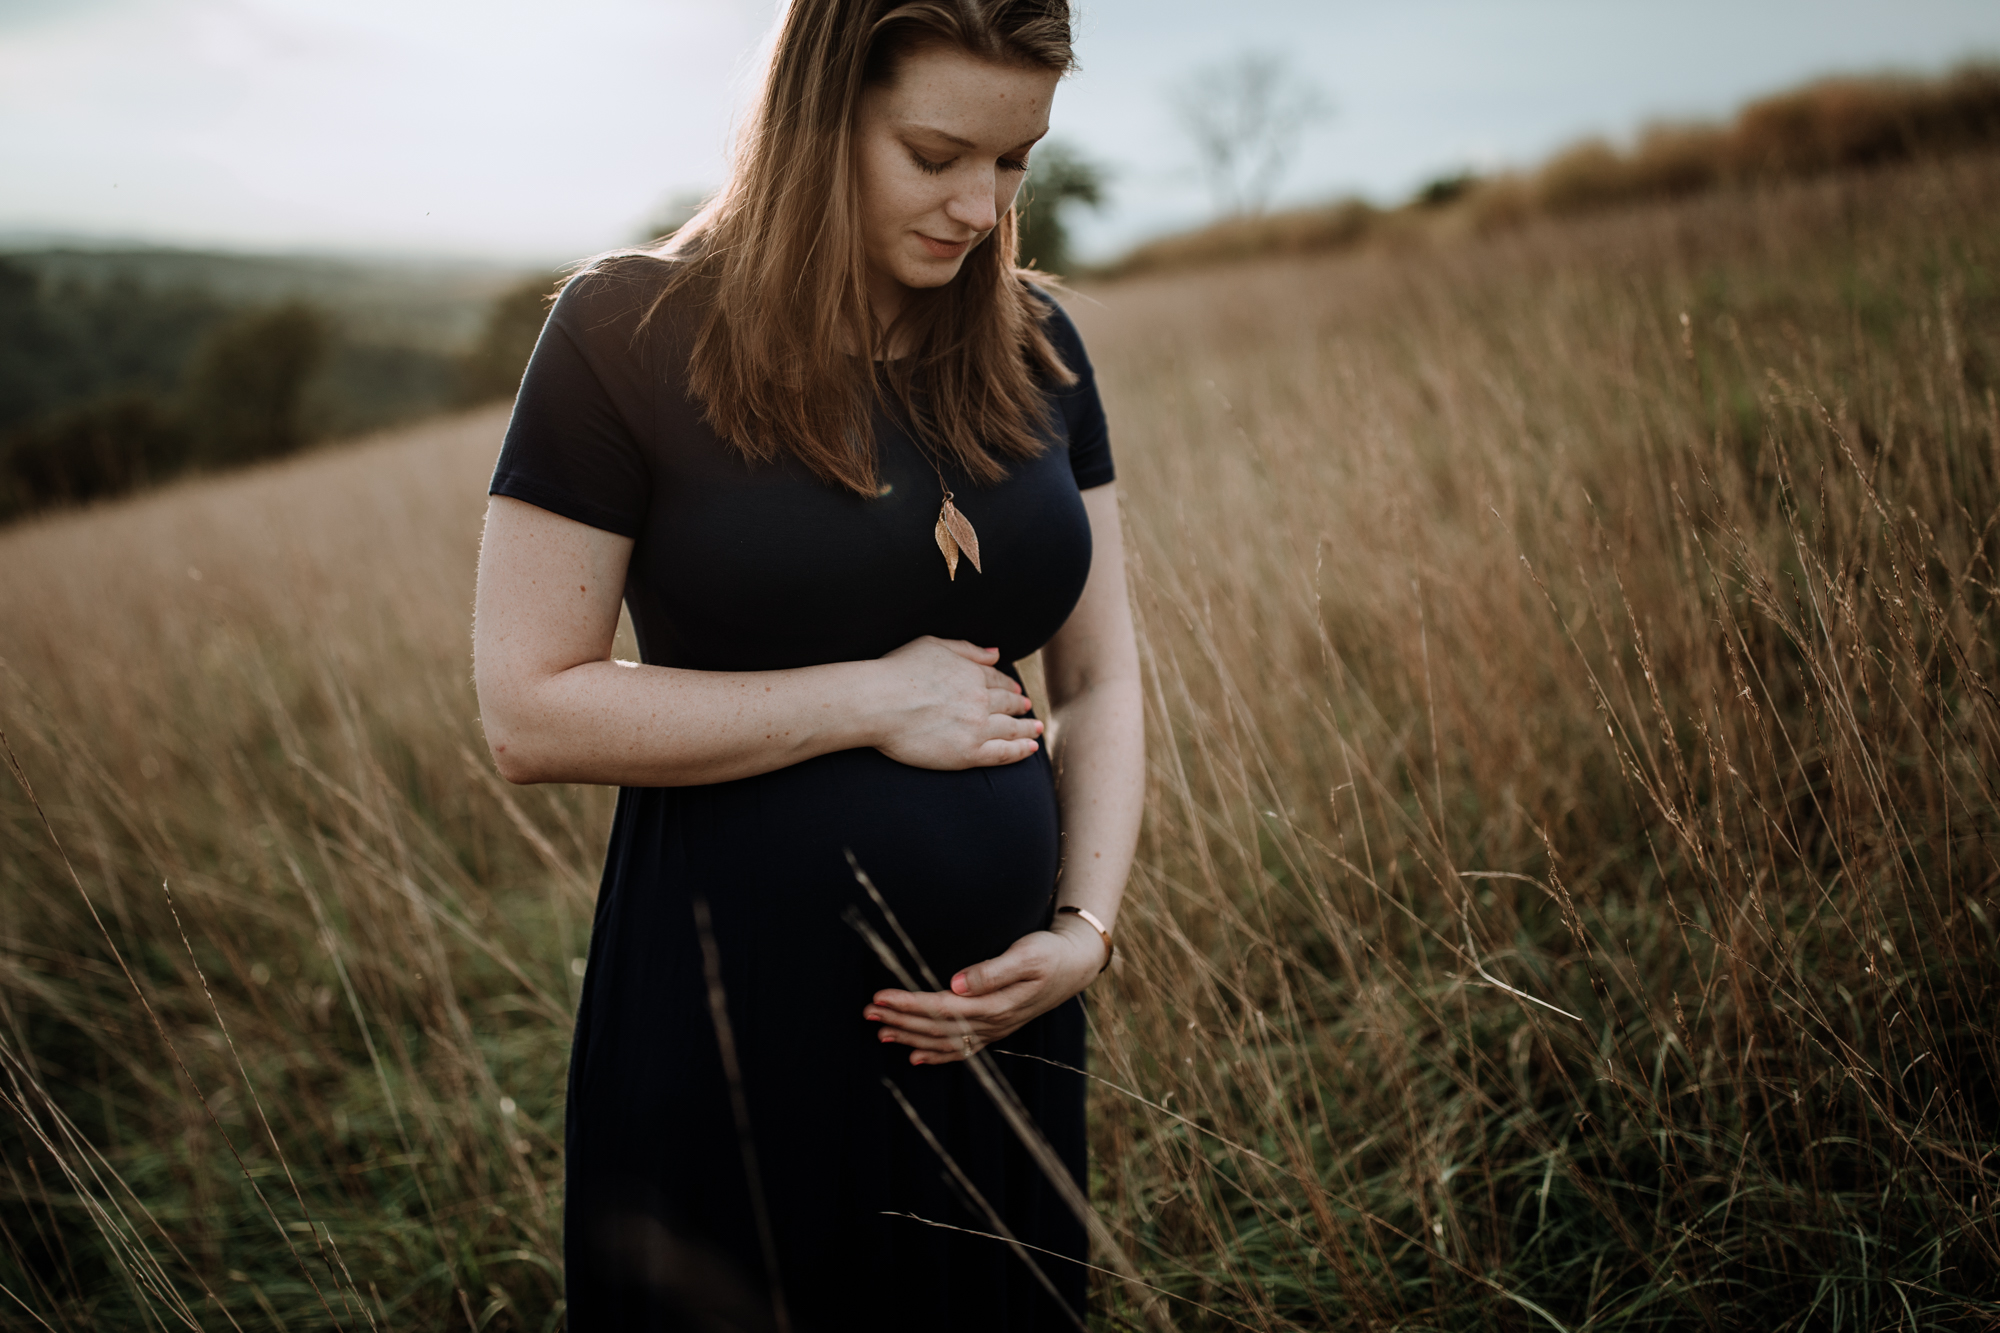
5). Know How to Shoot in Natural Light
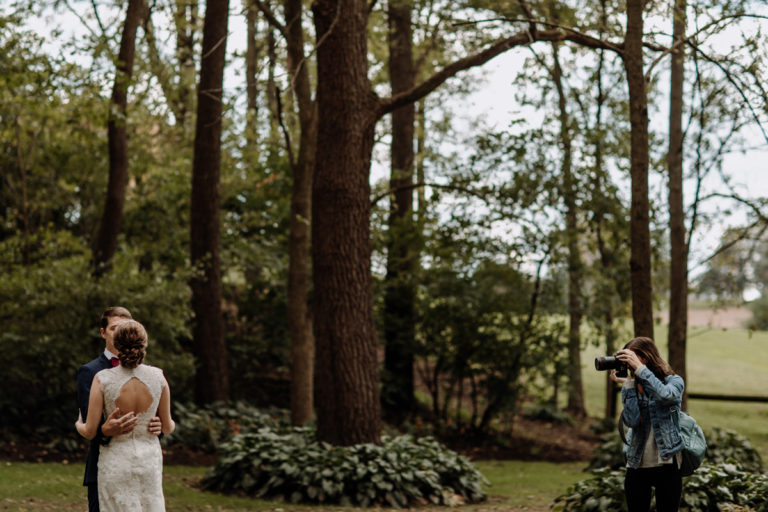
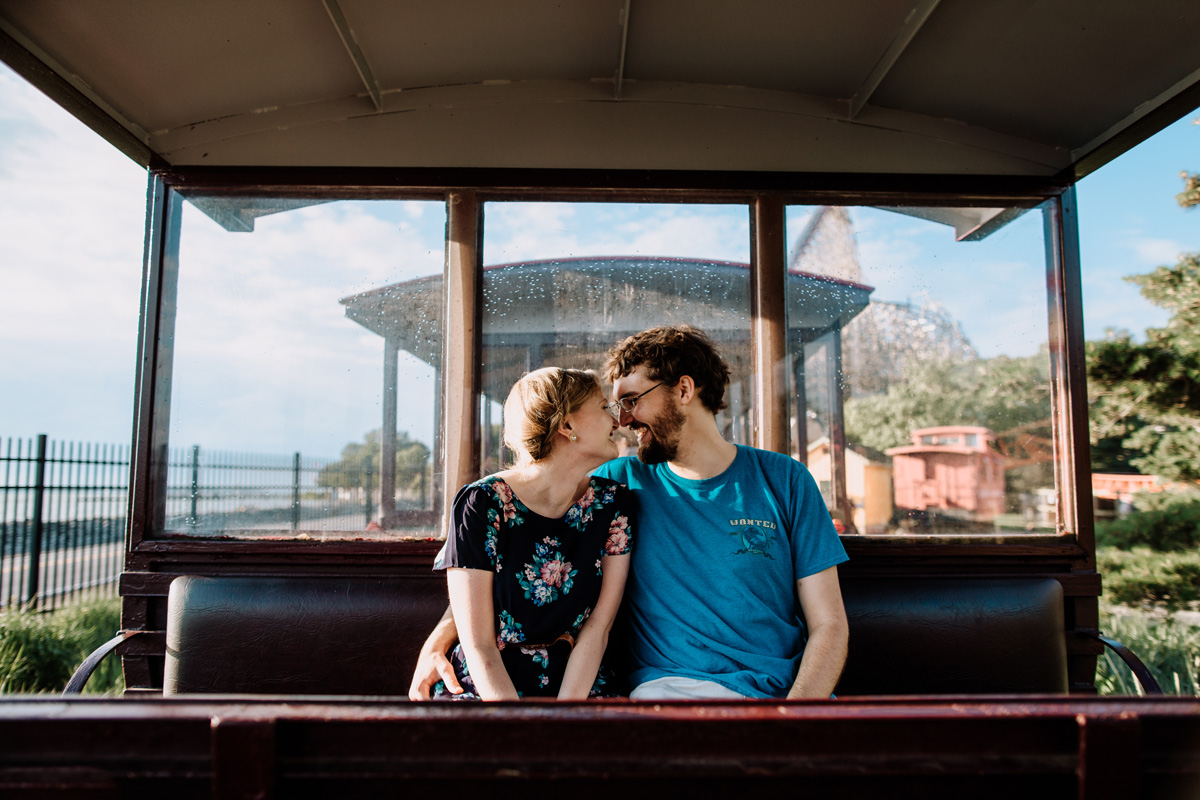
As professional wedding photographers, we have had to learn how to shoot in natural light in a variety of settings. When indoors, such as while doing getting ready photos in a hotel room prior to a wedding ceremony, part of our evaluation of a space for photography is looking for a suitable location for photos.
While we generally prefer the raw authentic emotion elicited from candid shots wherever they may happen, sometimes the limited availability of natural light, while indoors, requires at least some staging of our clients. As we mentioned in this article, wedding photographers shouldn’t hesitate to take advantage of available natural light indoors by taking their client and moving them by a window.
As you can see, there are times where natural light can be really quite abundant. On the other hand, there are times where the professional wedding photographer may need to employ some tactics to stage their clients appropriately to take advantage of any available natural light.
6). And Don’t Be Afraid of Flash Photography
For one reason or another, we have found there to be somewhat of a general fear among photographers with regards to using flash. We have felt this ourselves, especially early on into shooting weddings in particular.
When used effectively, flash can really compliment your images, and in some environments – make them usable as just relying on bumping ISO on your camera may not always work.
The most difficult part of shooting with flash is getting the settings right.
We started off using some inexpensive flash options such as the Yongnuo YN560 speedlite. This worked well for what it is, but would often be challenging as it really required a deep dive into the instruction manual to get it to work even in a simple way.
Earlier this year, we upgraded to a Profoto flash system, using the Profoto A1 for on camera flash and the Profoto B1X for off camera flash – while expensive, this system is far easier to use and outputs better quality flash light. It was well worth the investment, and has helped to simplify our flash photography.
7). Don’t Use Built-In Flash as Your Primary Light Source
Regardless of your choice of flash, you should avoid using any built-in flash options your camera may have. These are often found on consumer level cameras, and while it can be suitable if you just want to take a quick picture, they often leave an unflattering look.
Using an on camera flash that mounts to your camera’s hotshoe with the ability to manipulate the direction of the flash enables you to bounce off walls and the ceiling to get a much more flattering image. This works with even inexpensive flash options.
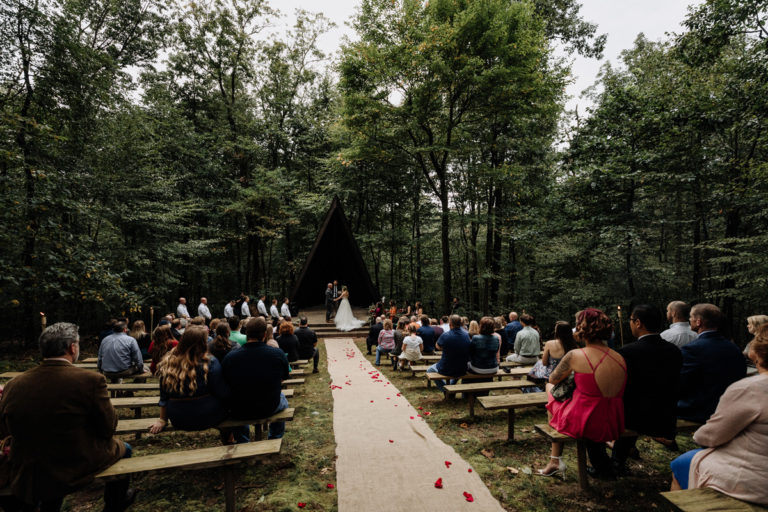
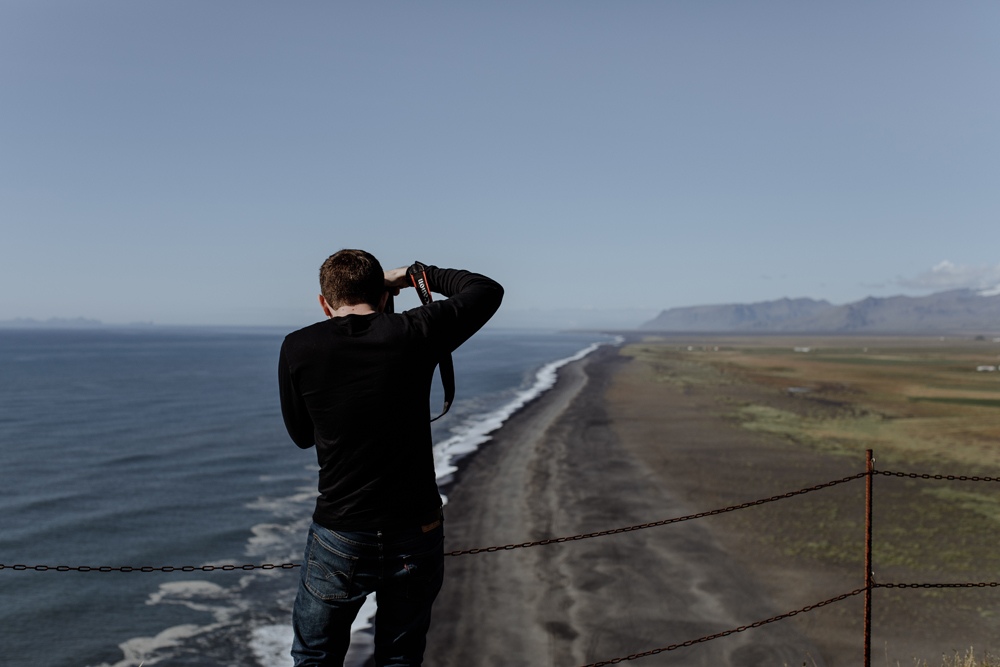
8). Think About the Environment(s) You Are Going to Shoot In
We have had the opportunity to work for our clients by shooting in a variety of different environments ranging from the great outdoors, inside homes, in large cathedrals, tight bar spaces, and so on.
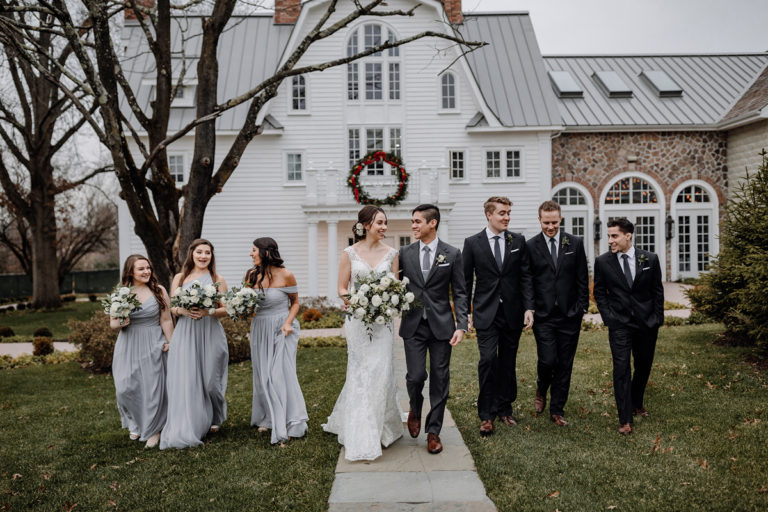
Throughout the course of a wedding day, the environments we shoot in change in accordance with a schedule that usually has us moving from getting ready photos (usually at common getting ready locations, such as a parent’s home, a venue’s preparation suite, or a hotel room) to a ceremony site and lastly to a reception hall.
When possible, we like to scope out the places we will be shooting beforehand – sometimes in person, but other times just by looking through other pictures taken of the location(s). This can be an effective way to have a better understanding of what will be required once we arrive, and help us to better capture the images we need to for our clients.
Of course, considerations on the environment you’re shooting in don’t have to just be limited to the photography found on a wedding day. If you want to shoot portraits, you’ll need to consider the place you’re holding these. The same goes with landscape shots as well!
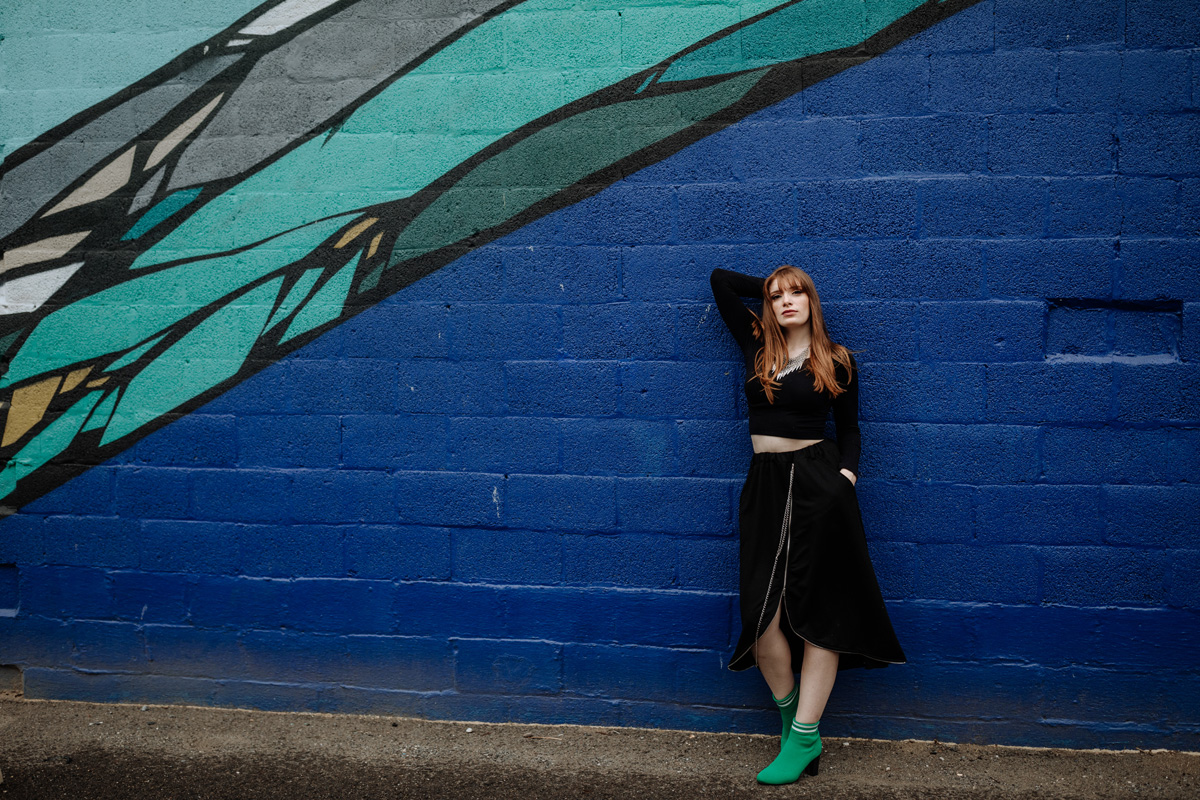
9). Go to New Places to Experiment
One of the most inspiring things in the world of photography is going to new places. Some of our favorite photos help commemorate times we really stepped out of our own comfort zones and traveled across the world. Recent trips to Iceland, Oregon, and Death Valley have all lent themselves to some extraordinary life experiences and beautiful photos as well.
Of course, new places don’t have to just require a long drive or a flight across the world. You can explore new places even within your own city. We keep finding new parks, hiking trails, and little alleys to explore and take photos in – all giving a little jolt of creative energy.
10). Be Proactive to Make the Pictures You Want Come to Life
Do you have a particular picture in mind you just really want to take? If so, what is holding you back?
Most images that we really want to take require effort to get them done. Our experience with astrophotography was a lot like this. Virtually impossible to do in our area because of the light pollution, we found ourselves in Death Valley with a significant intention of testing this out for ourselves in one of the most perfect places on Earth for stargazing.
11). Know How to Photograph Your Subject
Every subject you can photograph will be different. How you approach a person, a cat, a bouquet of flowers, the night sky, or a sweeping landscape in the rain all require something different to make a good picture happen.
At it’s core, all of these things are similar in that you want to find interesting angles that flatter them. There is a “good side” of most people – so how you fill the frame is an important thing. But maybe more than this – how you even approach and interact with your subject will ultimately impact your resulting image most significantly.
12). Know When to Stage, and When to Keep It Candid
For a long time we were pretty adverse to the idea of “posing” people. It felt forced, and some clients actively went out of their way to mention how they don’t like “being posed.” Over time, we started to learn that, in reality, posing comes in two simple forms: good posing and bad posing.
When you begin to learn how to pose effectively, you can stage a scene, a moment, in a way that is perfect for photography. With wedding days, this is something we’ve learned to do more and more. Often, this takes a very simple form – like moving a bride by a window and requesting she put on her jewelry there. Of course, staging can become more complex depending on your photography style as well.
On the other end, candid photography is something we also love. It’s capturing things as they naturally occur, and searching for the right angles to make them interesting. These are truly the most authentic moments.
13). Know the Limitations of Your Equipment
All camera gear has limitations.
How far you can push your own equipment is dependent on the technical specs and the environment you are in. You need to be aware of the limitations before you shoot in order to avoid any missed photo opportunities or frustration.
If you are interested in learning more about how limitations can help you grow as a photographer, head on over to this article entitled How Limitations Can Help You Grow as a Photographer, written by Melinda Smith, from Melinda Smith Photography.
14). Find Inspiration and Get Creative
Photography has so many different avenues that you can take, whether it be for a career or if you’re just wanting a new hobby. No matter what your path in photography, find your inspiration and get creative with it!
Often the best way to find a muse for your next photograph is to look at a photographer’s or artist’s work you love and take inspiration from them! But take only that! You should never compare your work to someone else or try even try to copy that, especially if you are just starting out. Instead, take away aspects of that image or piece of art that drew you to it in the first place and create from that. Inspiration is a useful learning tool in the photography world, but your work should always be 100% your own in the end.
15). Have Enough Batteries and SD Cards on Hand
As professional photographers, it would be absolutely devastating to us (and, to our clients) if our camera battery died or something happened to our SD Cards while in mid-shoot if we weren’t prepared to deal with this. Fortunately, we always are!
Batteries are easy enough – just purchase enough of them to have on hand to swap out as you need. If you’re just going out and shooting on your own for an hour, you won’t need many. If you are shooting a 14 hour wedding day, you will want a bag of them. We easily have 20 backup camera batteries, as well as a large number of batteries for our flashes. Sometimes we don’t always need to use them all, but it’s best to be prepared.
With SD cards, the same is true. Have enough storage capacity for all the shots you need. Even on long days, we normally just need a single 128GB SD Card per camera. We also put a secondary 128GB card in as our camera bodies have dual card slots, so we can double write all of the images we take as a back up. This might be overkill for a hobbyist, but for wedding photos in particular – it’s absolutely a must.
16). Keep a Steady Hand to Avoid Camera Shake
Camera shake is one of the top reasons why images come out looking blurry (the other reason being using too low of a shutter speed to capture the action in front of you). Sometimes, keeping a steady hand can actually be something we need to remind ourselves of – especially when running around on a wedding day and trying to quickly grab in-the-moment shots. The real key is actively reminding yourself to slow down and press the shutter button lightly.
In some scenarios, where avoiding this shake may seem…unavoidable…you can also take advantage of a tripod or lenses (such as the Canon 70-200mm f.2.8 III) which has built in image stabilization. These are additional tools to help offset or entirely eliminate a shaky camera.
17). Shoot What You Love
 Photography that will inspire you as a photographer are the shots you decide to take on your own terms. If you like shooting pictures of animals in your backyard, do it! If you really want to shoot beautiful brides on their wedding day, put yourself out there and do it!
But what about shooting the night sky? Or ocean life? Or skateboarders? Or bands?
Yes, yes to all of them!
Anything that exists that we can see with our eyes you can photograph. You are free to select your choice of subject(s).
The reason we highlight this, as silly as it may seem, is because so often we get caught up doing things we don’t really care for. We go to jobs that don’t inspire us, do chores around the house, and so on. Photography can be a creative outlet, and you can define what you want it to be for yourself.
18). View Photography as an Opportunity to Tell a Story
The storytelling aspects of photography is what really gets us interested in actually taking pictures. It’s one of the reasons why we wanted to take up shooting weddings, because while photographs are still snippets of a single moment, when we deliver a gallery of hundreds of them to a client, it helps them showcase an entire day and bring out a lot of memories and feelings of things happening in the scenes we present them and in between these scenes.
Whether or not wedding photography specifically is your jam, telling a story can be found across many spectrums of photography. Even within a single image, a whole lot can be conveyed. With the right things going on in front of you, and the right framing, you can really drive home something that speaks louder than just a shot on it’s own.
Are you interested in learning more about how you can effectively tell stories with photographs?
If so, head on over to these websites and read these great articles about how you can use your photography to tell stories!:
19). Set Your White Balance Correctly in Camera
White balance helps to dictate the temperature (color) of your images in camera. This can sometimes be a difficult thing to determine, so relying on your camera’s auto white balance option is always available – but not always reliable.
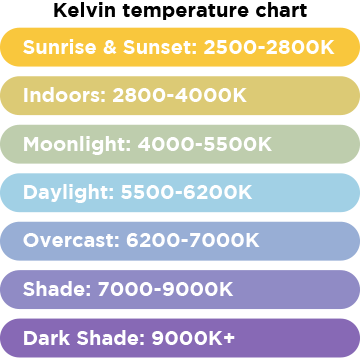
While we used to use auto white balance, we have found that setting a white balance in camera ourselves makes editing our images much easier.
Getting to know the Kelvin temperature scale helps to make this easier, as seen in the chart on the right!
A simple way to see why it’s easier to set it yourself is to think about this scenario we’ve faced ourselves:
You’re shooting portraits of a couple outside. With auto white balance set, your image may come out looking great set at 6300K. Your next shot with the auto white balance still set comes out with a 5400K reading. When it comes time to edit your images, you apply a preset to the image with the 6300K setting – and it works perfectly! Next, you apply the same present to the image with the 5400K reading – and now you have to make additional edits to alter the white balance.
If you had chosen your white balance in camera, all of your images would carry a consistent color temperature. That’s not to say you can totally avoid the need for additional editing as there are other factors to consider, but this is one you can at least minimize.
20). Shoot in Camera RAW format
The RAW file format is the digital negative – equivalent to the negatives you would get when shooting on film cameras back in the day (or current day if you’re into that – medium format Hasselblad shooters we’re looking at you!). These tend to be large image files, but provide the maximum amount of data in your images – making for more flexibility in post production to make adjustments and sometimes even save photos that were poorly exposed.
21). Minimize the Number of Times You Review Your Photos on the Back of Your Camera
It might seem like common sense to check the photos you are taking after every shot, but this doesn’t work for many shooting scenarios. Sure, if you’re shooting a static landscape – this probably makes a lot of sense, but with portraits, group shots, wedding days, and so on – checking your camera review screen too much can actually cause you to miss out on some things happening naturally in front of your eyes.
Of course, you want to make sure you have your settings right, so taking some tests shot before really rolling into more free-form photography is a good idea – but on the fly you will learn to make changes by memory and by checking settings in the optical viewfinder.
22). Change Up Your (Mental) Perspective
Perspective is everything with photography.
We will talk more about perspective in photography later in our list of tips, but before you even pick up the camera, you might need to do some fine tuning of your mindset and how you approach taking a picture first.
Sometimes, we can get in the mindset that every photo we take has to be “perfect,” or meet some external need such as that of validation through social media. Like most people – we fall prey to this once in a while ourselves.
We mention these things because they can be debilitating, and directly impact the images we are able to take. Limited success on social media, as an example, can make one feel like they simply aren’t good at photography – and even drive them away from pursuing it as something that can be enjoyed. This tip should ultimately be a reminder to, when possible, remember to enjoy taking photographs – sometimes the process of creation is even better than the end result. This is especially true when just starting out!
23). Check Your Backgrounds
What is happening in the background of an image can dictate a lot about whether you have a good or bad photograph. If your background is too busy or even lit differently, it can create a distraction that may be unwanted in your shot.
Fortunately, even the most undesirable backgrounds can be turned into something beautiful if you use a wide aperture (a low f-stop on your camera). When paired with a prime lens that stops down as far as f/1.0 like we do, it gives us more control of the environment, and sometimes the resulting bokeh makes a distracting background more interesting due to the look of the blur – which is often something akin to a watercolor painting.
24). Analyze Quality Compositions by Other Photographers
There is a reason why there are college classes dedicated to the study of art history and photography – because the images society has determined to be “great” have a real reason for being viewed in this way. While the currently existing art you can find in museums, in a simple Google search, or while browsing Instagram should not limit you – knowing what has made great compositions in the past can help you to emulate successful artists, and find your own style with time.
In the landscape photography world, there are few other photographers as aesthetically desired or generally well known and regarded as Ansel Adams. If you’re out shooting landscapes, you’d certainly be missing something without having taken even a little time to get to know some of his biography and take a look through his photographs. If you want a hard copy, the book Ansel Adams: 400 Images is a great starting resource.
This same feeling can be found in all the niches of photography!!
25). Invest More on Learning (And Less on Gear)
We started this article talking about gear, because it is fundamentally the starting point for anyone participating in photography.
As important as having the right gear is, no matter what you choose to use – understanding how to take photographs ultimately comes down to learning the ins-and-outs.
A great starting point to learn about photography is simply investigating the huge amounts of free content out there (such as what you are looking at here on our website!). YouTube videos from established photographers are also extremely helpful – and we’ve used these significantly as we continue to learn new techniques.
Of course, most free resources have limits – and you might want to consider spending a little money on photography books and courses (both online and in person) to better help you get to a level of knowledge you are looking for.
We’ve put together a couple quick resources we would recommend below:
Recommended Photography Books:
Recommended Online Photography Courses:
Our first stop for photography courses online is at Digital Photography School. If you’ve been around a camera and the internet, you have probably already crossed paths with this popular website. They have loads of free content, much driven by user submissions, and their courses are well received to help beginners and pros alike.
Section #2: Digital Photography Tips for When You Are Taking Photos
Now that you’ve survived the prep work that goes into photography before even picking up the camera, here are some tips dedicated to the moments when you are actually taking photos…
26). Expose How You Want To
The search for the right camera settings to nail the “perfect exposure” will ultimately lead to a pretty subjective end point. While a camera’s automatic exposure mode will take into consideration a number of factors to output a well exposed image (if it works correctly), there is more that goes into getting the right exposure than simple math.
There are fundamentally 3 types of exposures:
-
Underexposure
-
Perfect Exposure
-
Overexposure
In the optimal lighting scenarios, we might prefer to have a technically “perfect” exposure. This is where the highlight and shadows are well balanced, and very much an accurate representation of what is being seen in front of our faces.
With underexposure, this can be utilized intentionally to (often) retain more image data in the shadows and highlights. While most images are not attractive out of camera like this, with tweaking in Lightroom (or some other image processing software), these can make for some really beautiful images. We actually use this type of exposure ourselves much of the time as it suits our editing style – which is heavy on shadows and contrast.
Lastly, overexposure is another approach that increases highlights. When shooting portraits, this can be a way to “overpower” shadows on a person’s face if they are not lit by the sun naturally or flash. You do tend to lose some other elements in the image, particularly those that are quite bright – often this can result in simply blowing out the sky in outdoor photos. We use this technique less, but see it’s use frequently with photographers who prefer a more light and airy editing style.
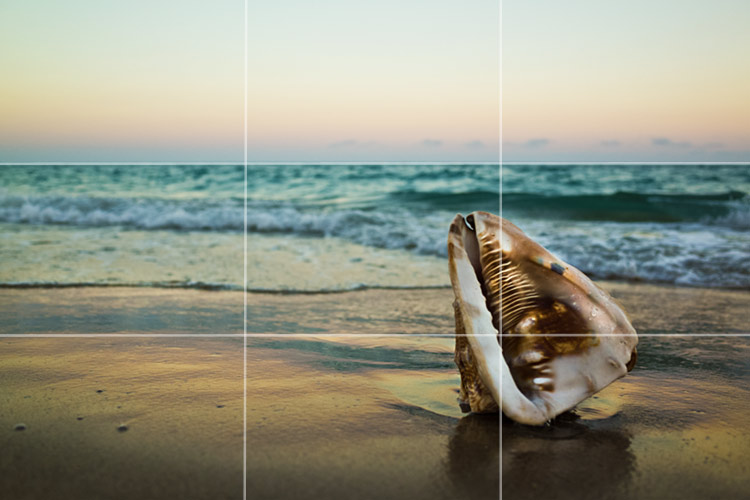
27). Use the Rule of Thirds
One of the most basic, but important, compositional tips we can give you is to use the rule of thirds. The rule of thirds is the view of your image frame as being comprised of 9 parts – this can either be seen just in your mind, or in some camera LCD viewfinders there is a function available to have this grid display while you are taking a picture (this is an available feature in the Canon 5D Mark IV we use).
The theory is that if you place points of interest at the intersecting lines, you will be able to create a more interesting image. In the vertical planes, you can either fill most of the space or leave some empty to create negative space.
 Example image from It’s Just Light
28). Change Up Your (Physical) Perspective
It can fundamentally make things that are boring look more exciting, or things that are too “busy” look more structured. Shooting at eye level with your subject gives a simple look, while shooting from a lower angle closer to the ground can sometimes give a more dramatic, even imposing, look depending on what your subject is doing.
29). Use Selective Framing

“Selective framing” is the term that really refers to choosing what to frame in our images. At it’s core, it is the reason why photography is so interesting, because it allows us to choose what things are seen and what things are not.
A simple example of selective framing looks like this: you are taking portrait photographs on a crowded city street. In the hustle and bustle of people, your subject could easily get lost if someone walks in front of the camera, or is too close to the subject you are taking pictures of. By getting closer to the subject, zooming in with a longer focal length, or simply cropping the image in post production – you can make them the target of the image, and eliminate the fact that other people were around at all. Had the same photo been taken with a 16mm lens, as an extreme example, the photo would have been entirely different.
Ultimately, selective framing boils down to simply being intentional with what you are shooting.
30). Shoot in Both Portrait Orientation and Landscape Orientation
To shake up your photography, be sure to change up the orientation of your camera. In some scenarios, a shot that might be boring in landscape orientation (the “standard” camera position) can be made more interesting by being in the portrait orientation.
With this in mind, you may also want to consider the end goal of your photo as well. For example, we have specifically turned the camera one way or the other if we had a print in mind – as we did when photographing a waterfall not too long ago that we knew would suit a vertical print in our living room.
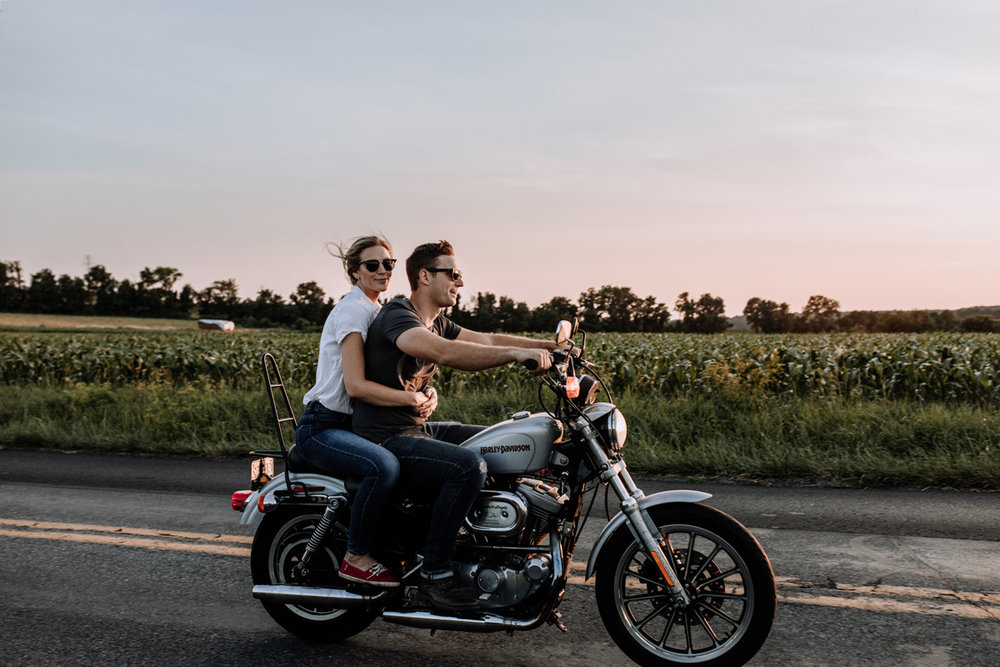
31). Look for and Use Leading Lines in Your Photos
Leading lines are naturally occurring lines in your environment that can help move your eye throughout a photo. Almost anything can be turned into a leading line. Most frequently, we look for lines that really standout.
When taking portraits, having a defined walking path can be an example of a simple leading line as it can regress nicely into the background, leading away from your subject.
With landscape photography, a frequently loved example is taking a scenic shot in the middle of a road. The road itself is a line, and when paired with the defined yellow lines on many roads, these can also add an element.
Generally speaking, leading lines should lead somewhere interesting in your image. This isn’t a hard and fast rule, but when taking pictures it is a good tip to keep in mind. In our experience, this sometimes leads to a natural structure like a mountain, or you can simply add a point of interest (like a person) at the end of the line. Experimentation in this area is key!
If you’d like to see more discussion on leading lines, we discussed then in context of our analysis of different images taken from the film The Fountain.
32). Give Your Subject Space
Like a teenager will tell their parents at some point, sometimes we all just need a little space.
In photography, allowing for some breathing room in an image can keep things feeling comfortable and interesting. Sometimes the space we’re referring to is simply empty, on occasion quite literally if you blow out the highlights of the sky and all that remains is a stark white in its place.
More often, this space will just be filled with whatever is surrounding your subject or in the background.
It’s simple stuff, but important.
33). Fill the Frame Entirely
On the other end of things, sometimes the solution to getting a good image is to fill the frame entirely. We do this often with couples portraits when we want to get up close and personal, and showcase them in a more intimate fashion.
34). Use a Polarizing Filter
A polarizer, like this cheap one found on Amazon, is attached to your lens. It is used to control reflections, darken skies, and suppress glare from the sun and on watery surfaces.
The benefits of shooting with a polarizer then are best felt when shooting during less-than-ideal times of day like you would find at high noon when the sky is it’s brightest and, if by a body of water, the sun glare is a very real and painful thing. While this is the general use case, they are also great because you can create smoother looking water flows (at any time of the day) with a long exposure.
35). Get the Right Depth of Field
The depth of field of an image is about how close or far your subject is to it’s background. This is influenced by a number of factors including: actual distance between the subject and the background, focal length, and the camera’s aperture setting. Other elements may also play into it, such as the appearance of shadows or highlights in different areas of the frame – leading to changes in the perceived image depth.
With this in mind, a brief background to get the right depth of field would go something like this:
Pretend you are out shooting with the Canon 85mm f/1.2 lens (a favorite of ours). This is a longer focal length lens most suitable for portraits. Due to the longer focal length, content in the picture will already feel compressed together.
The lens aperture range is from f/1.2 to f/22.
At the farthest extreme (f/22), you would be shooting with a narrow aperture, which would allow everything in the frame from foreground to background to be in focus. Assuming your other settings are just right, you could expect a sharp image in all of the image.
At the other end (f/1.2), this would be shooting with a wide open aperture. This allows more light to reach the camera’s sensor, and ultimately results in more separation of the subject from the background. This separation is seen in the background blur effect (called “bokeh”). In the right lighting conditions and with the right lens (such as this 85mm), the bokeh can be really beautiful and take on a life of it’s own.
The right depth of field for your shooting situation is entirely up to you!
36). Know What Shutter Speed to Use to Capture the Action
Getting the right shutter speed is a little more difficult than the right DOF. The reason for this is because, even if you understand that having a higher shutter speed is necessary in order to freeze movement in front of you, selecting what shutter speed is sufficient for different types of movement is more challenging.
While there is likely some complicated math out there about the optimal shutter speed to use for different scenarios based on the speed of the subject and other factors, we haven’t seen it (we tried looking, too!).
Instead, when searching the web for input on the best shutter speed to use for different scenarios, we get a bunch of opinions. While maybe a little frustrating, this is our own experience as well – from shooting in many scenarios, we’ve come to determine reasonable shutter speed minimums in order to effectively capture sharp movement without the blur.
Before we put our two cents out there, keep in mind that shutter speed is measured by fractions of a second. On some cameras, you can even set up your shutter to release over the course of multiple seconds, even minutes!
Additionally, one quick rule to live by: never use a shutter speed less than the focal length of the lens you are using, otherwise there will be unwanted movement in your frame. The exception to this is when using a tripod and a remote shutter release as these items help to counteract this.
Recommended shutter speeds:
-
Use slow shutter speeds to capture motion blur such as with dancing photos, astrophotography, and waterfall photography (multiple second exposures)
-
For static subjects like standing portraits use a slow shutter speed (1/200 – 1/400)
-
For slow moving subjects like people walking use a moderate shutter speed (1/400 – 1/800)
-
For faster moving subjects like people running use a fast shutter speed (1/800 – 1/1000)
-
For really fast moving subjects like a race car use a really fast shutter speed (1/1000 – 1/2000+)
37). Expose First, then Frame Your Shot
Before pressing the shutter and taking a photo, get your exposure right in camera. As we discussed earlier, how you decide to expose is ultimately up to you, but it is one of the hardest parts of photography. Once your settings are locked in, you can make better decisions about framing. Treat these as separate parts of the same equation, and you’re gold!
38). Focus on the Eyes
When shooting portraits, place your focus on the eye closest to the camera. The reason for this is because the eyes are very emotive and should be the primary focus of a good portrait image.
It goes without saying, while this is certainly the “norm” when it comes to portrait photography, it is a rule that can be broken when it suits you. A great article that details some alternative approaches is Do You Always Need to Focus on the Eyes? over on ThePhotoblographer.
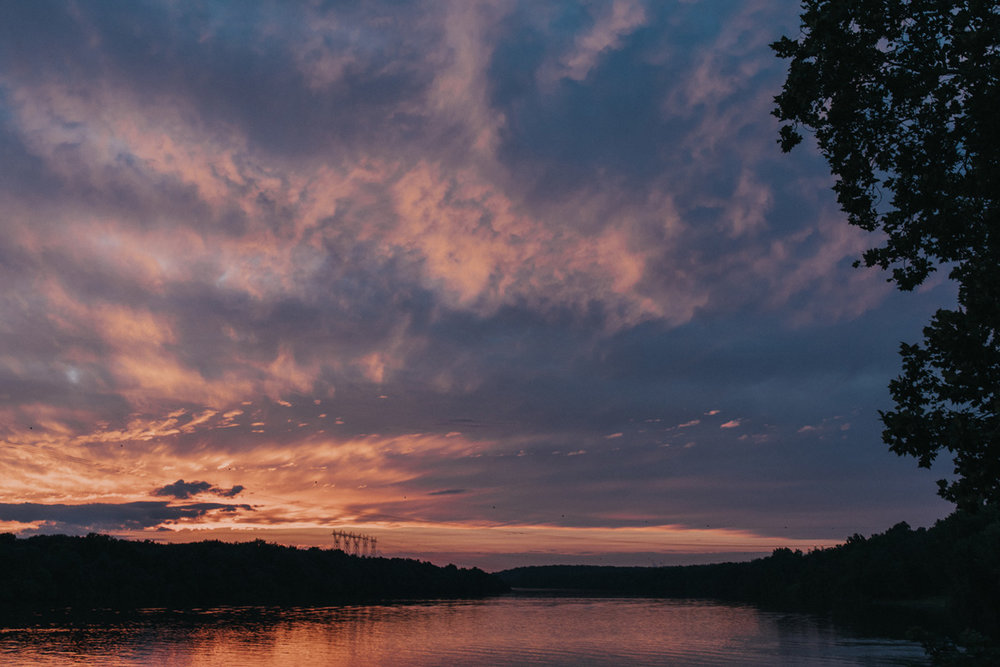
39). Make Use of Reflections
Reflections are a powerful natural tool we photographers have at our disposal to warp perspective and convey an alternative reality (if we want too…). Alternatively, reflections can just be used as a compositional tool to bring symmetrical balance to an image.
The simplest types of reflections to look out for would be those of the environment on a lake or shots in a mirror. There are certainly other surfaces out there that reflect things as well, you just need to experiment and keep an open eye.
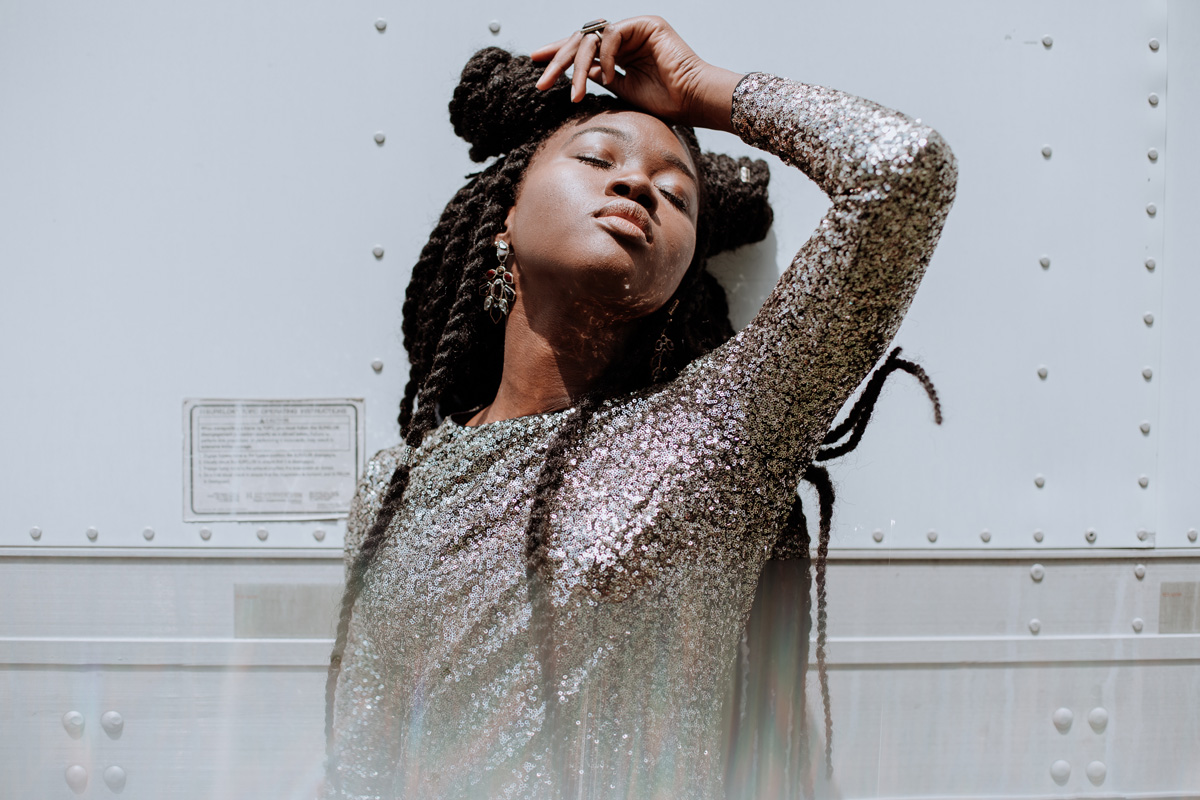
40). Experiment with Prisms and Copper Piping for Cool Effects
In July 2017, Jess (one half of our husband & wife photography team) had the opportunity to be apart of Elaine Zelker’s photography challenge, along with several other photographers in our local area.
You can see the whole video right here and get some insight into each person’s individual approach to shooting the model, and their resulting images.
During this shoot, she used a prism and light catchers to great effect to impact a portrait shoot that would otherwise be pretty standard.
These little accessories allow for you to influence your image in some very specific ways. The prism effect adds a rainbow color and fractal distortions when aligned with a light source (like the sun) because of how this is filtered through the prism and into your camera’s sensor. Another great tool that we love to use is some simple copper piping, which can be used at Golden Hour while the sun is getting low on the horizon to create the Ring of Fire effect.
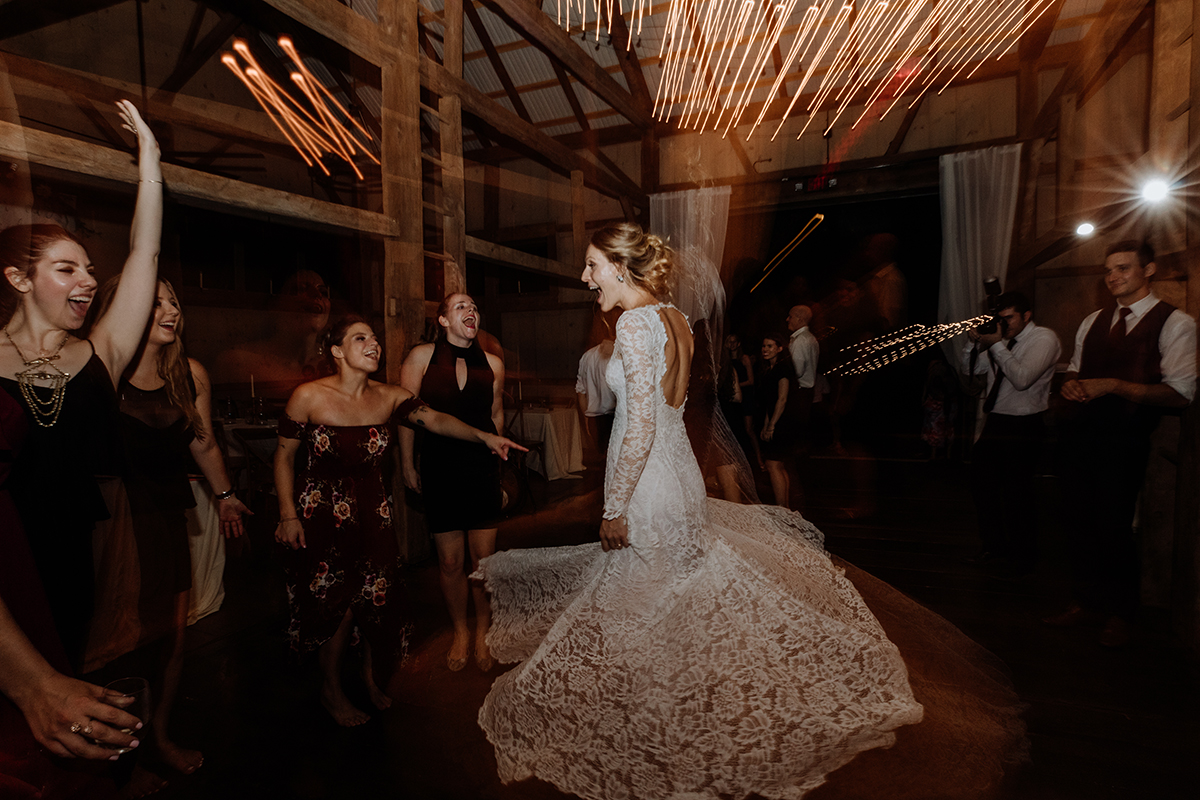
41). Paint with Light
In our opinion, light painting is one of the more fascinating aspects of digital photography, and is one way that taking pictures is elevated distinctly as it’s own art form.
This is especially true nowadays where everyone is taking pictures (even if most of these are just iPhone selfies).
This isn’t said to downplay other types of photography, but while we can just get lucky when shooting portraits or a simple landscape from time to time, getting a really good light painted photo takes more advanced technical knowledge and a real imagination to see your painting without even really being able to see your “canvas.”
To keep it short and sweet, light painting is made possible by the conjunction of long exposure photography techniques paired with a dark environment that you can illuminate with any light source such as sparklers, a flashlight, and so on. There is virtually limitless potential, and all things you would photograph normally during the day can be enhanced with painted light techniques.
If you are just starting out with light painting, we’d suggest picking up a Nanguang RGB LED Ice Tube Light Wand to help you get the best effect, and the book Night Photography and Light Painting: Finding Your Way in the Dark as an excellent starting resource.
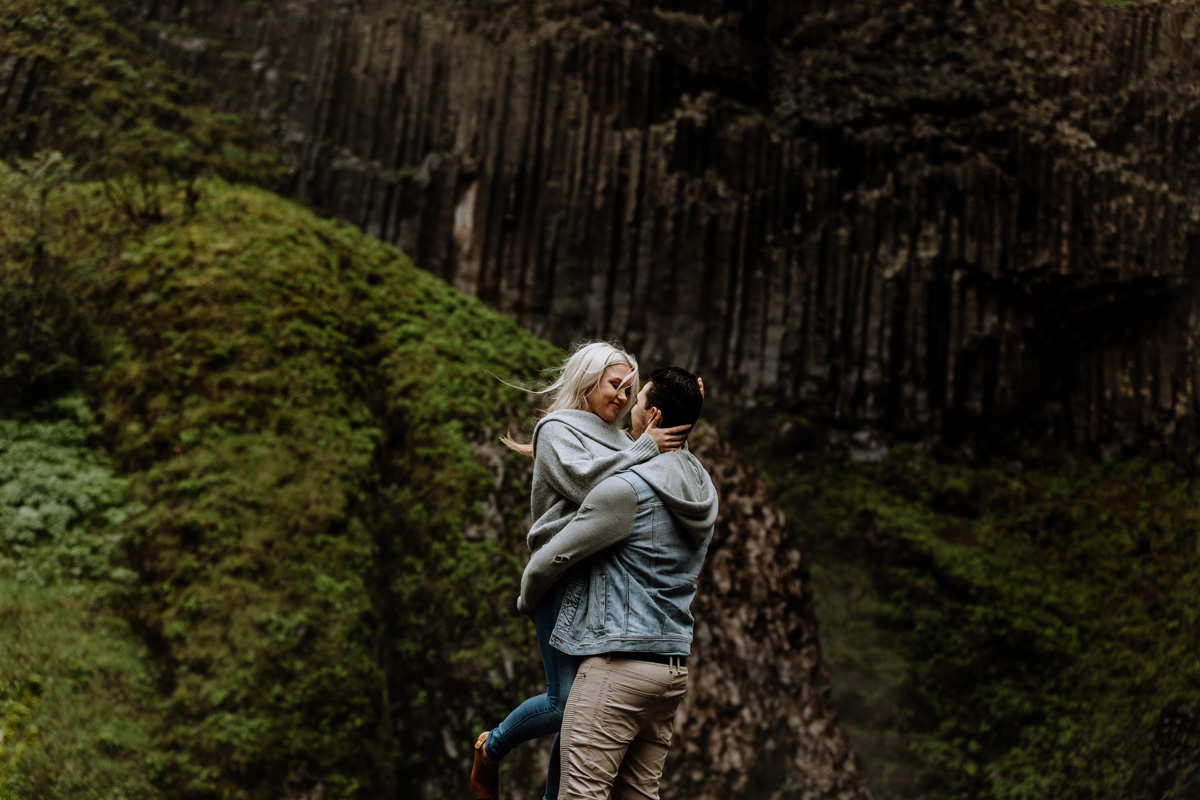
42). Frame Your Shot With Things in the Foreground
One of our favorite framing devices is finding things to shoot through. When out wandering through the woods, this is often very easy to come by thanks to the abundance of foliage. On lower trees, you can shoot through the leaves and limbs, while in other situations you might just want to pick up a fallen leaf and put it in front of your lens artistically to frame your subject.
There really is no limitation to things you can use like this as a bit of foreground intrigue. Depending on your aperture, you can also get some really interesting blurring effects.
One way we consistently utilize this sort of technique is when shooting wedding day solo portraits of the bride & groom respectively. Our approach involves having the partner off camera talk with the person we’re focusing our portrait shots on, and snagging a couple shots of them interacting. Most of the time, the results are stunning and some of our favorite images. The look and feel of them as portraits is virtually impossible to replicate because of how authentic the interaction is.
43). Use Wide Angle Lens Vignetting in Your Compositions
The more we look through some of the previous photos we have taken, the more we really come to love shots taken with our wide angle lenses (16mm – 35mm focal range). As anyone who has used a wide angle lens can attest, these lenses are well known to leave vignetting around the edges (to varying degrees dependent on the manufacturer, lens quality, etc.). While some may argue this detracts from images, we would suggest you step into this vignetting and let it help guide your compositions.
The reason for this is because this form of vignetting can draw your eyes towards the center of the frame quite easily. In some of our favorite shots, the vignetting help to really set a mood, and gives what can only be described as a film-look to an image.
This is especially powerful when taking portraits with wide angle lenses, something that is often frowned upon too as the common advice is to use longer focal lengths for portraits.
44). Look for Shapes in the Environment
The best photographers have a keen eye for framing devices, and using things as they naturally occur where they are photographing to their advantage. One simple way to approach this in your photography is to look for distinct shapes that draw the eye, and thus your attention.
A recent example where we got really hooked on environmental shapes was while photographing a bride getting ready at her home. These types of photos can sometimes be difficult – or at least, one could say…uninspiring. We had noticed some features of the home that formed leading lines and shapes around the bride while she was having her makeup put on – and sure enough some of these shots have ended up being some of our favorite wedding day prep photos.
45). Use Contrast for More Recognizable Images
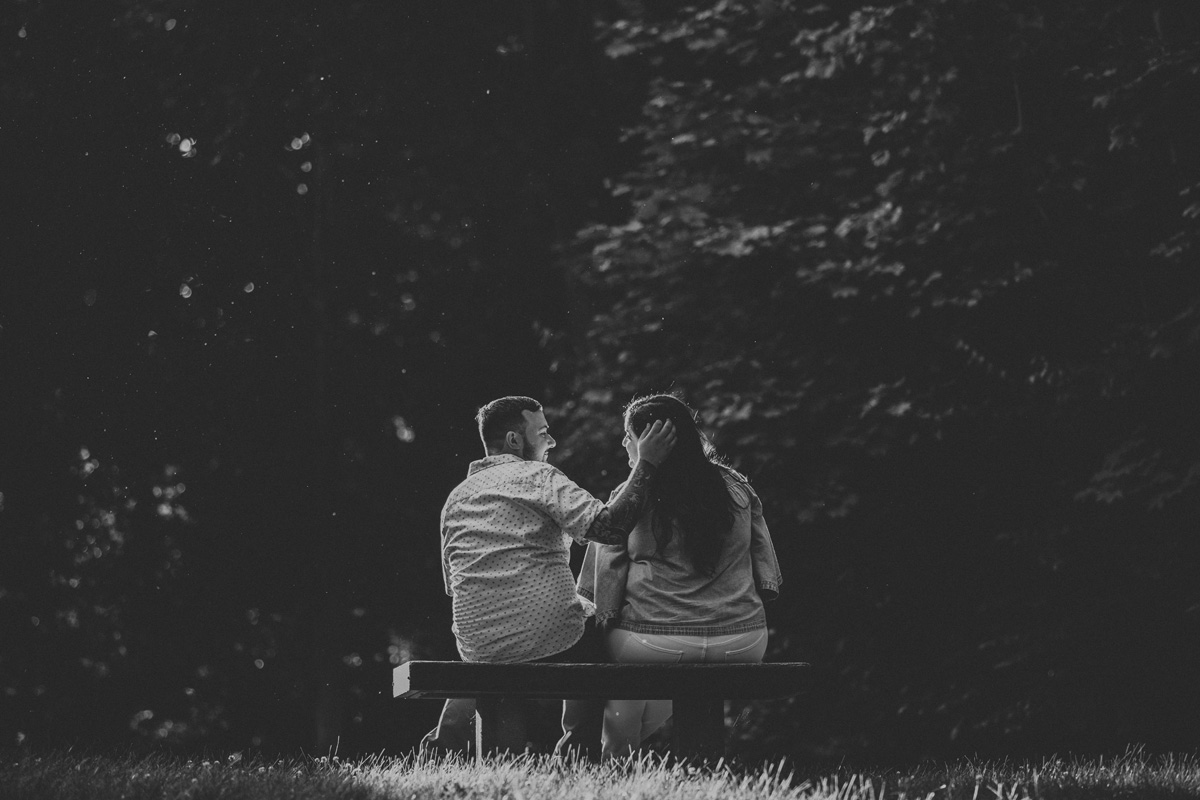
While photography is “all about the light,” it is also in equal parts about the lack of light, too.
The difference between highlights and shadows is what is called contrast. There is naturally occurring contrast everywhere – just take a walk in the woods in the late morning hours and you’ll see plenty of trees covered in sunlight on one side, and covered in shadow on the other.
This sort of contrast is sometimes scary for photographers (especially portrait photographers), as uneven lighting isn’t always flattering unless you know how to control it, BUT it can also be very powerful and make for really compelling images.
Think about this as an example: you stumble into the woods with your model for the day. There are lots of areas with streaking light, but one area in particular sticks out to you because it basically forms a little circle of light between a cluster of trees. This light stands out pretty significantly from the rest of the scene that is surrounding it in shadows. You set your model up in this space, and it ends up functioning like a spotlight on her.
This is a really cool dynamic in your image, this harsh contrast between dark and light.
46). Actually Use Your Flash (and Even During the Day!)
Going back to very early in this article where we discussed the benefits of using flash, we’re here to reiterate how important it is to actually use your flash. Again, it’s a common fear photographers have of using flash that leads them to never take it out when they are shooting, but it’s the same fear that holds people up from actually learning to use it through a hands on approach.
For ourselves, flash so obviously comes in handy when working in dark spaces (such as a reception hall to light the dance floor). This is probably the most obvious application of flash in photography.
But…your use of flash doesn’t have to be exclusively limited to just dark environments. A powerful flash, like the Profoto B1X that we use, can overpower even harsh sunlight so as to expose for both people and the sky (it’s an amazing thing!!). Even with a less powerful flash, these can be used even just as a fill light – meaning the flash can fill in shadows on a person’s face, making for a more usable end image.
When used correctly, flash can absolutely enhance your photography by being a useful tool to compliment your camera, your technical knowledge, and your composition skills.
47). Apply Different Lighting Patterns for the Best Images

Whether with flash, natural light, or a combination of the two – utilizing different lighting patterns to get the desired effect you are after is critically important to your photography. While these patterns are often discussed in the context of portrait photography, most can actually be applied to photography of any object in practice.
The 4 Main Lighting Patterns:
-
Split Lighting – The light source is directly to one side of the subject resulting in one side of the face being illuminated, and the other being cast in shadow.
-
Loop Lighting – The light source is 30-45 degrees from the camera and slightly higher than eye level resulting in a small shadow of the subjects nose being cast on their cheeks.
-
Rembrandt Lighting – The light source should be to the side of the subject, with the subject faced slightly away from the light source, resulting in shadows from the nose being cast down on the cheek ending with a triangular lighting pattern on the cheeks.
-
Butterfly Lighting – The light source is directly in front of the subject resulting in illumination of the whole subject, with shadows being cast around the edges (such as under the jawline).
All of these lighting effects can be achieved through natural means, or by supplementing the available light by using some photography tools such as flash or even a cheap reflector like this (it can make a world of difference!).
For a more detailed illustration of these lighting techniques, check out 6 Portrait Lighting Patterns Every Photographer Should Know.
48). Learn Posing Techniques That Suit Your Portrait Style

Posing is a topic of much passionate discussion among portrait photographers.
Many books have been written on this topic, and more recently alternatives to posing have been circulating in a pretty significant way such as can be found in the Unposed Field Guide. The “unposing” basically moves away from the classic style of posing that was very hands on and intentional, and instead replaces it more with prompting in order to elicit more natural responses.
If that paragraph didn’t boggle your brain, no matter your approach to portrait photography, one thing is clear: you need to have an approach to getting people to pose in a way that is effective for the photography being taken of them.
Over the years, we have grown very familiar with how to approach posing – this is especially true when working with couples as they fill 95% of our bookings.
Much of this approach is rooted in this prompting style by getting couples to do things together in ways to get natural responses and emotions. We say things like “pretend you’re cookie monster and give her a million kisses”, which often gets a lot of laughs. On the other side of things, when having a quieter moment we’ll sometimes have each person say to the other things that make them proud of each other. It’s simple things, but effective.
When all else fails, we do get a little hands on from time to time. When working with regular people (ie: not models), the right pose might not always come naturally even with instruction. Helping these people along to get the best side of them shown in front of the camera is what it is all about.
49). Reference the Histogram
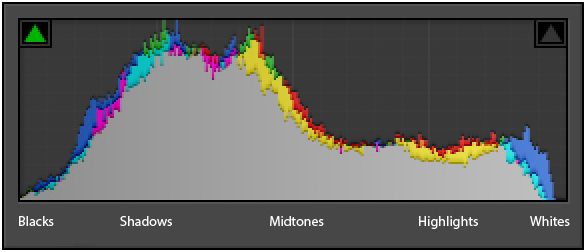
Your camera puts out a whole lot of data, but it’s not really of much use if you don’t know how to use it.
The histogram is one of those things that most people just ignore (because who likes graphs?), but is an invaluable tool that can help you get better exposures. In our experience, we don’t reference the histogram all the time – this is especially true in balanced lighting conditions (such as during Golden Hour) when we do much of our shooting. However, when in environments we are less comfortable with, it is a quick point of reference to help guide our exposures.
In a simple summary, your camera’s histogram provides information about the tonal values in your image that include:
-
Blacks
-
Shadows
-
Mid-Tones
-
Highlights
-
Whites
The tones are measured in the “brightness” they take up in a particular image.
If you have done any photo editing, these terms may be familiar to you as they are elements you can control when processing an image later.
The main thing you will be looking for is to determine if there is any clipping in any of these areas in camera, which would be represented by a really high peak in one (or more) of these areas of the image. In its simplest form, if you saw your highlights were clipping (ie: being “blown out” as photographers would say), you would often want to do something to reduce highlight blowout by decreasing your exposure settings (ways to do this in camera: increase your shutter speed or aperture, and bring down your ISO).
50). Experiment with Different Lenses
One of the greatest things about having multiple lenses in your photography toolkit is that they give a lot of different opportunities for expression.
The impact felt from an image taken with a 50mm (probably the most common focal length for people to be using) is very different than that of a wide angle 16mm. The same can be felt on the other extreme – shooting at 200mm provides a wealth of opportunities you couldn’t visualize with a different lens.
The focal length of your lens will directly impact what you are able to shoot, and how you go about framing your subject. Sometimes it is a great exercise to make yourself work with a single lens, as this can sometimes require out of the box thinking in order to get a good shot. Other times, though, having the ability to swap your lenses and experiment is what will help you to get the best shot possible that you can see in your head…but can’t quite see through the viewfinder.
As we’ve collected a large number of lenses over the year, and use all of them regularly for different purposes, we thought we’d highlight a few that we use and discuss what they have to offer. If you’d like to check them out, absolutely feel free to click them and read more!
As a quick reminder, these are affiliate links to Amazon, so you will be redirected there and if you make a purchase, we make a commission. If you are finding this article to be a useful source for photography tips, please consider doing this if you are in the buying mood 🙂
1). Canon EF 16-35mm f/2.8 USM III Lens
Having a wide angle lens capable of zooming to a focal length that is suitable for portraits is pretty much a dream come true. When deciding whether or not to purchase this lens ourselves, we were conflicted between this and a really wide angle exclusive lens. Comparing costs, this one just ended up making sense, especially for our use as wedding photographers where 16mm may not always need to be put to use – but 35mm would function perfectly for portraits.
This has turned out to be one of the staple lenses in our photo bag. It gets use consistently throughout the day, and takes some stellar pictures. Playing with the distortion of the 16mm is really cool, and frankly a unique way to visualize what we are photographing.
We purchased this lens vs. the Canon EF 16-35mm f/4 lens simply because the couple of extra stops of light would be beneficial for our shooting needs (sometimes indoor applications especially). The f/4 lens (from what we understand) is virtually comparable, a little less costly, but doesn’t provide the extra stops of light. If you are just shooting wide angle landscapes, the f/4 may work just fine – but if you also plan to use it as a portrait lens, we suggest the f/2.8 for the reasons we mentioned.
2). Canon EF 24mm f/1.4 USM II Lens
Unlike the previous zoom lens we looked at, the Canon EF 24mm f/1.4 USM II lens is a static wide angle lens. The real draw for this lens is being able to stop down to f/1.4 – which really allows you to let in a good deal of light without having to compensate by lifting the ISO into a really grainy territory.
Prior to getting the 16-35mm lens, this was our go too wide angle lens. We still use it regularly – and the reason for this is because the image quality from this thing is downright beautiful. It’s hard to describe, but the image quality, color, and general feeling of depth is hard to compete with. Yes, we do sometimes use the 16-35mm more these days because of the convenience it offers (and still a very nice image), but this 24mm prime lens has a character all its own.
If you experiment with astrophotography, this is also a great option because of the low f-stop!!
3). Canon EF 35mm f/1.4 USM II Lens
This 35mm prime lens is exceptional for portraits that need more breathing room. While our initial instinct for portrait photography was to use longer focal length lenses (…and we do), we had seen many other photographers using the 35mm and get some stunning shots.
The beauty of the 35mm focal length is that it enables you to capture the subject, as well as their surrounding environment if you so choose, without a large amount of noticeable distortion. This puts it in a unique position as a wide angle lens with little vignetting.
Also unlike much wider lenses like a 8mm or 16mm, stopping down as low as f/1.4 actually results in a really noticeable depth of field and bokeh effect.
It’s all of this combined that make it one of our candidates for “best lens out there” (we made that award up).
4). Canon EF 50mm f/1.2 USM Lens
A 50mm lens is the “standard.” Just about every camera kit that includes a lens will include a 50mm. This is the focal length most comparable to the human eye, and as a result images taken with it tend to look the most “natural” to what we see in real life.
For us, the 50mm has become a good fall back lens when we just need some simple shots, but due to overuse – we’ve come to shoot less with this lens than we once did. Still, it is a great lens option.
5). Canon EF 85mm f/1.2 IS USM II Lens
Another one of our favorites, the 85mm is the go-to portrait lens. The compression of the longer lens paired with the ability to shoot as low as f/1.2 really enables for some beautiful images. The resulting bokeh is always beautiful and can even distract our eyes from time to time. This is an example of a lens whose images speak for themselves.
6). Canon EF 100mm f/2.8 IS USM Macro Lens
After a year of trying to shoot wedding rings and other detail items with our 50mm and 85mm (to varying levels of success), we decided getting a macro lens would be better to capture these small scale items in a big way.
Little did we know, by investing in a quality macro lens, we’d actually be opening a really interesting door into a world of photography we didn’t really expect to care much for. Initial tests just our backyard shooting some dandelions and bees made us realize just how much we had been missing, and now photographing the smaller things in our world has become much more interesting.
This is a highly recommended lens if you are needing to get shots of really small items.
Strangely enough, we’ve also used this as a portrait lens, and it takes these pretty nicely as well – a nice added perk!!
7). Canon EF 70-200mm f/2.8 IS USM II Lens
Lastly, the Canon 70-200mm f/2.8 lens is a staple for us when we need to be able to get in real close on the action without actually being close.
It is also the epitome of lenses to have if you want to look like a professional photographer, because it has a very distinct look, many of us use it, and it’s $2,000 price tag has turned it into a bit of a status symbol in the photography world.
As you might have guessed from getting to know us through this article, shooting wedding ceremonies critically requires a lens like this, as we aim not to be in the way of people if we can avoid it – but still want to be able to get the shots we need (and our couples need!).
This 70-200mm in particular has a number of impressive features, and the image quality it produces when paired with a quality camera body (such as the Canon 5D Mark III we use) is a high standard. It’s built in image stabilization helps to reduce the effects of camera shake, which can happen after prolonged periods of use as this is a HEAVY lens (probably it’s one drawback for some).
Note: As you can see, we use all Canon lenses as they suit our specific needs and we shoot with Canon camera bodies. Most of these lenses have equivalents by other brands such as Nikon, Sony, Olympus, and so on if you search by the brand, focal length, and aperture.
Section #3: Digital Photography Tips for a Smooth Post-Processing Experience
51). Have a Good Computer Setup for Photo Editing
Digital photo editing begins on the computer (or, well, more recently it’s started to expand to tablets and phones, but we’ll save that for another day). Having a computer that can handle the amount of image processing you will be doing is critically important.
Early on in our photography business, we started to realize the computers we had were not going to cut it in the long term, because of the volume of images we would have to cull through and edit. While, no doubt, if you’re just planning to edit a handful of photos for your own personal use – most computers can manage this – the reality is that if you are needing to work through many photos in post-processing, you will need a computer with specs capable of handling this.
Since updating, our primary workstations include our iMac and Macbook Pro. While pretty expensive upfront, we have also not had any issues with either in the time we have used them. This is one of the reason why we have remained Mac users since our college days. The Mac platform is very simple and intuitive, and well regarded in artistic industries such as photography.
52). Cull Your Images Quickly with Photo Mechanic
Once you have your computer squared aware, the next step is to figure out how you are going to cull down the images you have taken.
If you have a low volume of pictures to wade through, you can certainly just do so in your regular computer’s Finder window. We did this for a long time, and prior to becoming professional photographers, this was our go to.
However, if you are like us and have to manage A LOT of photos – culling can be a nightmare that seems to take forever. The solution? Photo Mechanic!
Once we downloaded Photo Mechanic, our business was transformed almost instantly. Culling down thousands of images for a single wedding no longer would take 4 hours, and instead is something we can now do in 30 minutes. It is well worth the price, and even has a free 30 day trial if you want to test it out!
53). Use the Right Software Editing Program(s)

There are many photo editing suites out there, which one should I choose?
It’s a good question. For us, the simple solution is to just stick with Adobe Lightroom and Photoshop. These are really the staple for most photographers, and are what we use ourselves.
Lightroom provides convenience for getting most of our editing out of the way, while Photoshop has more support for more detailed editing jobs (such as removing people from the background of a shot).
There are, of course, other options available – though we’ve never really dabbled with other programs simply because there hasn’t been a need.
The only reason we could think to not go this route is if you wanted to have a free option (maybe you’re a hobbyist who doesn’t need a really intensive photo editing software), and certainly there are a few decent programs out there that we’ve heard about. A few of these include: Gimp, Fotor, and Photoshop Express.
More modern, AI editing solutions are also here like Aftershoot, Evoto and Imagen AI.
54). Get a Loupedeck
After editing many weddings and sessions comprising thousands and thousands of images, we started to feel some strain on our hands when using a mouse to click around on all the sliders as we make our image adjustments. We probably sound like nerds (and we probably are), but mouses are not exactly comfortable or ergonomically designed (at least not out-of-the-box ones that we have) for the endless amount of work hours we put into our editing – and this has translates as far as having pains in our hands (we are in our 20’s and should not feel like we have arthritis!).
As a result of this, we looked at different options available and came across the Loupedeck – an analog editing console compatible with Lightroom (and some other programs).
The design is very intuitive, and has helped us get away from needing to click through a bunch of menus and drag the sliders with the mouse. It’s amazing what freeing up your hands can do to improve the editing process.
Another side effect that comes from this change in approach to editing is it results in some changes to your editing habits. In our case, it resulted in better edits. Probably our favorite thing to do now is to put our images into full screen mode, and edit without all of the other windows taking away our attention.
55). Straighten and Crop Images
Now that we’ve squared away some of the essential products and software that can enable you to get great edits on your photos, we’ll be talking in more detail about some of the things you should do to create better images in post.
One of the first areas we tweak is in the form of straightening crooked images, and cropping in images that have too much going on around the periphery. Both of these are fairly obvious first steps to do.
In the case of image cropping, this is actually a way to take more control of your composition as when you originally took the shot you may not have factored something that detracts from your initial image. We often use cropping to get in closer to our subject(s), and to add more symmetry in our shots.
56). Use Presets to Speed Up Your Editing Process
It’s good to explore a photo editing program like Lightroom with an open mind when just starting out, but as you aim for more stylized and consistent images – having presets will help you better get where you want your images to be quicker.
While there are presets available for a bunch of different programs, we only use presets for Lightroom. So for this section, the remaining of what we have to say specifically addresses Lightroom preset options.
Once you have down a general look you’d like to go for, whether by working this out on your own or by wanting to emulate images you’ve seen from other people, the next step is finding a preset pack that works for you.
If you look around online, you will find plenty of free Lightroom presets, as well as many paid preset options as well. We have dabbled in both of these areas with varying levels of success.
Given that photo editing is a subjective art in and of itself, we’re not going to talk about specific presets we use (or don’t use) – and instead provide you with a list of some great presets we know about. In truth, while we did use presets created by others – we have come to develop our own presets as we grew into our own style. We are actually working to get these perfectly refined so we can put them out there for others to try out who are into our photography editing style. You may find this to be the case for yourself down the road as well.
5 Recommended Lightroom Preset Brands:
57). Copy/Paste Settings from One Image to the Next
If you are editing a collection of images, copy and pasting the settings you have fine tuned from one image to the next can be a real time saver. Whether you start from a preset and make adjustments, or just start from scratch, this is an effective way to make sure all of the images you are editing have a consistent look and feel.
To make things even quicker, make sure you are using your keyboards quick keys to perform this action. To copy, simply use CTRL + C. To paste the settings, use CTRL + P.
58). Don’t Spend Too Much Time Editing a Single Image
One of the easiest ways to get frustrated and lose sight of your overall vision is to get caught up in over editing an image. This happens to the best of us from time-to-time, but it is one of those things that feels like it’s beneficial – but is actually harming the end result of your image.
We suggest making a base edit that takes a few minutes at maximum, then move on. You can always come back to it later for more refinements.
59). Use Profile Corrections When Needed
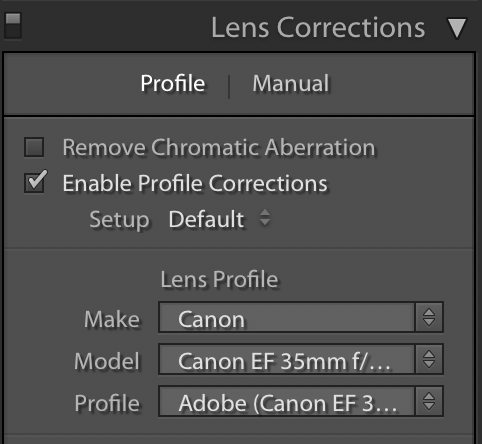
“Profile corrections” is a fancy term for being able to change the appearance of the lens vignetting. These corrections are most heavily noticed on shots taken with a wide angle lens, where the editing program can smooth out the vignette. It is, in the least, worth toggling this option on and off and seeing which you prefer. We use it quite often ourselves, though there are images where we prefer the vignetting as it appears right out of camera.
60). Try Making Landscape Shots Into Portrait Orientation
Have you ever had a picture that you took that you just feel would work better if you could flip the image to make it vertical? This is something we do pretty often ourselves in Lightroom by simply adjusting the aspect ratio. It’s an easy change that can make a big difference.
61). Experiment with Black & White
Most photographers shooting on a digital DSLR camera shoot in color. In truth, it doesn’t make a huge amount of sense to shoot straight to black & white, when color gives the most flexibility – and images can simply be edited nicely into B&W anyways.
For ourselves, black & white images do a lot to compliment the galleries we send our clients. There is something distinctly cinematic about them, and the absence of color adds a romantic moodiness that just suits the types of photos we take.
It’s also a pretty small secret, but black & white edits can also be an easy way to make a difficult to edit photo usable. We encounter this from time to time as we work through collections of images, where we may really like what is happening in a photo – but find some difficulty in getting all the colors to balance out within our editing style.
62). Identify Your Color Scheme
Presets can help give a starting point to the overall color scheme you are wanting to edit in. When it comes to more detailed editing and color grading, the use of Split Toning, which allows you to alter the color of the highlights and shadows in an image separately from the normal hue, luminance, and saturation sliders for the colors. This is one of those tools that can be abused, or used to a really stunning effect.
How to define your color palette can be as simple or complex as you’d like.
On a simple level, we can define the look of our edits broadly as being: relatively warm, natural, high contrast, with some desaturated greens. We are always refining how we define our editing style as we encounter new scenarios.
How you decide to define your color scheme is entirely up to you!
63). Increase the Luminance in the Oranges for Better Skin Tones
An easy tip we apply to the vast majority of our portrait photos is to bump the luminance slider to get better skin tones. Often the trouble we have with getting good and natural looking skin when editing is getting it to stand out from other elements in a scene. As most skin is comprised of orange tones (even if it might not look that way “in real life”), bringing up the luminance helps to give more light to the skin.
64). Use the Spot Removal Brush to Fix Small Flaws
Probably one of the handiest and simple tools to use is the Spot Removal Brush. As the name suggests, this is meant to eliminate small blemishes that may hinder a photo.
The most obvious application is for removing acne and scars that might make a person self-conscious, but it can also be applied to areas of the landscape that are a little off. An example of this we sometimes encounter is in a beautifully scenic outdoor location where most of the image is filled with nature, but a small orange traffic cone just happens to be sitting around. With this tool, we can quickly remove the cone and replace with grass – and no one would be any wiser!
65). Use the Hue Sliders to Change Colors Dramatically
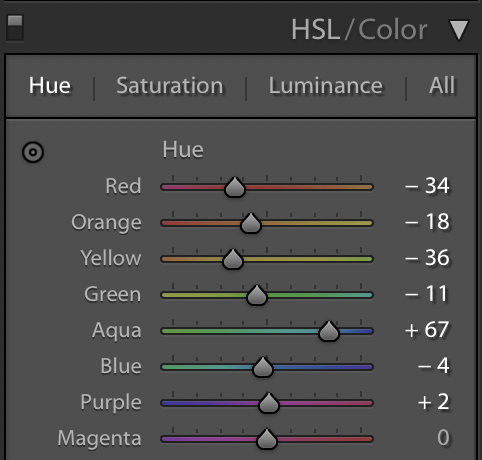
The standard color hues that are editable are the following:
-
Red
-
Orange
-
Yellow
-
Green
-
Aqua
-
Blue
-
Purple
-
Magenta
Within these color categories lies many colors that would fit into its family. The farthest ends of each colors respective spectrum gets closer to the next (or last) color on the list. This suggests there are many possibilities for manipulating colors in an image to your liking just by simply adjusting the hues.
For ourselves, since we normally aim to have our images retain a natural look of what was originally captured, we don’t move these sliders too heavily. On occasion, such as with styled shoots (where we wouldn’t be caring so much about our client’s color choices, as an example), we may take these a little more extreme to suit our specific interests. Entirely changing the color of a shirt someone is wearing is possible using the hue sliders (sometimes paired with split toning depending on the image).
66). Increase or Decrease Contrast to Make More Compelling Images
We talked earlier in this article that when shooting, finding areas of contrast can make for powerful images. The intensity of the contrast that was captured in camera can be boosted even further in post processing.
Even images that were fairly soft (such as those shot during Golden Hour) can be made to have more contrast. We like this look in a lot of images ourselves.
Of course, you do not always need (or want) to pull the contrast slider in the direction of making things more contrasted. Sometimes softening an image by reducing the contrast can benefit the image too. Experiment and find what you like!
67). Experiment with the Auto White Balance Dropper Tool
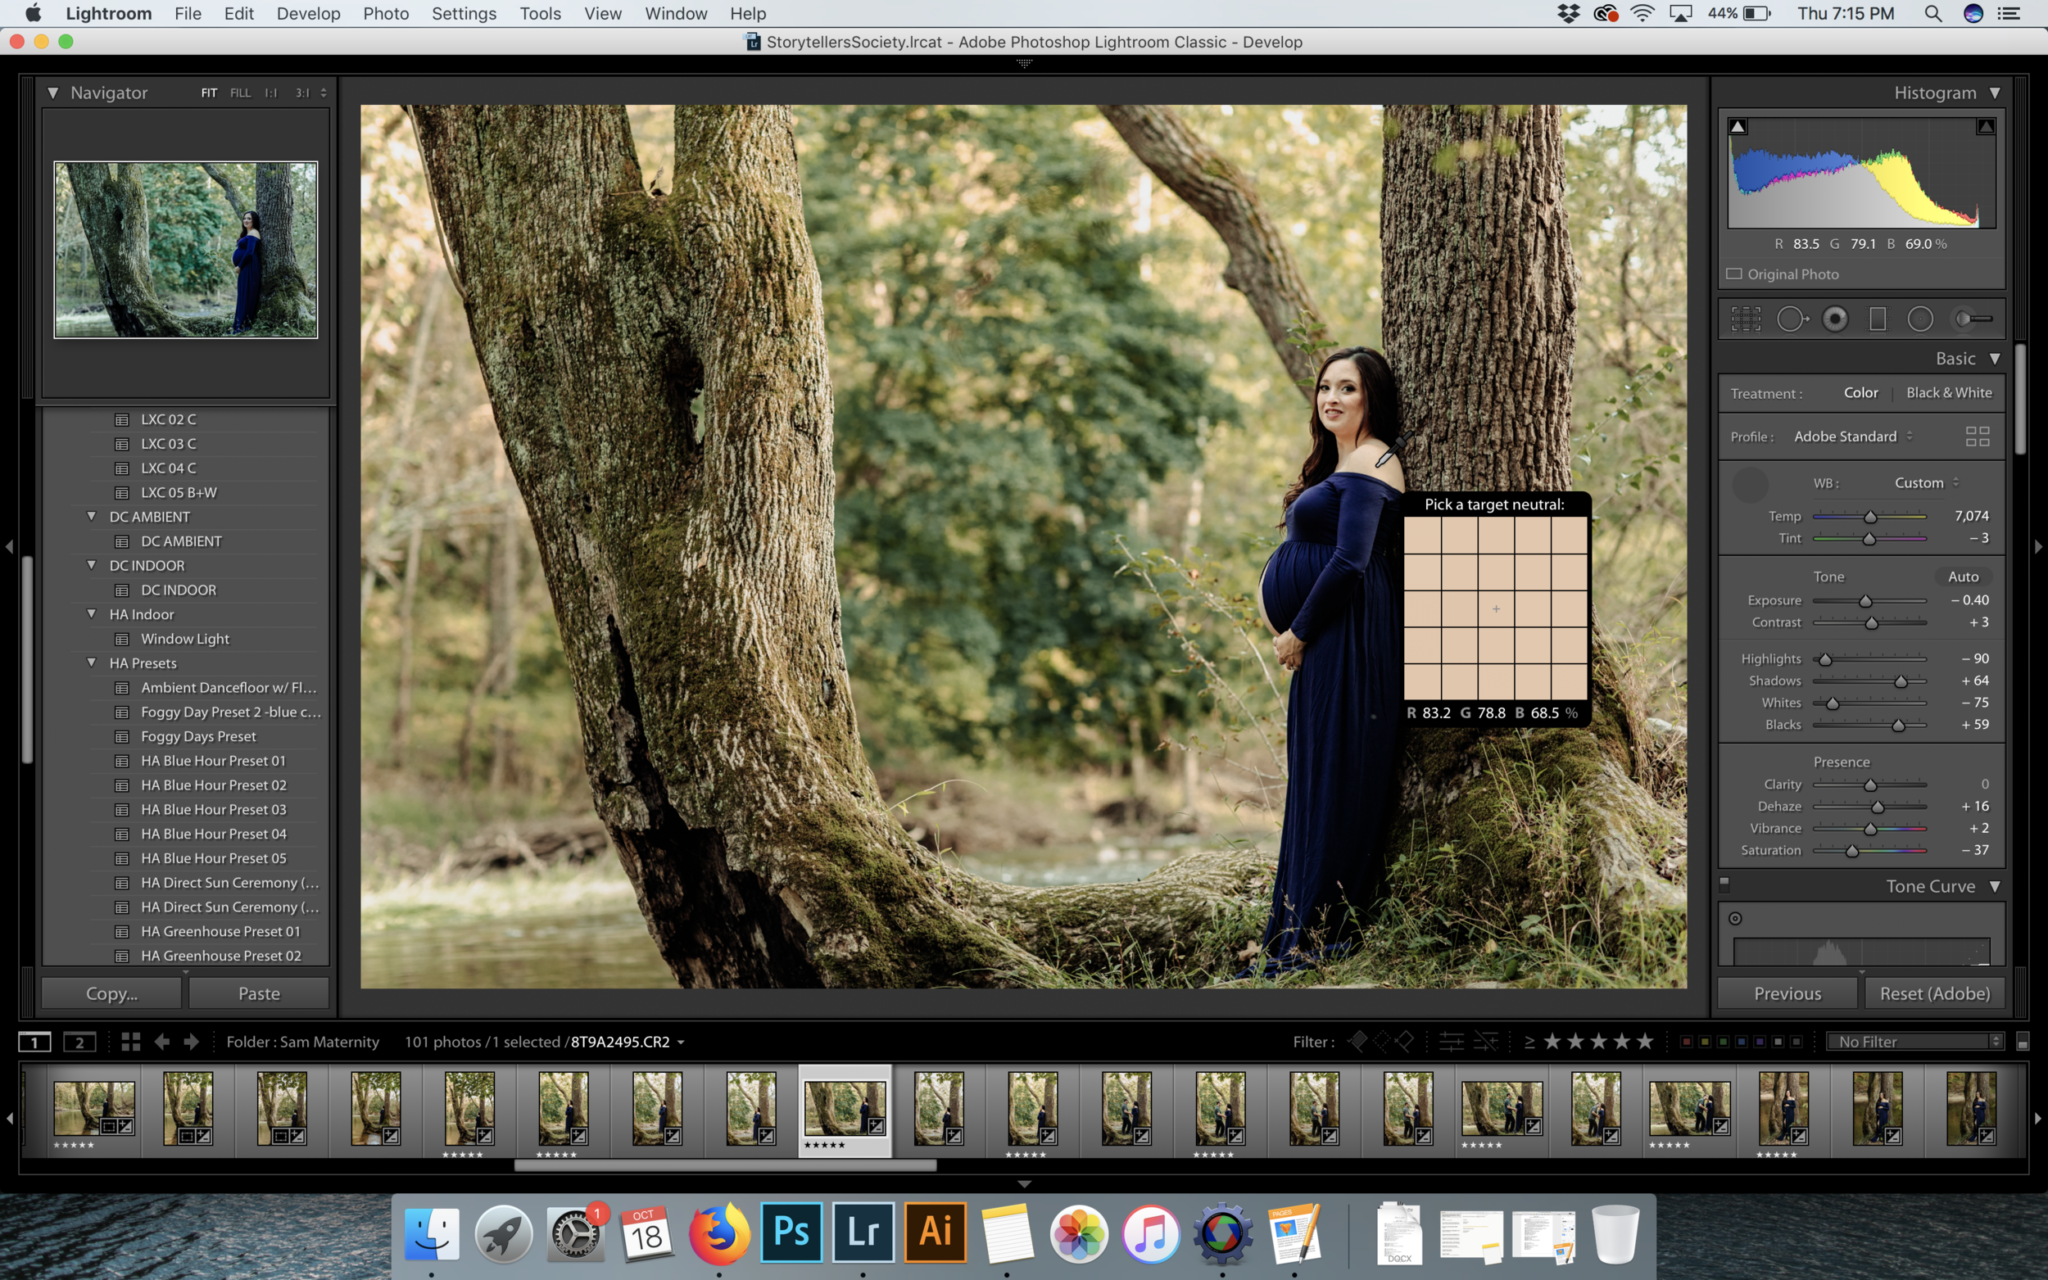
The auto white balance dropper is a really useful tool that can be used to make adjustments to the white balance of your image based on your chosen “target neutral” point in the image. This “target neutral” point is simply a color that is present with equal amounts of Red (R), Green (G), and Blue (B) tones.
For many photo editors, such as ourselves, this can be a useful starting point to have a well balanced image temperature if we weren’t able to get this perfect in camera. Once this is balanced, we do often increase the white balance temperature to suit our editing style, so it’s not like you need to just stick with a “perfect” white balance if you don’t want too.
68). Saturate or Desaturate to Taste
Like pretty much every editing adjustment that can be…adjusted…the saturation sliders can make a powerful addition to your image OR severely distract when used too much.
Your approach to saturation will no doubt be influenced by your stylistic choices in general. For ourselves, it is common we will desaturate greens, and boost the saturation on reds to make them more vivid.
The use of saturation might also change depending on the type of photography. For example, real estate photographers often provide highly saturated and borderline HDR images because these can be appealing for home listings online to make them pop.
69). Apply Local Adjustments
If you don’t know what local adjustments are, these are changes to a part of a picture instead of the entire image. Often our approach to editing requires changes that impact everything going on, but the reality is that sometimes we only want to make changes to one area.
A great example of this that we use frequently is again in the area of portrait photography. Depending on the lighting, we may find ourselves shooting people with their face in the shade. As a result, in the editing process they can feel a little flat or get sucked into the background. By applying a local adjustments, we can boost the shadow slider to remove some of this look – and it helps quite a lot!
70). Explore Radial and Gradient Filters
In many editing situations, use the the radial or gradient filters would often come at the end of your editing workflow. This is a tool that is really designed to help further enhance a photo you have already refined to a good extent.
The radial filter can be used to add a subtle (or not so subtle) vignetting effect to different areas of the image (as opposed to just the corners). The gradient filter, on the other hand, is a digital way of recreating the effect you would have from using a graduated filter on your camera lens. This type of filter normally focuses on a single color, and can be used to add a vivid touch of color that fades into transparency depending on how you set it up across your image.
71). Apply Grain for a Film Look
Adding grain to your image is a simple way to give it the appearance of having been shot on film. Some editing styles revolve heavily around this look. Outside of photography in the world of modern cinematography, often films and shows like Stranger Things that seek to emulate an 80’s look on screen will add a layer of grain even though they are shot on digital cameras.
In our editing approach, we very rarely use grain on our regular photos. On black & white images, we do often add a small amount, just to further enhance the mood of the image.
72). Use Auto-Blend Layers in Photoshop to Combine Multiple Images into One
The most impressive editing feature in Adobe Photoshop is the ability to automatically blend multiple layers (ie: images) together. You can read more about this feature here as it can be a little complex the first few times.
One scenario where this might be useful is where you have taken several photos on a tripod of the same location. By layering all the photos together and using the auto-blend function, the software will remove the inconsistent parts of the images you have inputted and will result in a final image that is cleaned up from unwanted items in a scene.
73). Aim for Consistency Across Your Images for a Better Portfolio
Ultimately, through all of the editing you will do in the course of your time as a digital photographer, you should always strive for consistency above all things. This can be a real challenge when dealing with less-than-ideal lighting situations or environments, but these are exactly the types of situations that really help you to define your style more thoroughly.
Regardless of the end result of the edits on all of your photos, the images you personally showcase in your portfolio absolutely should be consistent. Your portfolio should serve as a handpicked collection of images that reveal your best work.
This consistency should also be seen throughout your photography brand – particularly if you are doing photography professionally and as a service. By aligning your portfolio with your brand (and your brand with your portfolio), you are setting you business up on a strong footing!
74). Step Away From the Computer for a Little Bit
With all the photo editing we do, stepping away from our computer screens is one of the more important editing tips we can provide. At it’s most extreme, Computer Eye Syndrome is a medical conditions comparable to carpel tunnel that stems from your eyes following the same track over and over again. A large number of people who work in front of a computer experience at least some symptoms of this including blurred vision, double vision, eye irritation, headaches, etc.
In addition, many photographers struggle with mental fatigue and things like imposter syndrome, which can be helped by taking a break from the computer (and particularly social media or photo editing when you are being particularly critical of your work and edits).
Outside of this, stepping away can let you refresh your mind and look at the images you’ve already been editing again with fresh eyes. This is invaluable to the editing process.
75). Hire a Photo Editor
If worst comes to worst and you just don’t feel like editing a whole bunch of photos yourself, there are many people out there who do photo editing as a full time job. Of course, finding someone who is reputable is a different story.
Depending on the extent of your editing needs, you can check out some of the photo editing business resources we’ve assembled below to find someone who might fit your needs. We’ve listed these in order of expected costs from cheapest to most expensive:
Section #4: Digital Photography Tips for Having Your Images Seen by the World!
76). Create Quality Photographs
If you’ve been waiting for the most obvious tip on this list, you have found it!!
In a sea of photography, only the best images tend to be recognized. Photo quality isn’t the only thing that influences popularity, but generally speaking, people are attracted to good photography.
How people define a quality photograph depends on your niche and the audience you are speaking too. Some of this insight can come from researching other photographers with a similar style to you, and looking at what is working from them.
77). Store and Send Out Images in an Online Gallery
Online galleries are the best way to send out collections of your images.
These can be kept for your own personal safekeeping, sent to clients, and sent to other people in the photography industry (such as publishers) with just a simple link to access everything.
There are a number of options out there for this type of service. Our recommendation is Pixieset, as this is what we use ourselves for sending out galleries and cloud photo storage.
78). Setup a Blog and Post!
Getting your work seen in the modern world requires that you have an online presence.
We can’t image any current photographers gaining notoriety without a website.
How simple or complex you decide to keep your site is totally up to you. Many photographers are drawn to neat and clean portfolio sites as can be assembled quite easily with Squarespace, Wix, or Divi (a WordPress theme).
We use Showit for our business website with much success and appreciation for it’s simplicity, and have used WordPress pretty heavily for other website ventures in the past. Both provide a lot of great options for starting websites, while WP does offer a lot more advanced customization options for those seeking more nuanced websites.
 If you are interested in going the route of WordPress, consider using Bluehost as your web hosting service (a well regarded and stable service).
Ultimately, whichever route you decide to go, it is crucial you set up a blog to interact with your audience. Blog rolls can be used to showcase more of your portfolio of images, and can be further expanded on to talk about personal things going on in your life, discussions about photography, and so on. The sky is really the limit as to what is open for discussion here.
If the goal is to grow your website traffic, the side effect of blogging for photographers is that it creates opportunities for search engines to pick up your website and increase your exposure. You can take advantage of this possibility by learning about search engine optimization (SEO) and applying some of these elements (such as alt text and keyword research) to your blog content.
79). Join Photography Forums and Post
One of the best ways to build a following in photography is to put yourself out there and engage in conversations about it. You shouldn’t self-promote the whole time, but have a good time getting to know others out there and allowing your photography to come up naturally in conversation from time to time where it makes sense.
There are many photography forums out there, so which ones to choose? While we by no means have an exhaustive list, a few we frequent and enjoy include the following:
-
Reddit – There are many “sub-Reddits” (basically: sub-forums) on here that are great for photographers ranging from general photography talks at r/Photography and r/AskPhotography, to more niche discussions happening such as those on r/WeddingPhotography and r/EarthPorn. These are 4 great starting points. Try using the search function if you’re interested in another style of photography and see what comes up!
80). Find Websites That May Want to Display Your Work
While some lucky photographers manage to find overnight fame as a result of one great shot that someone finds and shares, most of us need to do a lot of legwork to get recognized.
A great starting point is to simply reach out to websites and see if your images can be used in some fashion. Smaller websites may be more keen to share your work in some capacity, while larger photography-centric platforms (like National Geographic) are going to be much more selective about work they display.
81). Setup Social Media Accounts for Your Photography
Going along with engaging in conversations via your website blog and on forums, social media is an essential platform for getting your photos seen and talked about.
For ourselves, social media sites are double-edged swords as we can sometimes feel a bit too addicted to them (we have cut back on usage as a result of this), but they also fuel our photography business and recognition in a lot of ways as well. In fact, the majority of our client bookings come from people finding us on Instagram. It’s a crazy world we live in.
Once your social media sites are setup, make sure you post regularly to keep your audience interested and engaged. We help this process along by scheduling posts using Later – a service that can be used for free to schedule posts on Facebook, Instagram, Twitter, and Pinterest. Paid plans are also available if you need to schedule a larger number of posts.
82). Enter Photography Contests
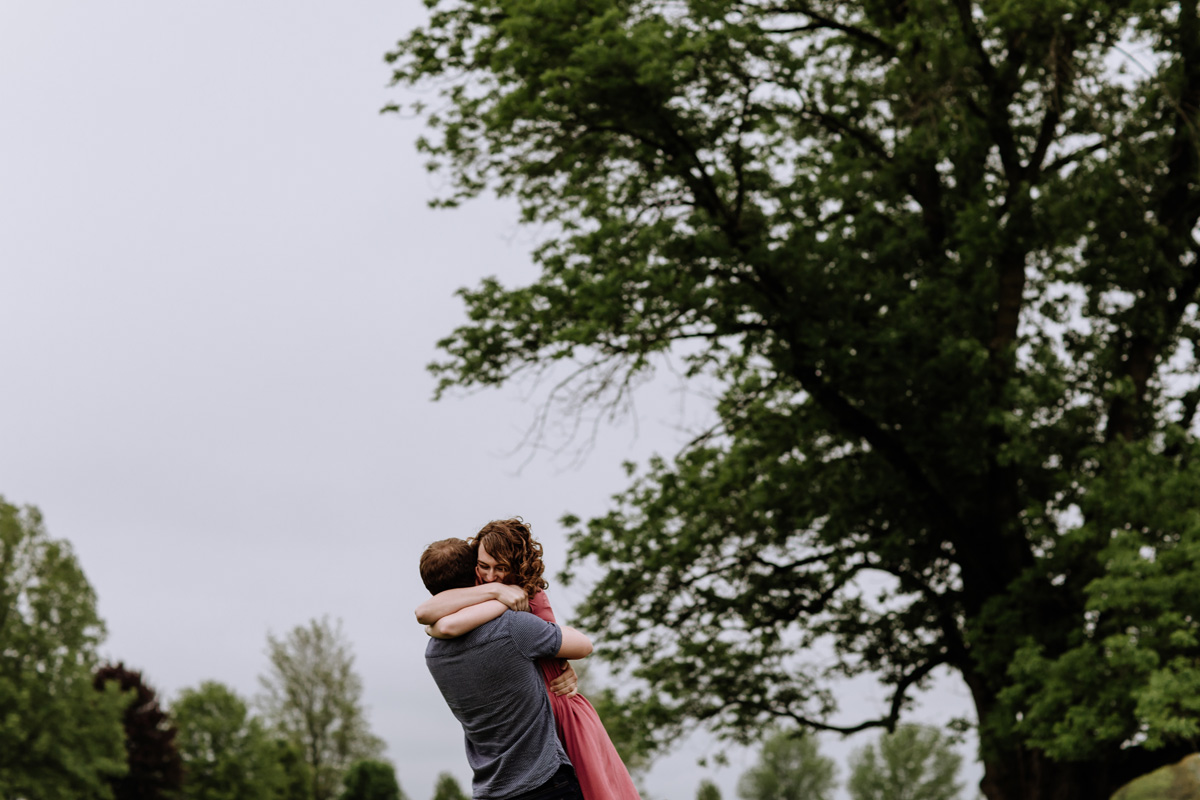
With so many photographers among us, a little friendly competition can be a great way to fuel ourselves and get inspired to take better and better photographs. While we certainly don’t believe in shooting for the sole purpose of submitting to contests, it can be a fun use for the pictures we take.
Throughout the year, there are many great photo contests that are put on. You might even see some just within your local area. Our preferred contests are online, though, and have a lot of potential to reach a widespread audience.
83). Get Your Photographs Published
Having your photos published by online blogs, magazines, and so on can be a real honor, and on the right platform – be a significant catapult to success.
Our work has previously been published on some popular local blogs such as Philly in Love. We have some additional work slated to be hitting store shelves and mailboxes early next year (we had to submit this far in advanced!) in a popular magazine as well (we’ll update this post with more details once it’s released!).
84). Join Photo Sharing Networks
You can think of photo sharing networks as social media platforms specifically for photographers. While Facebook and Instagram have their fair share of photos, they are not strictly designed for photographers to interact.
Photo sharing networks like Flickr and 500px provide a unique opportunity to put your work in front of others in the same boat as you. It can be a great source of exposure – given the work will be seen by people who have more potential to appreciate it. Additionally, these networks can also be a great outlet for growing community, and even inspire you to work together with other artists on them as well.
85). Get Involved With Local Photography Groups
Tired of all the online options for getting your work seen? We hear you 🙂
There are likely photography groups in your local area. This can be an extremely good place to start as engaging your community is one way to grow recognition. While there are many great photographers around the world, where you live may just have a handful of really notable artists.
But…how do I find these groups? A simple starting point would be to search “[Your City] Photography Group.” You can look for similar groups on Facebook, some which might have in person meetings (we have this in our city!). Alternatively, you could also check the local newspaper for postings about meet ups, as well as your community center as it’s a possibility this space might be used for meet ups.
86). Engage With Art Galleries
There are many art galleries around still in full sway that showcase the work of photographers. For most, this will likely lean in the direction of fine art photography, so if you’re work happens to fall specifically into this category – this is a great way to get exposure.
Of course, art galleries themselves can range from very small operations in town, to world renowned galleries looking only for the best-of-the-best such as what might be found at the Met in New York.
87). Create Something Unique
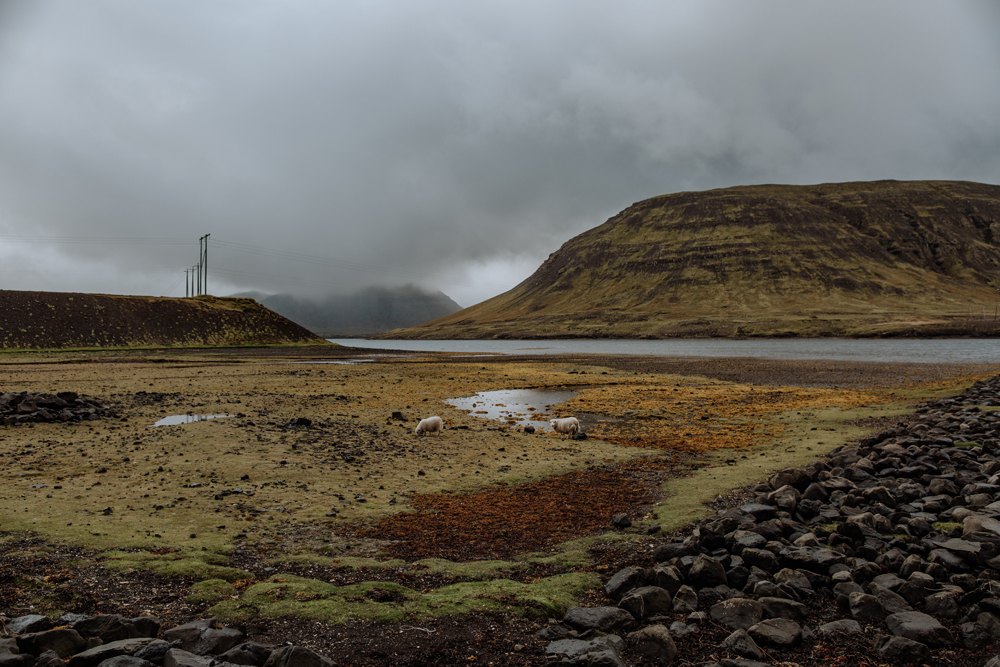
We began this section talking about the need to take great photographs, and while this still holds true, what might be even more important is being able to create something unique.
Unlike the days of old where being able to take photographs was more of a luxury, these days just about everyone is a “photographer” in some sense. In the least, taking pictures has never been easier – most of us do it every day just with our phones. Anyone looking to get into photography as a hobby have easy and affordable access to starter DSLR options, and those who really want the high quality images that are taken by professionals only need to spend some time educating themselves and spending some money to get better equipment.
In all of this, finding a way to be different is a challenge, but when a person manages too – it can often lead to a lot of notoriety. Often, these unique qualities are defined more by what is being photographed.
88). Piggyback on Already Known Brands
Popularity tends to be an event that can be shared.
Think of it this way: you have a circle of 5 friends. One of them becomes uber famous overnight, and starts getting a large number of requests for interviews, online articles are written about them, and their face is starting to be plastered on magazines. Someone with this type of popularity has the opportunity to bring others with them some times. Even a simple shout out in one of those interview columns has the potential to inspire reader’s to check out this other person.
In our view, this other person could be you.
Now, most of us don’t have this sort of fortune to be directly connected with someone in the spotlight, but that’s okay! In our little analogy, replace the popular person in your life with a respected brand or another photographer already out there, and there is a lot of potential for a synergy to be created.
As with a lot of things in this list, it may require some legwork from you to reach out and see what opportunities might exist, but when just starting out with this approach consider this: even a small shout in (like in a Twitter post) from a big brand with an active social media fan base has the potential to drive a lot of new leads your way.
89). Be Social and Engage Others About Your Photography
We’ve mentioned the importance of being social throughout this post, but now want to dedicate a tip to drive this point home. For photographers, the social aspect of your work is likely more important than your work itself. What form this takes is up to you, and we certainly understand some artists tend to be more introverted (we are in a lot of ways ourselves!) – so sometimes the appeal of social media is that you don’t have to put in a whole lot of face-to-face time.
Whatever your approach, this social aspect is critical to participate in.
90). Travel the World and Open Up About Your Photography, Too!
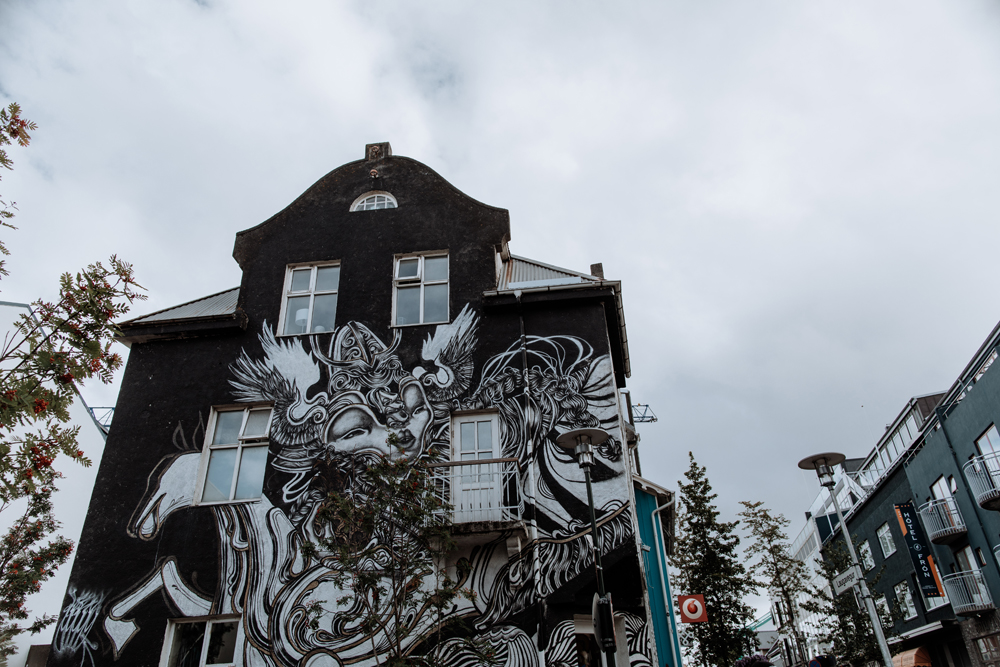
As an extension of socializing and networking, we often limit ourselves to just our home areas (or the internet). As nothing can compare to real life interactions, another great way to expand your audience is to talk with people in different parts of the world, too.
For ourselves, Instagram (as an example) has provided us cool opportunities to meet people while on the road and traveling. It’s how we connected with a model while out in Oregon, and got some really beautiful photos as a result.
In even more simple ways, just while you travel and converse with other people while on vacation, if it makes sense conversationally – you can always drop a line about being into photography and seeing where the conversation takes you. You never know who you will meet!
91). Print Your Images and Share With Friends & Family
While our go-to approach for getting exposure to our photography is online through our website portfolio and social media, sharing tangible prints with friends and family is another great way to bring exposure to your work. By extension, you don’t need to feel limited to just your immediate circle of people – thinking outside of the box and sharing prints with small stores in town can also bring even a small amount of recognition to your work.
As far as printers go, there are many great options that we use including CanvasPop. Through them, we printed some huge custom size canvas prints for a commercial job we did – and the quality was excellent!
92). Sell Your Photos Online
If you are looking to make money by selling photos online, there are many platforms to do this. It should be noted that this isn’t always an easy thing to do, given so many people are trying to sell their work as well. But if you create something interesting with market appeal, you could do very well for yourself.
Selling your images on your own website is an excellent option if you have an already established presence. If you need more help getting out there, some of the best platforms for selling your photos online are SmugMug, Shutterstock, and Adobe Stock (formerly known as Fotolia).
93). Offer Free Images to Up-and-Coming Bands Needing Artwork
We aren’t for offering a whole lot of free work as often working for exposure doesn’t net a whole lot of benefit. With this said, if you happen to stumble upon a band looking for album artwork for free, this may be something to consider as it can make for an interesting portfolio piece and you can leverage the band’s audience to bring more actual exposure to your photography.
This recommendation is most likely going to appeal most to those of you who specifically are interested in photography of musicians and for musicians.
94). Publish Guest Posts on Other Blogs
Guest posts are one of the best ways to create backlinks to your website, while also showcasing your value to the audience of other more established brands. You can read all about the importance of guest blogging here and it’s role in a larger SEO plan.
Some of your favorite photography websites are comprised quite heavily of guest posts – such as what is found on Digital Photography School and SLR Lounge these days.
95). Offer Free to Discounted Services to People With Large Social Media Followings
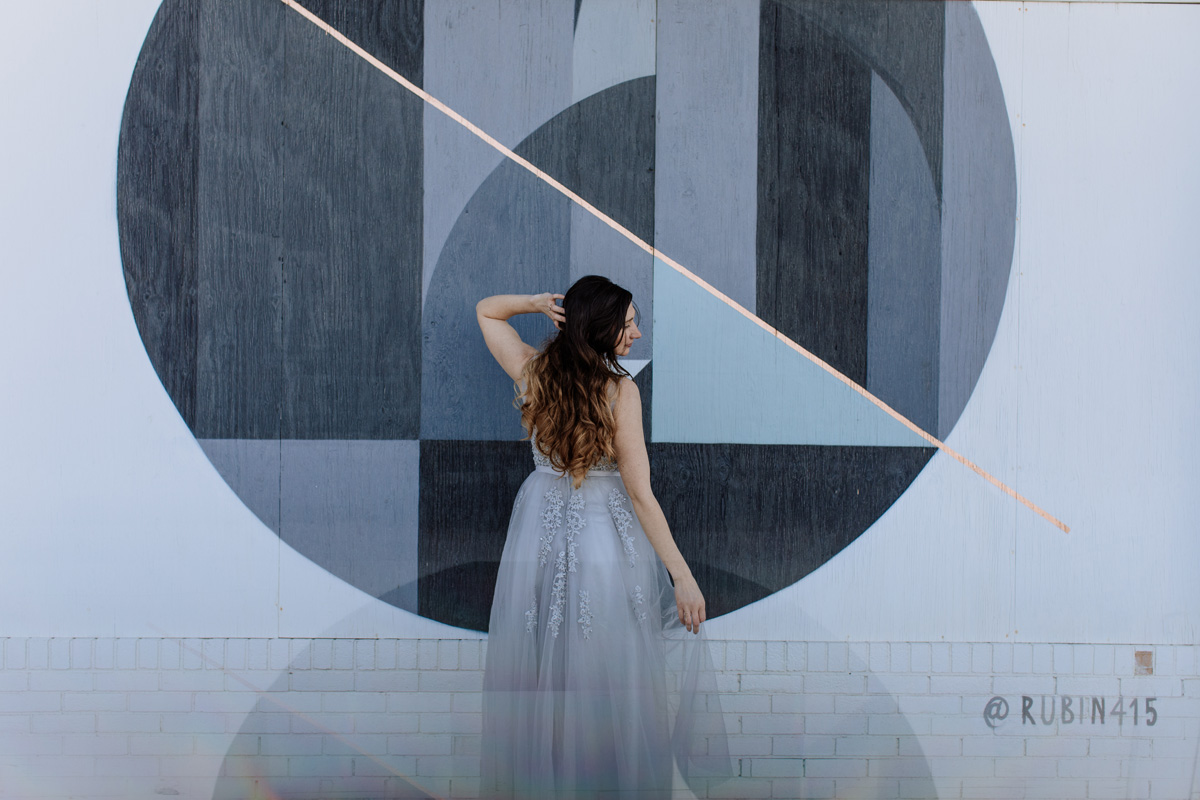
This will likely be one of the more controversial tips we provide as work for exposure doesn’t always equal increase followers, sales, etc. We completely understand this mindset, and generally speaking do not work for free ourselves.
However, we give this suggestion in particular if you are a new photographer looking for just that: exposure. In our modern world, people with large social media followings have a lot of ability to push your brand. This is why even huge companies use some advertising dollars to pay social media influencers.
It is fundamentally a form of advertising. As with any advertisement option available, whether it being taking out an ad on Facebook, running a TV commercial, or buying billboard space (or something in between), the reality is there is always some amount of gambling involved to find what works right for your service or product.
In theory, photographing a social media influencer, who will then share and credit their images to large followings could lend itself to be a valuable form of marketing for your business. Of course, do your research and make sure the person being given this type of service will follow through in promoting you, and that their audience is the type of audience you actually want to reach.
96). Remember: Everyone You Meet Has the Potential to be an Advocate
This tip provides a simple reality: everyone you talk to about your photography has the potential to advocate for you to others. These are the “real world influencers” that are so important.
For those with already established businesses and a wealth of clients, your current clients can often become advocates for your business if they really love the work you have done for them. This leads directly to word of mouth referrals – the most valuable type. In our experience, these types of referrals are more likely to be willing to pay more for your service, because their friends & family have already made a case for you.
97). Realize that Photography Recognition Often Comes Connected With a Memorable Personality
One thing we often reiterate in our blog posts is the importance of your brand. By definition, a brand helps to elevate you into a realm that borders on being a fantasy.
As photographers, we really do sell a fantasy to people – as our approach to photography comes with a certain amount of drama in our posing and how we edit our images afterwards. This is vastly different than just anyone picking up a phone and snapping a few pictures.
Having a memorable brand, and a memorable personality by extension, is what really ends up selling people on your product or service.
A great example of this comes from the world of “high end art.” You probably have heard of Banksy – the anonymous artist who has work that sells for millions of dollars at auction. Looking through his catalogue of works, he doesn’t create the best pieces in the world (though this is subjective of course), but he does things that make even simple things memorable. He’s so notorious because of how he approaches his art – often graffiti works that just seem to show up without people noticing. Recently, after his piece “The Girl With The Balloon” sold at auction for $1.4 million dollars, before it could be claimed by the buyer it self-destructed in front of a stunned audience. This is an aspect of his brand – unpredictability – and it’s one of the reasons his artwork is valued so heavily.
98). Take Photos for Blogs, Businesses, Newspapers, Etc.
Think now for a moment about places where photos are featured consistently, and who runs these media sources. While some of these sources may just use stock images for their photo content, others may prefer more customized pictures.
The way we see it, there are two notable options available to you when it comes to approaching a blog, business, or newspaper.
-
Offer images you currently have for use. You can decide to offer this content for free in exchange for a backlink or other form of recognition OR you can charge a use fee. This is, no doubt, a simple but effective approach.
-
Offer a commissioned service. Sometimes businesses don’t even know they need something until they’ve heard a sales pitch. This is why cold calling sales can be a significant avenue for companies to increase their revenue figures. Of course, if you are reaching out to various platforms propositioning that they by commissioned photography, you will likely get a lot of “not interested” answers – but when things go well, you have just created a real opportunity for yourself.
99). Print High Quality Business Cards to Promote Your Brand
Having a quality business card can be a great way to help you standout in a sea of photographers. We consistently hand out our business cards to other wedding vendors when we work together, but there is no limit to who you can hand these out too.
As we’ve discussed throughout this section, you never do know when talks about your photography will come up, so it is best to be prepared.
For high quality business cards at a reasonable cost, we highly recommend Moo – the printing service we have used for years to create great quality business cards. If you use our link, you can get 25% off your first order, too!
100). Engage Your Clients
As we wind this huge post down…the last tip we want to leave you with is the importance of engaging with the clients you already have. In this industry, customer service takes many forms, and you need to be ready to cater to the specific needs and interests of the people you are working for.
Because we work so heavily with couples, we often take the approach of forming a common bond and even friendships at time in advance of the wedding. A simple way we do this that requires just a little bit of legwork is having engagement sessions that come with our wedding packages. This is an excellent way to get to know each other and see how we work together (sometimes allowing us to sort out what works and what doesn’t).
Of course, not every interaction you have is going to be while people are in front of your camera. Consistency in responding to emails, having phone or in person meetings when needed, and so on are all critically important. Doing other things to go above and beyond, such as sending out questionnaires for more information, putting together timelines (where necessary), being able to recommend other vendors and shoot locations, and being able to make the booking process as streamlined as possible are all critical things we do that make a difference.
Bonus Tip: How to Retain Your Photos for Years to Come
Whether you are taking photos for yourself or for your clients, it is always a good idea to make sure you have backups so they never get lost. Especially for the pros among us, you will likely want backups of your backups. It sounds like overkill, but it can save you if something ever happened.
The easiest way to do this is to distribute your files across multiple storage mediums.
We typically have a backup copy of images saved to our computer desktop, another copy saved to an external HD (we recommend the Western Digital MyPassport), and lastly have a final copy saved to the cloud.
For personal storage, a platform like Dropbox (which is free for up to 2GB of storage) or Amazon Drive (which is free for up to 5GB of storage with an Amazon Prime plan – you can try this free for 30 days with this link) is really great.
For professional storage, a client gallery service like Pixieset is highly recommended.
Conclusion
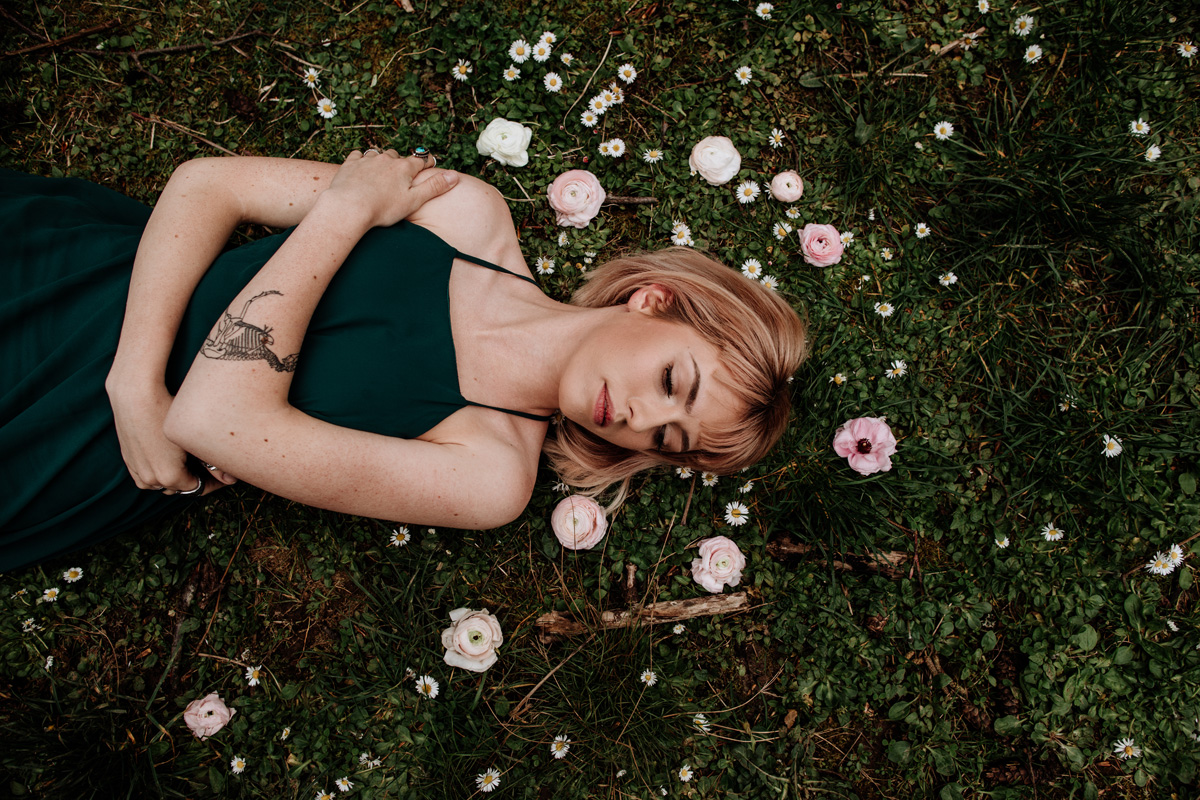
If you have reached the end of this article, we’d like to first say thanks!
Maybe even some congratulations are in order as this was one long post and took us upwards of a month to put together.
We hope it has proved useful in providing a lot of digital photography tips compiled into one simple location.
In our minds, there are so many facets that go into photography that we felt the critical need to explore tips that cover many aspects ranging from the initial thoughts we have before we even pick up the camera, actual photo shooting tips, tips for post processing our digital images, and finally – tips for getting those images we take seen by others.
With all these points covered in pretty significant detail, we hope you feel empowered to get what you want out of your photography.
If you happen to have any questions or thoughts you’d like to share (maybe even some of your own tips that didn’t make this list??), leave a comment below!!