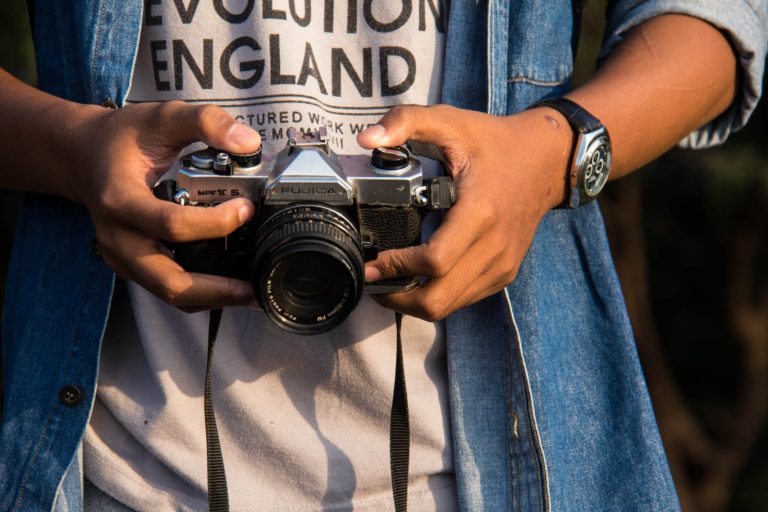
How to Take Tack Sharp Portraits – 21 Ways to Easily Fix This Problem!
Beginners and professionals alike will end up asking “why are my photos not sharp?” at least a few times in their lives. Even with all the technical knowledge and experience in the world, there are so many things that can contribute to an image not being tack sharp that it’s important to look at the symptoms and diagnose the problem (yes – like you’re a camera doctor!).
There are a few common reasons why your photos aren’t coming out sharp (or as sharp as you’d like).
First, focus issues are common – either the result of faulty mechanics in the camera or lens, or you’re just focusing on the wrong things. This will normally just result in part of an image being sharp, while other parts are not.
Alternatively, if an entire image is coming out blurry and nothing is sharp, this is either a really serious camera malfunction, you’re just seriously missing focus (and basically focusing on nothing), or your settings aren’t correct for what you’re trying to capture.
With these things in mind, let’s look at 21 problems that are causing soft, blurry, and out-of-focus images. These are all easily fixable – so just follow our tips, identify which problem you are encountering, and do the quick fixes we mention!
Now – the camera doctors are in the house and ready to help 🙂

21 Problems Causing You to Take Soft, Blurry, and Out-of-Focus Photos (and How to Fix Them!)
1). You are shaking your camera (even a small amount can ruin a photo!)
Most people will notice when they are violently shaking their camera – that’s for sure.
We think this is a fairly obvious problem.
But, it becomes a bigger issue when camera shake happens in really small amounts – it’s less noticeable and yet it is still having an impact on getting the crisp photos you want.
Even with decades of photography experience (as we have), we still sometimes have to catch ourselves and adjust how we are shooting. Often, the camera shake we experience is the result of anxiety or just rushing to get a picture.
The quick fix: Next time you are taking photos, pay some attention to your process.
- Are you rapidly firing off images?
- Are you feeling really excited, anxious, or similar?
By paying attention to yourself, you can also tell yourself to slow down and breath before taking a shot.
While it might not resonate with everyone, taking a photo is a lot like firing a gun. If you are not in control, the bullets will end up flying everywhere. If you take a deep breath, focus, and pull the trigger well – that’s when you will get the good shots you want and hit the target every time.
2). You’re using an aperture that is not sharp enough
Did you know that the aperture you are using will impact the sharpness of your photos?
With wide apertures (like f/1.2 or f/2.8), the camera will have a tougher time getting the right focus.
Aside from this, any lens is generally going to be more crisp 2 or 3 stops down from the max aperture setting.
For example, if you are using a lens with a maximum aperture of f/4, the sweet spot for crisp images will be between f/8 and f/11. For a wide aperture lens like that of f/1.2, this spot will fall more in the range of f/2.8 and f/4.
The quick fix: Try using a higher f-stop in your photography. This isn’t to say that you can’t get crisp photos even at wide apertures, but it is more difficult.
3). You have a poor quality lens
Being honest, some camera lenses just aren’t all that great.
On one hand, price will play a big factor here – a $100 kit lens is just not going to compare in image quality to a $2,000 pro lens. More than this, though, some lenses just aren’t designed with total clarity and tack sharpness in mind. It’s also entirely possible something is wrong with your lens, causing it to malfunction and not perform as expected.
The quick fix:
This is a two-parter —
- Inspect your lens. Does something seem off? Or are you hearing any rattling sounds? These can be signs of a mechanical issue. If you’re unsure and need a second opinion, you can always take your lens to a local camera shop or, in some cases, send back to the manufacturer to evaluate.
- Get a new and better lens. If you’re under the impression you’re dealing with a bad lens, buy a new one. It might just be a replacement of your current lens, or an upgrade to something better. Note: this isn’t something that’s always necessary but can be a good (and maybe even only) solution if you’re unable to get better image quality when applying fixes for different issues we address in this article.
If you are wanting to explore new lens options, you can check out our Recommended Gear page to see the one’s we recommend!
4). You can use a tripod to take out human error
Tripods are used to stabilize the camera. This will remove any unwanted camera shake or movement that could be impacting the clarity of your photos. For some shots, like a long exposure of a waterfall that requires a low shutter speed, a tripod is essential.
The quick fix: Try using a tripod! This might not be feasible for all styles of photography, but if you’re taking pictures of a landscape, more formal portraits, etc. – it’s absolutely a tool you should be using.
You will most likely already have a tripod at home. They are often packaged with photography kits of all types.
If you don’t and need to get one, a cheap one like this will do. Even in our professional work, a $20 tripod has been all we’ve really needed. More expensive tripods are only useful if you are shooting in harsher environments with a lot of wind that might require extra stability. For extra value, get a remote shutter release – a really cheap purchase to completely remove yourself from even needing to press the shutter button on your camera.

5). You’re setting your shutter speed too low
The shutter speed settings play a huge role in the clarity of your photos. When used correctly, the shutter speed is able to freeze motion in a scene and allow you to photograph moving subjects with crisp sharpness.
The quick fix: Try setting your shutter speed a little higher.
There is a simple shutter speed rule to always keep in mind: your shutter speed should always be set to a number equal or greater than the lens’ focal length. This means – if you are using a 50mm lens, you will always want to use a shutter speed of 50 or greater. If you are using a 200mm lens, you will want to use a shutter speed of 200 or more. And so on.
For us, we actually almost always keep our shutter speed at 200 or greater regardless of our lens choice. The only exception is when we really need a slower shutter and want to capture movement – normally with a tripod. With portraits, especially of the “lifestyle” variety, this is especially true because people have a tendency to move – sometimes a little, and sometimes a lot. 🙂
6). You’re shooting in an environment without enough light
Shooting in darker environments can be a real challenge when you are trying to get better quality images. It’s straightforward enough and easy to understand when you are dealing with a pitch black room or photographing outside when the sun has gone down. But, more often than not, the issues with low light performance happen in areas with a mixture of light sources and darkness (ie: shadows).
The quick fix: There are a couple key things in play when dealing with shooting locations that don’t have enough light –
- Your current camera setup may not be able to handle low light photography. Most beginner photography kits can’t be used at high ISO’s or have more difficulty focusing in low light. This is one of the biggest limitations of beginner gear we’ve encountered. We put together a list of good low light cameras to help get better performance.
- You need to move to where the light is. This is not always possible depending on your subject and where you are shooting. But, in some cases, you have the control by just moving around. For example, with portrait photography, simply moving by a window if you are indoors is one simple way to get better images.
- You need to add light yourself. Flash and other external light sources can be used to artificially create light even in dark shooting locations. It’s easy to be intimidated by flash photography, but it’s valuable to learn about because it will give you the most control over your images – no matter what the environment has to offer.
7). You can use flash to freeze your subject
Aside from just adding light into a scene, a flash also has another benefit – it freezes the subject in place. In a lot of ways, flash photography basically compensates for the camera’s shutter speed.
The quick fix: Simply adding a flash to your camera will do the trick.
8). You’re just not getting the right focus
Focus problems will be another big contributor to you have issues with capturing tack sharp images.
These issues normally result from being mechanical problems (like a broken AF system) or user error (like not focusing correctly).
The hard part about this is that sometimes your photos will appear to basically be “half-focused.” This means – things are mostly in focus, but not quite as sharp as you’d like or expect. We refer to these images as “soft.”
The quick fix: You should know that not all soft images are bad or unusable. Some photographers even like the look of softer images. In wedding photography, we intentionally make some images softer (by using really wide apertures) because it adds a romantic feel.
Assuming you understand that and still want that really nice looking and perfectly focused shot, then there are a few things you can do:
- Have your camera inspected. Focus problems caused by the camera and lens need to be addressed by a professional. Fixing this type of issue will require more skill.
- Be careful that you are getting a fully focused shot before you push the shutter. Some lenses take a little bit of time before they actually grab focus. We see this a lot with longer focal length lenses, which tend to take more time than usual. On our Canon cameras, focus is normally indicated by a little sound when the camera achieves the focus, and this is paired with a visual indicator in the optical viewfinder. These types of features may or may not be available to you depending on your camera make and model.
- Take photos at the optimal distance for your lens. Every lens has a “minimum focusing distance.” You will usually see this imprinted on the lens itself in small letters. This tells you that you need to be at least a certain distance away from your subject to get a focused image. For example, the Nikon AF-S Nikkor 50mm f/1.4G as a minimum focus distance of 0.45m (or 1.5 feet/18 inches). This means if you are trying to take a photo at a range closer than this, you are going to fail to get a proper focus.
9). You are (unintentionally) putting too much grain in your photos
As we started to learn how to take photos in manual mode, we would occasionally put our ISO setting too high. When you do this, it will translate into grainy images that don’t have the depth you would expect from a crisp and clear photo.
The quick fix: Keep your ISO setting as close to 100 as possible. On more professional cameras, you will be able to put this up quite a bit and still get crisp images. However, on beginner camera bodies, you will most likely not be able to push this too much before it makes photos unusable.

10). You are using lens filters that are softening your images
There are many lens filters out there that you may be using like a UV filter or a polarizing filter. These can potentially lead to softer images if they aren’t attached well to your lens, or if they are dirty in any way.
The quick fix: The solutions are pretty obvious here – make sure the filters are properly attached, and if you aren’t, definitely get a lens cleaning kit and wipe down your lens and filters.
11). You need to take test photos and check the quality on screen
Sometimes, we find ourselves rushing while taking pictures.
It can be the result of anxiety when we are taking photos during a wedding day. Other times, when we’re out just enjoying photography as a hobby, it can be because we’re just really excited with what is in front of our eyes that we forget to take a step back and review our work.
The quick fix: Your digital camera should have an LCD screen that will allow you to review the photos you’ve already taken. Take good advantage of this! We can admit, these screens are not always 100% accurate, and can even be misleading at times – but it’s still better than nothing. It’s really the simplest way you can check for clarity in your images while “in the field.”
12). You’re not adapting your camera settings for different subjects
A common situation that we encounter is going from shooting moving subjects (like people walking around) to objects that are still. This is just one example of many that we could dig up to showcase how you’re camera settings might just need to be changed pretty significantly. If you’re not doing this well, then you will definitely have some shots that are not crisp or altogether missed.
The quick fix: Get really comfortable with your camera settings.
For beginners, this is not usually something you really have to worry about if you are using an Automatic Camera Mode (but…the downside is the camera might not always make the right judgments!).
Assuming your shooting in Manual Mode, fixing this particular problem tends to just come with experience and practice. We are at a point where we can make changes to our shutter speed by rotating the dial, while talking with someone, and have it land correctly. In a lot of ways, it’s similar to how a pianist or guitarist can move to the right notes without looking at their instrument.
If you need more help getting the right settings for portraits, we recommend Digital Photography School’s Portraits: Making the Shot eBook, which provides an excellent walkthrough of how to nail great portraits every time.
Also related: 101 Digital Photography Tips – A Comprehensive Guide for You
13). You’re not accommodating a moving subject
If you are trying to photograph a moving subject like a jogging person, a dog playing, or a racecar flying around a track – you won’t be able to just use the same settings you’d use when photographing a stationary subject.
The quick fix: This one is easy! You need to increase your shutter speed. This is one of the biggest offenders when it comes to not having crisp images. If this sounds like a foreign subject to you, we’d suggest you read up on the basics of the Exposure Triangle – which will help you to understand how to set your shutter speed, ISO, and aperture to get the best images every time.

14). Your camera is being affected by the weather and other elements
Most beginner photographers will primarily be shooting on nice days. It makes sense, because it’s really the easiest time to learn the ins-and-outs of a camera without having to worry about bad weather. Over time, you may find yourself wanting to shoot more during “bad weather” (which can actually be really cool for photography).
We’ve done this many times, facing weather and other element challenges like:
- Rain
- Snow
- Wind
- Hail
- Sand
- Mud
You name it, we’ve probably shot in it!
While each of these things can offer a lot for photography, they ALL come with the potential downside of impacting your camera equipment. Get a little rain, snow, sand, mud…even dust…on your camera lens, and you may find it difficult to focus properly.
The quick fix: The first thing you will want to do is get a protective covering for your camera. A pack of cheap and reusable covers work like a charm for most shooting situations. If the weather is especially harsh, you might want something more durable like an Altura Professional Rain Cover. We bought both for our trip to Iceland in 2017, and have used them since for all types of shoots from personal landscape projects to engagement photos and wedding shoots.
The next thing you should do is always keep camera cleaning cloths on hand to gently wipe off rain and other things. It’s really unavoidable to not get anything on your lens, but taking these measures to protect and clean it off as necessary will help you tremendously.
Lastly, when you are not shooting, always put your lens cap on. You will protect the glass. When paired with a camera cover, you will have all the mechanical pieces of the camera well covered and ready to face the elements. And the added bonus of NOT having to pay to replace broken gear. 🙂

15). You are shooting too quickly
Caught up in the moment, it can be easy to rapidly fire off photos. We do this so much when capturing weddings – sometimes the excitement just gets us going, but then we look at the photos after the fact and…blurry, missed focus, bad compositions…
The quick fix: There is such a thing as shooting too quickly. There are a number of things in this area that will contribute to you not getting the crisp and clean shots you really want such as:
- You’re just not paying attention to what your shooting (this is the “spray-and-pray” method!)
- You’re not giving your camera enough time to grab focus
- You’re shaking your camera and it’s impacting the shot
For some, learning to slow down the shooting speed might take some time. It’s been a learning curve for both of us. We still catch ourselves resorting to old habits of shooting excessively. The times we really slow down and focus (no pun intended), we nail much better shots all around.
16). Your lens has a bad auto-focus system, try manual focus instead!
The constantly advancing qualities of camera auto-focus has made photography a really accessible hobby even for beginners, but this technology can also be it’s undoing. There are a wide range of AF problems you might encounter, ranging from a flat out broken mechanism to problems with individual focus points.
The quick fix: One route is to simply stop using auto-focus. Most lenses have a switch that can be used to put it into manual focus mode. If you are able to get a sharp photo with manual focus, but cannot with your AF system, then it’s reasonable to believe that there is a problem with the auto-focus mechanism.
A great video on solving auto-focus problems to help you get crisp photos was put together by photographer Steve Perry:
[penci_video url=”https://www.youtube.com/watch?v=gEDzAMm1FCc” align=”center” width=”” /]
If it’s not something that you can seem to troubleshoot and you still want to use the AF (and who wouldn’t most of the time?), you can always take it to a camera repair shop. Alternatively, pick up a new lens and don’t worry about the hassle and cost of trying to fix what you currently have!
17). You need to clean your lens from time to time
Did you know, your camera lens can get dirty? Filthy even?
Okay, so we say that a little tongue in cheek, but there is some truth to gleam from it.
We’ve been guilty of not properly maintaining our gear in the past – and it’s shown in our photos. These days, before every shoot, we have started to ritually clean all of our lenses to make sure they are prepped to use.
In the past, we’ve had issues with our camera focusing on specs of dust, or worse – grabbing focus but causing parts of the image to be blurry and not in focus as we’d like.
The quick fix: Fortunately, this is one of the easiest things to fix yourself! You should pick up a camera cleaning kit like this one that we regularly use. With the lens cleaning spray and microfiber cloth, you can gently clean your camera lens. The air blower and brush can be used to get heavier particles (like sand) out safely as well without scratching the glass.
18). You’re not within optimal shooting distance with your subject
We’ve already mentioned at the beginning of this post “minimum focusing distance” of your lens, this is one important thing to consider when it comes to proximity from the subject. But, in addition to this, there will be different distances that work better (or worse).
The quick fix: This will often come with some experimentation as every lens is a little different. As a general observation, we tend to get our best focused images on the following lens types as the listed distance:
Note: for the purposes of this, assume we’re using a relatively wide/moderate aperture like f/2.8. If you shoot with ANY of these lenses at something like f/16, you should not be having much in the way of issues with clarity. These figures also come from photographing people, so take them with a grain of salt if trying to photograph any other subjects.
- 24mm lens – 3′
- 50mm lens – 3′ – 5′
- 85mm lens – 5′ – 8′
- 200mm lens – 10′ +
19). You should press your shutter release button softly
We shutter at the thought of pressing our shutter button too quickly.
The quick fix: When you press the shutter button on your camera, it triggers the shutter to go off and a photo to generate. This is so much like firing a gun where, when a person pulls the trigger, a bullet exits the chamber. The impact of this pressing motion is significantly (even if it isn’t easily noticed). If done wrong, you can have misfires, too much movement can it to not land where you want, and so on. Just slow down and focus your attention on pressing the shutter button gently.

20). You’re using a lens that is too heavy
You will not likely have this issue with most camera lenses, but it’s worth pointing out because some of them are heavy for the average user.
We regularly use the Canon 70-200mm lens, and it’s biggest setback is it’s weight of ~3.3lbs (~1.5kg). If we sound like wimps, it’s probably rightfully so, but the issue is more how the weight is distributed. Gripping the camera like normal, the camera lens protrudes outwards about a foot or so, with much of the weight towards the front. In practice, it’s easy to use in short spurts, but can be more difficult to use over time as hands and arms will get fatigued.
If you really want an arm workout, pick up the ~10lb Canon EF 800mm f/5.6L IS USM Super Telephoto Lens – it only costs as much as your next car!!
The quick fix: There is no simple solution other than taking a break from holding the lens, or using a lens that is less heavy. Of course, you could use a tripod, but this won’t be practical in every shooting situation – and if you feel weight is a concern, it’s probably because…you’re holding it…
For us, we use our heavier lenses very selectively. For example, when photographing a wedding, we only really use the 70-200mm lens for ceremonies since we need the functionality and flexibility it provides us. Other parts of the day, we get along just fine with lower weight prime lenses and smaller zoom lenses.
21). You can try back-button focusing
Last, but not least, the type of focusing you are using can impact your images.
We can admit, this is an area of camera technology where it’s not always user friendly. Really, what’s the point of having 64 auto-focus points if only some of them are good while others don’t really benefit the image? That’s probably a topic for another day…
The quick fix: Our solution is to set your camera up to only have one focus point (normally the center one), and setup back-button focusing. By doing this, you know 100% what focus point is being used (and can judge it’s quality accordingly). Back-button focus gives you some extra control, and once you get used to it, it feels far more natural when taking photos.
Alternatively: take test shots with different focus points. Every camera and lens will be a little different. One lens may have an ideal focus point in the center, while another might have a better one a few points above, below, or to the sides. It’s a little odd, but true!
By this point, you should have enough information to really settle in to make your own diagnosis. As you can see, what is causing you to not get the tack sharp portraits you really want could be so many things. By process of elimination, you should be able to narrow down and identify what is really impacting your shots, and make corrections as needed.
The good news in all of this is that, much of the time, having soft and out-of-focus shots is simply the result of user error. Making some corrections to your technique can go a long way.
Of course, in some instances, your camera equipment will be to blame. For these cases, it may be possible to fix on your own, have a professional repair service take a look (we recommend local shops!), or simply replace the gear – whichever makes the most sense for you. If you want to check out some new replacement equipment, you can check out our Recommended Gear page to read up on all the products we LOVE and can suggest!!