135 Wedding Photography Tips for Beginners – Go From Novice to Expert Quick!
Last Updated: August 30th, 2025
In just the past ~10 years, we have photographed over 200 weddings together. As of the time of this writing, we have another 30 weddings booked over the course of the next two years. If you think about it, that is some pretty incredible stuff. As far as we’re concerned, we are doing something right and have become serious experts on wedding photography.
Our wedding photography tips for beginners are fueled by these experiences.
A lot of what we talk about here are the result of much trial-and-error. In years of being wedding photographers, we’ve experienced a lot of failures. We’ve made mistakes. But, we’ve also seen some great successes!!
We’ve read countless wedding photography tip lists ourselves in the past, and feel like those have only started to touch the tip of the iceberg. Our wedding photography tips for beginners is the most comprehensive collection of advice you will find online.
Wedding photography is simultaneously a very challenging and rewarding thing. It is both stressful at times, and fun much of the time!
Just Starting Out

When we set out to create this resource of 135 wedding photography tips for beginners, we knew we wanted to make something comprehensive and filled with information that we would have found useful when we started photographing weddings.
While some of the information collected here may be found all over the web, much of it comes with our own personal commentary that is a result of our hands on, down-and-dirty, experience actually being wedding photographers. This isn’t a post we paid someone to write!
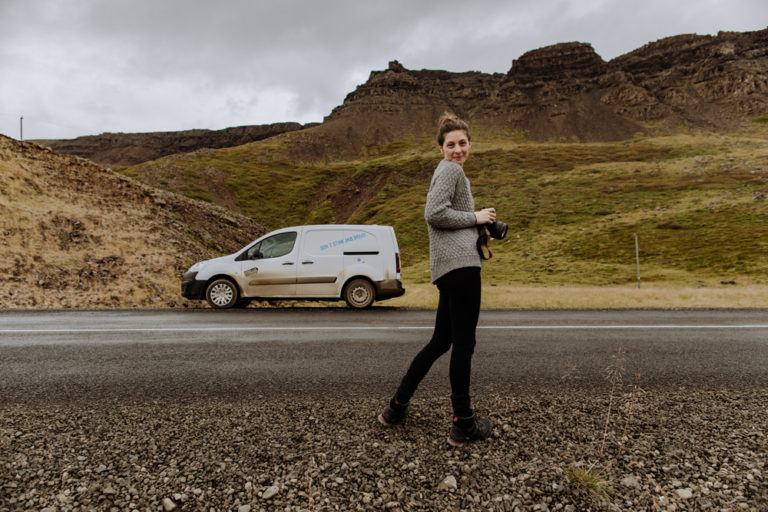
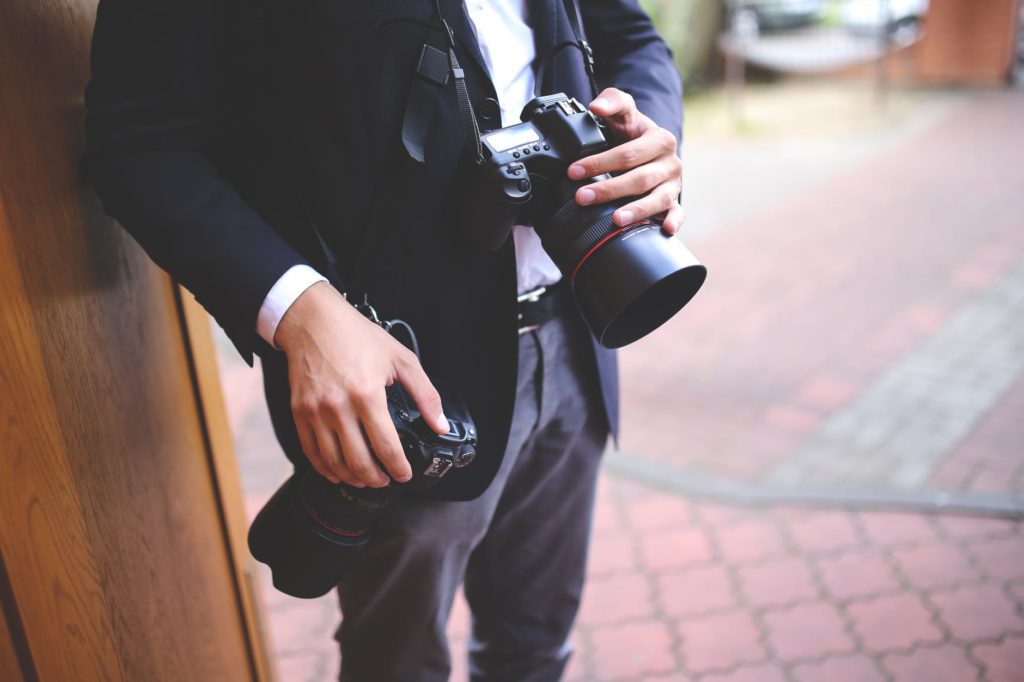
Our journey into wedding photography began after seeing the potential of taking our love for photography into a business, and really got going when we decided to take the plunge and purchase a Canon 5D Mark III (which at the time was the popular go-to camera body). At the time, we had the impression that upgrading our camera equipment would give us more capabilities to capture professional wedding photographs. Before this, we had some experience second shooting weddings with other photographers, but this was the moment when things really changed.
We were a little naïve then.
Buying awesome camera equipment isn’t going to make you a great wedding photographer.
What it did do, though, is help us to become invested in wedding photography as something we were passionate about. It was more than just “work”, but something we wanted to do so much that we would put our money where our mouths were.
Over the course of the past few years, we have since spent a lot of money investing in our wedding photography pursuits. More than this, though, we’ve spent a lot of time and energy. Like we mentioned in our intro – we’ve shot over 200 weddings now. Add to this hundreds of engagement sessions, and other portrait, family, couple, and corporate photography work – and we have amassed an amazing portfolio of photography work and experiences.
At times, our paths have even crossed with some especially interesting characters in this world of ours, like having the opportunity to shoot the wedding of Nathan Pyle – a comic illustrator most known for Strange Planet.
At the start, we never thought in a million years that all the good we’ve gotten out of wedding photography would have been possible.
It has simply been life changing.
We hope you find this little background to give you some useful insight into who we are so you can feel more confident that we will be teaching you great things as you read on to find out our wedding photography tips for beginners!
For more info, take a look at our About page.
Wedding Photography Tips for Beginners: Before the Wedding
Every wedding photographer’s job begins before their client’s big day. If you don’t know this, consider it your first bonus tip!
Effective preparation will allow you to get the best wedding photos. We’re going to walk you through all the pre-wedding photography tips you will need to be successful.
From Inquiry to Booking the Wedding
Make Yourself Accessible
The absolute first thing you need to do is make sure people can get in contact with you.
At it’s most formal, receiving inquiries through email is pretty much the standard of the wedding photography industry now. But, you can also let people get in touch via phone, text message, and through social media accounts for your photography business.
The more options you give people to get in touch, the more likely it will be for you to get new leads.
Use a Good Inquiry Form
For most people getting in touch with you, the inquiry form will make-or-break the deal.
If you ask for too much information upfront, they might get bored and decide to go with someone else. Let’s chalk that up to millennial ADD or something.
And if you ask for too little information, you’ll end up not having enough to go on to write an effective response.
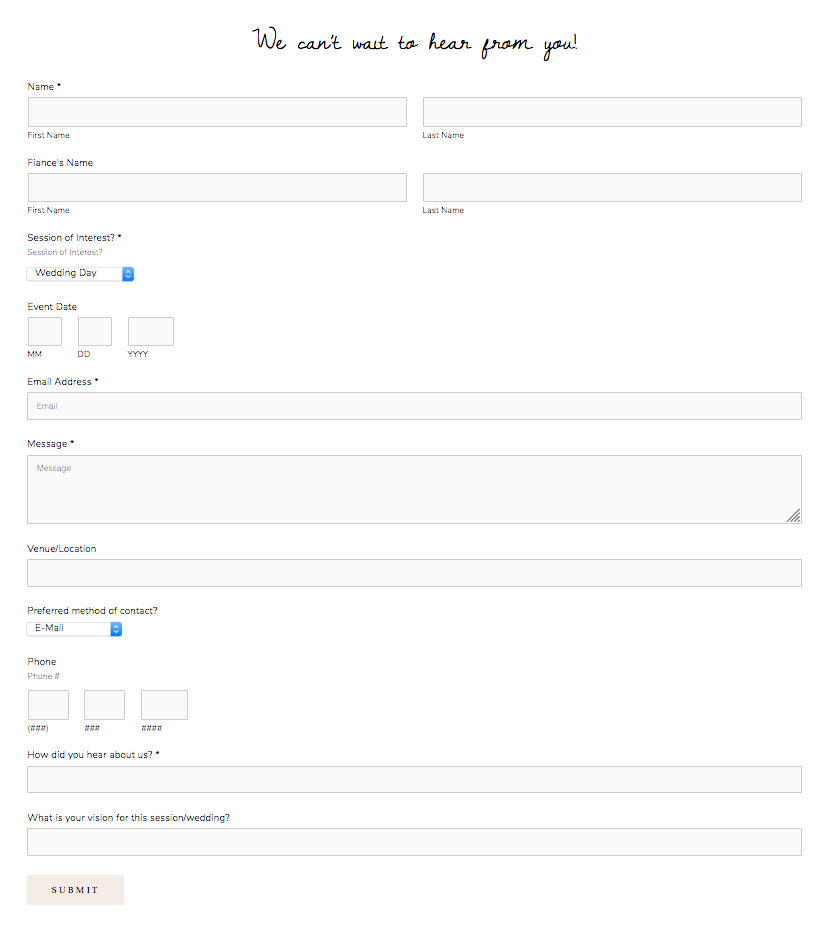
We’ve locked in a great inquiry form that has been working well for us (seen below).
It provides us the information we need, and gives our prospective client the opportunity to share as much information as they’d like.
In addition to the actual form fields, you should be sure to use a quality form plugin. On website platforms like Squarespace and Wix, this isn’t really something you’ll need to think about as there is only the built in option unless you are planning to code something from scratch. But, if you created your site through WordPress, you will have many options. In this case, we recommend WPForms.
Respond Effectively
Did you know: there are a lot of bad ways to respond to an inquiry?
Unfortunately, writing the right combination of words to make someone want to follow up and proceed with booking your wedding photography service isn’t always easy. Sometimes, people will ghost you for no apparent reason.
In reality, not everyone who inquires with you will be serious. We get plenty of inquiries that are pretty obviously just people looking to get a deal, or copy/pasting the same message to 20 other photographers. Don’t worry about these too much!
Instead – focus on writing really effective responses to the inquiries that seem the most serious.
Set Up a Meeting
In our experience, once we are able to set up a meeting with a prospective client, we are 95% of the way to booking them!!
You can have meetings…
- In person
- On video conference (like Google Meet)
- Over the Phone
We meet with people in all of these ways.
Sometimes, it just depends on how far apart we are. Some of our bookings are with people across the country, so it’s not possible to meet IRL – but video calls and cell phones have made everyone more accessible than ever.
Require a Contract Signing
The biggest beginner mistake we see is new photographers NOT having a contract.
The reasons for having a contract include:
- Clearly stating what you will be doing (as a professional) and what the clients will be receiving
- Cover yourself legally if anything was to go bad
- Guarantee that you will make some money
- Shows that both you and the clients are serious about working together
The list goes on…
How you get a contract put together will vary. Some people do it themselves, others work off of a contract template for photographers you can find through online sources like The Law Tog and The Legal Paige, while others will choose to meet with a lawyer and pay them to create one.
Whatever route you decide, you can make the contract signing process very easy by using a CRM like Honeybook. This is a end-to-end booking suite that covers ALL of the needs you will have to send contracts, get them signed digitally, collect payment, and more. If you want more information, you can read our comprehensive review. We recommend it highly!
…And a Retainer Payment!
Going along with having a solid contract in place, photographers need to be collecting a retainer payment.
You can read the linked post above for more detailed information on what this entails, but to sum it all up:
A retainer helps to ensure that you get paid and is indicative that the people you are going to do work for is serious about hiring you. It can be nerve wracking to ask people for money upfront, especially when you are just starting out, but it’s the only way to work. In general, we require 50% payment upfront.
Cover What Is Included
It’s important to spell out everything that is going to be included in the wedding photography package your client is going to book. This may need to be done multiple times – and for sure, it needs to be done at least once in writing.
Most of our bookings get directly exposed to what they will be getting in their wedding package at least 3 times:
- Via our Pricing page – this spells out what is included in our standard wedding photography packages. More information is made available on our FAQ – where we answer common questions that are asked.
- Via email – after talking with the client, we like to restate through email what they will be purchasing. Most of the time, this just repeats information from our pricing page as around 80% of our clients just book one of the standard packages. Sometimes, clients may make adjustments (like adding or removing an engagement shoot), so we’ll be clear on this, too!
- In the contract – finally, your contract is the most important location to make sure you clarify what is included. This sets a legal precedence for what the client will owe you and be responsible for, and what you will be responsible to provide.
Set Expectations
“Set expectations – early and often”
This is a simple quote we reiterate to ourselves and to other photographers any time we talk about how to make it in the wedding industry.
Being able to effectively set expectations will help you make sure your clients will walk away happy with anything you give them. Most of the time, client/photographer problems are the result of miscommunications. Sure, there are some crazy clients out there. And no doubt – some shady photographers. But, in general, we’d like to assume most people are out to do good by each other.
One area where we often have to set expectations (and it’s really easy!!) is when we recommend portrait time to be around Golden Hour. Sometimes it’s obvious why this is to bride & groom’s to be – but other times the response is more like, “can we just do those photos earlier so we have more time during our reception to just chill?”
As expert photographers, our answer here is simple: Golden Hour portraits tend to be the best portraits because the light of soft and glowy. We absolutely can take photos earlier in the day, but just keep in mind this will likely be under harsher sunlight. We can make it work, but always like to suggest Golden Hour for this reason.
At this stage, it’s up to the client to make a decision. There is no right or wrong – but this is a simple fact that (in this case) is widely accepted by most wedding photographers.
Organize Your Email Inbox
Last thing before we move onto the next section…
This is such a simple tip for wedding photographers, but something that you can easily go without if you aren’t an organized person.
A lot of emails in your Inbox = clutter
At first, it won’t be that bad if you just have one or two clients. But, as you grow, you will need to take better measures to organize your client messages.
We keep this simple and use a simple folder structure that looks like this:
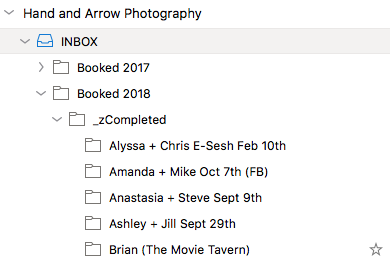
In some email platforms like Microsoft Outlook, you can also set up rules so messages received from clients go instantly to their folders. It’s a neat little trick to save some time!
For related reading: The Wedding Photography Booking Process in 10 Steps (+ Helpful Tips to Secure More Clients!)
Make a Plan
Now, we’re going to shift gears in this post of wedding photography tips for beginners. In this section, we talk about the planning phase. A wedding photographers real job begins here. With excellent planning, you’ll be setting the stage to have a wildly great wedding photo experience – and your clients will love you for it!!
Visit the Venue Beforehand
Knowing the lay of the land will help you to avoid scrambling to find the scenic locations at a wedding venue.
This isn’t always possible, but it’s a simple tip that goes a long way to help reduce any anxiety you may be feeling about shooting at a new location.
When we were beginners, it was common for us to travel out to venues, meet with the owners, and get a walk through.
Shoot the Couple’s Engagement Session
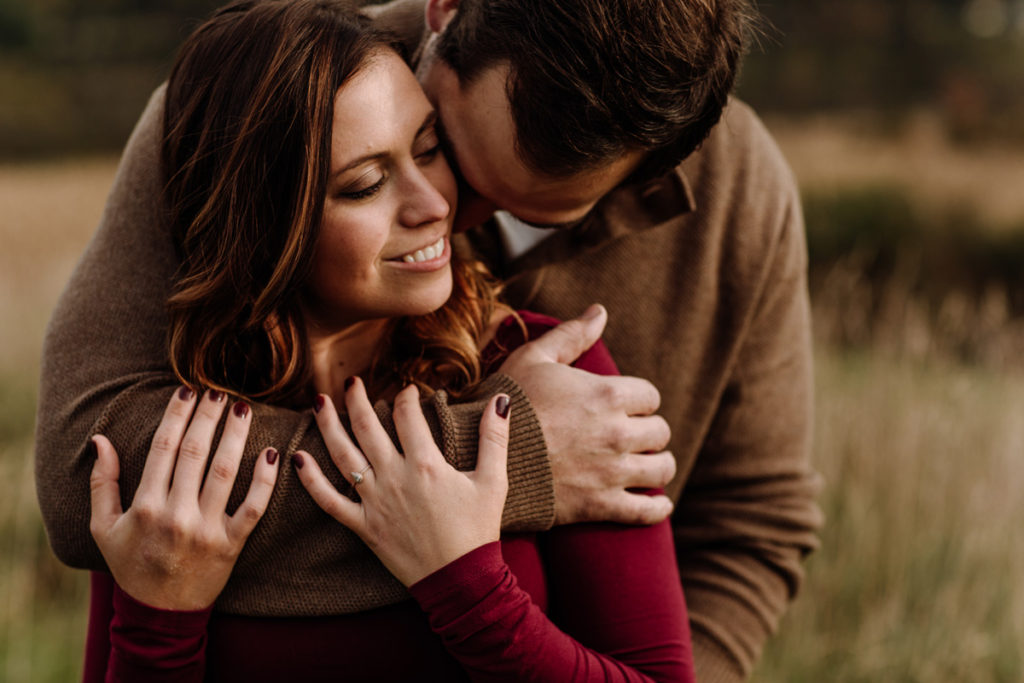
Engagement sessions are a great way to build a relationship with the couple.
While not everyone wants one, we recommend including them in your wedding packages and suggesting them as a way for people to get comfortable being photographed in this way.
At virtually every engagement session we’ve had (and we’ve had 60+ now), our couples normally go through 3 simple emotions:
- We’re nervous – we haven’t had pictures taken before OR we’ve had a bad experience.
- We’re feeling pretty good about this – naturally, within about 10-15 minutes the nervous jitters go away, and couples realize that it isn’t so bad.
- This was really fun and a good experience – by the end of the shoot, couples tell us how it was “so great:.
As a result, we’ve set ourselves up for a good time when the wedding day rolls around. The couple already knows our personality and what to expect from being photographed by us. We always aim to be professional in how we work with people, but as a wedding photographer – it’s also important to be personable, friendly, and easy going!!
Send the Couple a Wedding Questionnaire
In order to effectively plan out what you will need to do when the wedding comes around, you will want to begin by sending your couple a wedding questionnaire.
This is exactly what is sounds like!
You send a consolidated list of questions, and the couple fills in the answers. This will cover topics like their schedule of events, listing out must have shots, discuss any venue photography restrictions, etc.
You should aim to be comprehensive without asking for excessive information.
If you need some help finding the right questions to ask, we recommend checking out this resource on Wedding Timeline Creation for Photographers.
Make a Wedding Photography Timeline
With a completed questionnaire in hand (…or email inbox…), you can put together a wedding photography timeline.
The benefits of a wedding timeline are seriously significant! A few that come to mind:
- It shows a concrete start-to-end flow of the wedding day – this is helpful to both you and the couple!!
- It dictates when certain people will be needed and at what time
- It allows you to set timing expectations – you create the timeline based on your couple’s information
- It also lets you clearly indicate your start and end times – we find it’s easier to say “goodbye” when a client hasn’t booked us until the end of the night when we’ve been clear when we will be leaving
Always Leave Buffer Room
Your timeline will only be useful if you are able to stick to it on the big day!!
One of the most significant planning things we have learned is to always (ALWAYS) include buffer room around the key events. This is especially true earlier in the day.
For example, if a bride plans to only need 1 hour for hair and makeup, you should factor in at least 1.5 hours in case it runs over. About 90% of the time – it does.
Make Clear the Most Important Times of the Day
There are so many mini-events that happen during a wedding day, but only of a few of them really matter to the bride & groom.
Most events during the reception are fairly flexible to move around as needed. Cake can be cut a little earlier or later if necessary, and a bouquet toss or round of the shoe game can move around as needed too.
Obviously, the ceremony start time is going to be a time that is set in stone. Things that happen right around it like family formal portraits – are also hugely important. With this in mind, it’s good to remind your clients that “hey, this is important” and for events like family photos where other people are involved, those people should be notified in advance that “hey, we need you around for these pictures!”
We find this preparedness before the wedding makes things go so much smoother!
Put Together a Shot List
One of the essential wedding photography tips for beginners is this one!
Having a shot list will make a world of difference so that you remember all of the photos you need and want to capture.
Normally, our shot lists come with two sections:
- Photos our couple specifically want
- Photos we want to take
Our clients will sometimes request specific pictures. It might be a photo with some friends who came in from out of town, a shot of a special piece of jewelry, or even a shot similar to one they saw on Pinterest. Whatever it may be – we write these things down and make darn sure we get those photos.
On our end, we also like taking specific photos. We have some standard “go to’s” at virtually any wedding, but also come up with some special ones depending on the couple, the venue, and other factors. While normally it’s easy enough to remember some of these ideas, we like to write them out so we have no chance of forgetting.
Map Out Locations and Know Time Between Them
This is a wedding tip that is extra special for those with multiple locations.
We know that driving from a hotel to a church to a reception hall all take time. Sometimes, these are all within a short distance from each other. In other cases, they can be seriously spread out.
We once photographed a wedding where we met the couple for first look photos at their reception venue, then drove 30 minutes to a church, then 30 minutes back to the reception venue. If you do the math, that is 1 full hour of driving.
This is something we knew and planned for in advanced. But, had we not checked, we would have ended up completely off guard and behind schedule.
One other pro-tip: make sure you leave extra time in your schedule in case the drive ends up taking longer due to traffic, construction, etc.
Bring an Assistant
Is it better to have an assistant photographer or an assistant-to-the-photographer? (Any Office fans in here?)
In all seriousness, having a second set of hands on the big day will be very helpful. The amount of times we have scrambled to collect our gear bags, loose camera caps, and other things we end up carrying for our clients can be counted on many hands. Having someone around who could provide support in this way would be hugely beneficial.
The biggest area for this will be when setting up your lighting equipment. Being able to send an assistant ahead to a reception hall to situate your off camera flash setup can mean the difference between having to rush when you arrive or being able to take a quick breather before the entrances.
Or Better Yet – A Second Shooter!
As a husband and wife photography team, we’ve kind of lucked out with a built-in second shooter.
But, any wedding photographer would benefit from a second set of eyes taking actual pictures.
Having double the amount of photographs from multiple perspectives throughout the day makes for a more interesting gallery. While we hate to admit it, it also serves as a bit of insurance because if one of us messes up our settings during a pivotal moment like the first kiss – the other is going to have photos that can be used.
In addition, a second shooter just makes things more fun and less stressful. We also easily sell ourselves to couples because we can be in two places at once – like one of us photographing the girls getting ready, and the other capturing the guys.
If you don’t want a second shooter or can’t find one to help you out, don’t worry! You can still photograph a wedding by yourself – we even put together a whole post about doing just that!!
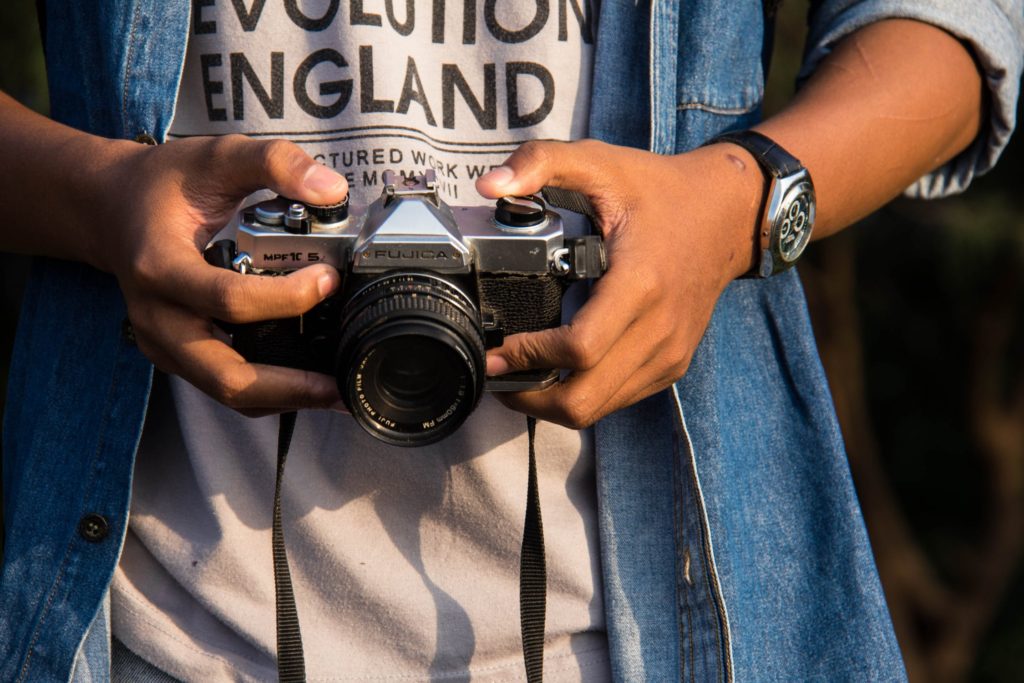
Have the Right Stuff for the Job
We consider our equipment to be a means to an end.
Having new and exciting gear is very cool at first, but over time they just become the things you use to create photographs. As you will find in any aspect of life, your tools can help you to produce a better end product – but at the end of the day, lower quality tools in the hands of a really experienced professional is still going to result in a better result than a novice coming out with the most high end supplies.
In this section, we’re going to talk about the many options you have as a beginner wedding photographer.
Rent Photo Gear if Needed
For beginner wedding photographers, you may not have all the money needed to buy the great equipment you’ll want to take high quality photos. While budget equipment will work for budget weddings, if you want to start charging more money for your service, you’ll need to support these costs by offering higher quality images.
One of the easiest and cost effective ways to get quality images in your portfolio at first is by simply renting gear.
Early on in our wedding photography career, we did exactly this. We didn’t have 2,000$ to spend on the Canon 70-200mm f/2.8 lens. We didn’t have $4,000 lying around to put towards a Canon 5D Mark IV of our own. So we rented them. It turned out, we loved them and ended up booking more weddings, saving, and buying them for ourselves.
But – it all began with a simple rental.
The only downside with renting is that you will end up spending money that is not going towards owning something. From a local camera store, we rented the Mark IV for $50/weekend. It’s not that bad, but after you rent it a couple of times – it ends up being a little chunk of change that you can’t help but wish was just put towards financing the camera on a credit card.
If you don’t have a local shop you can visit and support, there are online rental options like LensRentals.
Note: You should always try out equipment before a wedding day. Consider renting a camera and a lens or 2 the weekend before the wedding and take it out to test.
Buy the Best Gear You Can Afford
While renting is sometimes necessary, we do still prefer buying things when we can.
We’ve always been like this, though. We’d rather buy a car than lease it. We’d rather buy a house than rent an apartment. We bought most of our camera gear outright.
If you have decided that buying your equipment is best, then we’d recommend buying something within your means AND that will fulfill your wedding photography goals.
When we approached this, we knew we wanted to be professional photographers. As a result, we also knew we needed to have professional level gear. To make this happen, we put off buying cheaper gear just because it was in our current price range, but would save a little longer to get exactly what we needed.
This ends up saving money in the long run, as much camera equipment does begin to depreciate quickly after purchasing.
If you need some advice on what to buy, we put together a number of resources in our Recommended Gear section.
You can also jump right to our Wedding Photography Gear Checklist for a list of everything you would need to be a successful wedding photographer!!
Bring Enough Batteries and SD Cards
Batteries and SD cards are kind of like the salad of photography gear. They are not anyone’s favorite thing, but they can certainly compliment the main attraction. And much like salad, they add a lot of value.
It’s easy to take for granted how many batteries you actually will need to shoot a wedding. When we first started off, we were often under prepared and scrambling to get batteries on chargers in the corner of a reception hall. Over time, we started to bring more and more batteries until we learned how many we needed to successfully power all of our cameras, flashes, transmitters and so on.
On that note, if you need some advice on finding good AA’s, check out our post Find the Best Batteries for Your Speedlite – Our Helpful Guide.
As far as SD cards are concerned, you don’t need too many, but instead should just invest in a few good 128gb storage cards. We’ll talk our recommendations in a second!
Have Fast Enough SD Cards
First – you need SD cards with a fast write speed. We would suggest a card with at least 95MB/s speeds.
The reason for this is because, as a wedding photographer, you will be snapping a lot of photos in rapid succession. Your SD card needs to be able to withstand the number of images it needs to capture and store on the card. Most SD cards with suitable speeds will be branded as “professional” or similar terms.
Fortunately, SD cards with fast writing speeds are becoming more of the norm, and prices are becoming increasingly lower for these types of cards.
Dual Write Images on 2 SD Cards
The last thing about SD cards that you should seriously consider is having a camera with 2 SD camera slots that can be used to dual write images. This means – when you take a picture, it is backed up on 2 cards. In the event something would happen (God forbid!) like one of the cards becoming corrupted, you will still have a backup.
For most purposes, this isn’t really a necessary feature to take advantage of. But for professional work, and especially that of a wedding day that cannot be reproduced ever, having backups is really, really important.
To do this successfully, we use the following SD cards exclusively:
Get Insurance Coverage
It is important to have insurance so you can be covered from all angles. There are a few different insurance types we recommend you have as a wedding photographer:
- General Liability Insurance. The most important type of insurance for photographers. It provides coverage if you were to get hurt, hurt someone, or cause damage to property. Some wedding venues actually require that you have this type of insurance, often up to 1 million dollars of coverage.
- Professional Liability Insurance. This type of insurance will cover you in the event that you are sued by a client – whether you are actually at fault or not. There are some ways to invalidate your coverage, like if you committed actual fraud. In practice, this type of insurance comes into play to cover your legal costs to sort things out in court. While no one ever would hope to have to actually use this insurance, it is good to have in case the worst would happen.
- Commercial Property Insurance. Lastly, this insurance covers your business equipment. We have coverage on all our cameras, lenses, flashes, and so on. You should choose coverage so you could easily replace all of your gear in the event everything was lost like in a fire.
While this might look overwhelming if the idea of having insurance is new to you, it’s actually quite simple and more affordable than you might think.
We only pay about ~$60/month in insurance premiums for ALL of these. We have the peace of mind of having good insurance coverage.
With the right insurance in place, you could end up saving yourself millions of dollars!
Wear the Right Attire
One goal of a wedding photographer is to look presentable, professional, and like you are a guest at the wedding.
While we try not to get too hung up on our clothing (we are not the materialistic types at all), we do want to look put together. In the least, we want to show respect to our clients to get properly dressed up for their big day. It’s a simple way to not be a distraction from the important things.
To get this right, it’s very simple.
Be sure you ask your clients what their dress code is. You may want to just include this as a question in your wedding questionnaire we discussed earlier.
There are 4 types of dress codes we see most often:
- Casual
- Semi-Formal
- Formal
- Wear What You Want!
You should aim to wear clothing that suits the event (no pun intended!). If you have any concerns, be sure to ask your clients well in advance to clarify. We’ve gone to weddings that list “casual” as the dress code, yet everyone shows up in nice dresses and suits. At the end of a day, it is a wedding – so you will most likely be absolutely fine to dress like you would for any special event.
Workout and Eat Healthy
This is a general lifestyle tip, but it directly impacts our capabilities as wedding photographers.
Doing wedding photography regularly and as a career is physically and mentally taxing. We have found that making strides to better our personal health has positively influenced our photography work. Make an effort to get regular exercise and eat fairly healthy, and you will find yourself with more clarity and an ability to keep up as long and tough wedding days come along.
Bring Water and Snacks
When prepping for the wedding day, you can never underestimate how much being hydrated and having some extra energy will help you make it through the day. Whether your shooting for 8 hours or 14 hours, these simple things will help you stay on your feet and get all the shots you need.
Come Prepared with Extra Supplies to be a Good Support for the B&G
When we pack our bags, we always make sure we have a couple essential items with us in case our bride & groom need something in a pinch. These are items that aren’t photography related, but leave a lasting impression such as:
- Face wipes
- Pads/Tampons
- Mints
- Tissues
- Bug Spray
You can see how these things would be valuable!!
Prep Your Bag(s) the Night Before
The easiest way to make sure you have everything you need is to pack your bags in advance.
On occasion, we’ve found ourselves scrambling to make sure we had everything the morning of a wedding. We’ve cut out all this unnecessary stress that used to come on as a result of procrastinating (ie: being lazy!). When you pack the night before, you can make sure you have EVERYTHING you will need. You’ll then be able to just chill before the wedding, instead of rushing around like a crazy person!!
Have Business Cards on Hand
Finally, business cards are your friend!
At every wedding, we always find ourselves handing out at least a few cards. Often we’ll exchange with other wedding vendors. Sometimes, we’ll be approached by guests at the wedding for our information. It’s a simple way to build relationships and get new business. What better way for someone to get exposed to your photography service than actually seeing you do your job?
If you need some cheap but high quality business cards, look no further than Moo. Despite the funny name, it’s actually one of the most trusted print company for this purpose. We had tried some big box shops, and none compared to the sleek looking cards we ended up getting here. Highly recommended!!
Wedding Photography Tips for Beginners: At the Wedding
The most practical wedding photography tips for beginners we can give you will be found here.
These are the tips and tricks that will help you to capture great photographs during the wedding day.
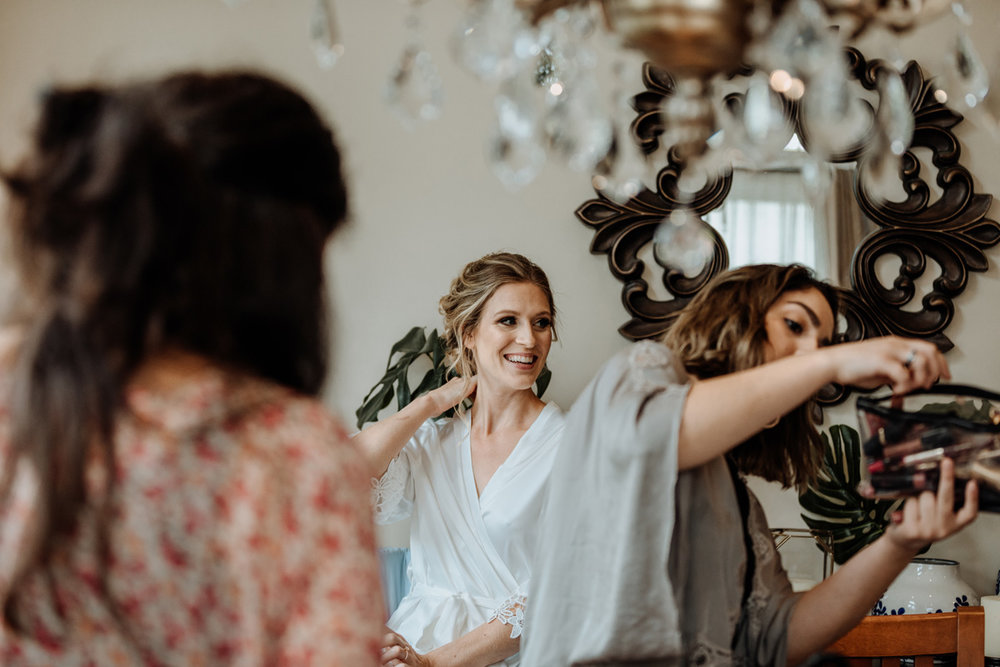
Getting Ready
Arrive a Little Early
Getting to the wedding prep location is the first wedding photography tip for beginners that will play directly into how you are taking photos. Some of the benefits of arriving early include:
- Time to check in with the bride and groom without being under time pressure to get all the shots you need
- Scope out the venue for best photography spots
- Get to meet some immediate family and bridal party members
- Make sure all the detail items are together and in one place
How early you arrive is up to you. Normally we show up 15-30 minutes in advance depending on the specifics.
Identify the Best Light Source
Light is always going to be your best friend as a photographer. When we arrive, one of our first goals is to check the lighting. If there is natural light available – great! If there is not, we’ll need to make some adjustments and use flash to create better images.
In some cases, there will be a great light source, but it’s not being utilized effectively. The number of times we’ve seen this is staggering. Commonly, we’ll go into a nice space with a row of windows and sunlight gleaming through, but hair and makeup is being done across the room in some dim lit area. The logic of it blows our minds!
To fix this and get better images, you can always ask the hair/makeup artists to move things over towards the better lit area. They should understand the reasoning pretty quick!
Embrace the Stress
No lie – getting ready photos can be a little stressful to take!
There is often so much going on at this time. A lot of people rushing around to get things done. As a photographer, working in this type of space can be tough – especially if you are an introverted type of person!
All we can say is do what you can to prepare in advance, and embrace the stress of the situation to create the best images you can. Stress can sometimes be debilitating, but we’ve learned to view it as a positive – and this has helped us to perform really well even when things aren’t easy.
Make the Best of ANY Location
Some getting ready locations are naturally photogenic. We absolutely LOVE these!
But…most of the time people are getting prepared for their wedding in hotel rooms or their parent’s cramped spare bedrooms.
One of the big goals of being a wedding photographer is to make magic no matter what the location is.
Fortunately, it becomes easier with time. You can help yourself prepare by really learning how to take advantage of light and use your camera effectively in any situation.
We’ve written a few posts to help you in this area including:
- Wedding Photography 101: How Do You Shoot Getting Ready Photos at a Hotel?
- How to Shoot Portraits in Ugly Locations
Bridal Boudoir Portraits (optional)
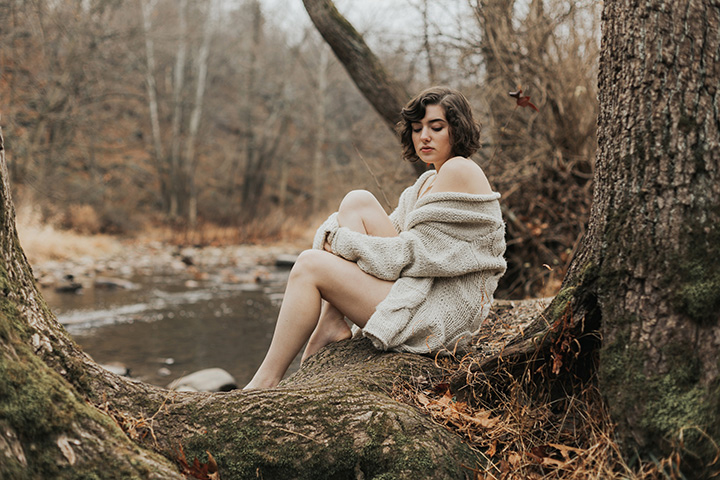
Be Sensitive and Reassuring
For the uninitiated, bridal boudoir portraits are an example of nude photography (or semi-nude) where the bride has these types of photos taken as she gets ready. They are becoming more-and-more common, and brides will often take these images and have them put together in a printed album for their husband.
At it’s best, bridal boudoir portraits can be empowering for the bride, and really exciting for the groom to see!!
As a wedding photographer, you are tasked with taking these shots in a way that is tasteful and as a professional. To achieve this goal, you should always do what you can to empathize with your bride.
The easiest way to do this is ask one simple question:
How would I want to be treated if someone was taking photographs of me like this?
Always Get Consent
Wedding photographers often have to do a lot of posing to get the best shots. While you should always make an effort to make sure the people you are having move around (or in some cases – actually helping to move around) are comfortable with the things you are requesting, it is especially important for boudoir photography.
Getting verbal consent is easy to do, though!
When you ask the bride to do something, always follow up with statements like “if you are comfortable”. You can always set the stage before starting your shoot by telling her that if at any time she feels uncomfortable, to let you know and we can adjust course.
In addition to this, you may want to consider having an additional model release form to cover this type of photography in a legal document. For sure, nude photography of this sort is a lot more personal, so most people will want more control over their images due to privacy concerns. Clarifying what can and cannot be done in advanced is a great way to proactively make sure no harm would ever come to anyone.
Use Natural Lighting
Bridal boudoir photography should always aspire to be soft and flattering. Natural light is one of the best ways to achieve this look. While flash photography can be used, it is easy to go overboard and create harsh lighting that doesn’t have a gentle and soft look you will likely be going for.
Most locations will have some areas of natural light. Once you’ve identified the right spot, be sure to get everyone to clear out so it is just the bride and you taking pictures. You really only need 5-10 minutes to get a lot of great shots!
Be Aware of Unflattering Angles
The positioning of the bride will play a significant role in how the photos turn out. Once you’ve accounted for the light and have a good exposure dialed in on your camera, your composition and posing instructions will dictate how the photos end up.
While there are different factors that will play into what is flattering vs. unflattering depending on the person, a few things we look for include:
- Double chins. If your bride is “double chinning”, we suggest using more posing prompts to help her extend her neck. You will want less images of her looking down. Having her turn her head left or right is one way to help eliminate this.
- Unbent limbs. This one sounds pretty funny. In practice, a big portrait photography tip is this – “if it bends, bend it.”
You may also want to consider any personal attributes the bride may be self-conscious about. For example, a curvy bride may not be entirely comfortable with some extra weight around her stomach area – especially when nude or in lingerie. One solution may be to take more photos from the torso up.
Please note…there is no one size fits all solution here. You need to use your judgment, and communicate with your bride as necessary. Always, ALWAYS, use positive language.
Details
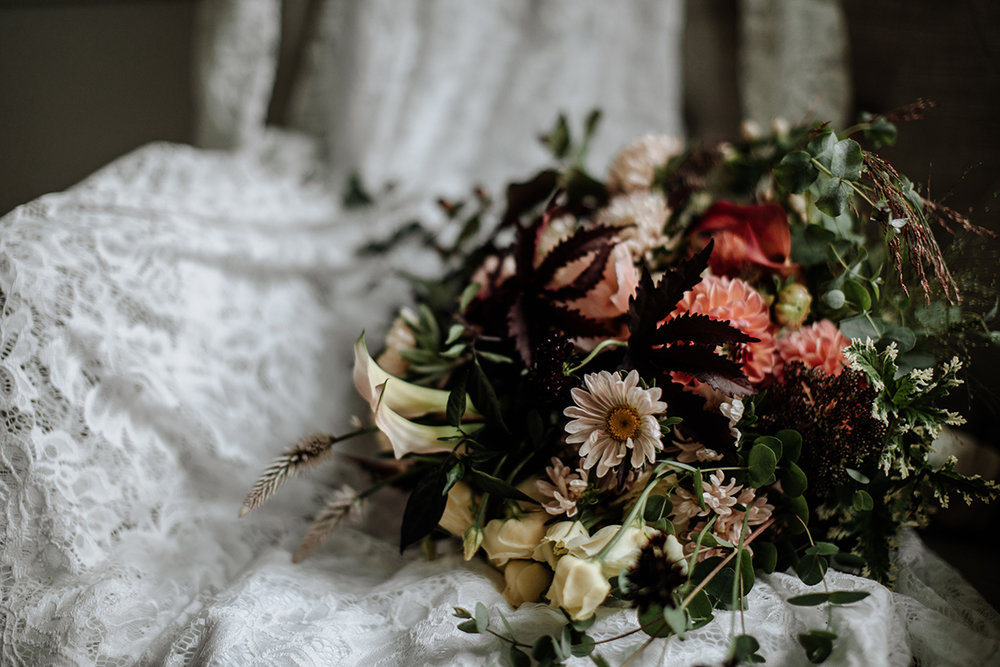
Understand the Value of the “Little Things”
Photographing wedding details begins by understanding what all of these objects represent for the bride & groom. At most weddings, you’ll come into contact with at least 1 or 2 details that have been hand-made with care, or even handed down from generation to generation. We see this so often, and always pay extra special attention to make sure we’re capturing these items just right.
On occasion, we get asked why photographs of details matter. The truth is – for some people, it doesn’t matter all that much. Especially right now. But, when a couple revisits their wedding day a decade or two from now, having photos of the little items will help to stir up great memories of the event. No, they probably won’t compare to their portraits, but they will help to enhance their memories.
This is the the single reason why we find it to be so important to capture the details.
It helps tell the story of the wedding in the same way a great movie features some well designed props. The props don’t make the movie, but they can make it better!
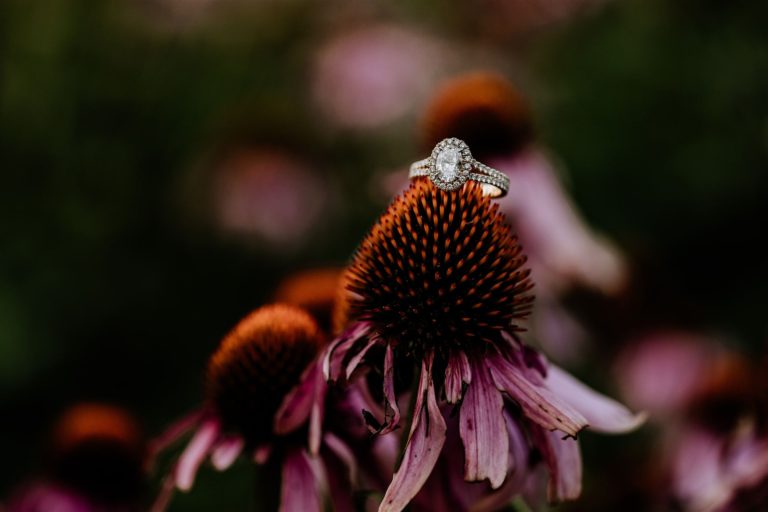
Use a Macro Lens for Close Ups
The smallest details like wedding rings and other jewelry will need a macro lens to capture them in their finest. The best macro lens we’ve ever used is the Canon EF 100mm f/2.8L IS USM Macro Lens. Early on in our career, we would photograph details with a 50mm – while it worked for what it was, our images became instantly better once we had a dedicated macro lens like this.
If you need a cheaper solution since you are just starting out with wedding photography, you could also pick up a macro lens adapter. You can think of these as magnifying glass attachments you can put on the lenses you currently have. We have used a few that have come with lens and camera kits we have purchased in the past, and they do a decent job considering how little they cost.
Manual Focus is Your Friend
For most of our photography, we simply use auto-focus. For macro photography, we make an exception and shift our lens from auto to manual focus. When taking pictures of small objects, your cameras auto focus performance will probably not be all that great. We have found that adjusting the focus ourselves is a way to get more consistently in focus shots.
Use a High F-Stop
One of the keys to getting crisp images is to make sure you are getting everything in the scene in focus.
For normal sized subjects like taking pictures of people or landscapes, you can often get away with using a wide aperture (ie: low f-stop) to create depth by blurring out the background of the image.
While this still applies in macro photography of wedding details, you will want to use a higher f-stop to get more of the item(s) in the frame in focus. As we have learned photographing wedding rings, a wide aperture doesn’t work as well when focusing on the rings diamond because, even if the diamond is in focus, the hoop of the ring will turn into a big blur.
Have a Few Props to Enhance the Details
One special wedding photography tip we have is to bring along props to make the layout of your images more interesting and appealing. The change up is often subtle, but can help you to have more control over your images. One way to have a really consistent portfolio of detail images across all of your weddings is to use props.
A few things we recommend:
- Wood hangers for the wedding dress
- Rustic serving tray for photos of smaller details AND flat lay images
- Moss for adding texture around the detail items
- Loose tulle for adding additional texture
These are just a few things to have with you.
If you prefer using things already present in the environment, that is okay!
We are actually like that ourselves – but if we’re in a time crunch, or just not finding the right materials (such as when we’re at a pretty sterile hotel room), these are easy solutions to make better photos quickly.
For related reading: 27 Wedding Photography Tips for Brides
Get a Written List of ALL the Most Important Details
If you get the sense that we like lists, you’d be right!
Having a list of all the details you should be capturing will help you ensure that you photograph them all.
You should request this information in the wedding questionnaire you send out to your clients in advance of the wedding. It’s that simple!
Always Capture Details Throughout the Day, Too!
While we love details on their own, it’s important to continue getting detail shots throughout the day.
Using wedding rings as an example, you can often take close up shots of the rings on the newly married bride & grooms fingers. Taken during their portraits, these can be really intimate and romantic shots that showoff the jewelry in the context of being on the people who are wearing them.
First Look (optional)
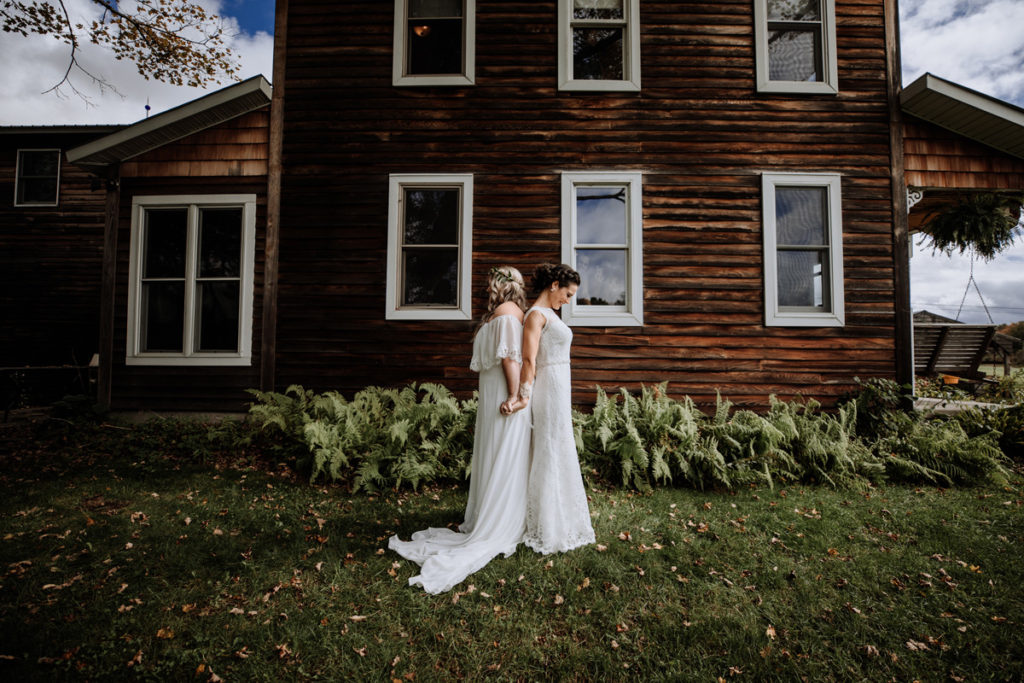
Select a Great Spot Earlier in the Day
Nailing the first look begins by finding a location that fits the bill. The things we look for in a great spot:
- It’s private. This is a moment to be shared between the bride & groom alone.
- It’s got the right lighting. One of the most difficult parts about picking a spot is needing to keep in mind how the sun will impact it. If we arrive at a venue at 8am and find a great spot for a first look at noon, the light will be very different.
- It has some unique character. The first look is a lot like a standout moment in a good movie. This is the first time this couple will be seeing each other on the big day. Finding a spot that looks great is an excellent way to add to the romance in the air, and make for a really photogenic first look.
Walk the Bride & Groom Through What to Expect
You should know by now that the biggest wedding photography tips for beginners is communication.
On paper, a first look is super simple. But, for a photographer, it can require some logistical planning to make sure everyone is set up and in position AND not seeing each before the moment is just right.
Working as 2 photographers, we often approach it like this:
- Photographer #1 sticks with the groom. He gets in position and is arranged appropriately. Often, he’ll end up having to stay facing in one direction so as not to see the bride as she arrives.
- Photographer #2 sticks with the bride. This will normally involve walking with her from the bridal suite to the first look location. She will get positioned for the first look.
- Photographer #1 and #2 will quickly confirm their approach to capturing the scene, and make any last minute adjustments as needed.
- The first look begins, and that’s it!
Set Expectations with Family/Friends Who Are Around
Most couples want to be alone for their first look, but that isn’t always the case. In our opinion, it’s up to the bride & groom to decide what they want. You find this information out by simply asking!
In the event they want to be by themselves, finding a secluded location will help. But, as we’ve learned from experience, that doesn’t always mean a mom or best friend won’t find their way to the spot. As such, it’s important to make sure the information is conveyed that…”Hey, they want to have some quiet time to themselves for their first look, could you guys stick back for the next 15 minutes?”
Make Sure Light is Even on Both the B&G
Shooting in shade or more controlled environments will help with this tip. One of the absolute worst things to happen in any first look is for visualize how great a shot will look, then the sun decides to peak out and drench one person in bright light, and the other in dark shadow.
It’s for this very reason that we’ve become a lot more selective of our shooting locations, and make sure we factor in the lighting pretty seriously.
Ceremony
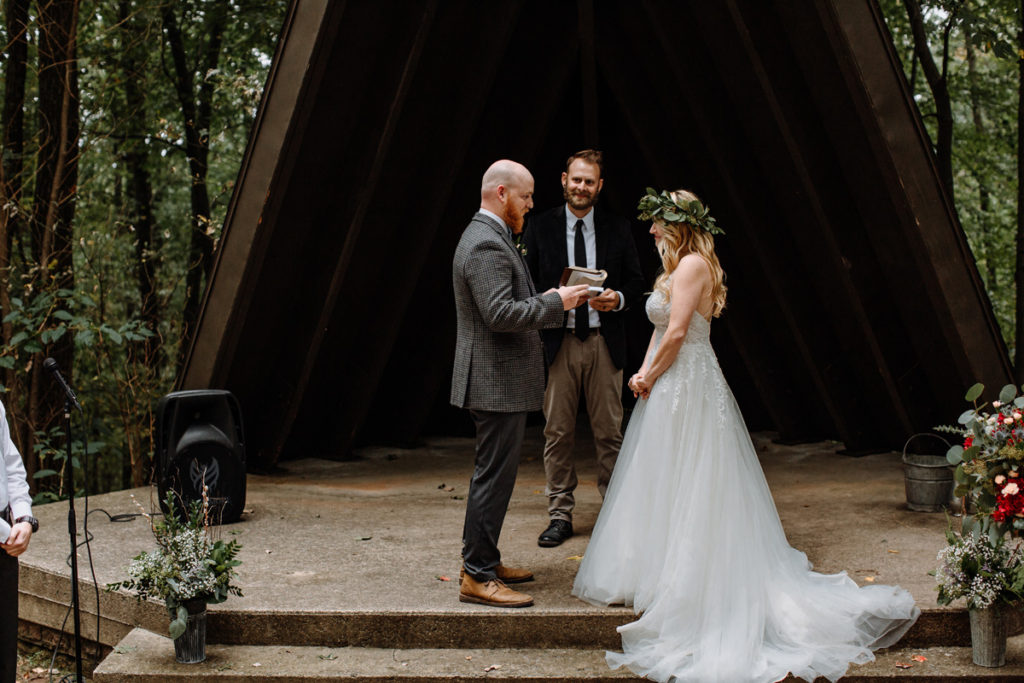
Wedding Traditions Vary – Ask Questions if You Don’t Know
Weddings have a lot of common traits between them, but there will also be big differences. Going from shooting a Jewish wedding to a Catholic wedding is a pretty significant change up when it comes to the traditions and pacing of the ceremony.
This is actually one of the most interesting parts about being a wedding photographer.
Being exposed to so many different religious and cultural traditions. Heck, some ceremonies even incorporate really personal and family traditions that are probably the ones that bring us closest to tears as they unfold.
If you’re unsure about what to expect, ask the couple and their officiant to walk you through the ceremony.
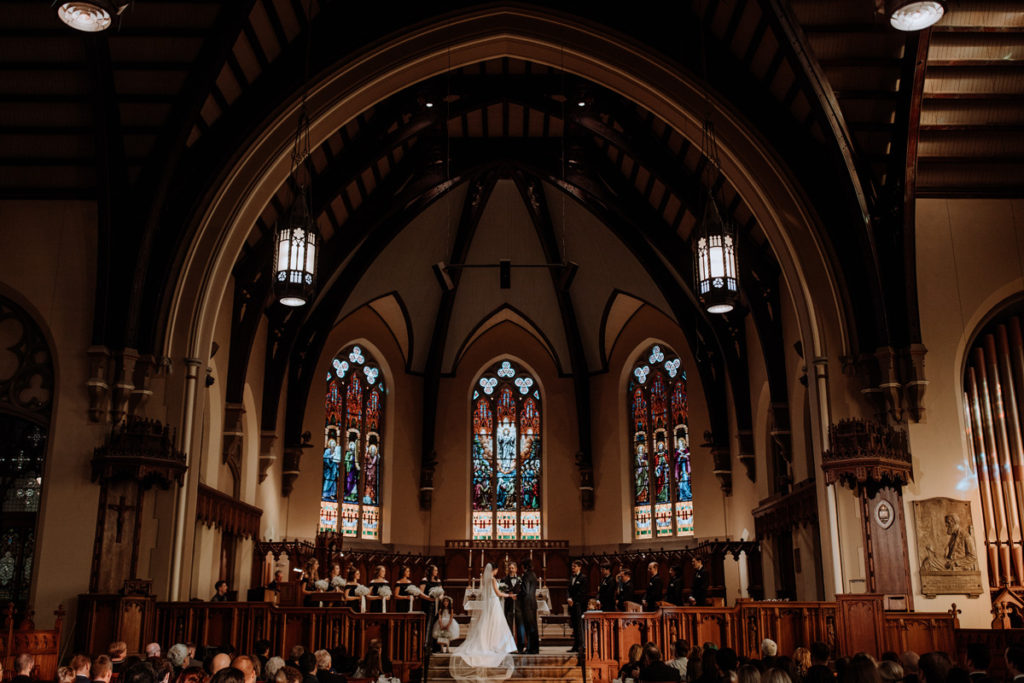
Know the Photography Restrictions (if Any)
Wedding ceremonies can be tough to photograph if there are restrictions.
In truth, most places will not have many, but one place we’ve consistently run into restrictions is in Catholic churches. Normally, you will not be allowed on the altar area and flash photography will be prohibited. There are exceptions even in the church, but it’s something worth noting and it’s a big reason why we recommend having a camera capable of shooting well in low light conditions.
Arrange How to Handle “Uncle Bob”
Have you ever met “Uncle Bob”? Or “Aunt Sally” for that matter?
These are the well-intentioned family members, often older in age, that want to show off their photography chops during the wedding ceremony. Sometimes it’s with a beginner DSLR camera, other times it’s with a camera phone, and at worst in our books – it involves a giant iPad screen.
In an effort to document the wedding, they end up serving as a distraction for a lot of the guests. They also can get in the way or otherwise distract from the professional photographer who is being paid to be there.
The easiest way for a couple to nip “Uncle Bob” from doing this is to have a camera and cell phone free ceremony. In the event they don’t want to go that far, it’s a good idea to talk about how they’d like you to handle the Uncle Bob who is disruptive or gets in the way.
Get a Copy of the Ceremony Schedule
While your wedding photography timeline will tell you when the ceremony starts, it won’t normally detail everything that will happen during it. From the processional to the exchanging of vows and rings to the first kiss, it can be valuable to know how the ceremony will unfold so you can make sure your in the right spot at the right time.
The more we photograph weddings, the more we’ve learned that the format of a wedding ceremony can play a huge role in how things unfold. Having a copy of the schedule will make a world of difference.
Shoot with Two Cameras
Two cameras is always going to be better than one for wedding ceremonies.
During most other points in the wedding day, you can manage with a single camera and lens setup, but ceremonies are so time limited that being able to quickly transition from one camera to the next is HUGE!!
The way we normally use two cameras is by setting each up with different but complimentary lenses. For example, you might choose a 70-200mm lens to capture shots from further back, and a 16-35mm lens for capturing wider photos. This can allow you to get virtually any composition your heart desires within seconds of each other.
While you could just keep one camera on the sidelines and run back-and-forth to swap it out with the other, our preferred solution for shooting with two cameras involves having a 2-camera harness.
The super affordable OP/TECH USA Double Sling is really accessible for any wedding photographers and does the job exactly as you’d want it too. If you wanted something with the same functionality but a little more durability and cool points, you could also pick up a HoldFast Moneymaker harness.
Be Quiet (We’re Hunting Rabbits!)
During a wedding ceremony, your goal as a photographer is to be like a ghost. Don’t do this at the expense of getting shots you need to get, but do it to be respectful of the bride & groom and their guests who have gathered to see them for this really special event. During religious ceremonies, it’s even more crucial to maintain this respectful sense as the marriage ceremony also reflects on the church itself.
Aside from just trying to be relatively quiet yourself as you are moving around, a pro wedding photography tip for beginners is to turn on your camera’s silent shutter mode. This will reduce the noise when you’re taking pictures!
Talk to the Bridal Party Before They Walk Down the Aisle
While the ceremony is about the B&G, you will also be capturing photos of the bridal party and family members as they walk down the aisle. A good idea is to quickly go over what you need with them before they walk.
Normally, you will want to suggest that they walk slowly and even pause for a quick shot at a certain location.
This is a good idea because it will help you to get all the shots you need, and allow the people walking down the aisle to have good photos taken of them. The number of shots we’ve taken that don’t look super great because the bridal party is hauling it down the aisle is enough evidence that a quick chat is a good idea!
Make Less Crowded Ceremonies Look Lively
One aspect of wedding ceremonies that often go overlooked is how many of them don’t actually have a lot of people in attendance. Whether the couple is having a small wedding altogether, or just invites a smaller group of people to the actual ceremony, there is always a chance that there will be few rows of people and the guests are spread thin.
One solution to not have this negatively impact the images is to use a longer focal length lens, and not utilize any of the empty seating in your shots.
Even if there are few people actually at the wedding ceremony, as a photographer you have the ability to make it seem like everyone is there.
Use Guests to Frame the Bride & Groom
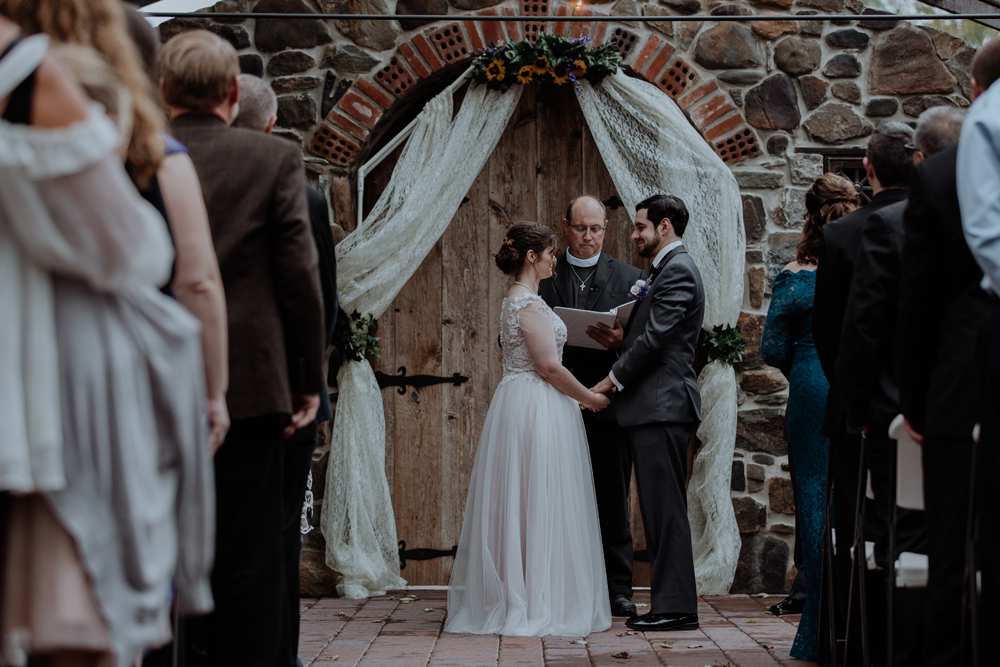
This wedding photography tip is really an extension of the one before it. We love using guests as a foreground framing device. It instantly gives more context to ceremony images. While shots of the bride & groom alone at the altar with the officiant are necessary, these types of shots help to give more context.
Not only this, but it is a way to show off that people are paying attention. You can even go as far as to intentionally use people close to the bride & groom – like parents, siblings, etc. Having a shot of mom watching from the front row as her daughter is getting married is a really simple and powerful thing!
Do Not Be Afraid to Get Close
We talk a lot about liking to use our zoom lens so we can stay more in the background, and that we like to be quiet and as unobtrusive as possible, but in practice – if we really need a shot that is close up, we will go and get it.
You will want to learn to use your best judgment for situations like this. At the end of the day, you are hired by the client to get photos, so if there is a shot you really need and feel would be valuable for them to have – get it!
Get Front-and-Center for the First Kiss
This may seem obvious, but given we’ve shot through some ceremonies where the first kiss wasn’t even announced, being front and center at the time the kiss will be happening is crucial. It’s one of the few shots of the entire ceremony you won’t want to take too many liberties with.
Wedding Portraits (Family, Bridal Party)
Have a Formal Portrait List
We know, it’s another list we’re suggesting here! But here us out!
Having a family formal portrait list is a great idea because it allows you to make sure you get a shot with everyone, and include shots of all the requested pairings. You can do the same with bridal parties, though we only do if they are particularly large.
With this list, we will call of names to coordinate things, we check them off when we are complete.
A sample family formal list would look like this:
- Bride, Groom, Bride’s Mom (Shirley), Bride’s Dad (Jeff)
- Bride, Mom, Dad
- Bride, Mom, Dad, Bride’s Brother (James)
- Bride, Groom, Groom’s Mom (Alexis), Groom’s Step-Dad (Adrian)
- Bride, Groom, Groom’s Mom
- Bride, Groom, Groom’s Dad (Rex)
This has been the tip we’ve used to streamline our wedding portrait process.
It makes it less stressful for everyone involved and saves time!!
Designate a Helper
The easiest way to get through formal portraits is to have an assistant. If you are photographing a wedding alone, designating someone from the family or bridal party can be a big way to get things in order.
We will often utilize the parents and best man/maid of honor to help wrangle people and get them together.
This helps solve one of the biggest challenges – getting together people you don’t actually know.
Look for Clean Backgrounds
This should be a standard tip for any type of portrait you are taking, but its especially important for these formal photos.
The reason for this is because these shots, among all others taken at a wedding, are the most likely to be printed out by the family. You know how it goes – the parents want a picture in a frame of the family, grandparents want a big wall canvas, and so on.
Having a well taken family portrait is one of the best things you can do for your clients. Unless they are adamant about having their photos taken in front of a busy altar, a simple backdrop would do best so the focus remains on the important people in the shot, and not on any distractions in the scene.
Bouquets Down to the Side
If in doubt about how to position the ladies of the bridal party, you can always fall back on a simple pose of facing the camera at a slight angle with bouquets down to the side. It’s a classic and great looking pose!
Look Through the Viewfinder Before You Shoot
This can be tough if you’re in a rush, but always make time to actually look at the people you are photographing.
Taking just a few seconds to actually pay attention before to click the shutter may be the difference between a good and great photo.
There are just a few things we look for during this time:
- Everyone is looking at the camera
- People are smiling!
- No one is being hidden
- All accessories are positioned well
These are absolutely basic things that when overlooked can create a lot of problems for your images.
Try to Address People by Name
Learning some names is a good way to help take control of the crowd, and build some repoire because it shows you care.
We know, it’s not always easy. We’ve made a few mistakes of calling people the wrong name, or just saying “Hey…you…“
With how many weddings we shoot and the hundreds of people we come into contact with, you can’t blame us. But, it’s something we’ve tried to more actively think about. Even if we only remember people’s names for a few minutes, it still makes a big difference.
Use Off Camera Flash
Unless you are shooting portraits outdoors under great lighting conditions, you will want to utilize flash to take good formal portraits. While you may be able to manage with an on camera flash setup, we’d actually suggest learning your way around off camera flash so you can better fill in the space with directional lighting. You may even want to have 2 off camera flashes setup if you are shooting a really large group.
To see our recommendations, check out our Recommended Flash Gear page.
Make Jokes, But Don’t Try and Be a Comedian
Keeping things light with some humor is a great way to get on with just about anyone. We all know that family formals and bridal party portraits can feel like a chore, but as the photographer in charge, interjecting some humor can help make it easier even for those who are feeling really impatient and wanting to get on to cocktail hour.
As with anything, you can take it too far. Just have a good time and be professional, and you’ll be fine! 🙂
Check for Any Unflattering or Unwanted Extras
There are 2 things that drive us crazy when we’re taking formal portraits:
- Bunny ears
- Guests and venue staff working in the background of the shot
If we dug deeper, there would probably be other things to add here (go ahead and comment if you have anything else that’s come up for you!).
These are surefire ways to ruin a portrait image. They are both (usually) fixable through photo editing, but being able to never have them as a problem in the first place is the way to go.
Capture People Authentically
Finally, you should always aim to capture people authentically.
Some portraits are of the simple variety – stand here and look at the camera. But, that doesn’t mean you can’t have some fun. Having mom hug and kiss her daughter, or dad take another shot with a huge grin on his face are some of our favorite family portraits. No to mention, the candid moments that happen when people are getting into position!
With the bridal party, this is an area you can really expand on. We love using prompts to get everyone interacting with each other instead of just standing still and looking at the camera. One of our favorites is setting everyone up and having them play whisper down the alley. It always leads to hilarity, and sets the stage that everyone is here to have a good time.
Wedding Portraits (Bride & Groom)
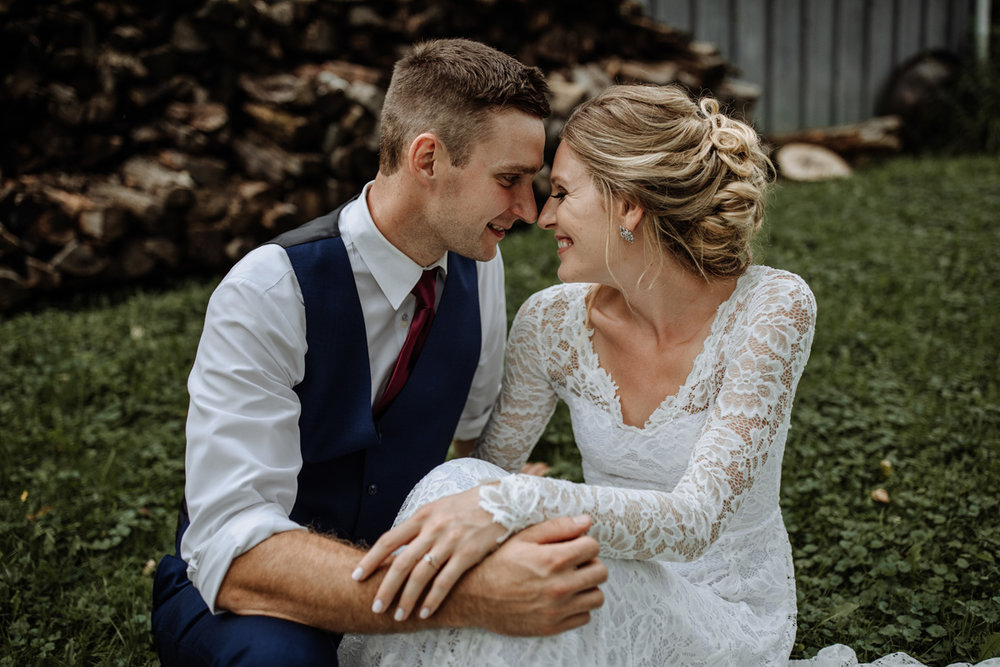
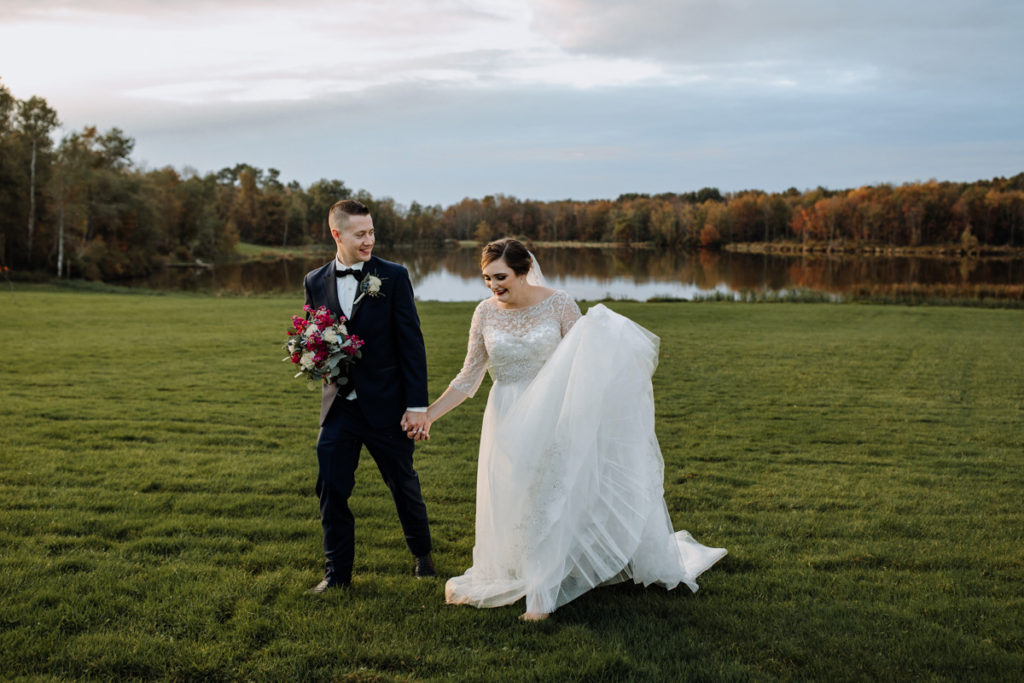
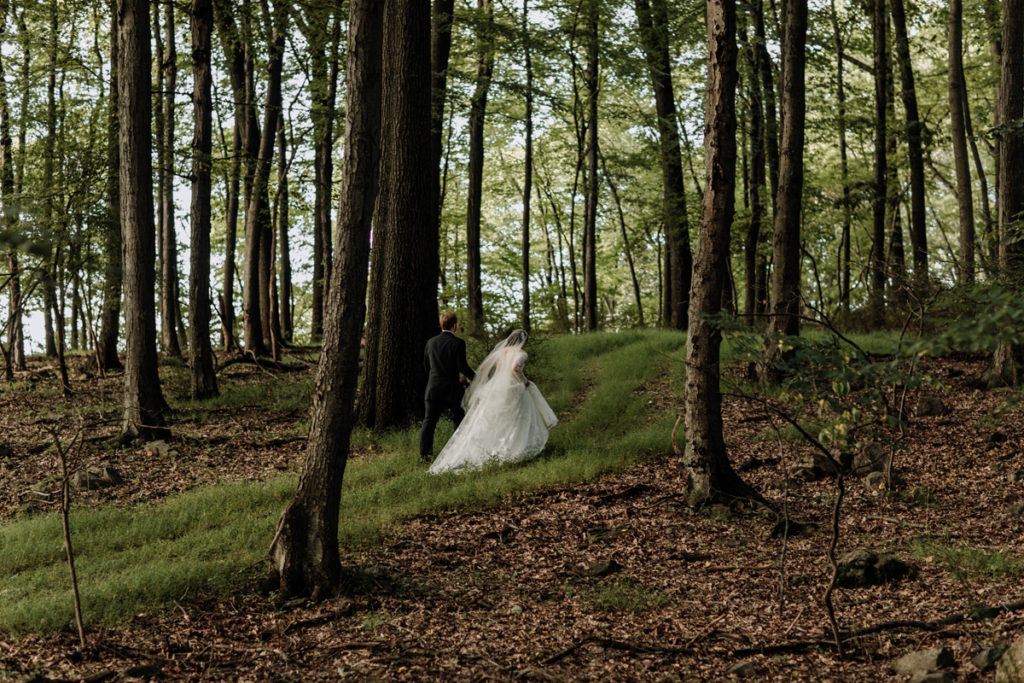
Golden Hour is Best
The hour before sunset is the absolute best time for romantic portraits of the bride & groom. The sun is low on the horizon, and leads to a really soft and beautiful look that is flattering for everyone. We 100% recommend scheduling these portraits during the time leading up to sunset, and make it clear why this is a good idea to your clients if they don’t understand!
Two Angles Are Better Than One
Taking pictures of from different angles can make even a simple pose all the more interesting.
This will be easiest to achieve if there are multiple photographers. But, the easiest wedding photography tip for beginners as it pertains to this is to keep moving. One thing we do is move in a circle around the couple while they remain in the same position. This allows you to get many different perspectives easily.
Move Regularly
Movement will allow you to get the best portraits imaginable.
Get low, get high, move in circles, stand further back, and get real close. All of these perspectives have something to offer – take advantage of each type!
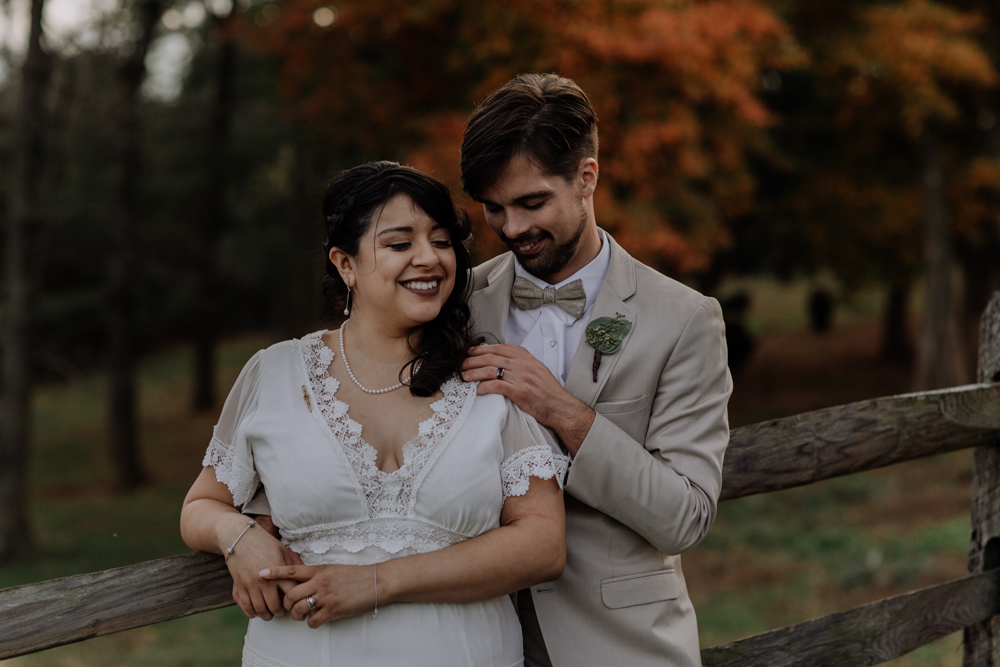
Be on the Lookout for Romance
Two people who just got married are most likely going to be feeling pretty sentimental and affectionate. It’s amazing how open we’ve found people to be in front of the camera. While our approach to posing is extremely important to getting great wedding portraits, the unexpected candid moments the couple shares with each other are also incredibly important.
Experiment with Wide & Tight Shots
Portraits do not just have to be taken with a 50mm lens.
Use a wide angle lens to capture environmental portraits. That is – portraits of the married couple in the context of their environment. This is a great way to show off a beautiful wedding venue that they selected for their big day.
For tighter shots, you can use really any lens, but just get up close. We often will turn to our trusted 85mm lens to get a tightly compressed photo. These portraits are much more intimate, and at times can even be abstractions just showing off parts of the couple like their hands holding each other.
Always Be Reassuring
The wedding day is the one day a couple really wants to feel like they are looking their best. Brides want to look and feel beautiful. Grooms, even if they won’t admit it, want to look and feel as sharp as ever. Photography can be an empowering part of this process – and you as the photographer have an important role to make sure they are feeling like they are looking great and doing great in front of the camera.
Aside from just using your words to say “You’re looking great” or “You’re naturals!” – one way to be reassuring is to show off some of the photos you are taking. Pull up an image preview and show it to your couple, and watch as they react with excitement. It gets us every time!!
Use a Combination of Posing and Prompts
We often are asked…how did you get that portrait? It looks so natural!!
The answer is a combination of good poses and posing prompts.
For poses, you mostly just need to replicate the work of others. Find some portrait images you really connect with online, and put your couple into a comparable pose. This part is not too difficult with a little practice.
To really enhance your poses and get more authentic reactions from your couple, prompts can help sweeten the deal. One of our favorite fun ones is to have the couple face each other and embrace, then we tell them…”Using your nose against his/her cheek, draw a shape and they need to guess what it is.” The reaction to this and other poses like it is always fun for us to watch and take pictures of.
Basically – what it comes down to is creating a shared moment. You’re kind of like a choreographer, but ultimately the couple will make the decisions of what to do that makes for compelling photos.
Use Artsy Accessories
One of our favorite things to do during portraits is bring in some accessories to really change up the look of our images. A few accessories that we frequently use include:
Each of these are extremely budget friendly and just plain fun to use.
Come Prepared (No Matter the Weather)
When the weather cooperates, portrait time may be the easiest and best part of the wedding day. Gosh, when we get perfect lighting and a gentle 72 degrees outside, we know we are in heaven.
In reality, we often have to work around bad weather to take great portraits. Rain, snow, high winds…these are all things that can actually positively impact a shot, giving them some moodiness and texture, but it’s easy to be under-prepared.
If you are seeing some bad weather in the forecast, you can either make plans to get great portraits indoors, or be prepared to go outside and brave the elements. If you choose the latter, we highly suggest bringing along some photogenic umbrellas and make sure you have lens wipes on hand. A camera rain cover will also come in hand to protect your most important asset on the big day!!
Make Solo Portraits Easier (extra special wedding photography tip!)
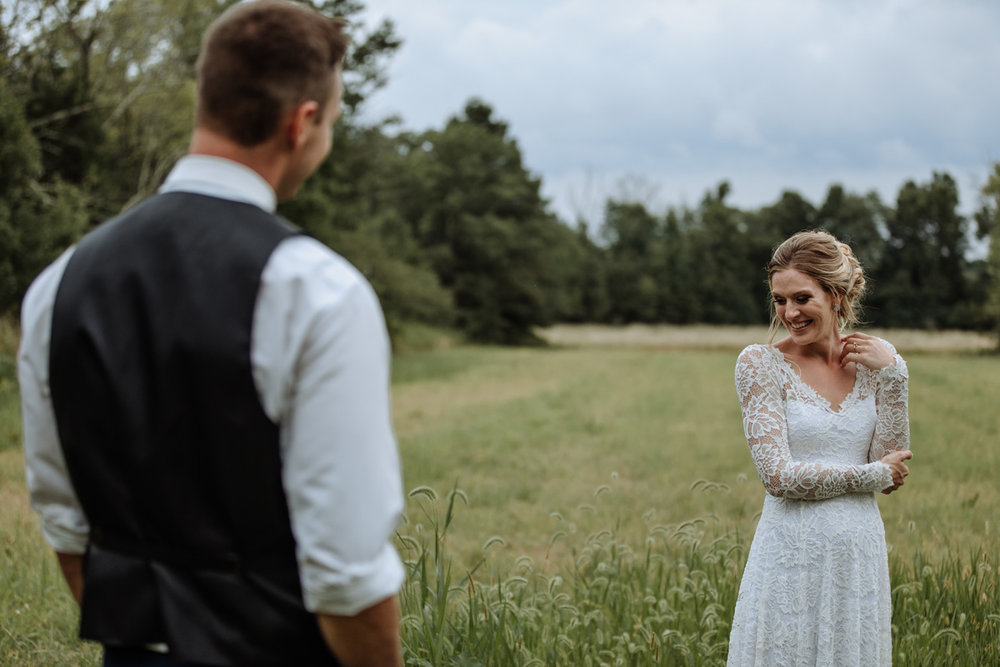
One of the best wedding photography tips for beginners you will read is our approach to taking solo portraits of the bride & groom. This time can often feel a little awkward, and most couples would rather be back in each others arms instead of having their picture taken.
We found out that a great solution to keeping our couple happy and engaged with each other, while also having their solo portraits taken by us, is to have them interact together during this time.
There are a few things that end up happening seamlessly as a result:
- We are able to capture photos of each person on their own with authentic reactions – no forced smiles or anything like that
- We let the couple dictate how their images will turn out based on their personalities – when photographing the bride, we’ll normally tell the groom to “tell her how beautiful she looked walking down the aisle”, this is so effective at eliciting a million emotions that photograph so well
- We consistently use an over-the-shoulder viewpoint of the groom looking at the bride (and vice versa) – this is a great photo moment
Reception
Talk to the DJ
When you first enter the reception hall, a great place to start is chatting up the DJ. Most of the time, they will have their own timeline on hand – and it’s good to compare notes to make sure you are both on the same page.
Most DJ’s will be on your side and helpful to make for a better experience by combining forces. We often utilize DJ’s to help us identify where everyone will be entering into the reception (if it’s not apparent), and discuss other things throughout the night.
Best of all – a good DJ leads to fun vendor-to-vendor conversations. This is one of the funnest aspects of doing our jobs because we’re both working this event!
Know the Rules of the Reception Venue
Most reception venues will have some rules in place like “don’t stand on the chairs.” These rules are mostly common sense.
With that said, some locations will have more rigid rules. In one case, we received a document with a bullet point list of things we could and couldn’t do – including not being able to use an off camera flash on a light stand.
Something like this, we obviously wouldn’t have thought of being a problem, but it’s best to know beforehand so as to avoid any unwelcome surprises.
A good way to find out the rules is to simply touch base with the venue. A phone call or email can make a world of difference, and help you stand out as a photographer who cares – earning you some brownie points. 🙂
Carefully Place Your Flash Equipment
Given that we use an expensive off camera flash setup, we are especially protective of our gear. The vast majority of times, we set up our flash stand right alongside the DJ booth. This allows it to be close to the dance floor, but not in a location where people will be likely to hit it (knock on wood).
Related: Formed From Light’s Recommended Flash Gear
Secure Your Belongings
Maybe it seems irrational, but we always have a small fear of theft when we are photographing weddings.
We have built a relationship with our clients by then and trust them, but at a wedding with 200 or 300 people, we don’t know everyone and their motives. And in our time, we’ve read plenty of horror stories of wedding photographers missing equipment ranging from batteries to entire camera bags.
While there is no real sure-proof method to avoid this sort of thing from happening, the steps you can take are as follows:
- Place your belongings in a “safe” location. We normally use behind the DJ booth. In some venues, we’ll also ask staff if there is a better place to store our stuff.
- Have a line of sight with your gear at most times. We feel best when we can see our camera bags. If we can see it, that means anyone who would try to swipe something would have to be really ballsy.
- Keep your most crucial belongings on you. Our personal things such as our wallets and phone stay in our pockets at all times. As nice as it might feel to unload some of the weight into your bags, keeping these things on you is the best option.
Always Look for the Action!
Unless their is an actual event happening like the bouquet toss or cake cutting, the reception time will be filled with you taking a lot of candid photos. In our experience, these are a huge amount of fun, but can get pretty dull after an hour or 2.
What we have started to do is take a step back, observe what is going on, and go where the action is.
Much of the time, this is right on the dance floor.
At other times, if you hear people laughing and having a great time over at a table, it’s worth popping in for a few quick shots.
At it’s best, we’re able to pick up on little moments that were completely unexpected. Once we noticed the groom chatting with his grandparents, and these turned into some of our favorite reception photos.
Kids = Great Photographs
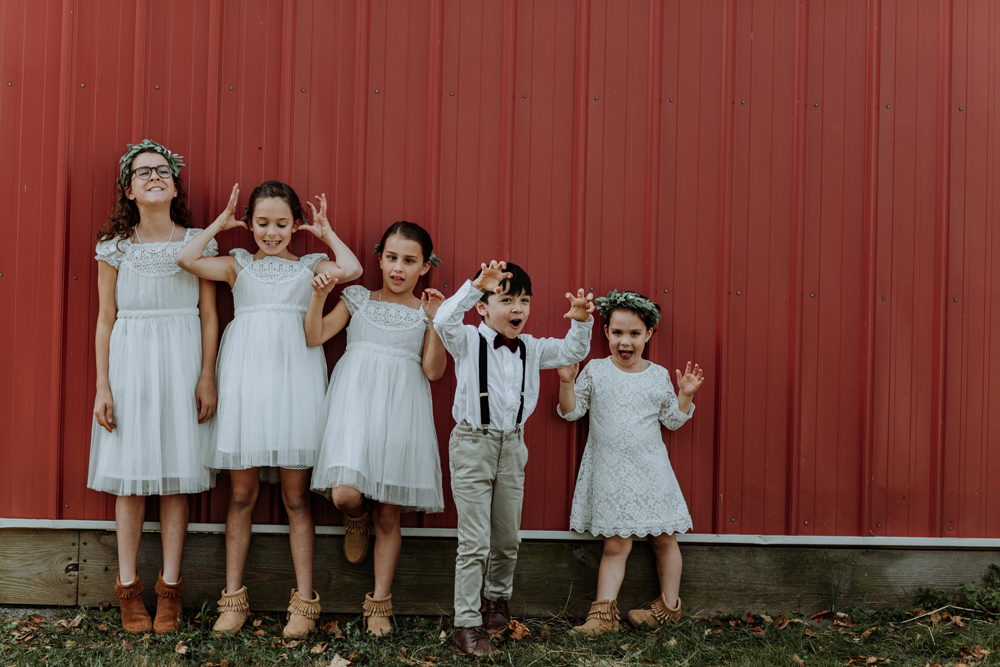
At every wedding we’ve gone to, there has always been at least 1 kid. Say what you will about children, but they make for great photography subjects. Whether they are being cute, driving someone crazy, or just doing something crazy – it’s always a good time.
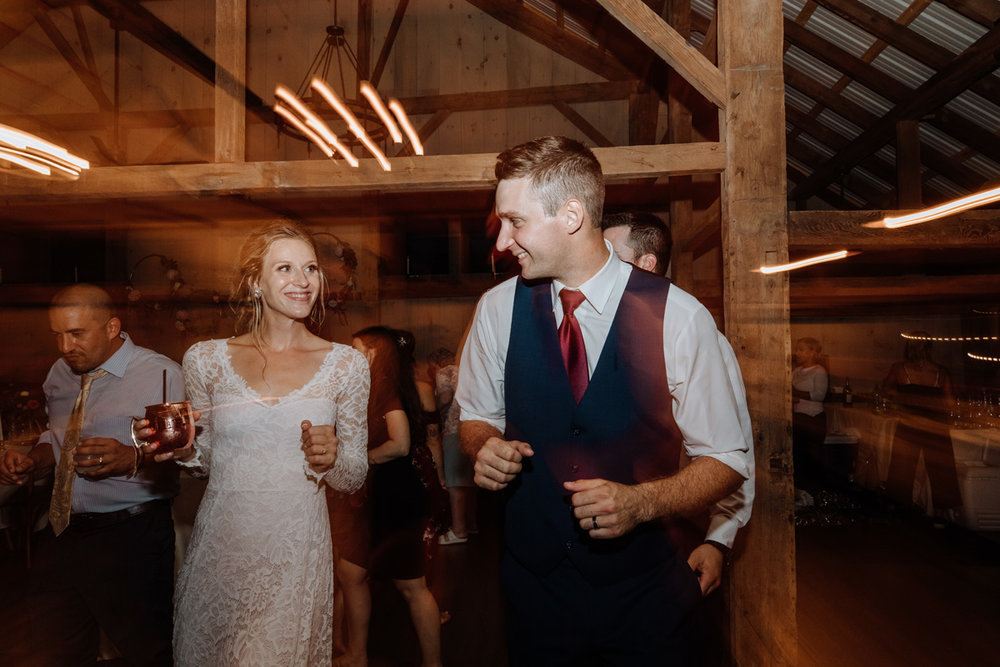
If You Want to Dance, Go for It!
This may not feel like a wedding photographer tip for beginners, but trust us – it is.
When the music is blasting and everyone is having a great time on the dance floor, it can be pretty hard to resist the urge to dance. As silly as it may sound, letting loose for a few minutes is a good way to show your human side to the bride, groom, and all their guests.
While you’re not getting paid to dance, you are getting paid to capture people having a good time. Sometimes, you can bring some extra life to the party by…being the photographer who started dancing…
As an extra tip – you can add some flair to the dance floor by passing along a spare flash to one of the guests and remote triggering it from your camera. This can add some interesting directional lighting and get everyone HYPED.
Take a Break
Wedding photography tip #89 – taking a break. Early on in our wedding career, we would feel this constant urge to just keep doing things non-stop. We would think to ourselves…”We’re being paid to take photos! No one wants to see us standing still for even a minute!!”
Just reading that, you can tell it is a little ridiculous.
Shooting non-stop for 8, 10, 12…or even more…hours will mean you need to have a break from time to time. This will help you not only feel rejuvenated, but allow you to pay attention to the things going on around you a little easier.
Identify Who is Most Important to the B&G
Take notice to who the bride & groom seem to interact with most throughout the wedding. Often this will be a parent, sibling, or best friend – but you’ll also see other relationships on display. The reason we aim to figure out who everyone is, and how important they are to the B&G, is because it influences what images we want to focus on capturing for them – and what images we’ll be sure to keep when we are culling them down.
If we are going to give the couple 400 photos from their wedding and need to narrow some down, we’d rather cut out shots of the twice-removed step aunt that the couple actually secretly loathes instead of photos of them with the people they really care about most.
Always Keep an Eye on Grandparents
We have a big soft spot for grandparents at weddings. Capturing their affection for one another and interactions with other family is a great thing.
Looking back at our own wedding gallery, the photos of our grandparents stand out as some of our favorites. From the formal photos to the random candid shots, they all mean a lot as we all know our time with them is more limited than with most other people on the planet.
Slow Down
You can make the mistake of rushing and not thinking much while you’re taking photos during the reception with everything going on, but this can lead to problems. Not only missing focus and just not getting any oxygen into your brain, but it can actually lead to you missing important things happening right in front of your eyes.
Slowing down, taking a deep breath, and paying close attention to what you are actually photographing can go a long way to ensure you take photos people will want to actually look at later.
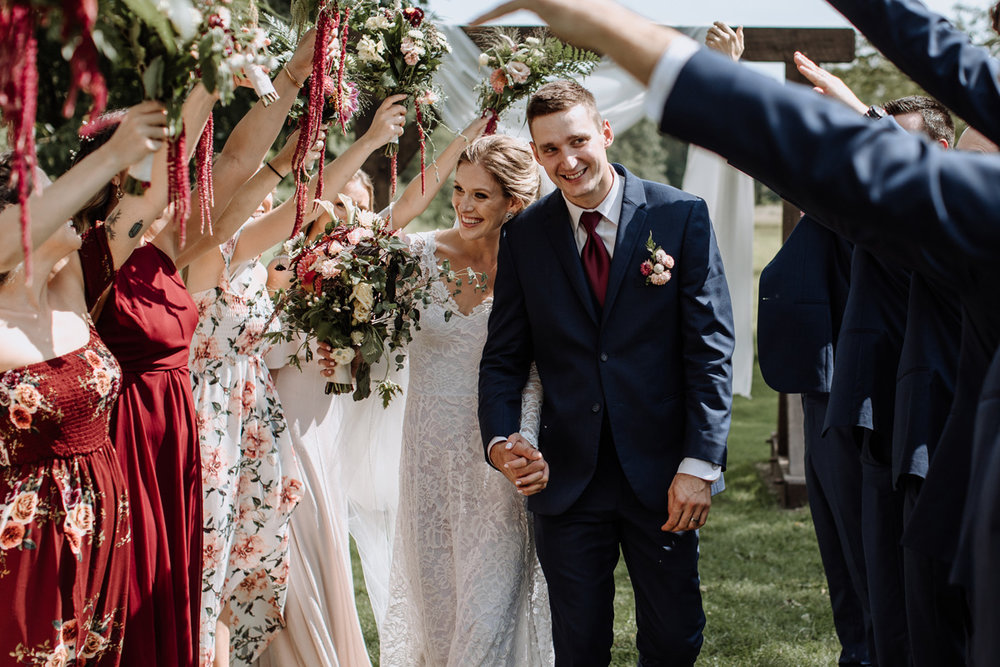
The Grand Exit
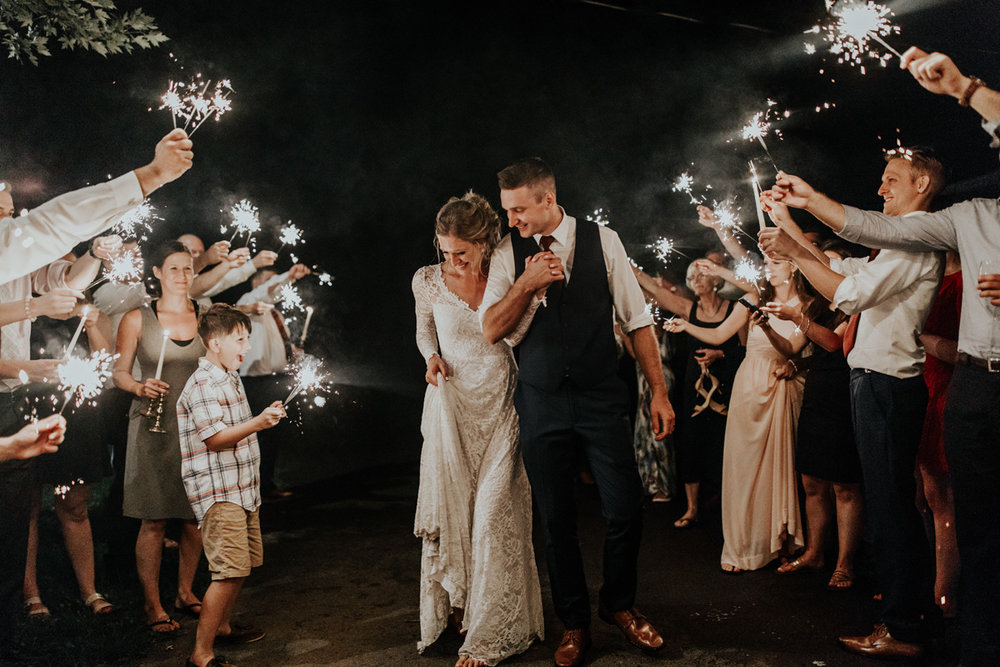
Finally, the moment you’ve been waiting for: the end of the wedding!
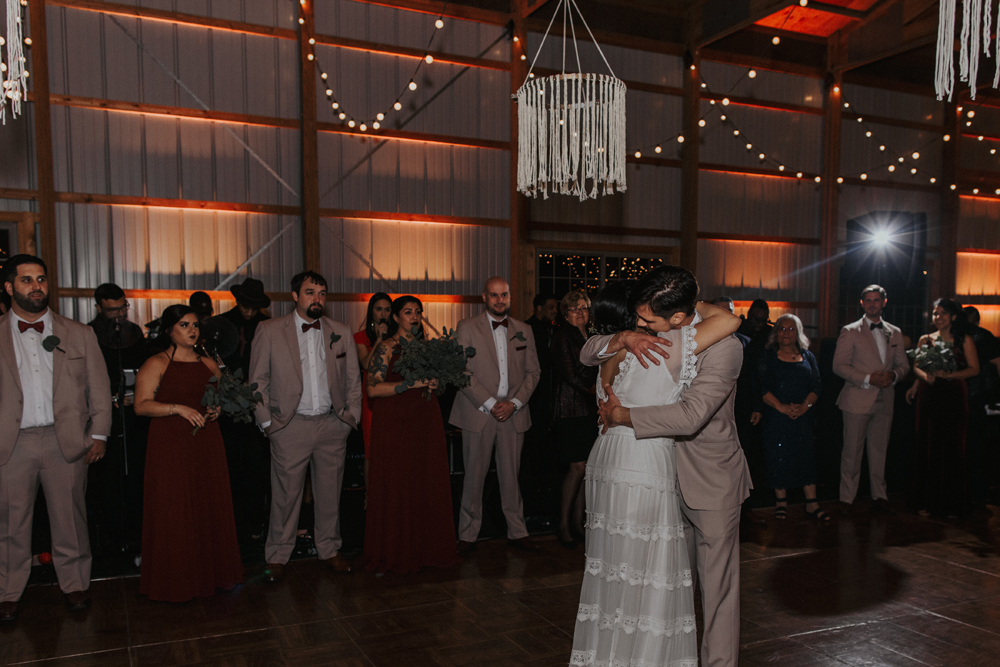
The majority of weddings we shoot end in a grand exit. About 90% of the time this involves a whole bunch of sparklers, all the guests (drunk or not) forming lines, and the bride & groom walking through as a newly married couple.
Actually photographing the exit is a mixture of challenging and exciting. In our experience, the photos always turn out looking better than we originally expected.
For these shots, we’ve used two different methods and like them both in their own ways:
- The Natural Light Method. In this approach, you will raise your ISO and use a reasonable aperture like f/2.8 capture the bride & groom as they move through the ambient light given off by the sparklers. In your camera preview, these images may not look the best – and admittedly we’re not a huge fan of the overly orange look to everything. But, with great preset selection, you can effectively edit the images to look absolutely breathtaking.
- The Flash Method. By using flash, you can fill in all the dark shadows and be guaranteed a great looking shot. While off camera flash would be preferable, it’s not always feasible to set up – and there is more of a risk of someone running into the equipment. With on camera flash, the results will normally look very good – nicely illuminating the bride & groom, and still being able to capture the sparklers authentically.
Camera Settings
Shoot in RAW
Camera RAW will give you the most opportunities to edit your images. When you don’t dial in a perfect exposure in camera, it will also give you the max control over recovering a poorly exposed picture.
Shutter = 200
One of our most basic photography tips is to set your shutter speed to 200 in most situations. This is, at least, a good starting point when you are dialing in settings.
Of course – if there is a lot of movement, you will want to increase your shutter speed. If you’re shooting in bright sunlight as well, increasing your shutter speed can be an easy way to reduce the amount of light coming into the camera if you still want to shoot at a wide aperture.
It is only in very unique situations where we go much lower than a 200 shutter speed – such as when we are experimenting with long exposures for an artistic effect.
Use Natural Light When Possible
Clean natural light is the best light for wedding photography.
While using flash and other lighting tools can be helpful, these really serve as tools to make photos look great when the natural light isn’t available.
Get Comfortable with Flash
As much as we love natural light, it’s just not realistic to think you can photograph an entire wedding without using some flash.
Some photographers do actually do this, but the results will not hold up over time. Once you enter a dimly lit cathedral or a dark reception hall, it’s going to be very difficult (if not impossible) to capture without flash.
Beginner flash photography during weddings is actually fairly easy to get started with. Here’s some quick fire (no pun intended) flash tips:
- We recommend having at least an on camera flash set up, and if you’re daring enough, an off camera flash mounted on a stand.
- You can place these flashes into auto mode (known as TTL or “Through the Lens” mode). In this mode, your flash will automatically calculate the amount of light it needs to send out to help you get the right exposure.
- Bounce the flash of of the ceiling and walls. If these walls are white, you’re in luck.
Use a Range of Apertures for the Best Effects
Your selection of aperture will play a big role in how you tell the story of a wedding.
The aperture dictates what thing(s) in an image are the focus.
With a wide aperture (low f-stop), you can isolate a single person or subject and make them the whole focus. For portraits, this is a great choice and our personal preference. We often shoot at f/2 – f/2.5 as our preference, actually, because it allows us to bring more light into the camera without creating unwanted noise – and it allows us to really blur out all of the background objects.
On the other end of things, though, there is a time and place for using more narrow apertures. When we take wider shots of a venue, for example, we draw on landscape photography techniques to get everything in focus so the image is nice and sharp. Between f/8 – f/16 we tend to see the best performance in this area.
Wondering what the best aperture and focal length for portraits is? We got you covered with the answer if you follow that link!
Keep ISO as Low as Possible
This is another beginner photography tip: keep your ISO as close to 100 as possible. In low light situations, you will need to raise it, and that is totally fine.
Wide Shots are More Forgiving
Wide camera lenses…
- Allow you to capture large scenes in a single image
- Can conceal errors like image blur and a person’s acne
Most of the time, close up shots are either good or bad. They are either usable or unusable.
In a lot of cases, with wider photos we are able to make them usable even if the camera handling technique wasn’t perfect.
Keep Spare Batteries On You
Throughout the wedding day, you will probably need more batteries than you think. Batteries for your camera, batteries for your flash…they are MVP’s of the wedding day.
We bring around 12 fully charged camera batteries along to weddings. Additionally, we used carry around 2 dozen AA batteries to use in our flash speedlites – only having replaced this in the past year when we upgraded to the Profoto flash system which has proprietary and longer lasting batteries.
Super related: The Best Batteries for Your Speedlight – Our Helpful Guide
Don’t Use Auto-White Balance (AWB)
Most wedding photographers will actually recommend that you use auto-white balance. We started our wedding photography career following this tip ourselves, and while the results were not bad, they lacked consistency.
In the past 6 months, we began transitioning to setting our white balance manually. On our cameras (the Canon 5D Mark III and Canon 5D Mark IV), we have the choice to select preset modes (like “Daylight” and “Cloudy”) as well as pick a specific measurement on the Kelvin scale. The latter ability is what we prefer, but it is not available on all camera models.
Whether you are able to pick the Kelvin reading or must go with a preset, you will still find yourself taking better and more consistent images. You will have photos more accurate to the look you want them to have right out of camera. When you begin editing the photos, even with great presets, you will find your workflow is sped up thanks to more consistency in your white balance throughout all of the images.
As wedding days take place at multiple locations, we adjust our white balance regularly throughout the day depending on where we are shooting.
Use Back Button Focus and a Single AF Point
Since learning about different focusing modes, our preference has been back button focusing.
What makes back button focusing so special is that it allows you to lock in your focus on a subject AND adjust your composition. In practice, this means you can actually focus on a bride’s eye (a key portrait photography tip), then proceed to move the camera around until you’re happy with the framing of your shot.
We can admit – it does take a little getting used to, but it works extremely well and will simplify your photography.
For more information on back button focusing, check out this great video tutorial:
Paired with BBF, we also suggest using a Single AF Point. Most cameras include a number of focus points (often represented as little square blocks in the viewfinder). You should know – not all focus points are made the same. Some are better than others. With so many focus point options, it can be easy to get distracted by them, or even find them to be inconsistent in how they perform. You can cut out all of this non-sense by setting up your camera to use a single focus point. We use the middle one and this will most likely be your preference too.
Working with Other Wedding Vendors
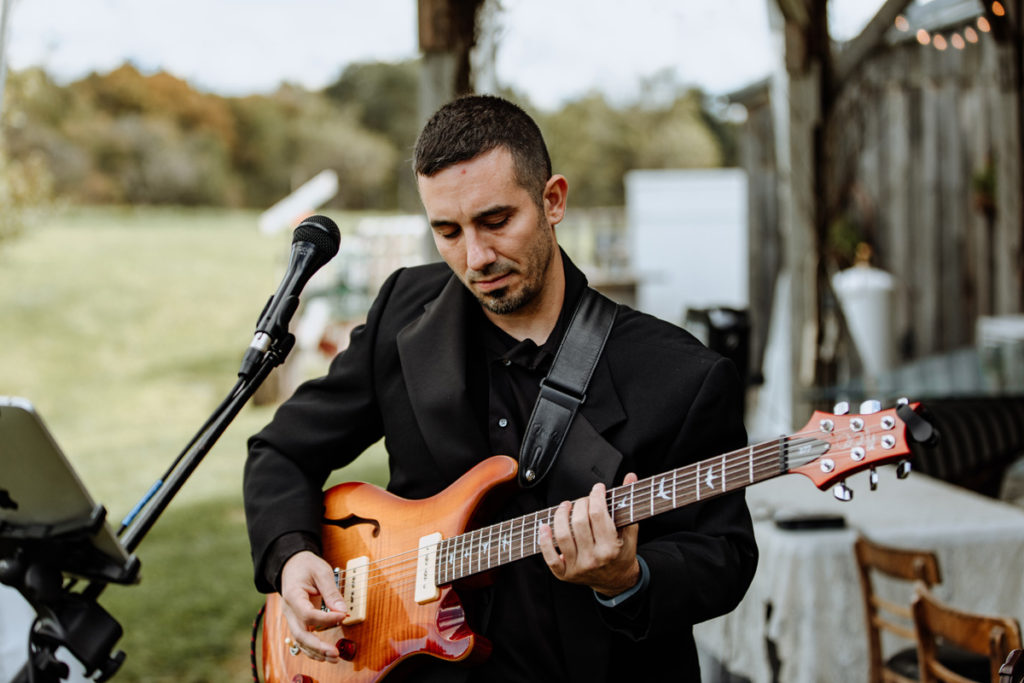
Be Nice and Professional
A little while back, wrote a post sharing the 10 Challenges Every Wedding Vendor Will Understand. As a wedding photographer, you are one of many service professionals that will be sharing in making the big day a great one for your mutual clients.
We have come across so many talented wedding vendors ourselves. They fit rolls both small and enormous.
- Florists
- Venues
- Videographers
- DJs and Bands
- Hair Stylists and Makeup Artists
- Caterers
- Wedding Planners
On the day, remember to be nice and professional as you work with these other people. With some people, like the videographer, you’ll be working directly with them through the majority of the day. In other cases, like florists, you’ll likely only say a quick “hello” (if you even see them!) but remember that there work is an integral part of the day.
Exchange Business Cards
It’s always a good idea to pass along your contact information to other vendors. This is especially true if you run into someone you really connect with, or who has work you can really get behind and support.
Having a high quality business card will help you to stand out in the sea of wedding photographers they most likely already encounter. Be creating beautiful images, always being ready to support your client, and having a good demeanor – these other vendors will be much more likely to actually take your card to heart instead of just tossing it in the trash.
If you need some high quality business cards at a reasonable price, we recommend Moo. Moo is an online business printing & design shop with a solid reputation for creating consistently high quality products. We’ve ordered hundreds of business cards from them over the years, and have loved every one of them. We have really preferred the feel of the Luxe Business Cards. We’ve had a number of vendors say to us…”Wow, this is a really nice card!!”
Incorporate Other Vendors Creations
Almost every wedding vendor will be providing something noteworthy that can be photographed. It’s important to remember that, these things were important enough for the bride & groom (and their families and friends in a lot of cases) to pay for – so it must be important to capture as a part of the wedding day.
Some items are common sense. You should always be photographing the bouquet with the bride and her bridesmaids. Other things, like the results of the work of hair and makeup artists will be photographed naturally throughout the day and on full display.
But, sometimes it can be a great idea to also feature the other vendors in photos. Not only can you share these images with those vendors for them to use themselves, but it will help the B&G remember years from now that…hey, these people were a big part of the wedding, too!
Share Images
Sharing your images with other wedding vendors is a great idea. We regularly do this with almost every wedding we photograph. Often, these vendors will share on their social media accounts – tagging us and directing new people to our website. From time to time, they will also use photos on their own websites, and include a backlink to us – which has a lot of SEO value for our website and brand.
Tag Other Vendors on Social Media
Whenever we post a photo on social media, we always tag all of the wedding vendors from that day. This is an easy way to keep on their radar, and your post will often display on their page in one way or another.
On Instagram, images will show up in the “Tagged” section as seen below:
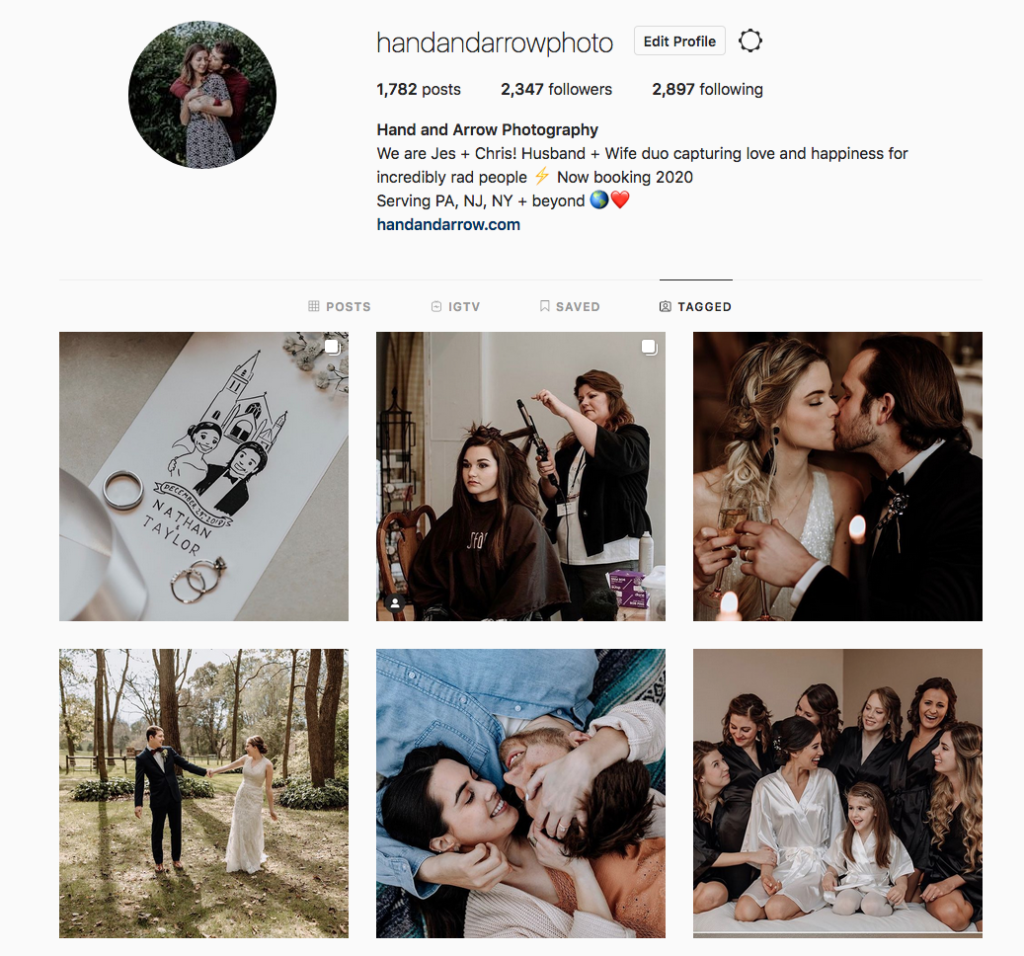
For more on using Instagram successfully, check out:
- How to Use Instagram to Market Your Photography Business
- How to Use Instagram Search to Get New Photography Gigs
Know When To Raise Your Voice
An important wedding photography tip for beginners – not every wedding vendor will be on your side.
We hate to break it to you, but some wedding vendors are just not that great. But, it’s not the people who aren’t the best in the industry that bother us so much as it is the vendors who don’t seem to care. We’ve met our share of cocky DJs and wedding coordinators who just disappear – and these types of people can make a bad impact. They immediately go on our “blacklist”.
In most things, we can manage stepping up as needed. If a coordinator has gone missing when it’s time to wrangle people up for the sparkler exit – we can help get people out the door and lined up.
The biggest thing that does impact us is when things are really detrimental to our photography.
Bad DJ lighting is one example – and we’ll ask them to shut it off if needed to get a good shot.
Knowing when to grin and bear it, and when to raise your voice is important!!
Wedding Photography Tips for Beginners: After the Wedding
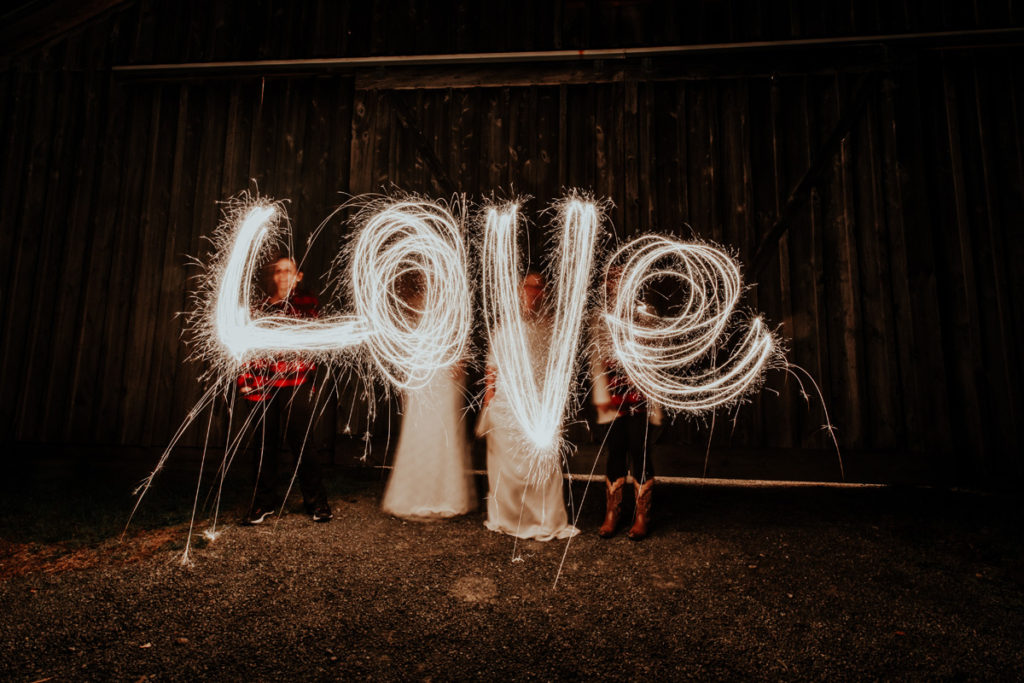
Now that you have wrapped up shooting, you get to take all of those great photos home and get to create them into a beautiful end product for your clients.
While at this stage you will no longer be lifting up your camera, the amount that could go wrong is very high. With our practical tips, we will help show you how to effectively select the images you want to use, how to edit the photos (A BIG DEAL), and what to do from there!
Editing the Wedding Photos
Make Backups of ALL Your Images
Two is one, and one is none.
This is a great quote that has stuck with us for a long time. It is used by people who have jobs backing up data (among other things). In the case of wedding photographers, a big part of our job is making sure we keep our clients information secure and private when we need to – but we also need to make sure we never, under any circumstance, lose photos we have taken for them.
It has become our tradition to immediately unload images off of the SD cards straight to an external hard drive when we get home from a wedding. Yes, it is kind of crazy considering we often don’t arrive home until midnight or later. But, it’s very intentional because we take this part of our job very seriously.
Before we even go to sleep, we have 3 backups of the images:
- one on the original SD card,
- one on a second SD card (our cameras can write to 2 at once),
- and the last backup on an external HD
Because of how important all of this is, having backup drives you can trust is critically important.
When it comes to external hard drives for photographers – we only use the Western Digital My Passport. We currently actually own 3 of them because of the volume of work we’ve had to backup over the years. They come in 1TB, 2TB, 3TB, and 4TB sizes and range in price from 50$ – 100$. A great deal if you ask us!
Cull Photos Quickly
One of the best things we did for our post-wedding workflow was get Photo Mechanic. This is a simple program that allows you to quickly cull through photos on your computer. At one time, it would take hours to cull down wedding photos since between the two of us we’d end up with around 4,000 photos per wedding. Doing this in our regular computer’s finder window was extremely slow and tedious. This is an easy workaround to save you a whole lot of time fast!
Define Your Editing Style With Words
Finding your preferred photo editing style can take time. You may find yourself browsing through countless presets available online – and this might help you narrow down the things you like and dislike.
While experimentation and proper product evaluation should be a part of finding the right edit for your wedding photography, there is another little tool that we used.
Write down what characteristics you want your photography to embody. Seriously, take out a piece of paper and just write down a list of words to describe your ideal photo edits.
When we did this, we came up with terms like…
- Romantic
- Moody
- Authentic
- Natural
From there, you can start to identify what in photo editing helps you to achieve the look you are going for.
For example, “moody” image edits are going to generally be darker with a good deal of contrast. You might even be incorporating a whole lot of stylish black and white imagery.
For “natural”, this could mean keeping colors true-to-life. A lot of photo editing is designed to alter coloring in some significant ways, but this just isn’t for us.
As you can see, defining what you want your edits to represent, then finding ways to make that actionable is a great little exercise that you can do pretty quickly!!
Use a Trusted Editing Software Program
The most popular photo editing applications are Photoshop and Lightroom.
These are, hands down, the photo editing tools we would recommend for anyone ranging from total beginners to advanced users. The things you can do with these platforms is absolutely amazing. Right out the gate, you can start to enhance your images in great ways.
Use Presets to Speed Up Editing
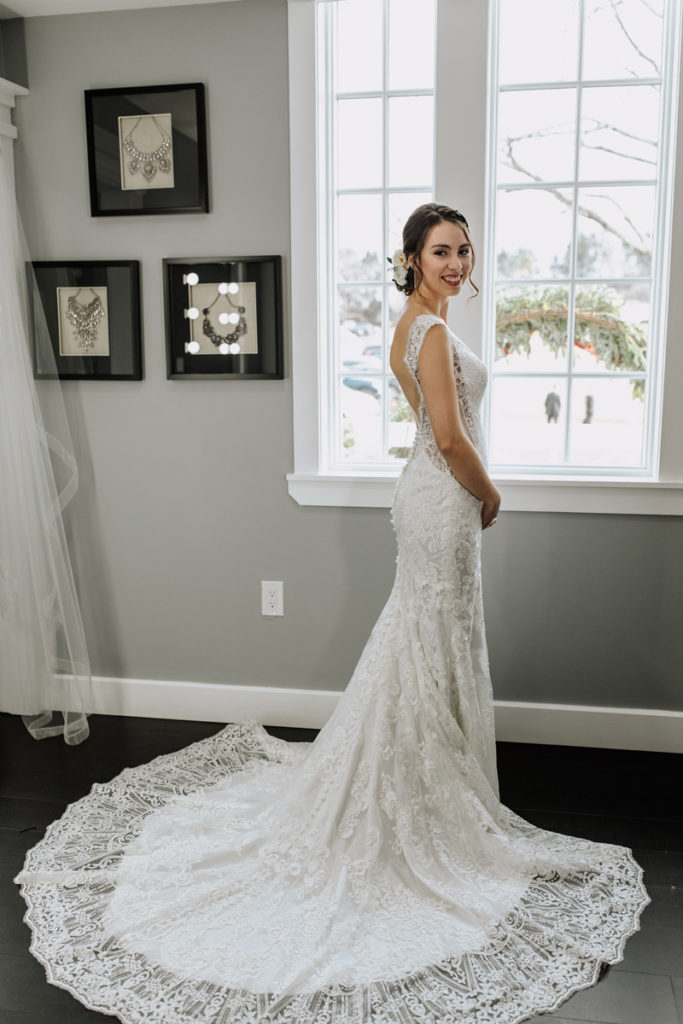
Presets are a wedding photographers best friend.
We use Lightroom presets ourselves – having initially bought a number of different packs until we created our own.
Your choice of presets will come down to how well they will help you achieve the style you are going for. Some really great preset packs we’ve seen and used ourselves include:
- Signature Edit’s Genesis Presets (you can read our review with sample images here)
- BeArt Wedding Presets, Film Wedding Collection, and Vintage Wedding Collection
Use AI editing tools to make editing faster
When I originally wrote this post (many years ago), AI editing tools for photographers didn’t even exist. Now, popular companies like Aftershoot, Imagen AI, and Evoto make editing your images even easier than presets (and quicker, too).
Prepare Sneak Peaks
After a wedding, our goal is to normally get some sneak peaks posted on social media within 24-48 hours. These are just a few photos so the newly married couple can see some photos from their big day, and often friends & family really LOVE seeing them, too.
Even if it’s tough to make time for this, it’s really important to. It’s during this window of time that people are riding the high of the wedding, and everyone will be excited to see and share the images around. Almost always – we end up receiving a number of new followers, too!
Black & White Photography Edits
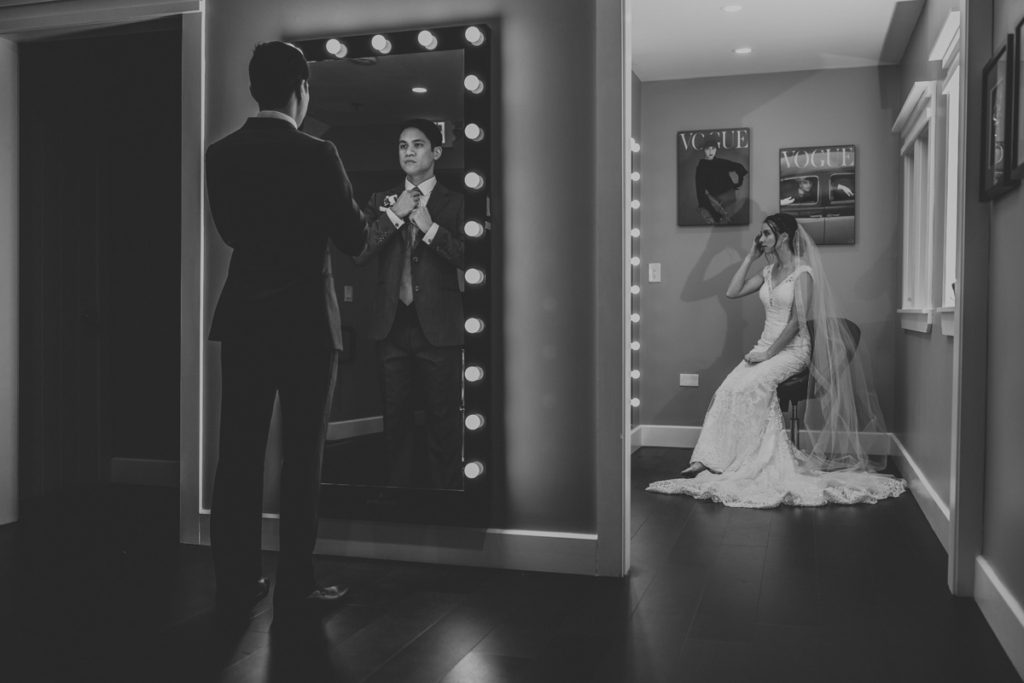
Black and white photography is extremely suited for weddings. It’s sleek, modern yet timeless, conveys raw emotion, and is very romantic when done right.
While we never take black and white photos in camera because we consider it unnecessary, every image can be edited to be black and white in post production. The solution here is to use solid black and white photography editing presets.
In general, there are 2 distinctly different styles of black and white editing:
- High contrast. These are photos where the blacks and whites in the photo are very distinct. There is much less of the middle ground (grey). These are often more dramatic and bold.
- Low contrast. Your edit can also include a mixture of black, white, and greys. The effect is far more soft.
We can see the merits of both approaches. We actually prefer lower contrast edits, but sometimes this can also be subjective depending on the specific image in front of our face.
Crop Images When Needed
The last editing tip for wedding photography beginners we want to give you is a really easy one: remember to crop your images (if you need to).
Sometimes, we snap photos without realizing that there is a lot of unnecessary space or distracting things around the edges. By cropping in the image, you can hand select what actually becomes the focus of the image.
The Follow Up
Deliver Photos on Time
Your follow up with the client is hugely important.
The first aspect that is most important is to make sure you are fulfilling your contractual obligations. Your contracts should state how long it will take for the client to receive their photos (if it does not – you need to update this ASAP!). For many photographers, this will be between a few weeks or 1-2 months. There is no right or wrong – but you need to be realistic with the amount of work you are taking on and set the expectations with your clients appropriately.
Delivering your photos on time is a surefire way to make sure your clients are happy, and not leaving them with some horror story of trying to chase their photographer to get images from the most important day of their lives.
The Online Wedding Gallery
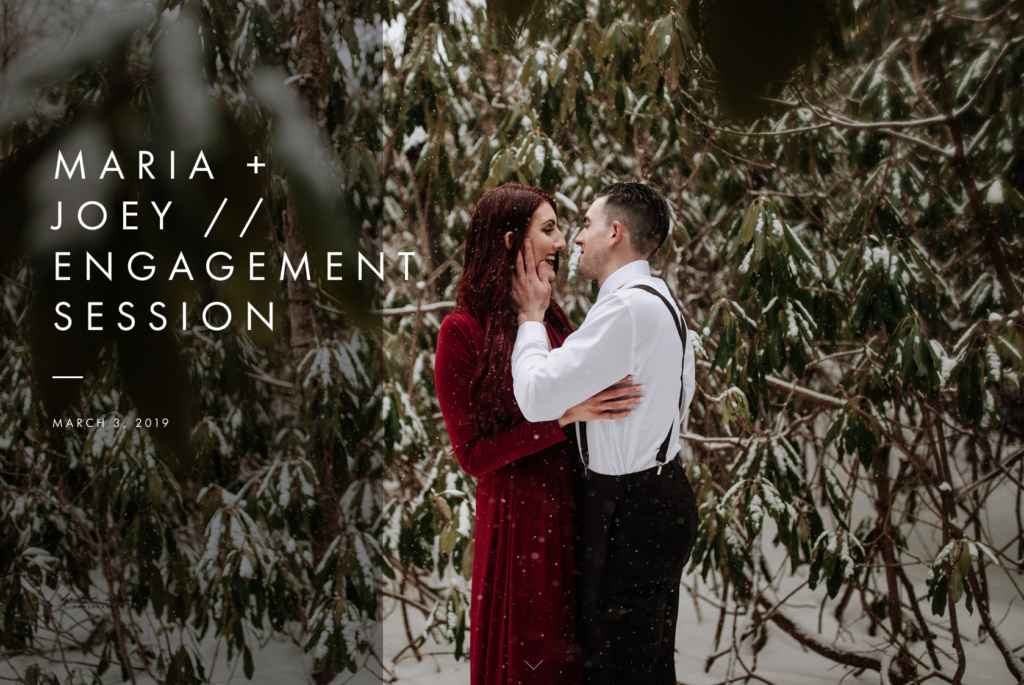
At one time, wedding photos would be purchased exclusively through prints and rolls of film, but the times have changed.
Any modern wedding photographer is going to use an online gallery to host their client’s images and make them available in digital format.
At it’s core, most gallery services offer at least one simple thing: a place to store photos online using cloud hosting.
From there, the many gallery platforms will also include other features such as the ability to sells prints through an online store.
In our experience, we currently use and recommend Pic-Time. This is a really great platform that offers one distinctive advantage over most others we have tried and used – the ability for clients to create their own wedding albums.
Offer Albums, Prints, and Other Upsells
An important part of running a successful wedding photography business is being able to sell additional products after a client has booked your services. The most common of these things are wedding albums and prints.
As we mentioned, most wedding gallery services incorporate a store front to make this an easier process. Your choice of printing vendor will vary, but a few we recommend include ZNO and CanvasPop.
Give Referral Incentives
Once you have completed all the work for your current client, a good idea is to give them a reason to refer new clients to you. In truth, most clients who are really happy with the work you’ve done for them will be spreading the word about your business to their friends and family – but this is a way to sweeten the deal for them.
Some possible referral incentives you could incorporate:
- Offer free or discount products from your print store
- Give actual cash for booked referrals
- Offer a % off a future photography session
You may also consider offering a discount for the client who has been referred as well!
Ask for Reviews
One of the easiest ways to grow your photography business is to be confident in your work and ask for reviews. It can be a little scary to do at first, but it’s always worked out in our experience. Clients who love their images will be happy to write a review for you, and those reviews provide proof to anyone looking to hire a photographer that you are legit.
We find reviews on Facebook, The Knot, and Wedding Wire to be the most worthwhile to ask for as a beginner.
Professional photographers who have their own studios (and thus – a physical address) would also benefit from having reviews on their Google Business page and other locations like Yelp.
Schedule Future Print Offers
You know how some companies send out emails every day with offers for discounts on products and other information? As a wedding photographer, you can do that too!
While we actually don’t recommend doing this every day, having offers for discounts on your print store is a good thing to do. Consider timing these around holidays when people might be most interested in buying prints like for Mother’s Day, Valentine’s Day, and Christmas.
The way we see it, there are 3 ways to go about scheduling these offers:
- Send emails the old fashioned way to ALL your previous clients with active galleries with a discount code to apply to their future orders.
- Use a mass email marketing platform like Mailchimp to curate a nicer looking message and automate the delivery of these emails throughout the year with offers.
- Take advantage of mailing discounts through Pic-Time periodically to ALL or some specific clients.
At it’s core, all of these methods work roughly the same. The 1st will be the most manual work on your part, while options #2 and #3 are ways to better automate this process to save time.
Be Clear About How Long the Gallery Will Be Online
Unless you plan to keep the wedding galleries online forever, you should be defining how long it will be available for your client to access their images digitally.
Our approach has been this:
- Wedding galleries – removed after 1 year
- Engagement session – removed after 6 months
This is what works for us, and we feel it gives our clients more than reasonable amounts of time to download their images. In general, we’d hope our clients would download these images and put them on their own external HD – or otherwise purchase a flash drive with the photos on it through us.
Send a “Thank You” note
The last part of your follow up should include giving a heartfelt “thank you” to your client for trusting you to provide a great wedding photography service. You can do this how you want, and really, there is no right or wrong way.
What we have done since the beginning is send thank you notes in the mail – because snail mail is a way to show you care because it takes just a little more effort than sending an online message.
You can buy some stock thank you note cards from the store, or customize your own designs to be more uniform with your brand using an online service. For this, we recommend BasicInvite – which we’ve used for much of our stationary needs since ordering wedding invitations for our own wedding. Their “thank you” cards are really quite beautiful, and the ability to customize with your own imagery, logo, etc. makes them just a little more powerful.
If this is a route you want to go, add in our promo code at checkout: handandarrow to get 20% off your order!!
General Mistakes to Avoid
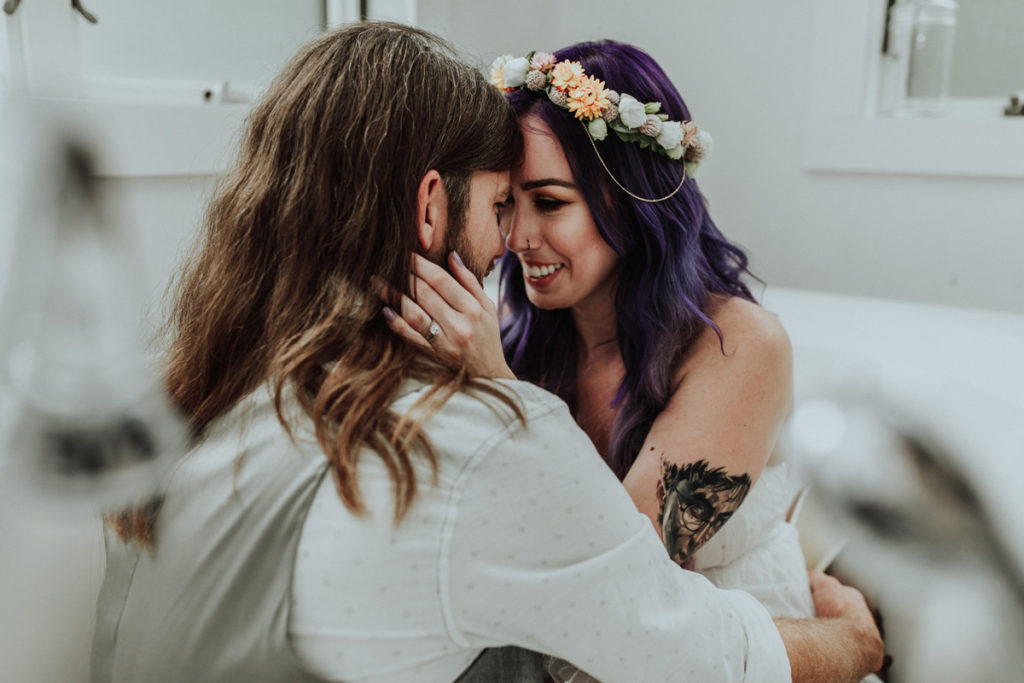
Don’t Make the Wedding Day All About Photography
Sometimes wedding photographers make the mistake of thinking the day is all about photography. While this is your job during the big day, you should also aim to balance getting the shots you need with the happiness of your clients.
Of course, with this comes a great responsibility. You need to be able to use good judgment to determine when to fight for certain photos vs. when you should say “it’s up to you.” If you haven’t done enough portraits to be happy with all the images you already have, that’s when it is super important to make this clear.
Ultimately though, the B&G are in control. It’s their wedding day, not yours.
Not Sticking to the Wedding Day Schedule
We put together wedding photography timelines for a reason. If you begin to ignore the timeline throughout the day, it ends up not serving a purpose, you actually wasted time putting it together, and the flow of the day will be off.
For sure, there are some things that will happen that are unavoidable. If hair & makeup runs over the allotted time, there is not a whole lot you can do. But, one of your goals should always be to get back on schedule.
Don’t Use Selective Coloring in Your Edits
In the film Schindler’s List, there was a great use of the color red to contrast with the otherwise black and white style of the movie. This is probably the only instance of selective coloring that is acceptable. In all seriousness, this is a very dated editing style, and while you can technically do what you want – we’d suggest against it.
Avoid Having Portraits with Blinding Bright Sun
Shooting portraits during Golden Hour is always going to be preferable. If for some reason it is not, you should be prepared to work with the sun. One of the simplest tricks is to position the sun behind the people you are photographing. This will keep their faces evenly lit and will result in no squinty eyes.
Don’t Focus on Guests Who Want Excessive Attention
From time to time, we’ll photograph a wedding that has that one guest who seems to want all eyes on them throughout the day. No, wedding photographers are not your personal paparazzi. It’s okay to grab some shots here and there, but if a guest is following you around and asking for photos too much, just walk away and focus on shots of the people who matter most.
Not Having a Contract
Early in this post, we mentioned the importance of having a contract. We know this is something a few of you may read and think, “Yeah…I should have one, but I don’t have time for that!” That’s why we’re reiterating it here.
The reasons for having a contract in place are significant.
Contracts provide legal protections, ensure you will get paid, and clarify in writing what you are expected to provide to your client.
Listening to Photography Opinion of Guests/Family
Once in a while, the guests at a wedding will raise their voice expressing their thoughts on the choice of location, lighting, and other things that play a role in your wedding photography. We suggest you take this sort of information with a grain of salt. You are the photographer. Your vision and judgment matter.
We sometimes shoot in locations that may look cluttered in the background and even unappealing to the average person. We’ve gone so far as to talk about how to photograph portraits in ugly locations. This gets mentioned because, as a photographer, we don’t always just see the junk lying around – but how that junk can turn into painterly fractals in the background when we adjust our camera settings just right.
So – trust yourself and your photography instincts!
Missing the “Firsts”
Wedding days are filled with a lot of firsts for a couple. These are some of the most crucial moments to capture throughout the day. If by some mistake you end up missing a little detail shot or a candid picture of Aunt Sue at the reception, these are much more forgivable things than messing up or entirely missing photos of these big moments.
- First Kiss
- First Dance
- Exchanging of Vows & Rings
Photographing People Eating
A big no-no of wedding photography is taking pictures of people actively consuming their food. Normally during dinner, we’ll find ourselves a seat and relax for a little while.
In our experience, we’ll photograph the food as it is being prepared and served to guests, but never while people are actually eating. It’s unflattering, and no one wants that. We certainly wouldn’t want a photographer taking a picture of us stuffing our faces!
Arguing (with anyone)
And the last wedding photography tip for beginners to keep in mind…don’t argue with anyone, for any reason, ever. 🙂
At 99% of weddings, you’ll more than likely have a great time doing a job that you can love and have a lot of fun at. At that 1% of weddings, you may come into contact with someone who just wants to start a fight for some ungodly reason. Spare yourself the headache and just respond calmly, professionally, and walk away if you need too.
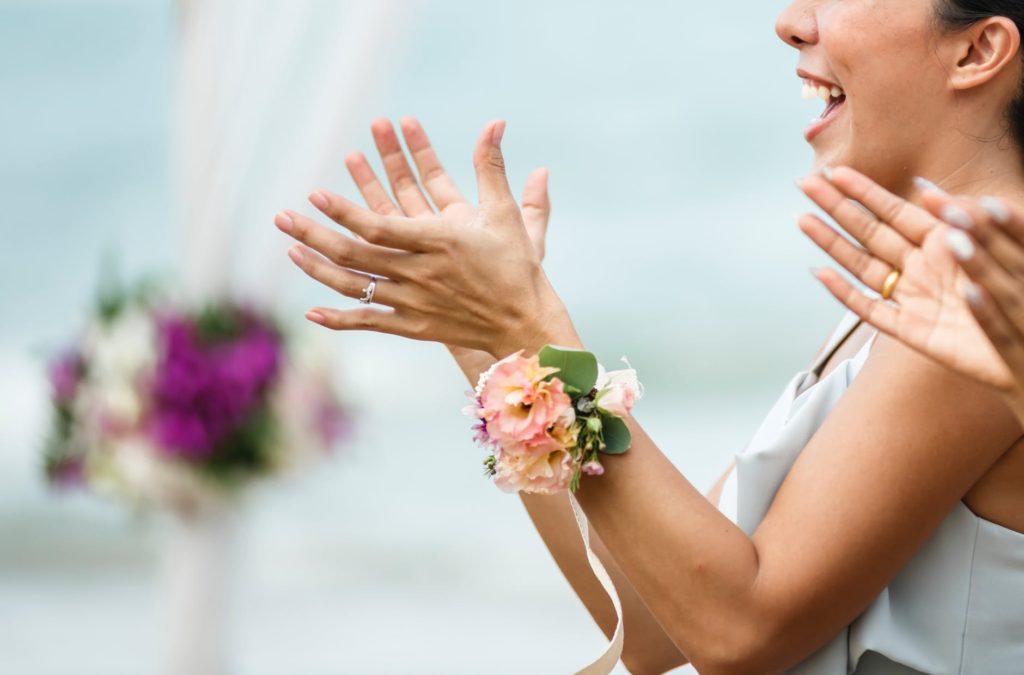
Conclusion
Our wedding photography tips for beginners is the most comprehensive post you will find on this subject online. We spent a crazy amount of time writing this beast of a post, and we hope you were able to find plenty of information you can take to heart and apply as you start to explore wedding photography yourself.
Even with the greatest tips on Earth, you’ll still need to get hands on experience to truly feel comfortable with what you are doing. And of course, you’re bound to have questions as you come up with new and unique challenges.