How to Photograph a Chinese Lantern Festival (Beginner Tutorial)
Last Updated: August 28th, 2025
We recently went to our first Chinese Lantern Festival held in our local area, and came away from with our jaws dropped. We had seen awesome photos online of other festivals featuring hundreds of paper lanterns floating up into the sky and always thought they looked cool, but experiencing it for yourself in real life is a whole other experience.
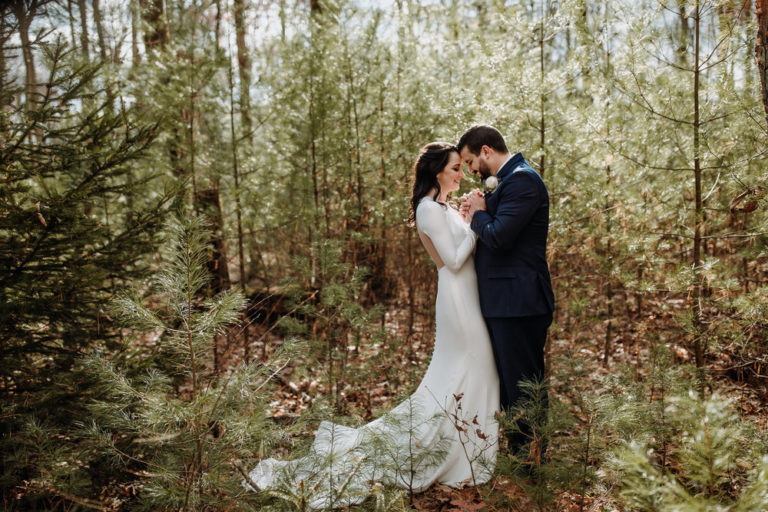
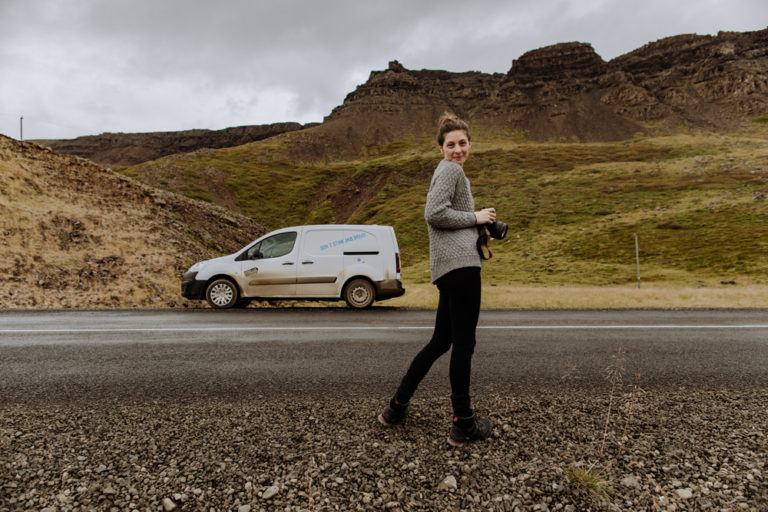
As photographers, this is the type of event many of us dream of photographing. We were fortunate to be approached by Night Lights Events – the host of the lantern festival we ended up visiting. They gave us the opportunity to visit for free to document the event and we even brought along one of our recently engaged couples and did engagement photos for them under the lantern lit sky, too! You can read our tips specifically about taking portraits at a Chinese lantern festival here.
Because we had such a cool experience and our images of the lantern fest turned out to be really awesome in their own right, we wanted to share some special photography tips for those of you planning to visit a Chinese lantern festival of your own!
What is so special about the Chinese Lantern Festivals?
Before we get into our actual photo tutorial, we wanted to highlight what makes Chinese lantern festivals so special.
These lantern festivals are celebrations in China and other Asian countries to honor deceased ancestors. The festivals have come to represent a promotion of peace, reconciliation, and forgiveness – all attributes we should be celebrating frequently.
While you can read an overview of how the festival is celebrated here, this little tidbit on the origin is enough to get our imaginations stirring:
“A legend concerning the festival’s origin tells the tale of the Jade Emperor (You Di), who became angered at a town for killing his goose. He planned to destroy the town with fire, but he was thwarted by a fairy who advised the people to light lanterns across the town on the appointed day of destruction. The emperor, fooled by all the light, assumed the town was already engulfed in flames. The town was spared, and in gratitude the people continued to commemorate the event annually by carrying colorful lanterns throughout the town.”
In modern times, lantern festivals are increasingly popping up around the world. Here in rural Pennsylvania, we aren’t so much celebrating the cultural background as we are taking in the spectacle of these events. Not to mention – they are very…Instagram friendly…but you’ll find a range of people, families, couples, and so on coming out to enjoy the events. Again – well worth checking out whether you happen to be in China experiencing the authentic lantern fests or somewhere else experiencing the sights.
How to Photograph Paper Lanterns at Night: 10 Tips
With our little history lesson wrapped up, let’s talk about photography!
In our experience, photographing the lantern festival is actually pretty easy to do in most cases if you keep just a few things in mind.
1). Arrive early to document the atmosphere
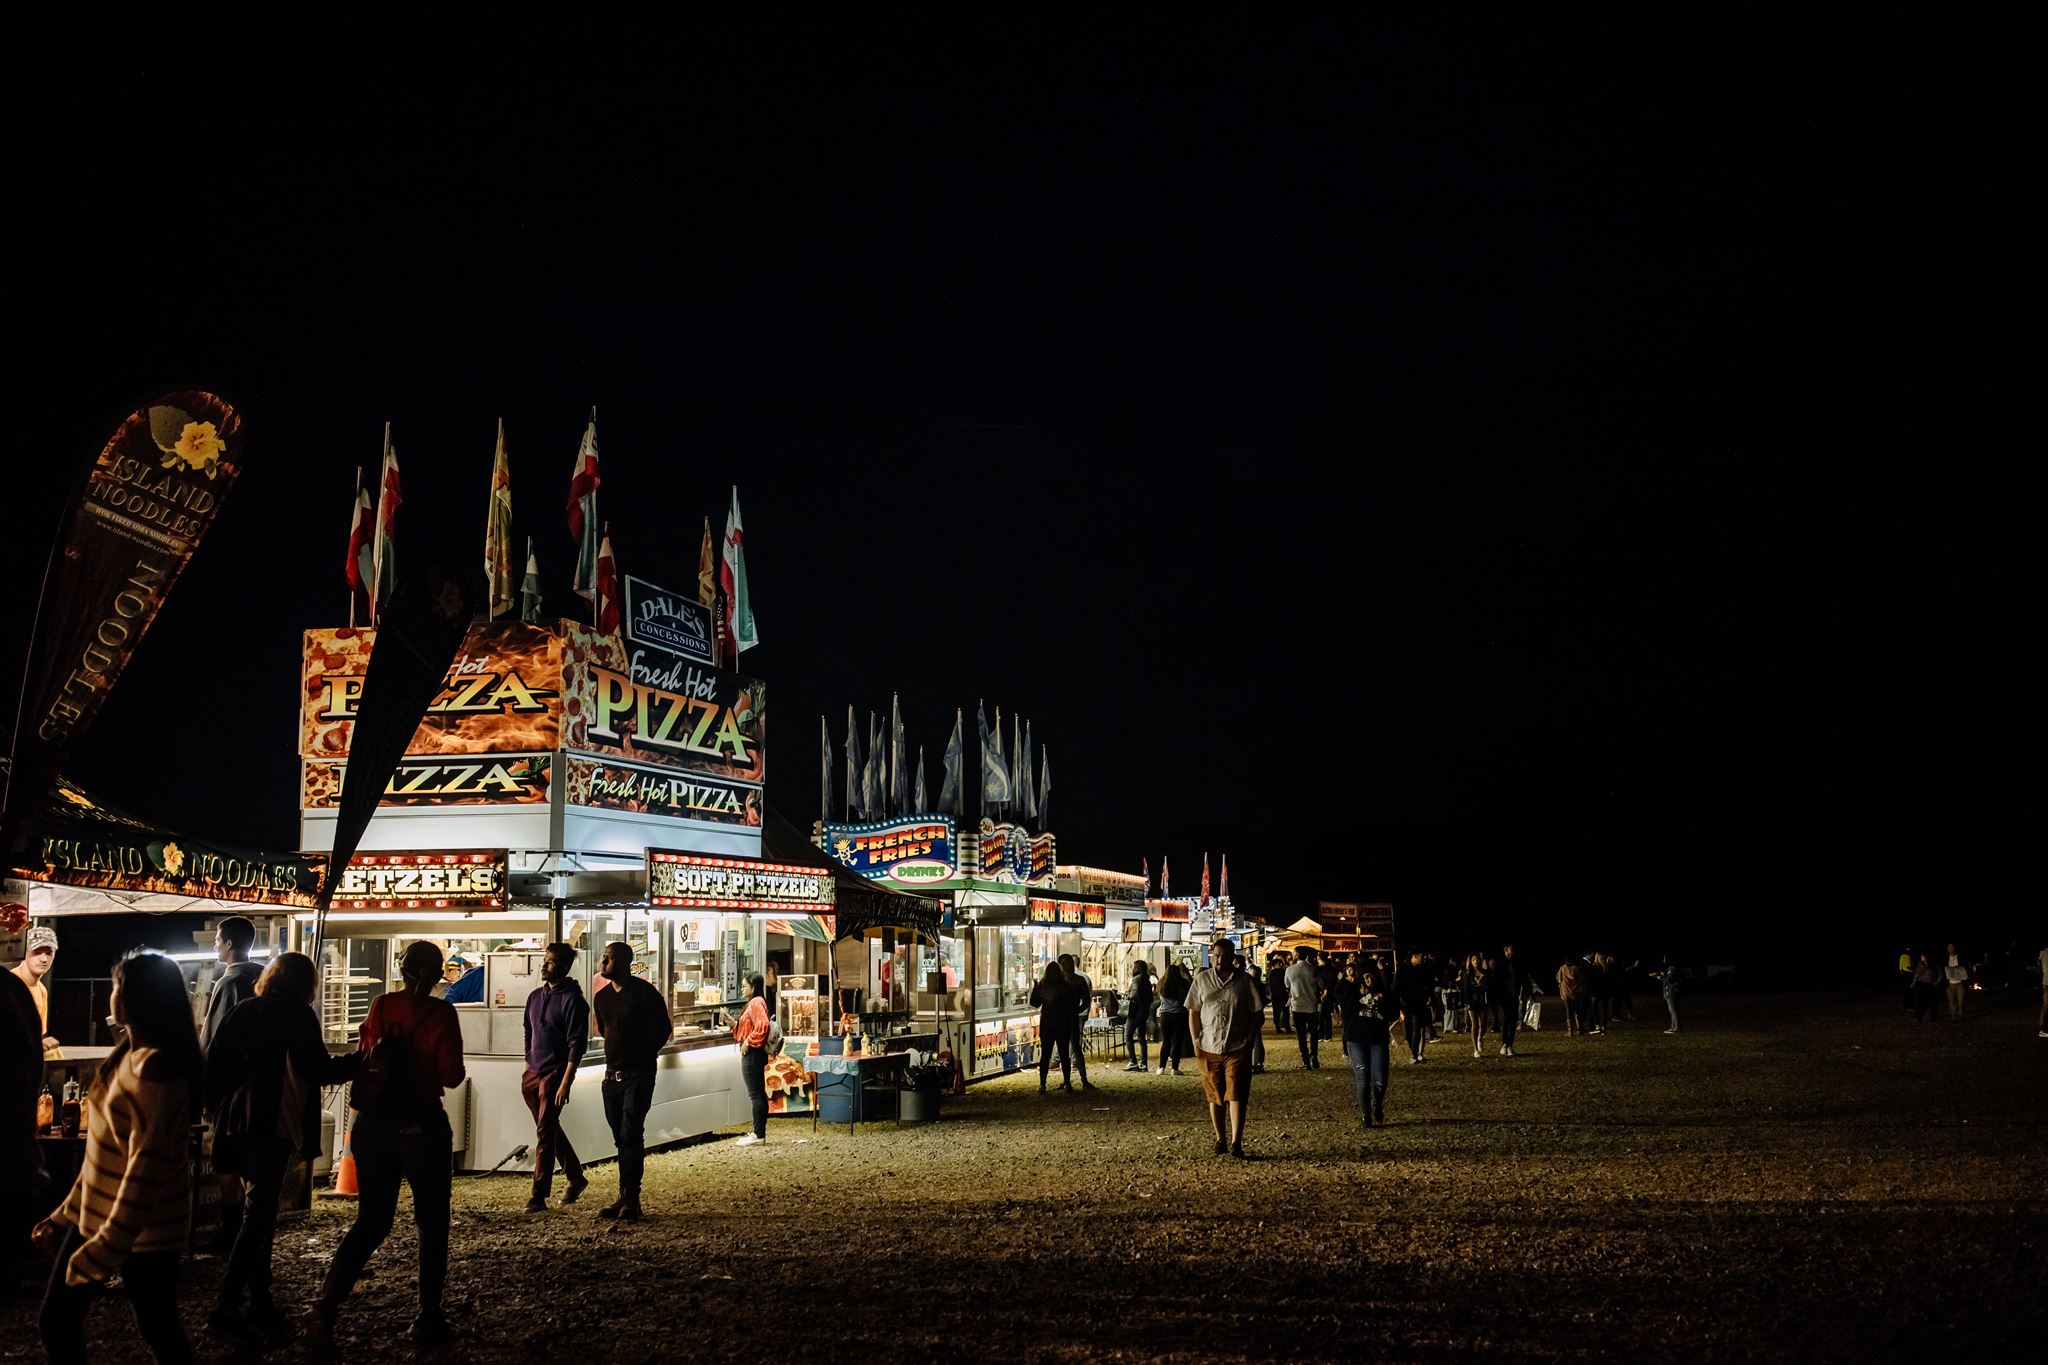 There are a few reasons why you’ll want to come early to the Chinese lantern festival. One of these is that, normally, there are plenty of things going on before the lanterns are even released!
At our local (and relatively small) festival, there was live music, food trucks, activities for kids, and other things going on. It’s all a fun time and documenting it as a photographer can be great if you like the subject matter that comes with a carnival-like atmosphere.
Of course, photography before all the lights go out tends to be easier. If you are an absolute beginner to photography, than reading our Beginner’s Guide to Photography and 101 Digital Photography Tips posts would be great starting points for you!
2). Pre-select a shooting location
When we arrived to the lantern festival, our first goal after checking in was to find a place we wanted to set up camp.
It’s important to be in position before the lanterns are released so you have time to catch them. This would be a great time to start configuring your settings and thinking out your compositions, too!
3). Expect to work with 5-10 minutes of high volumes of lanterns
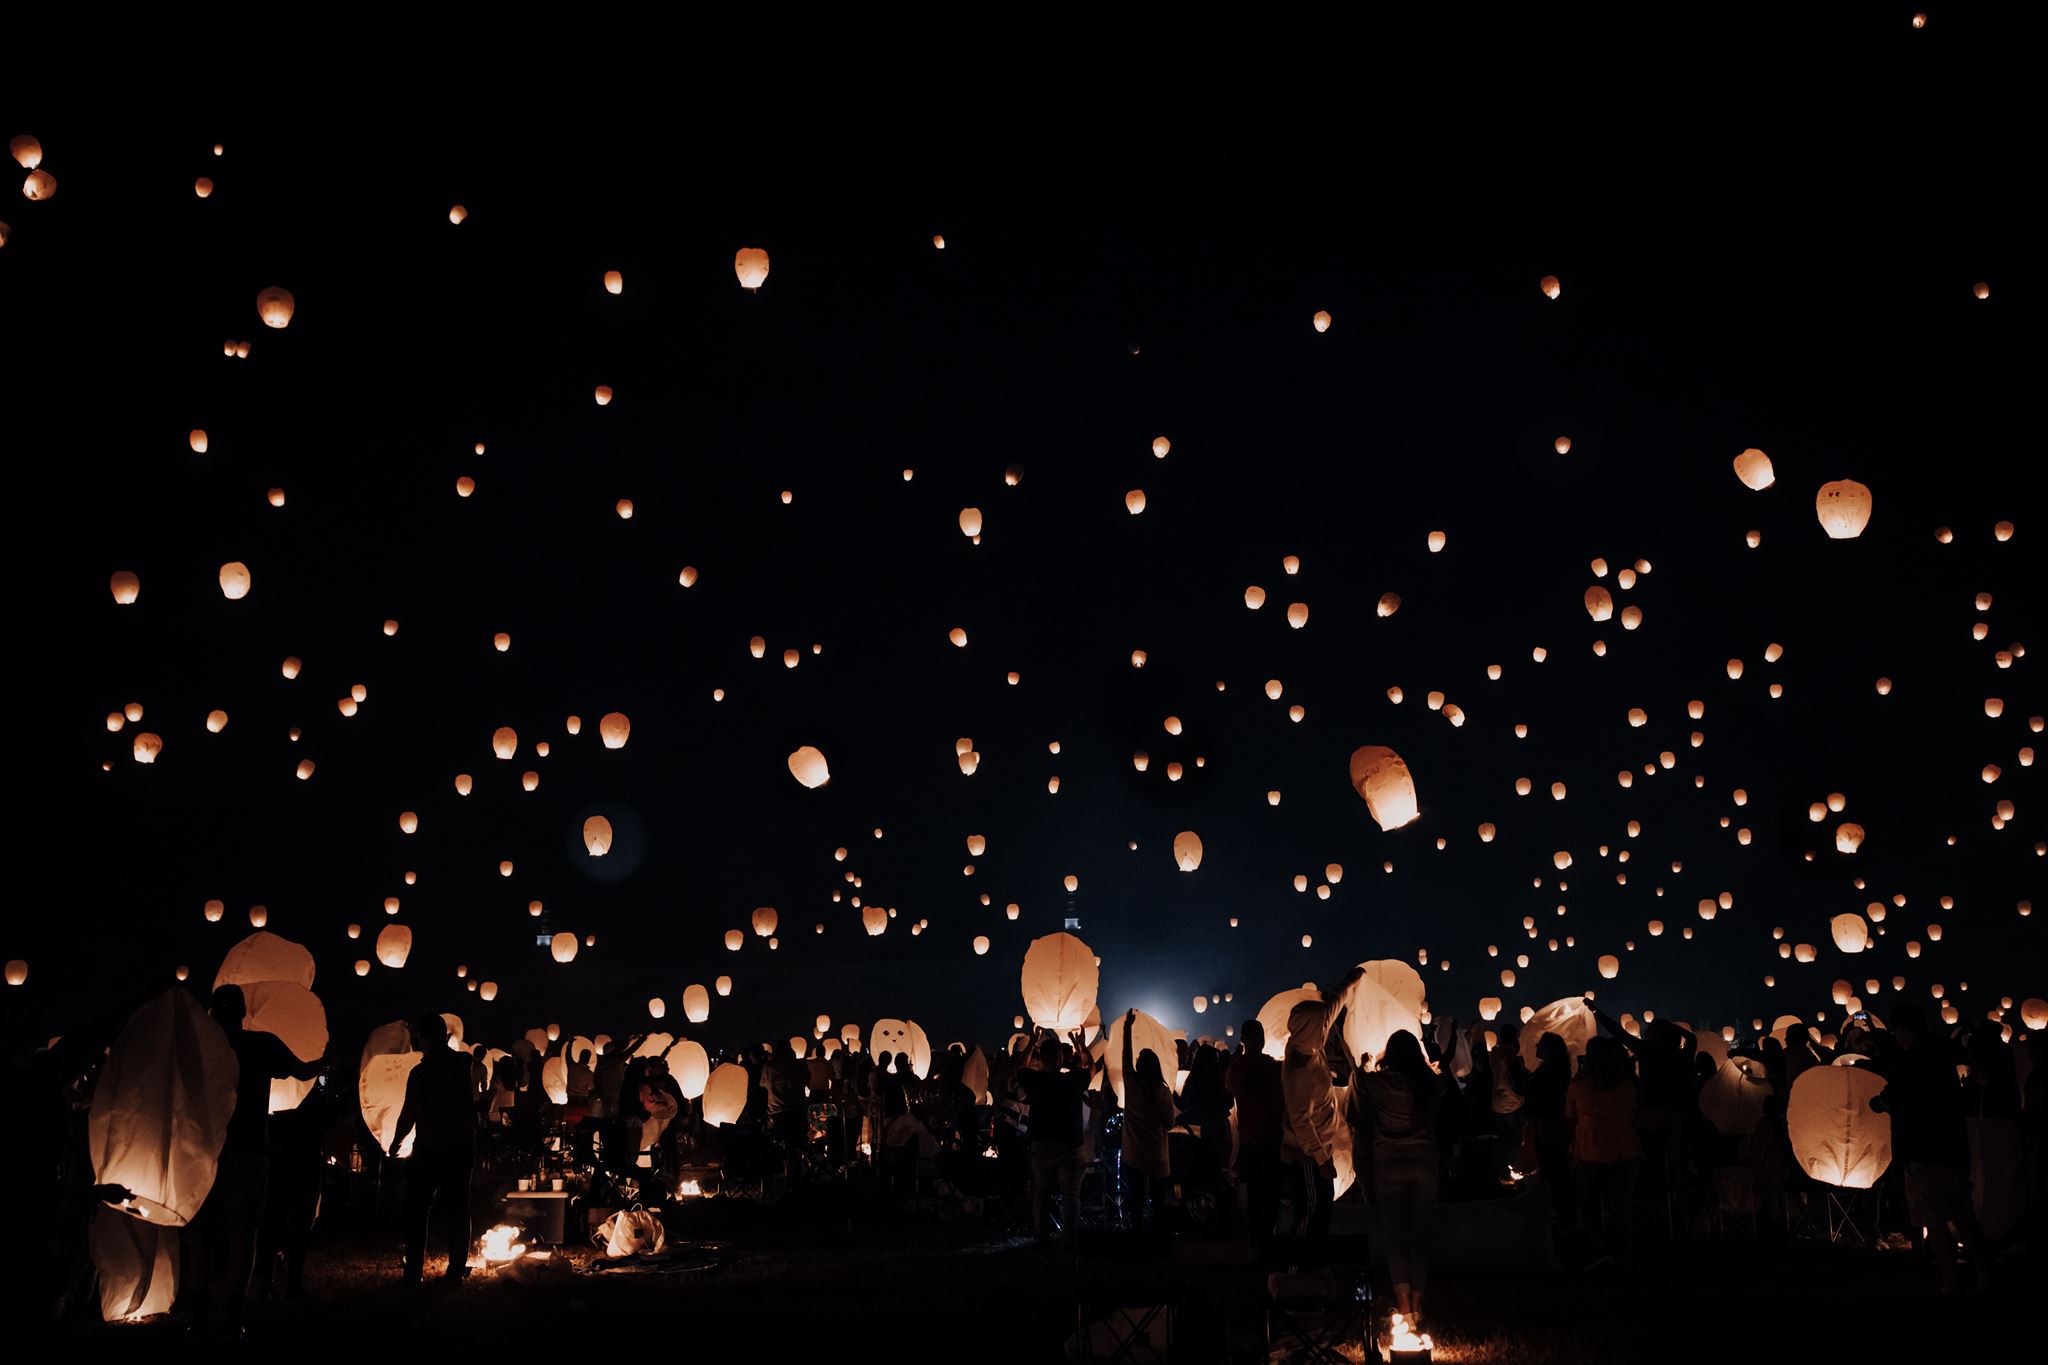 Before the event, we tried searching online to see how long we would expect to be able to shoot. We couldn’t seem to find anywhere how long we would have from when people started to release the lanterns to the sky being pretty bare. So, to give you an idea, based on our experience at a sold out local Chinese lantern festival: you only get 5-10 minutes of shooting time with a high volume of lanterns floating around in the scene.
It’s worth noting too that, the first minute or 2 are the most important, dense, and beautiful!
This point ties right back in to arriving early and being prepared to shoot because if you aren’t in place, you are already out of time!
4). A tripod is essential
While shooting handheld is not any more “difficult”, a camera tripod is much easier because it will allow you to produce better quality images in the dark environment that is a lantern fest. In our experience, setting up a camera on a tripod also has the added benefit of forcing us to select a location/composition and sticking with it more firmly as moving it around can take some extra time you don’t have while the lanterns are flying!
For a cheap but good quality tripod, you can check this one out (we use it ourselves!).
5). Images will look great with a high ISO on good quality equipment
 Because of the nature of paper lanterns, you will not want to use flash photography except, maybe, if you are photographing people at the fest (and this is entirely subjective!).
In reality, documenting the lanterns in their ambient lighting glory is the way to go for most shots you will be taking. It is the surreal and fiery look of the lanterns as they contrast starkly with the dark night sky and star light that makes it such an interesting subject matter.
One concern you may have is: how well will my camera perform in this dark environment? It’s a valid one – and applicable to any photography in dark environments. From astrophotography down to event photography in darkly lit reception halls. Some cameras like those found on our phones and cheap point-and-shoots will not create good quality images. Many beginner DSLR options will also struggle to keep up with the demands of low light shooting. You will want a higher quality camera to achieve the image quality you are expecting. These days, mirrorless cameras (like the Canon R6 II) is an excellent option for low light conditions.
If you don’t feel your camera will be up to the task, please be sure to check out our Guide to the Best Cameras for Low Light Photography for help in this area!
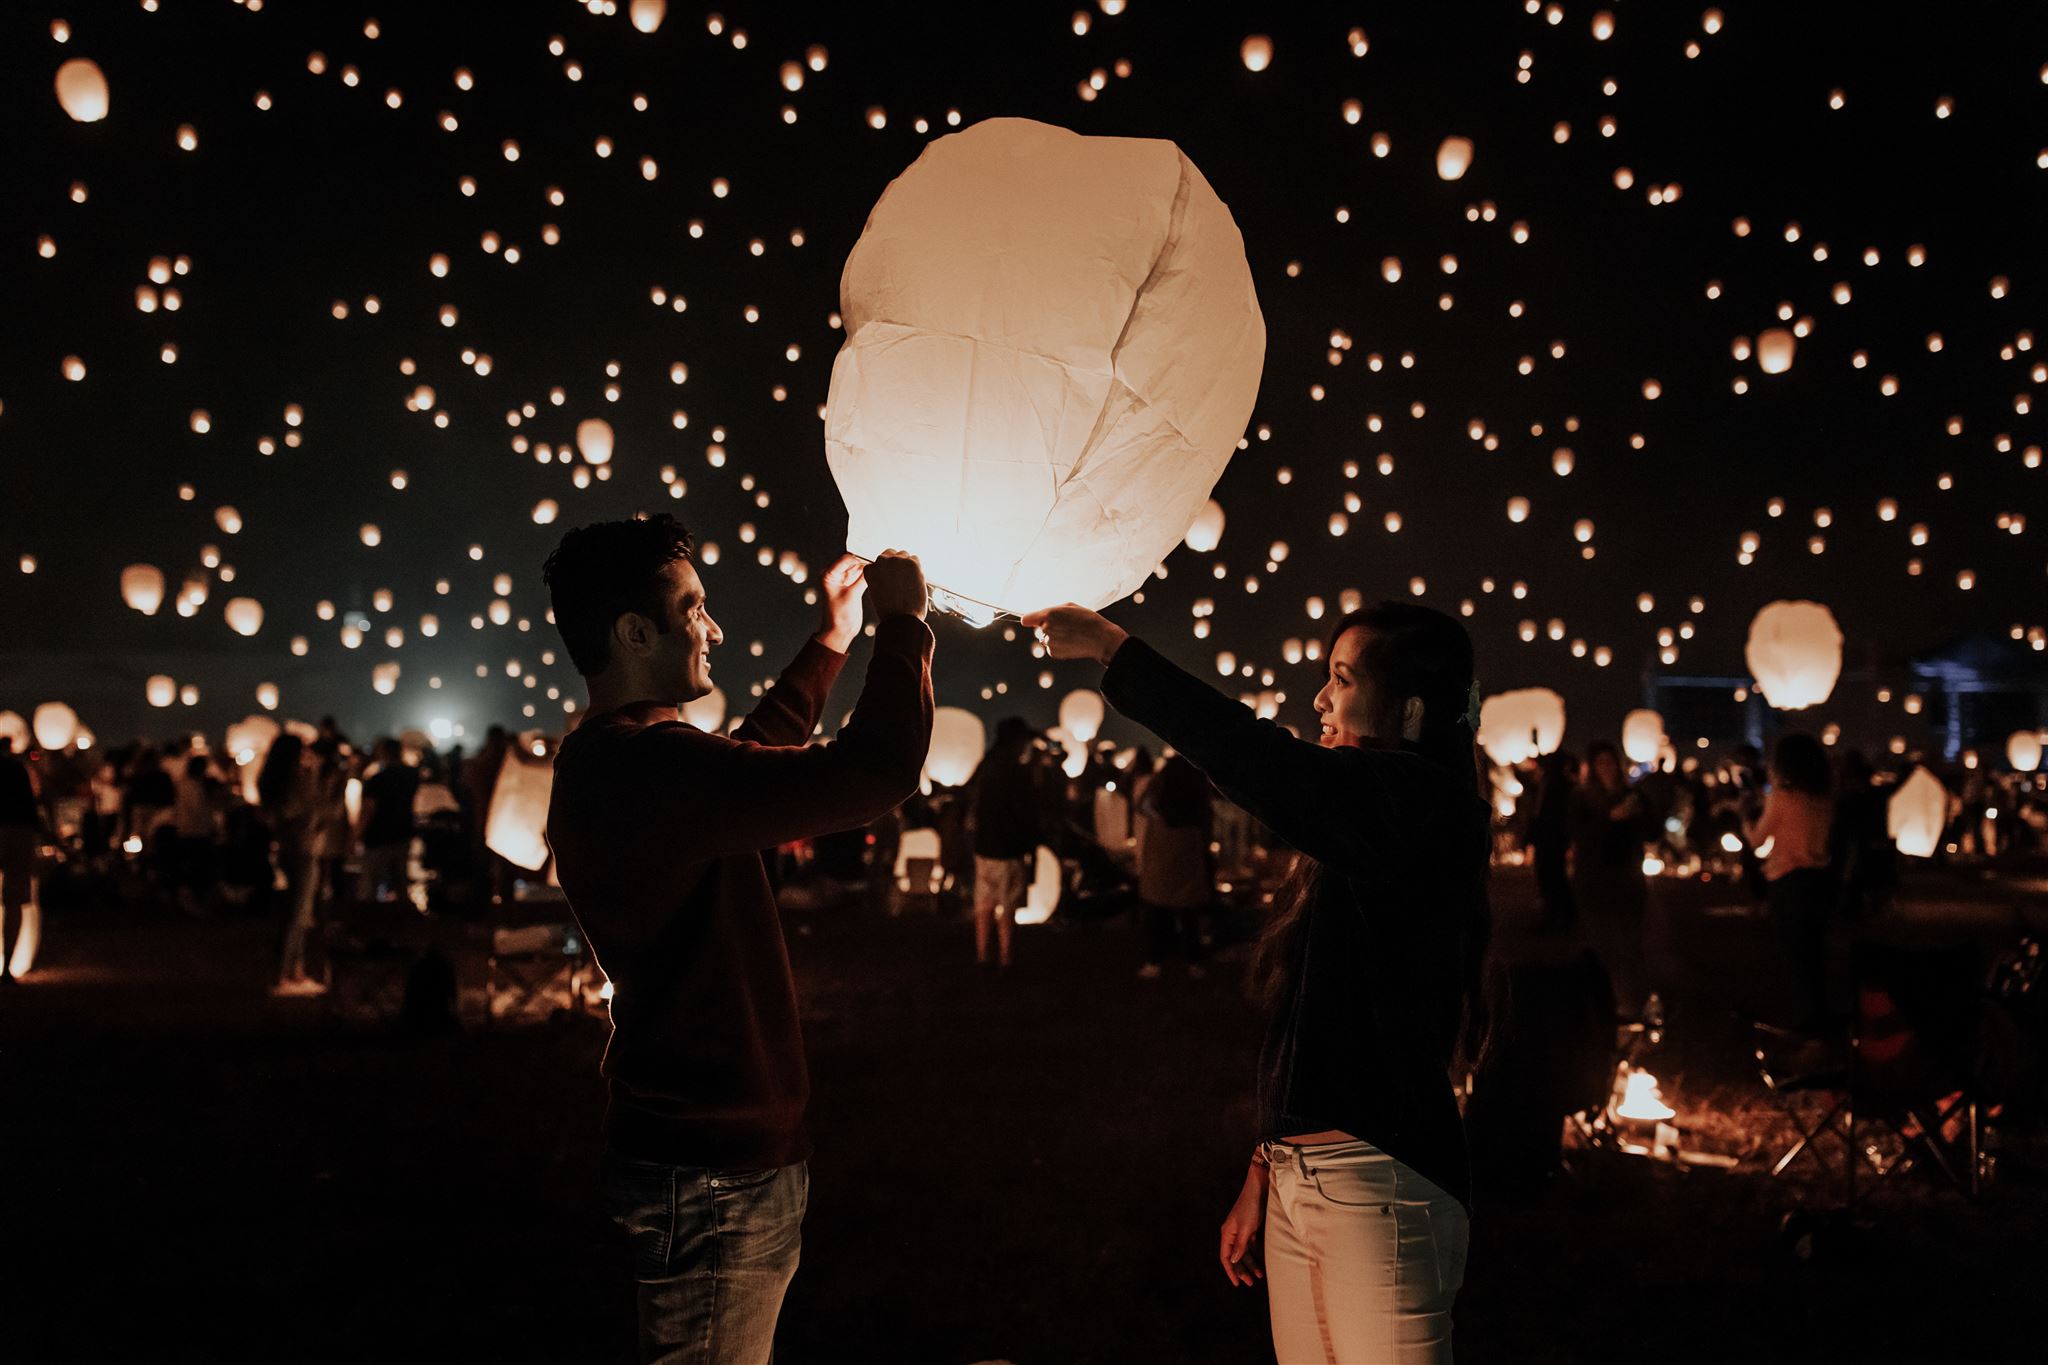
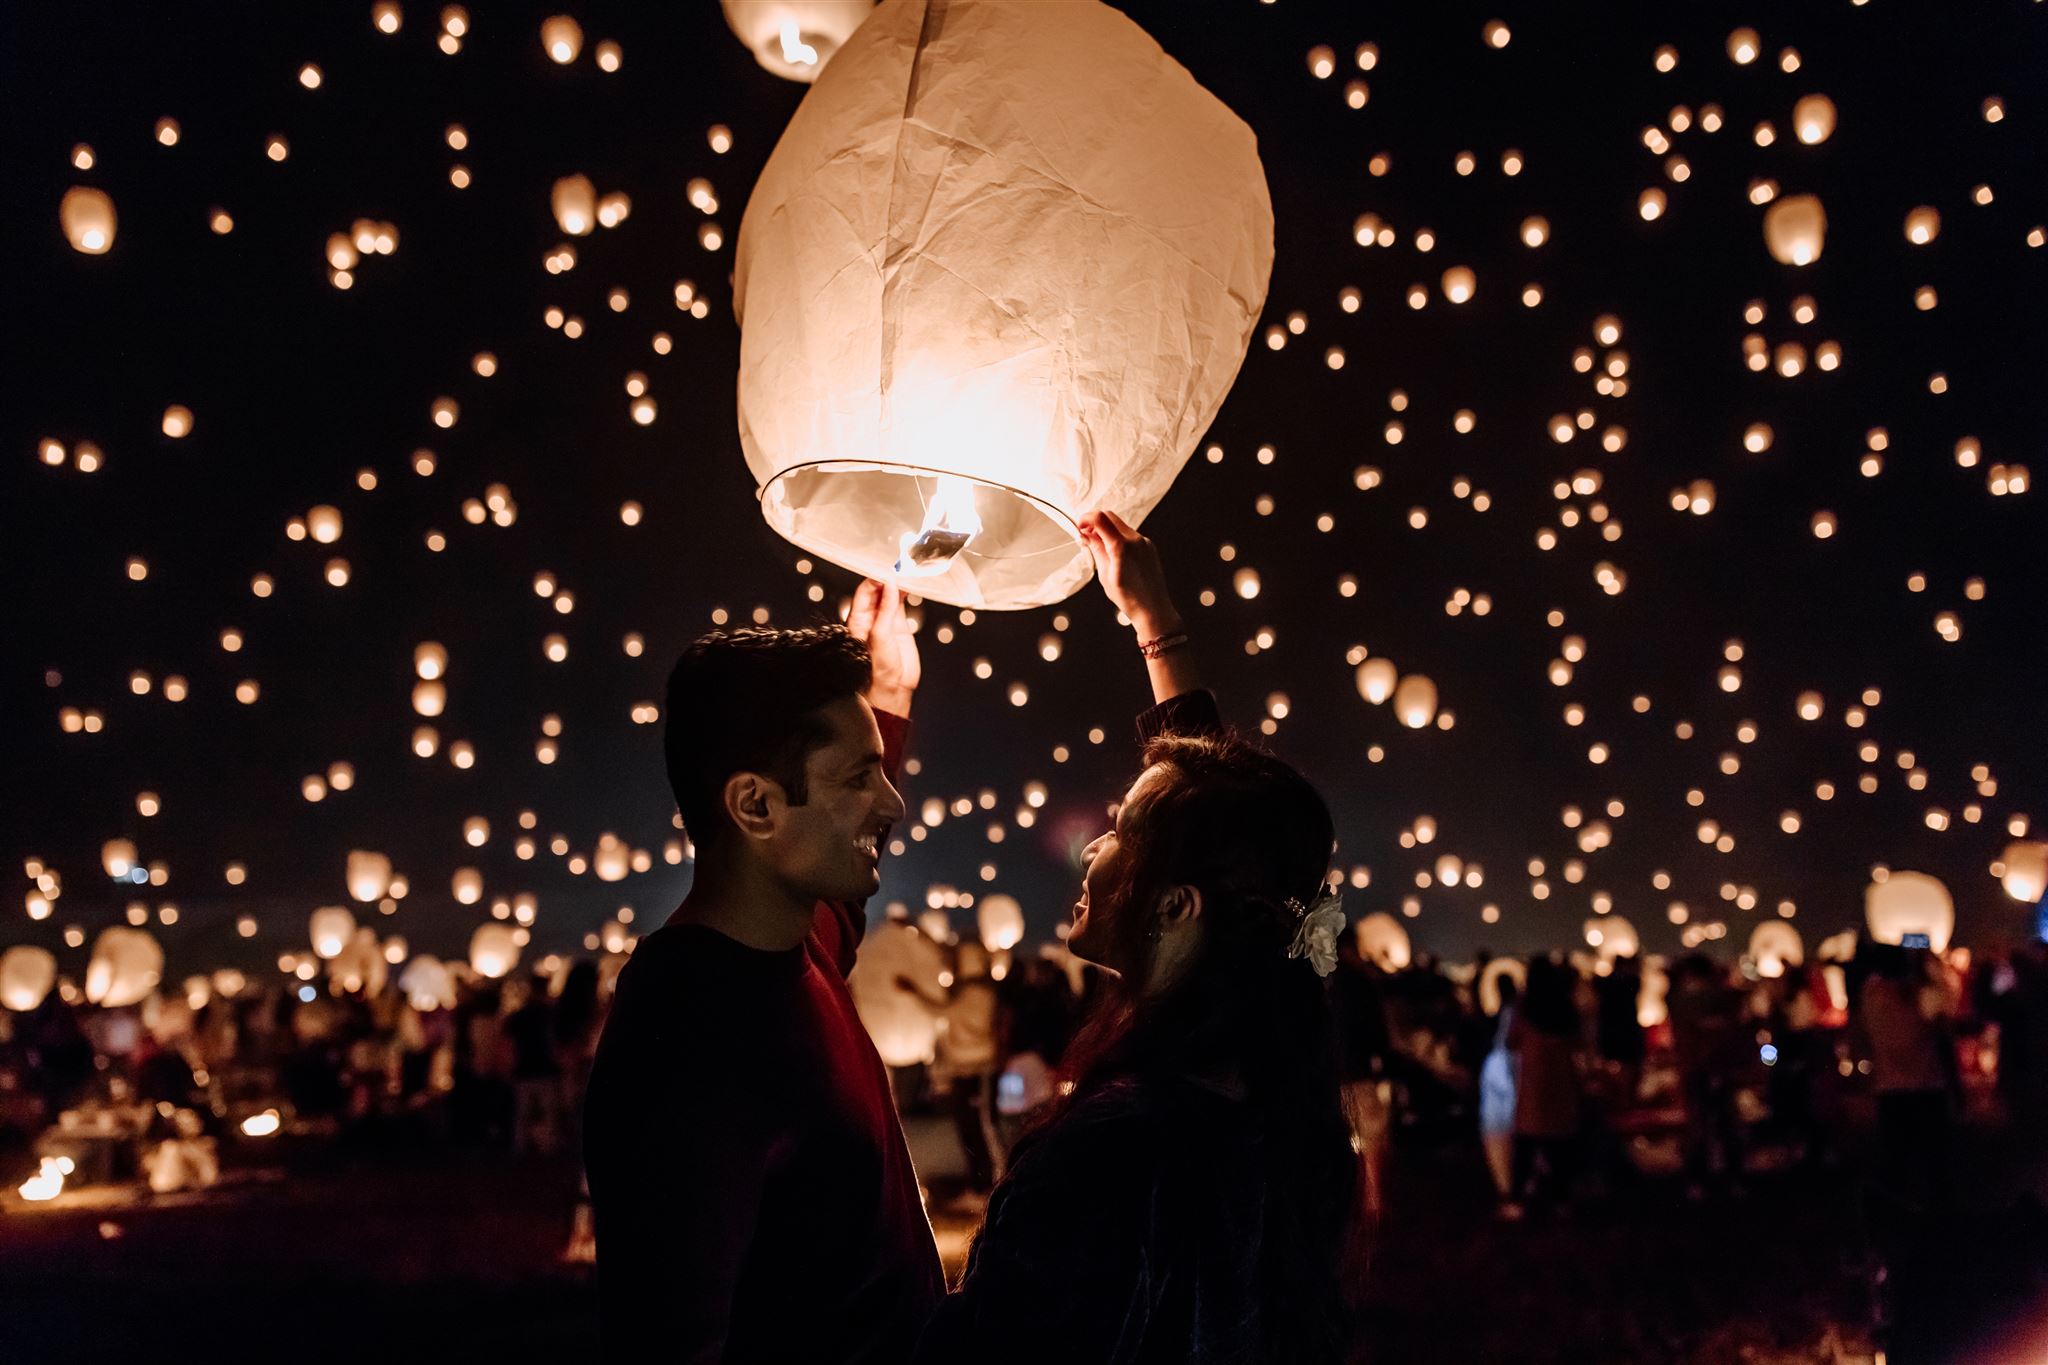
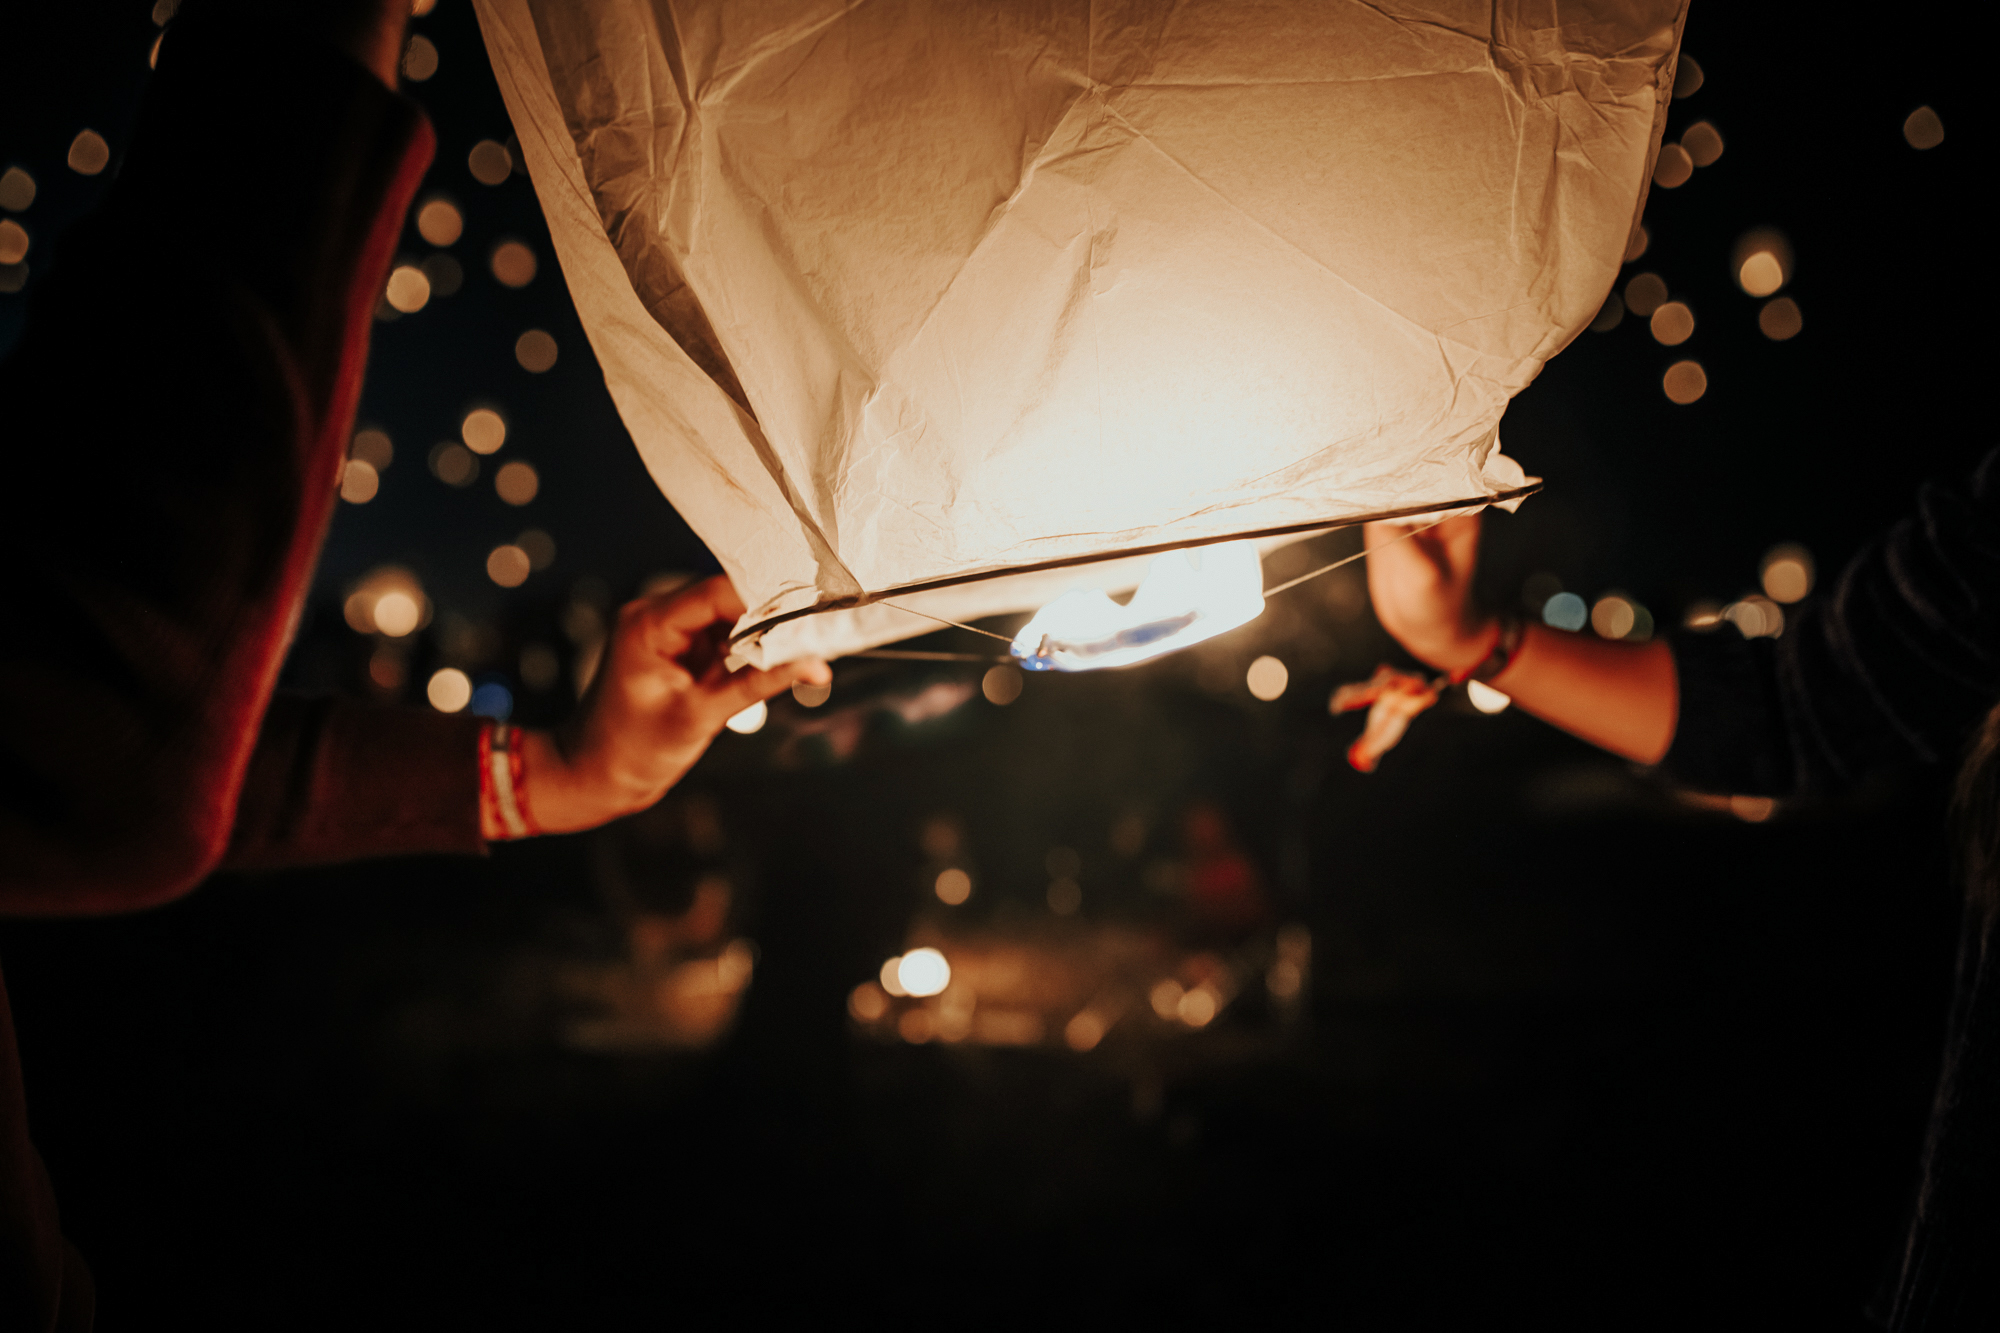
6). Photographing people at the lantern fest is more challenging (but doable)
 Normally when we think of photographing a lantern festival, we picture that wide sweeping shot featuring hundreds of lanterns in the sky with people on the ground. It’s pretty much iconic and featured in marketing materials by lantern event coordinators around the world.
But being practical, while some of our shots will be like that, we will also want to document the people we decide to visit the festival with. Friends and family make great company and subject matter for our photos. As we mentioned in our intro to this post, as professional wedding photographers we even took one of our couple’s for engagement photos under the lanterns. Ultimately – when the subject is a person, it adds some more difficulty to the shots (but the results can be so worth it!).
While reading our post on taking portraits under Chinese lanterns is a good source of information you should check out, the most important thing to keep in mind is this: keep people close to the light sources you have around for great looking ambient lit photos. Near a fire pit or close to the lantern once it is lit is really ideal.
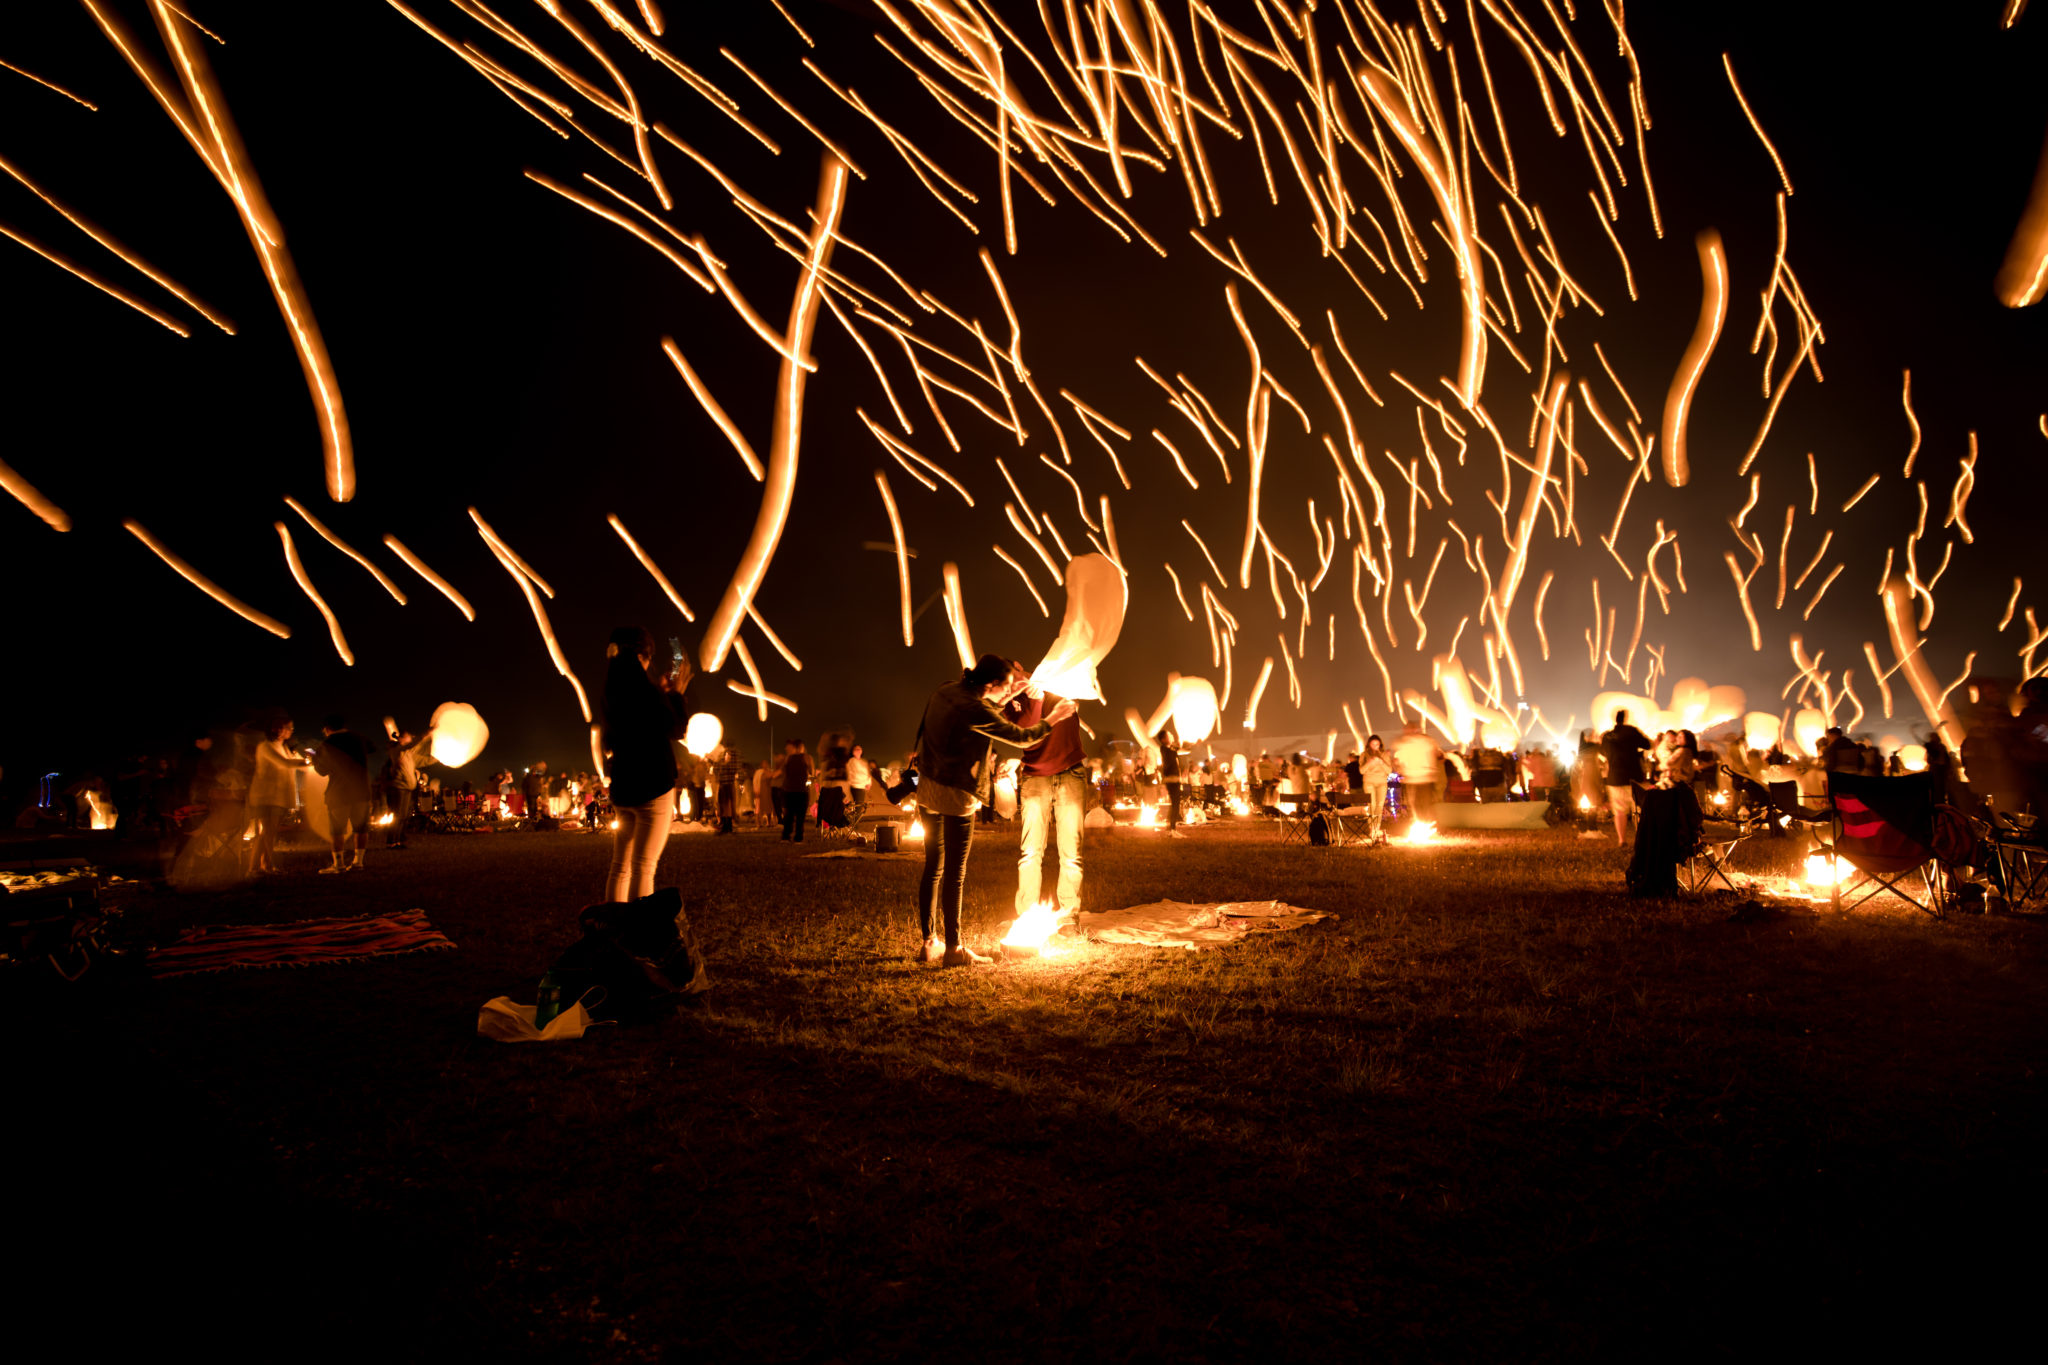
7). Try long exposures and light painting for more surreal results
One thing that really attracted us to visiting a Chinese lantern festival was just how dream-like it felt like it would be. This feeling was definitely true when we saw the lanterns start to float up while the DJ played soft music in the background. It was moody, romantic, beautiful – all the descriptors you could think of and more.
While documenting things as they are is great, as photographers it is often fun to explore the artistic side of our hobby to showcase the world in ways we can’t see with our own eyes.
Enter: long exposures and light painting.
Long exposure photography at a lantern festival will allow you to showcase movement of the lanterns as streaks of light through the sky. Being able to see the trajectory of the lanterns in a single image is a pretty cool thing.
Light painting would be a more nuanced technique to create very interesting photographs in this environment. Most likely, it would be better suited for more advanced photographers – particularly given the time restraints of these events. In practice, parts of a scene could be illuminated on ground level using light painting techniques to compliment shots of the sky filled with the lanterns.
For more on light painting, we HIGHLY recommend the book Night Photography and Light Painting: Finding Your Way in the Dark. The practical tips, illustrations and photos, all do a great job of teaching the necessary skills to take great photos at night. We referred to this as we learned how to photograph auroras, astrophotography, and yes – even paint with light (it’s so fun!!).
8). Edit photos for dramatic effects
One surefire way to make sure you walk away from the lantern festival with usable images that you will love is by shooting in camera RAW (file type) and editing your images in post production.
While you absolutely can capture great images in camera, photo editing can be used to enhance images both for practical and artistic purposes.
On the practical side, with such stark contrasts between the dark sky and the bright dots of light, nailing a perfect exposure can be challenging. This is especially true when adding people or other things to your image. Even making relatively minor adjustments to the exposure or shadows in post can result in a much better image overall.
Of course, on the artistic end of things – the sky is the limit! While we prefer to keep our photos edited relatively naturally (with only small changes made to the colors and so on), others may like to experiment with making larger alterations. A surreal event like this could suite that type of editing style super well.
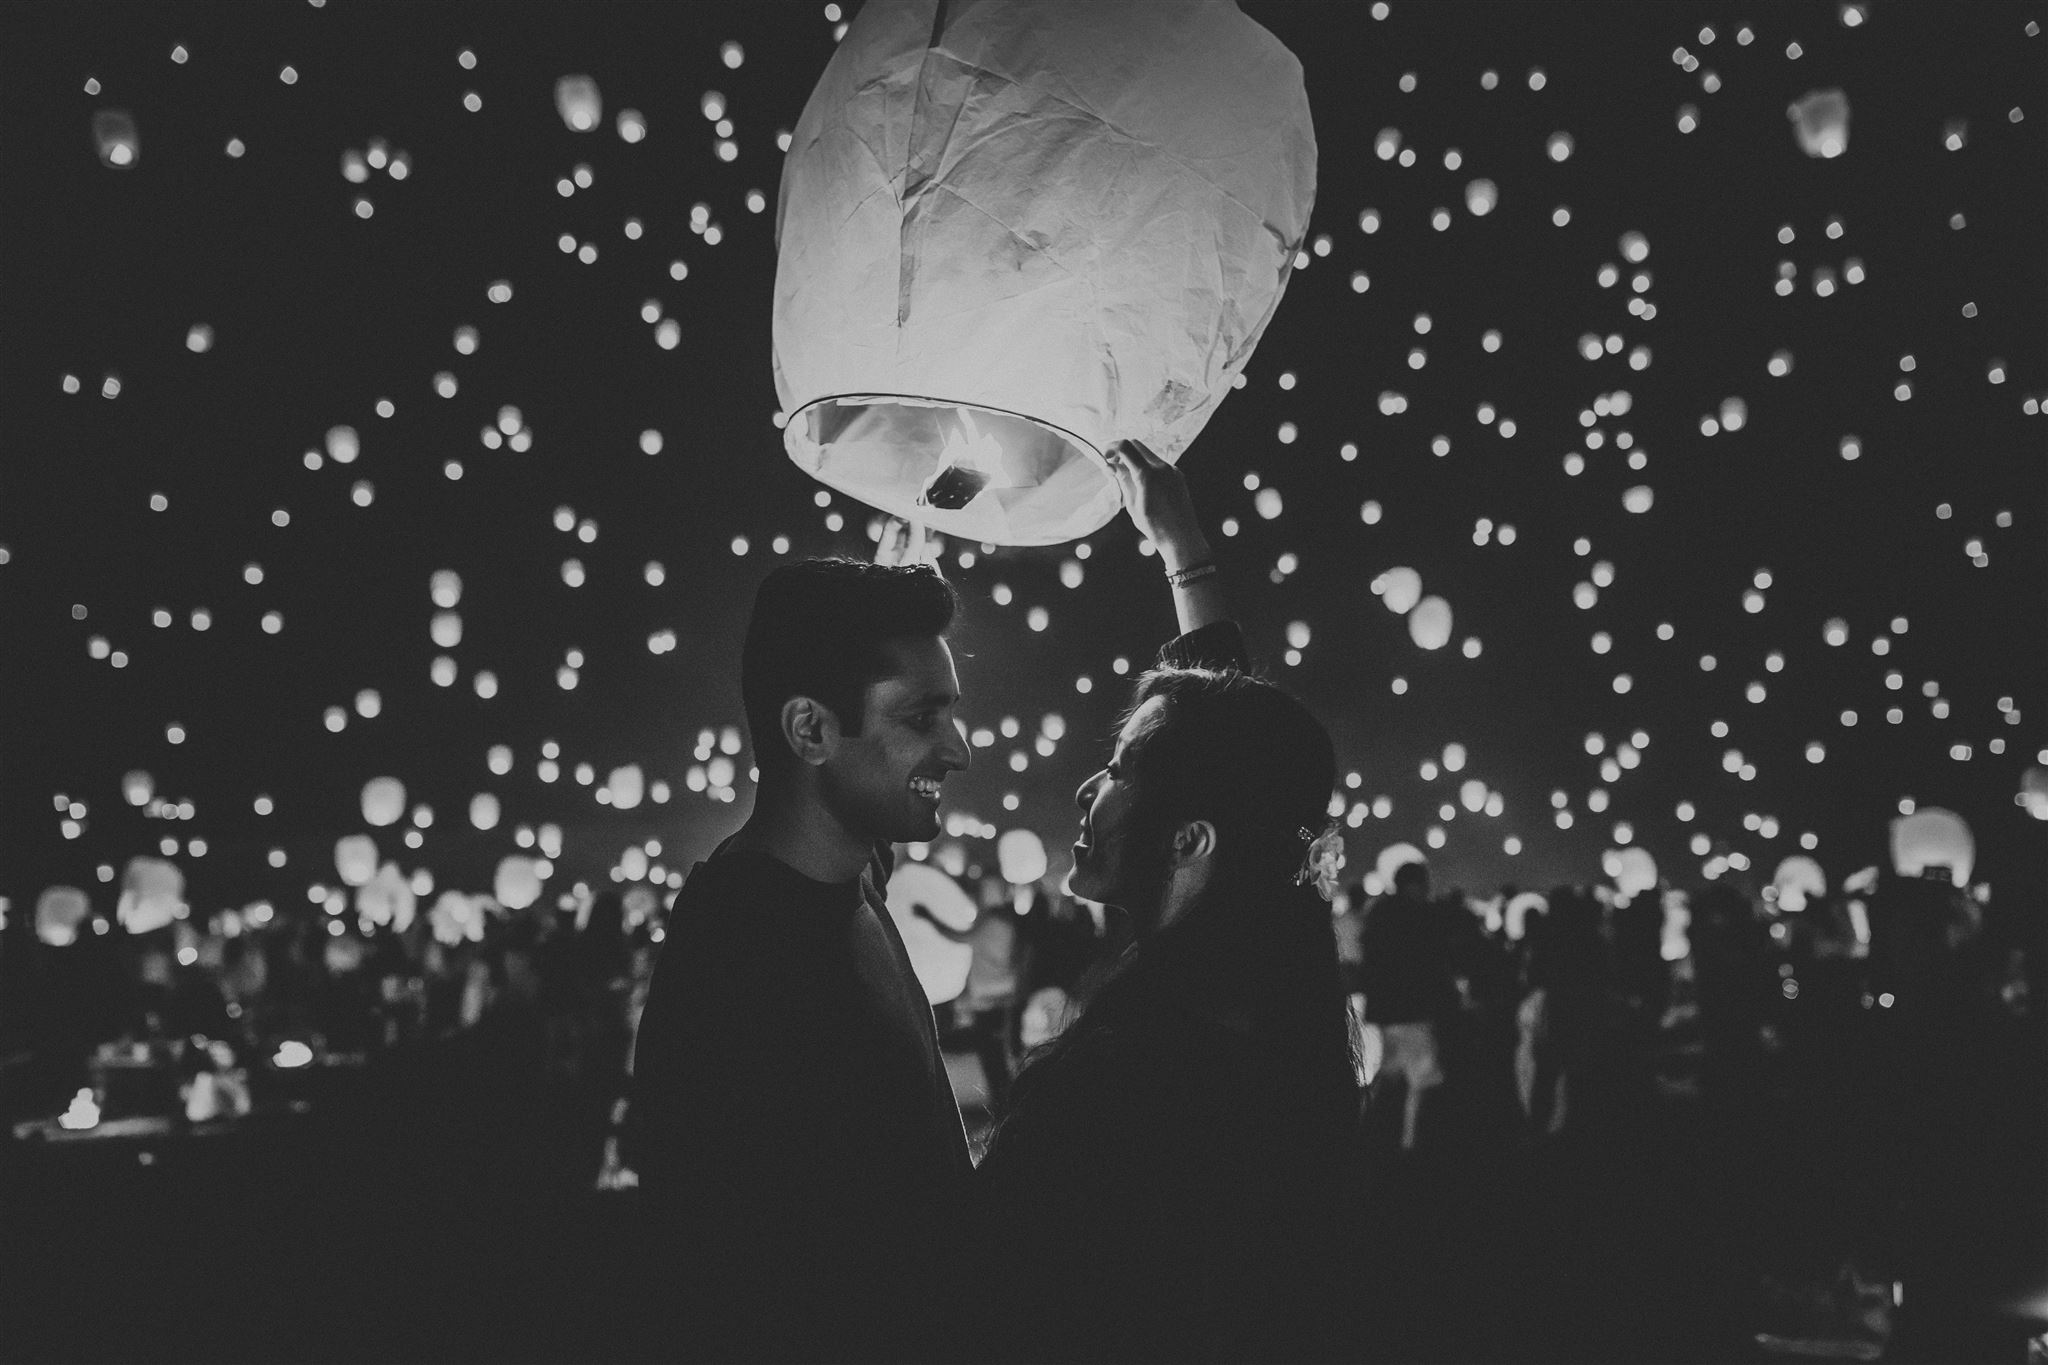
We must also mention – Chinese lantern festival photos are the prime candidates for being converted into black and white photography edits. See our before-and-after shot below to see why!
9). For wide shots: keep ISO at 100, use a narrow aperture, and adjust shutter speed for light
This is our “secret sauce” for many great outdoor night photographs that we use when photographing wedding venues, starry skies, lantern festivals, and more.
These settings allow you to minimize grain in your images and to get most (if not all) of the scene in focus. However, it should be noted that this will only work if you use a tripod and find a shutter speed that is not too long – otherwise you will quickly end up with long exposure lantern streaks.
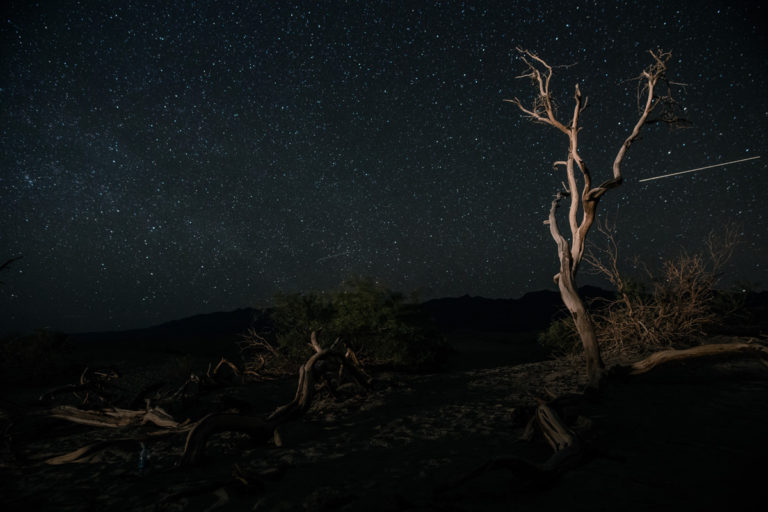
10). Prepare by practicing night sky photography with ambient lights like candles, fires, etc.
 In our post Get Better at Photography with Practice, we talked about how many beginner photographers can benefit from “shooting under stress” to help them rapidly apply knowledge they’ve learned to getting a great shot. If you will be visiting a lantern festival and shooting it for your own fun, this is the perfect type of environment to challenge your photography skills with a little stress (the good kind!), but you shouldn’t feel so overwhelmed either.
One thing that makes photographing a lantern festival difficult is that we have very few ways to really prepare for it. Even we (professional photographers!) felt plenty of nerves before shooting at one just because we had never done it before. That’s normal!
So, in order to practice for something like this, it’s a good idea to think about the “parts” you’d be photographing. In the case of a lantern festival there are a few key things you’ll end up shooting:
- Really low light and dark environments
- The night sky + some ambient light
- Fiery colored lanterns
- Large groups of people at the festival
Taking these couple of things, we can prepare ourselves by practicing shooting in different environments, lighting conditions, and subject matter all in the comfort of our backyards.
You can also combine some of these elements fairly easily to practice. For example, you could light a couple of candles and place them outside, then practice photographing them while it is dark out. It’s not a 100% replication of a lantern festival, but it puts you in the ballpark of what to expect.
Of course – you could also pick up a few cheap Chinese lanterns on Amazon as well and try your hand at photographing them too. We actually still have a few left over from the event that we plan to give to our nephews to release in the near future!
Best Lens for Lantern Festival Photography
In our opinion, the best camera lens for photography a lantern festival is a 16-36mm.
Around 90% of the images we used in this post and provided in our couple’s online gallery of engagement photos were created using this lens. The reason why this is so great is because it allows you to get great wide shots of the entire festival with hundreds of lanterns in sight, as well as closer up shots on people and other details.
The specific lens we use is the Canon EF 16-35mm f/2.8 III lens. While this is our recommendation, you can also find similar lenses at different price points and by different brands such as:
- Canon EF 16-35mm f/4 lens
- Sigma 18-35mm f/1.8 ART lens
- Sony – FE 16-35mm F2.8 GM
- Nikon AF-S FX NIKKOR 16-35mm f/4G
Conclusion
Chinese lantern festivals are a great combination of a challenge and a load of fun for photographers. We hope our photography tips help you to take amazing pictures when you go to see one.
Have any questions after all this? Drop us a line in the comments below and we’ll chat with you!