How to Take Stunning Engagement Ring Photos (Step-By-Step Guide)
Last Updated: February 14th, 2020
As engagement photographers, we’re plenty used to taking pictures of our couple’s engagement rings!
Maybe you’re an engagement photographer trying to prep yourself for your next shoot, or you’re a bride-to-be wanting to nail a really great picture of your ring (because come on – you need to show it off!).
Since we’ve worked with many couples over the years, we’ve had the opportunity to practice our skills and figure out what works best to effectively capture beautiful engagement ring pictures again and again. In an unexpected twist of our wedding photography career, we’ve found to really enjoy being creative as we showcase our client’s rings.
To produce stunning engagement ring photos yourself, just follow our guide!
Engagement Ring Photography: The Only Guide You’ll Need
In this guide, we will be giving you a bunch of engagement ring photography tips and a walkthrough of our approach to photographing rings at each and every one of our successful e-sessions. Getting a great ring pic is really easy!
Initial Things to Think About
 Photographing a ring is 1,000% easier than taking pictures of people. Couple’s photography and engagement photography as an extension takes a lot of skills outside of actually knowing how to work a camera. You have to have people skills to effectively pose, make people feel comfortable in front of the camera, etc. Rings don’t need that kind of attention!
With that said – engagement rings do require a special level of care. Often, they are expensive pieces of jewelry, but more than that – they represent something really meaningful to the wearer.
They are a symbol of love, affection, and a relationship between two people. Because of this, while we like to have fun when photographing engagement rings (and wedding rings at the wedding!), we also want to display them in a way that helps to elevate their beauty so when you see an image of one, you can feel the love.
Check this post out: Signature Edit’s The Candid Couple’s Posing Guide
What camera equipment do you need to take good engagement ring pictures?
When we first started taking pictures of engagement rings, we simply used our kit 50mm lens. In fact – we used this lens for literally everything – from ring photos to portraits and more. It was a workhorse lens and we definitely pushed it to the limit. The actual pictures weren’t “bad” by any means, but they did lack in quality and control.
While there is a time and place for wider shots of a ring in certain contexts (we sometimes photograph them while being worn by the bride-to-be), and these types of shots can be taken comfortably on a 35mm and longer focal length lens, most engagement ring photos that are really jaw-dropping and gorgeous are taken with a macro lens.
When we got our Canon 100mm f/2.8 macro lens, it drastically changed the engagement ring photo game for us.
Few times have we bought a new piece of photography gear and had such an immediate boost in quality. It turns out, a macro lens also opened our eyes to a larger world of potential as we now find ourselves constantly looking for really small details in daily life, at weddings, and so on to showcase in pictures.
While a macro lens like this is ideal, a cheaper solution that may suite you if you are on more of a budget or just want to start experimenting is a macro extension tube.
8 Engagement Ring Photography Tips to Get Started

Look for good light
We define “good light” as – soft, evenly distributed, and available in a large enough quantity so as to not require shooting at a high ISO.
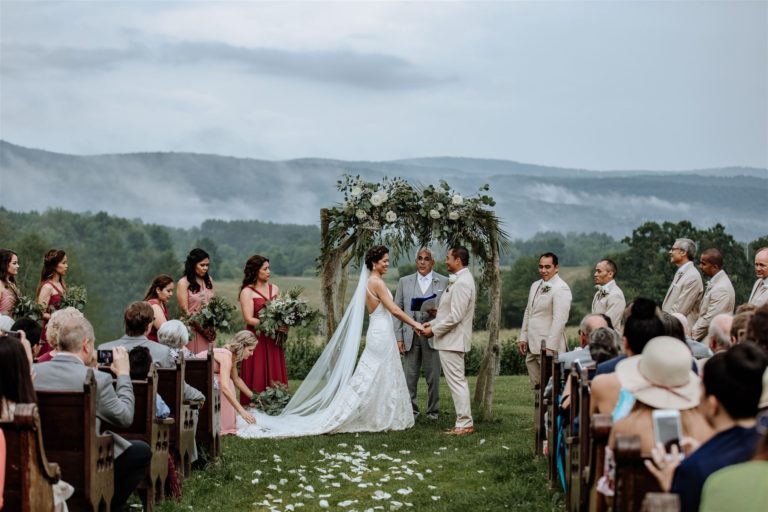
Shooting engagement ring pictures outdoors (or by natural light indoors) and often around Golden Hour tends to be ideal. It’s not as necessary in our book as taking portraits are during this time, but it does compliment a ring shot by producing interesting color dynamics and gently illuminating the ring itself. Given most engagement photography sessions are scheduled around Golden Hour – this shouldn’t be a big concern.
Keep the ISO low
We mentioned it, and now we want to elaborate on it.
ISO is one of the key elements that make up an images exposure (for more on that, check out The Exposure Triangle). In general, you want to keep your ISO low so as to not introduce unwanted grain into your pictures.
In our experience, this graininess tends to impact images of rings more than that of, say, a large landscape because our eyes are looking at the smaller details. High ISO’s also kill the dynamics of a photograph, reducing clarity and contrast between objects, colors, and background/foreground.
Normally, we aim to keep our ISO as close to 100 as possible. Generally, around 400-600 – the image will still look good and hardly impacted by grain. Much higher than that, and it starts to become much more noticeable and images end up unusable.
Add a flash
If, for some reason, you are stuck having to photograph an engagement ring in a poorly lit environment (maybe it got dark quicker than you thought it would), then introducing a flash to your photo can help you make a great photo despite this set back.
When we use flash on an engagement ring, we need to be mindful of trying not to create a lot of blown out highlights on and around the ring. This is because many rings will reflect the light. Manually setting your flash to a lower setting will help to eliminate this potential problem. If using an off camera flash option, you can also control the direction of the lighting for more dramatic effect and control over the look of your shot.
Related: Our review of the Profoto A1 flash
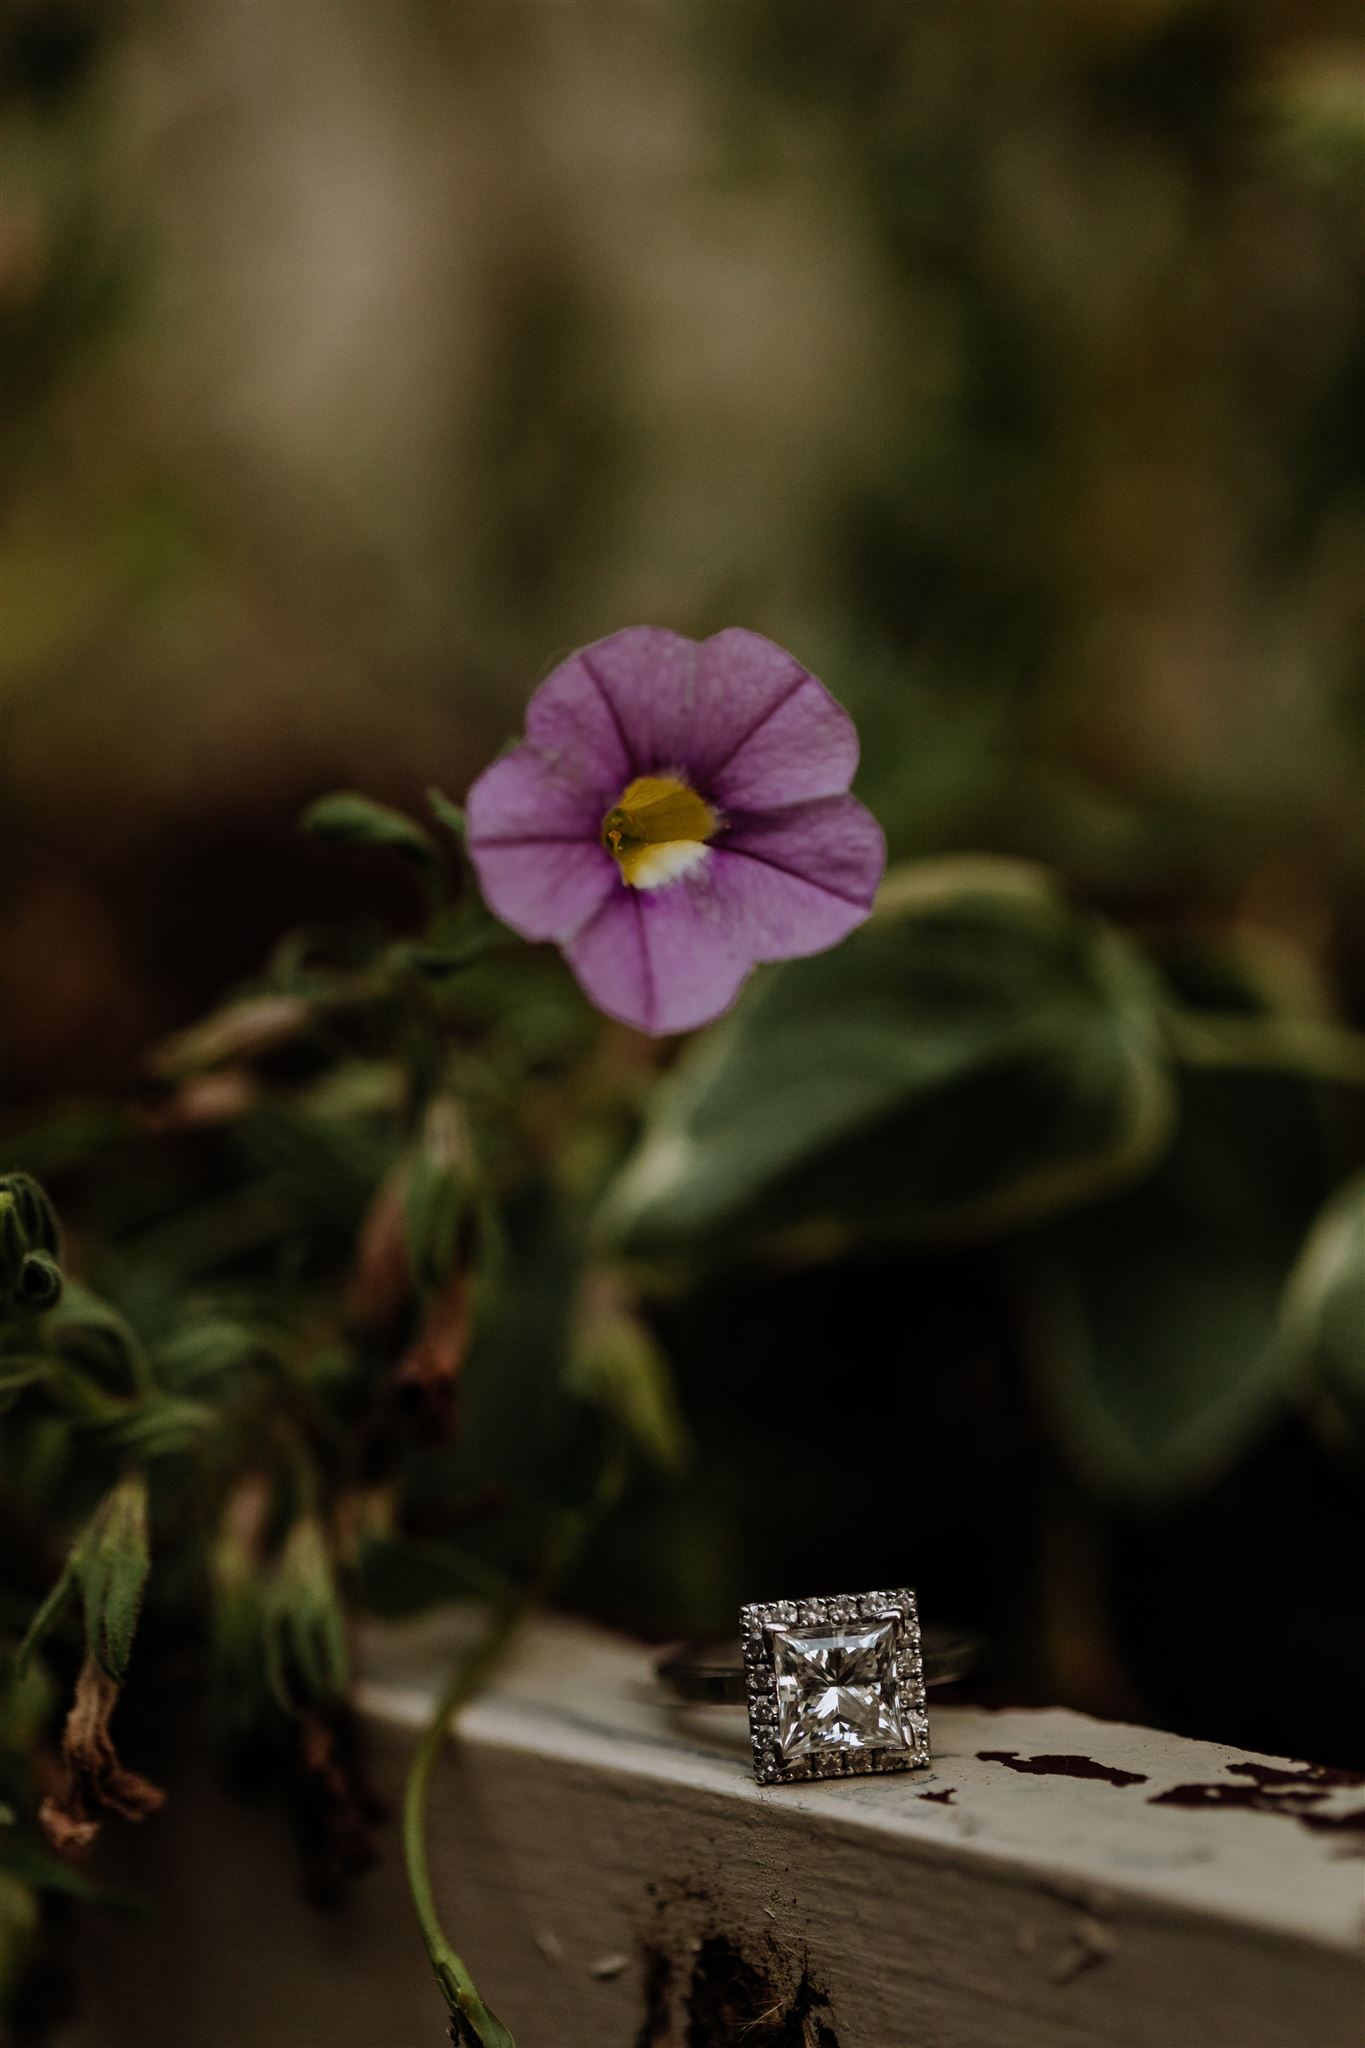
Incorporate nature
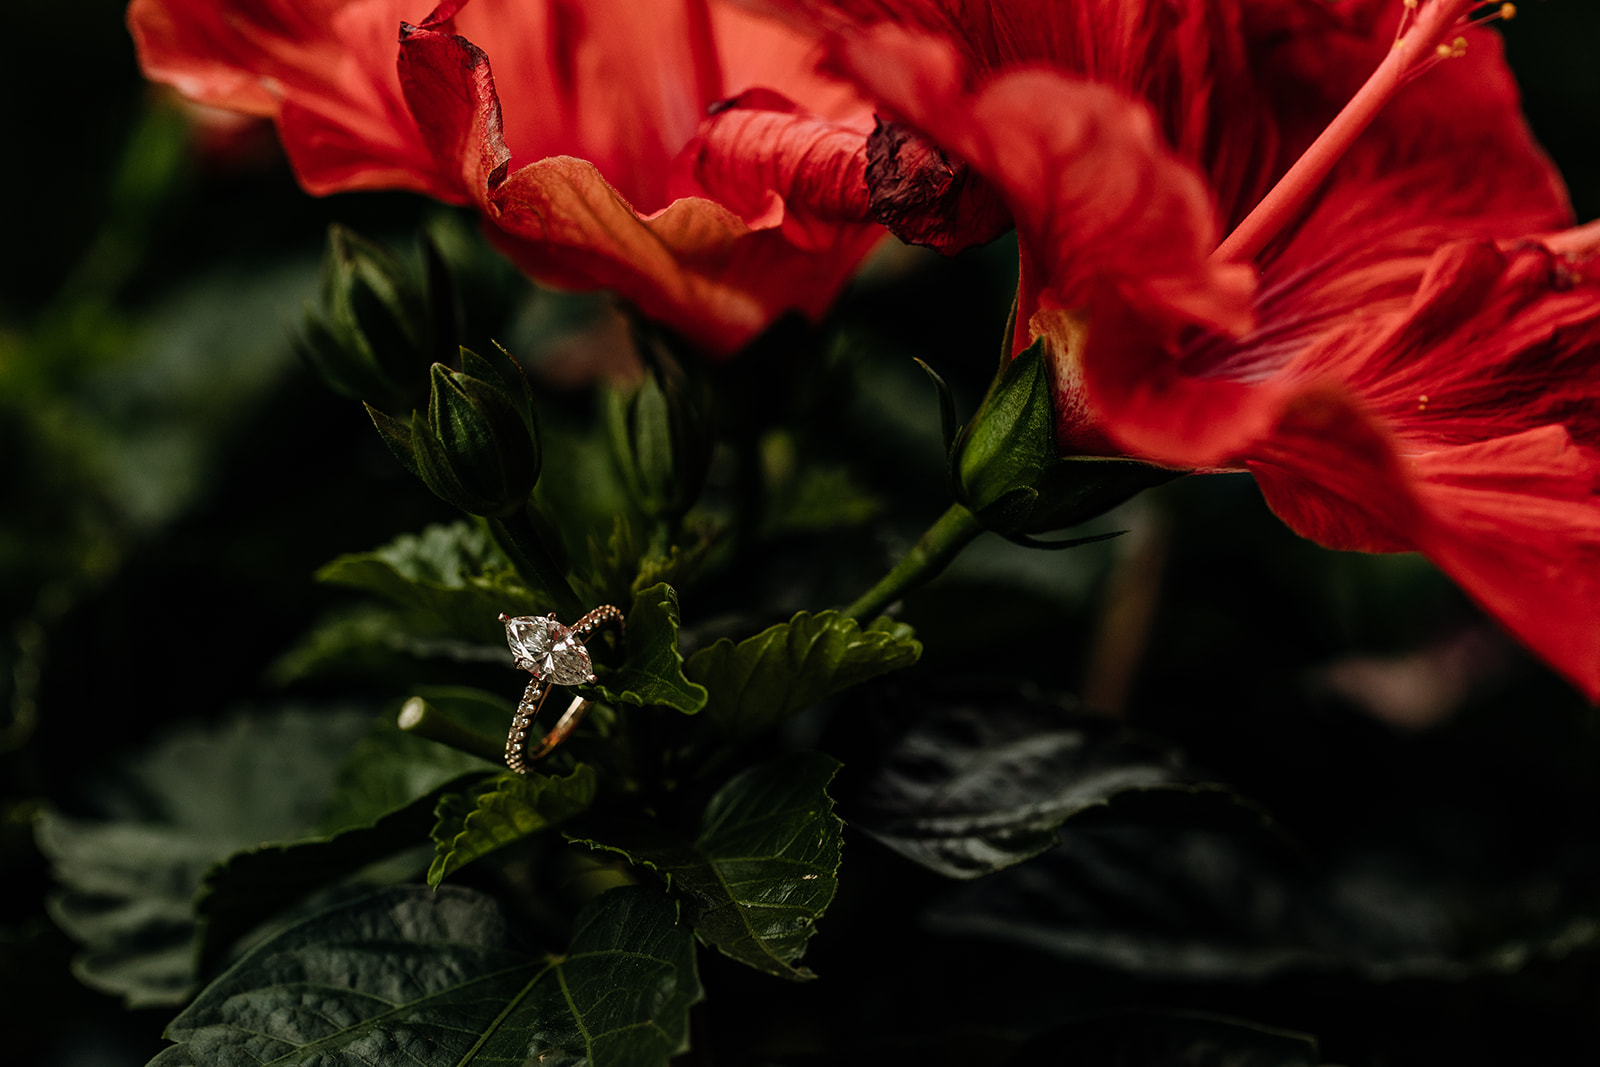 It’s maybe a little trendy, but one of the most beautiful ways to display an engagement ring is in the context of the natural world.
While rings are generally are made up of diamonds (and other precious stones) and formed by people into this beautiful end result, they have a element to them that just suits being paired with flowers, trees, rocks, and anything else in nature you can think of. The juxtaposition of the man-made beauty with natural beauty is what gets us! 🙂
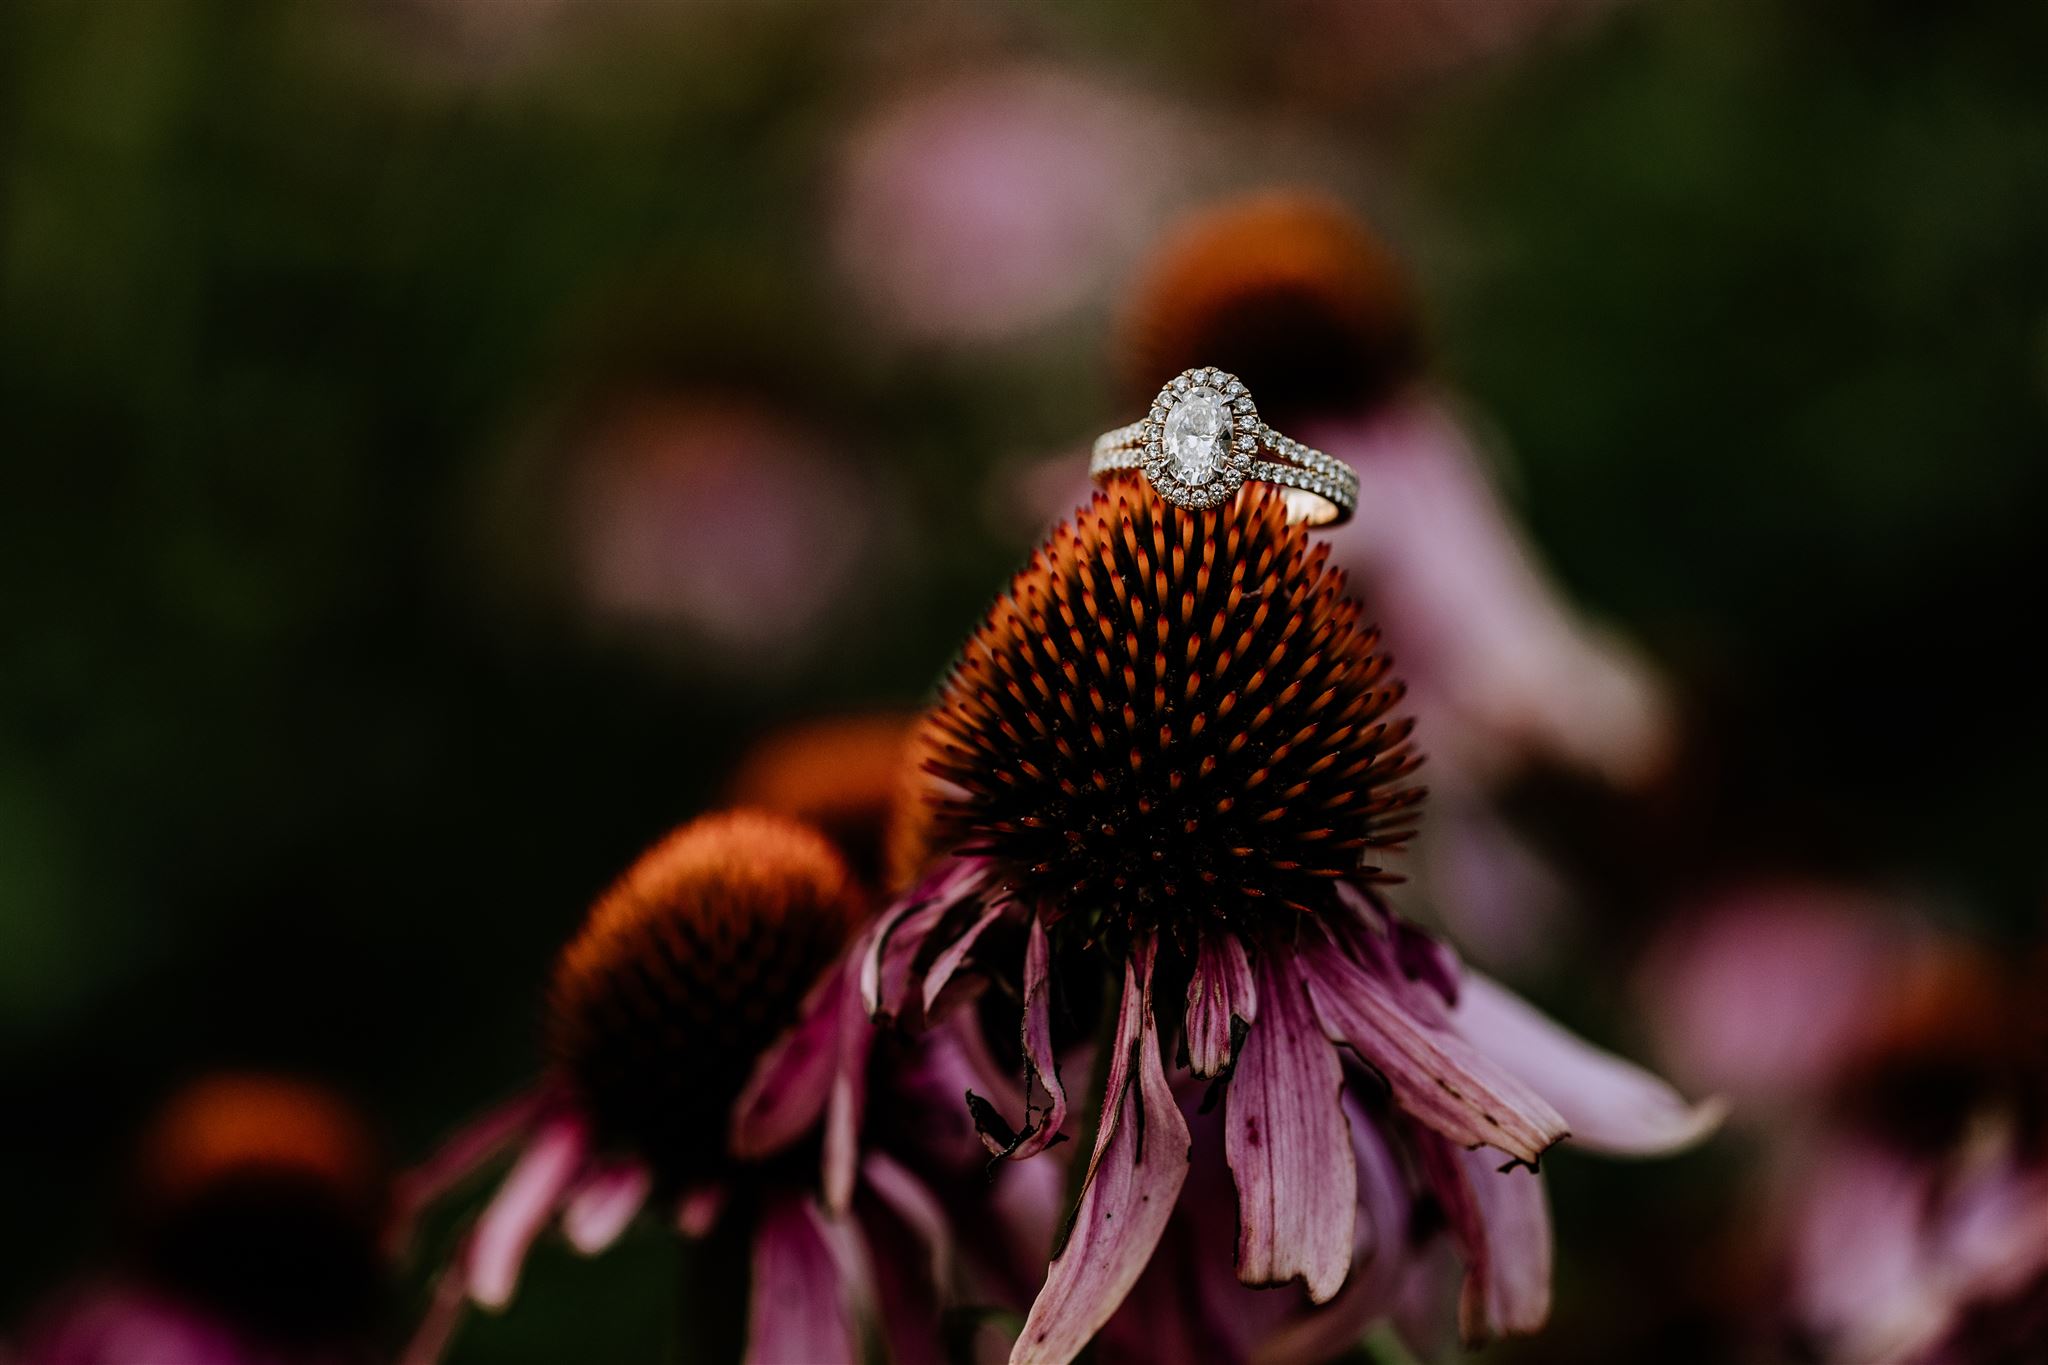
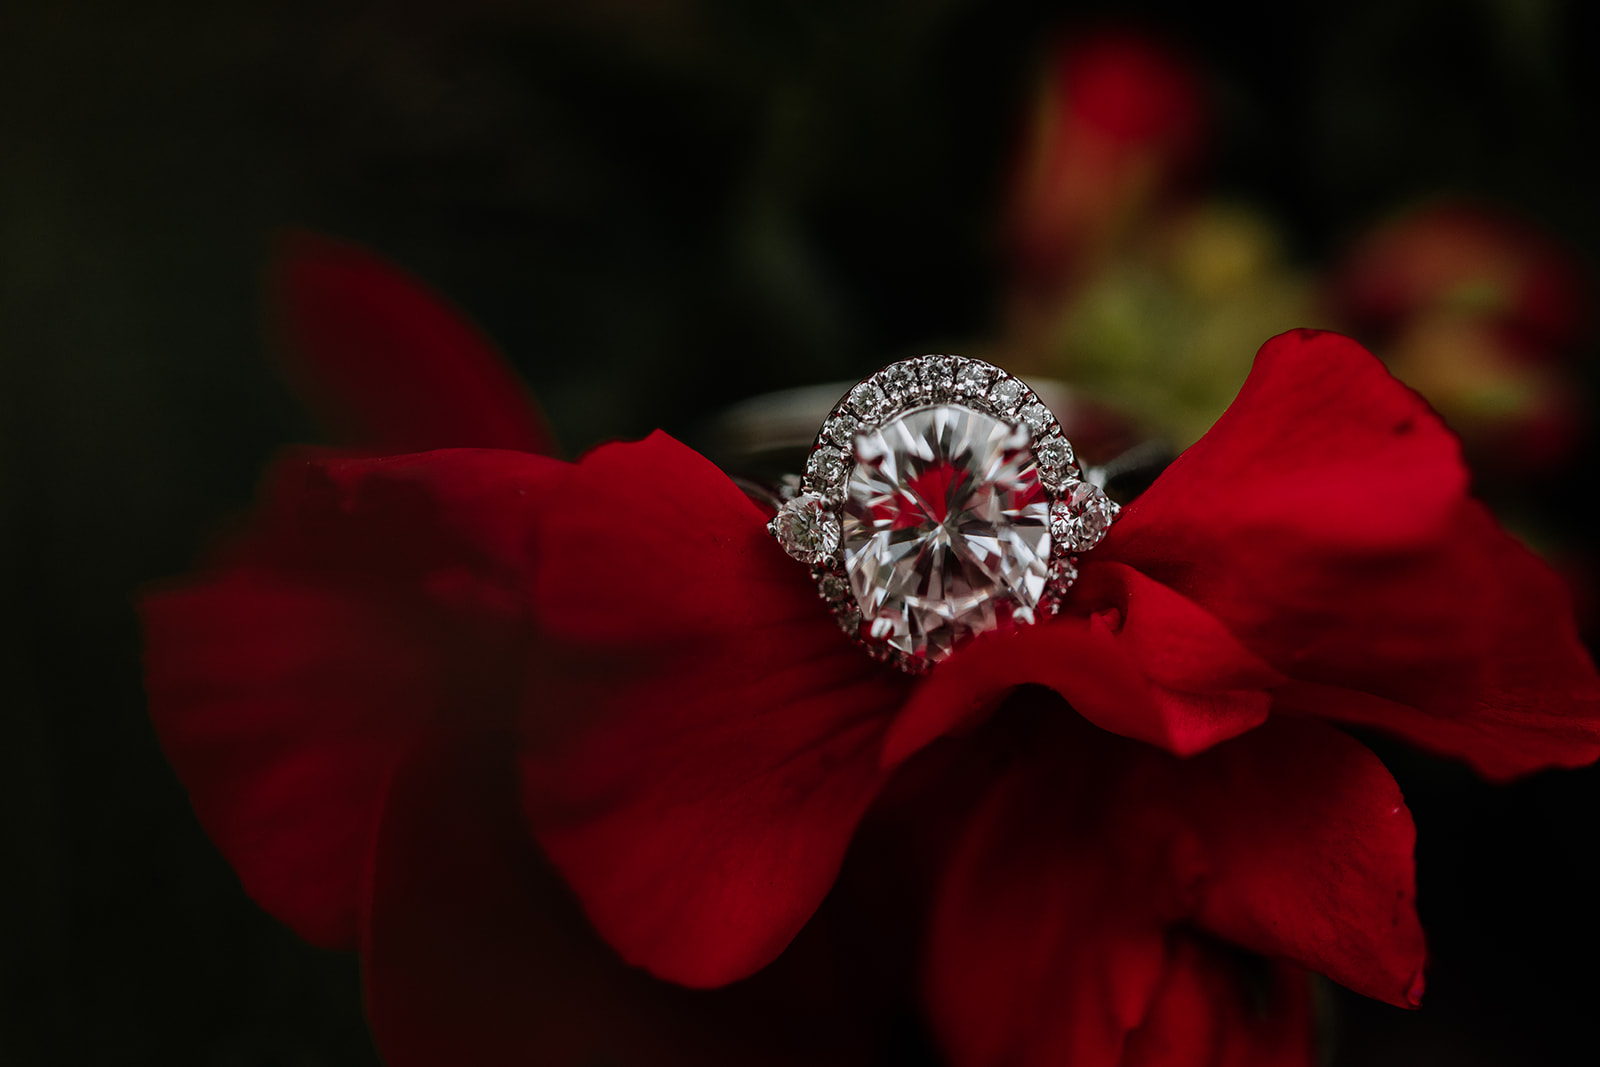
Think of the background as watercolors
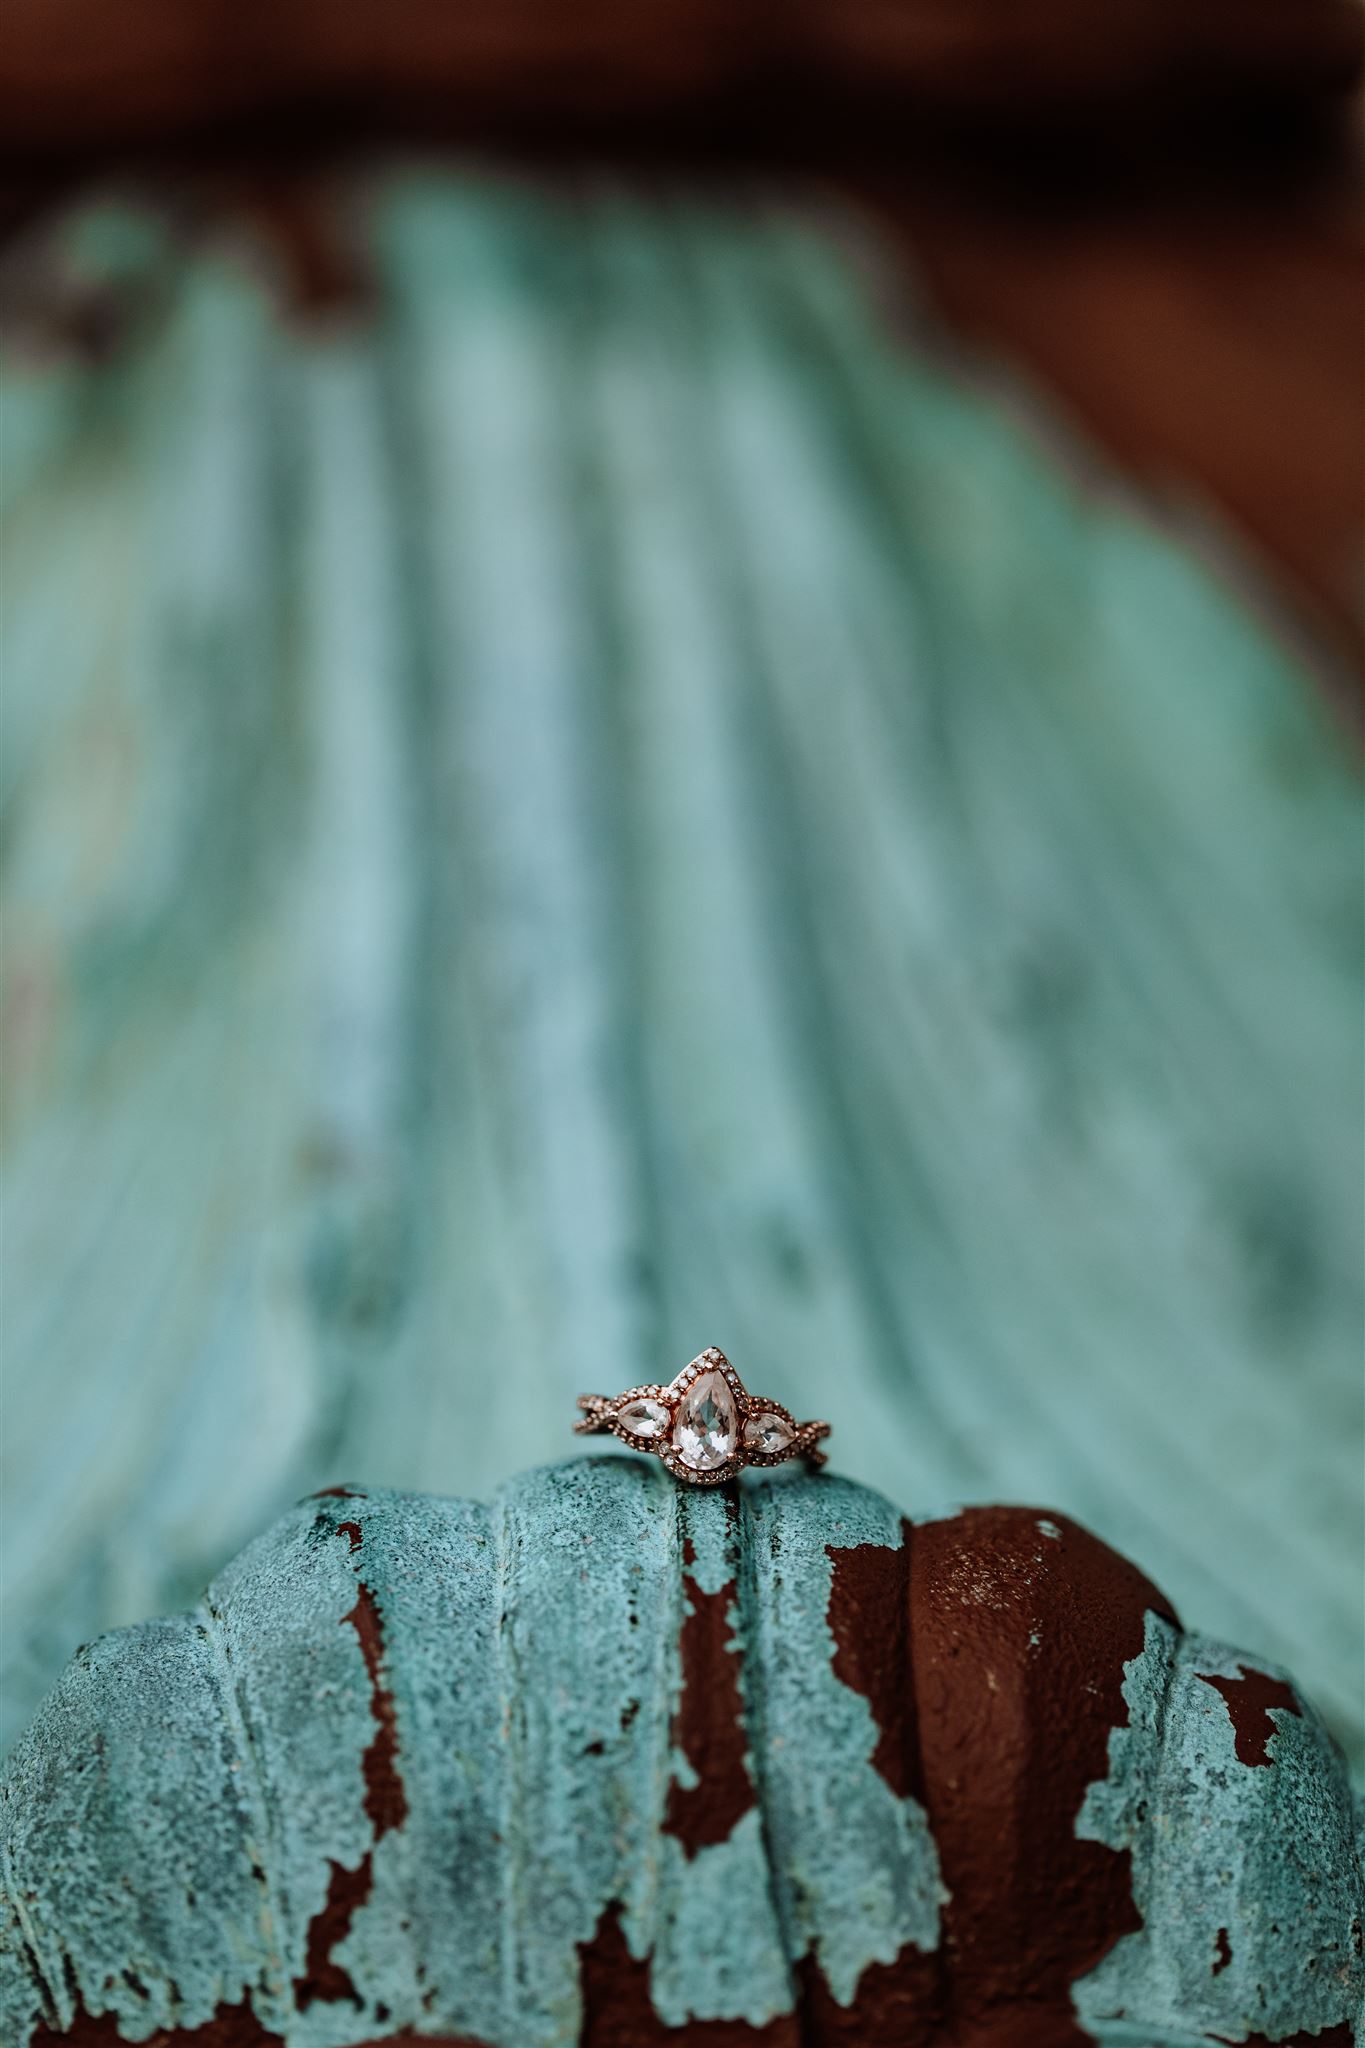
Since we entered the world of macro photography, we’ve started to see things a little differently.
When photographing an object like an engagement ring, your field of view needs to shift. Your focus is entirely on the ring, and everything around it should become a blur.
We’ve taken this mindset and actively applied it to how we choose locations to photograph rings. Often, we’ll look for spaces where the background will be comprised of pops up color to help provide contrast for the ring itself. The background can also offer a lot of texture.
Because our depth of field is so narrow, backgrounds will normally become compressed and turn into a watercolor-like blur of bokeh. This is one of our favorite aspects of photographing rings because seeing a picture like this elevates the ring in ways that viewing it with our naked eyes cannot.
The photo above is a great example of this in action – note how the lines and color hues of green, blue, yellow, and red all work together to make an interesting engagement ring shot.
Capture the whole ring with a higher f-stop
One of the things we regularly did wrong when we started photographing rings was only using a wide aperture to do so. While it is possible to shoot an engagement ring at f/2.8, we find that higher aperture of f/4 – f/8+ work best to get the feature stone + the band in focus.
Give the ring some context
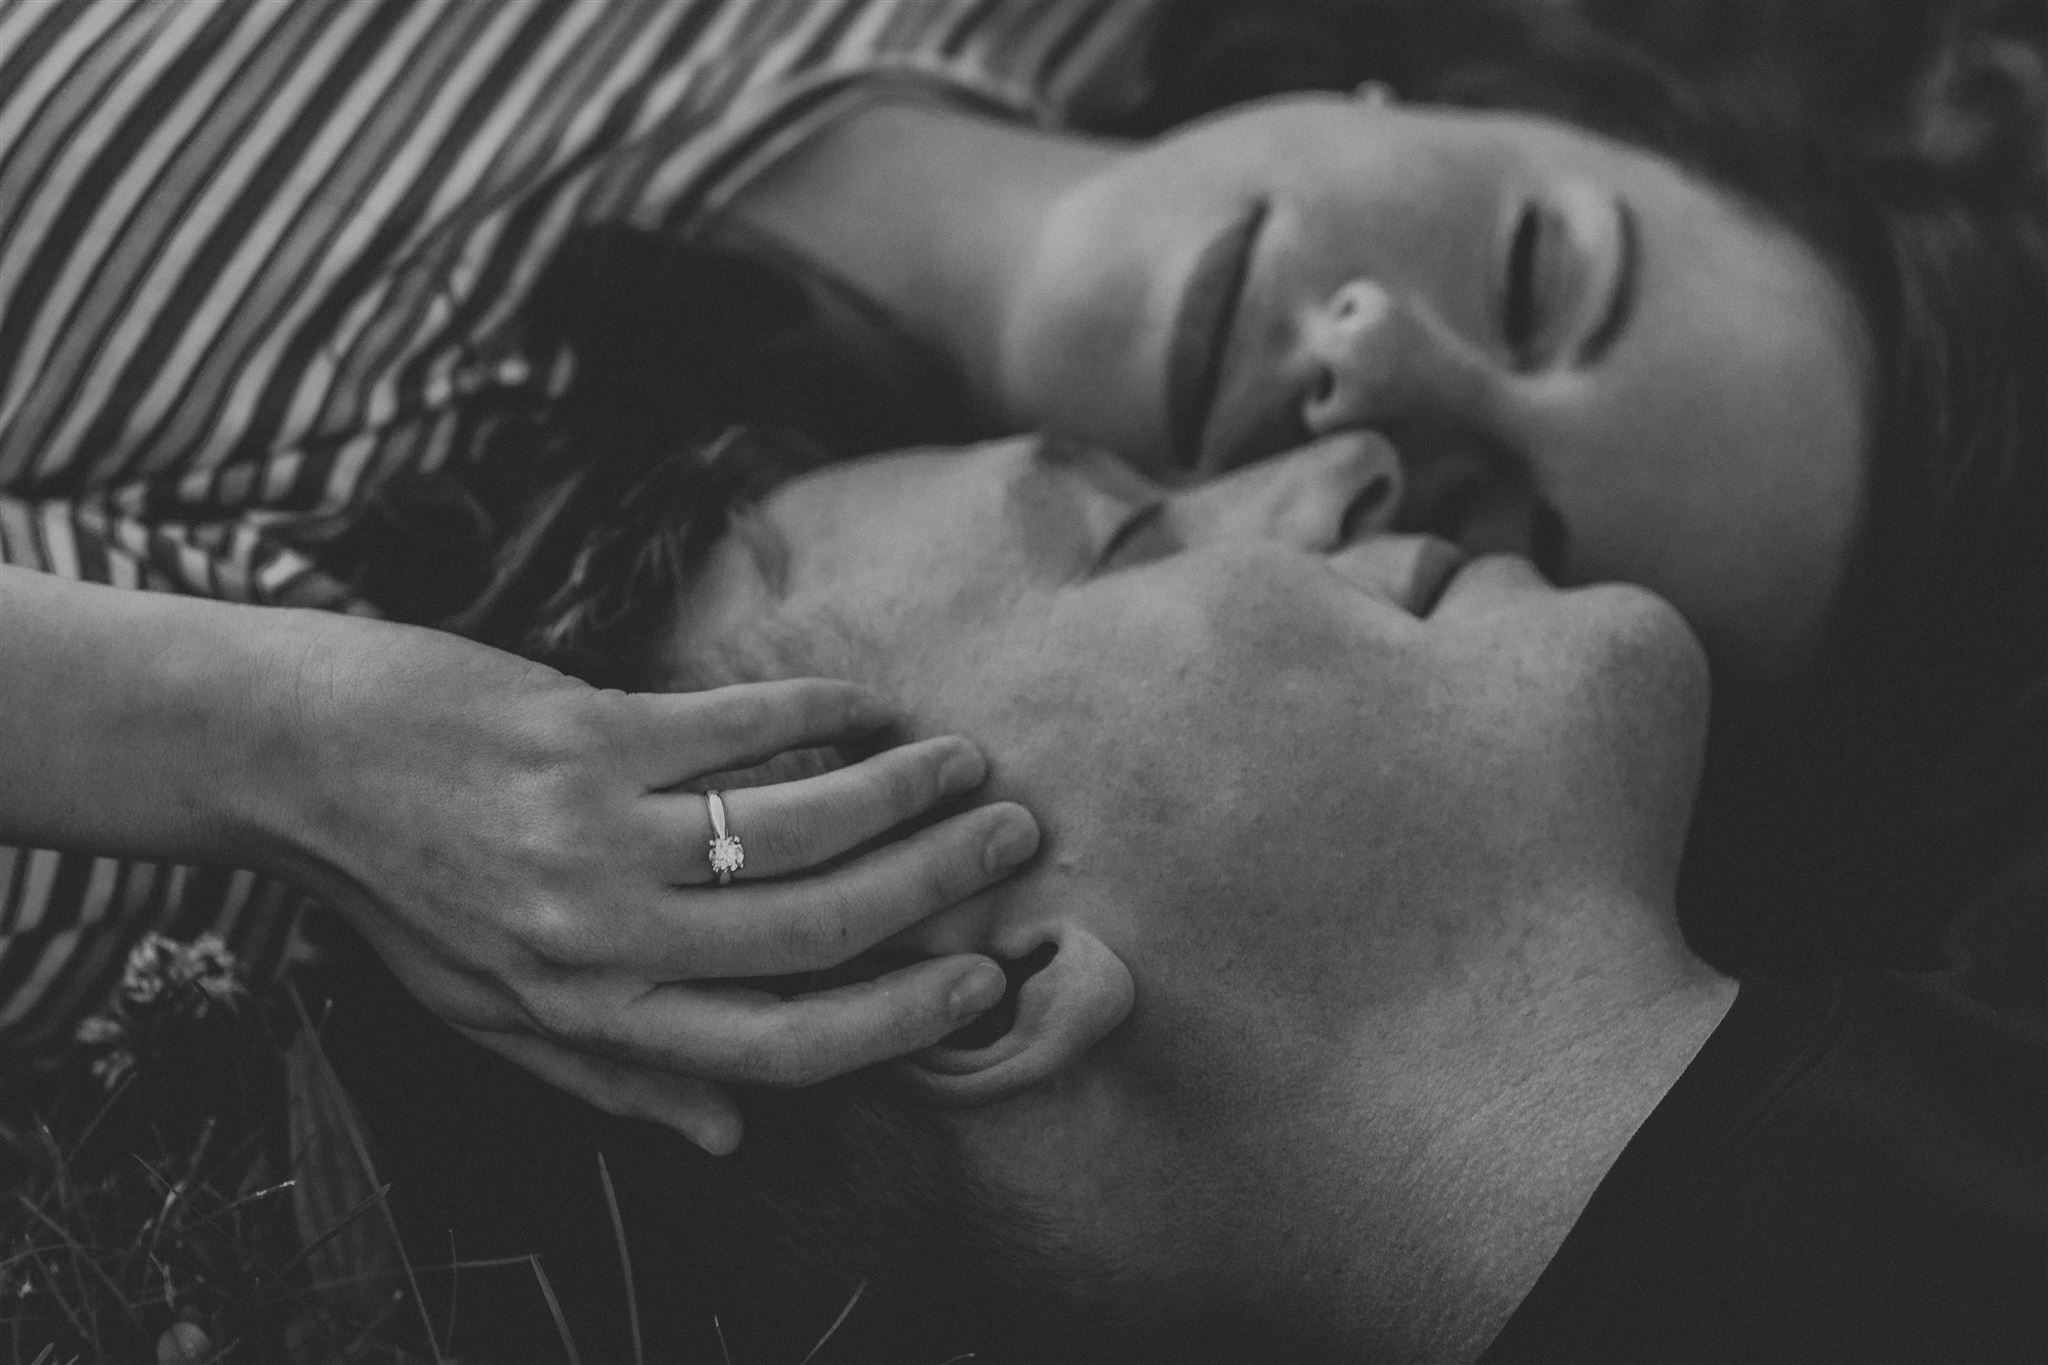 A lot of times when we think of “engagement ring photos”, we think of the ring in isolation. We photograph it in nature or as a part of a lay-flat of other details.
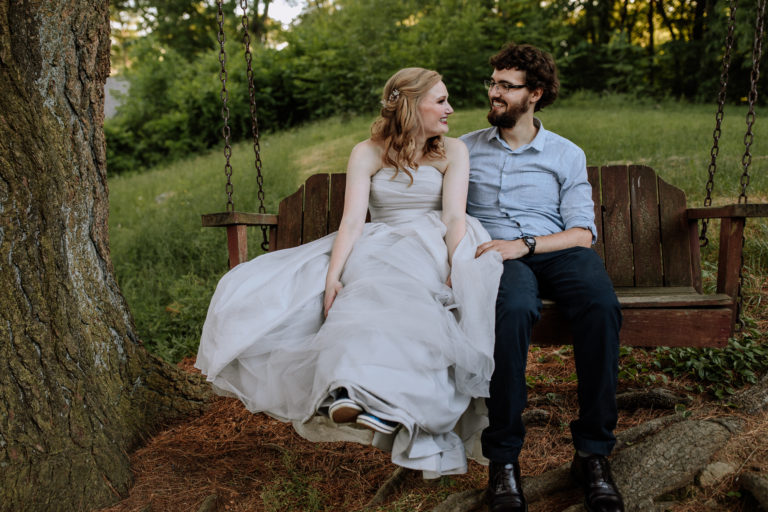
In reality, one of the best ways to show off an engagement ring is by showing it off on the person who is wearing it.
A simple close up on a hand can do the trick!
In the photo above, we intentionally positioned our couple to show off the ring. We used a fairly wide aperture (f/3.2) so there is a gradual blurring of the image as you get into the background.
Photograph the ring details
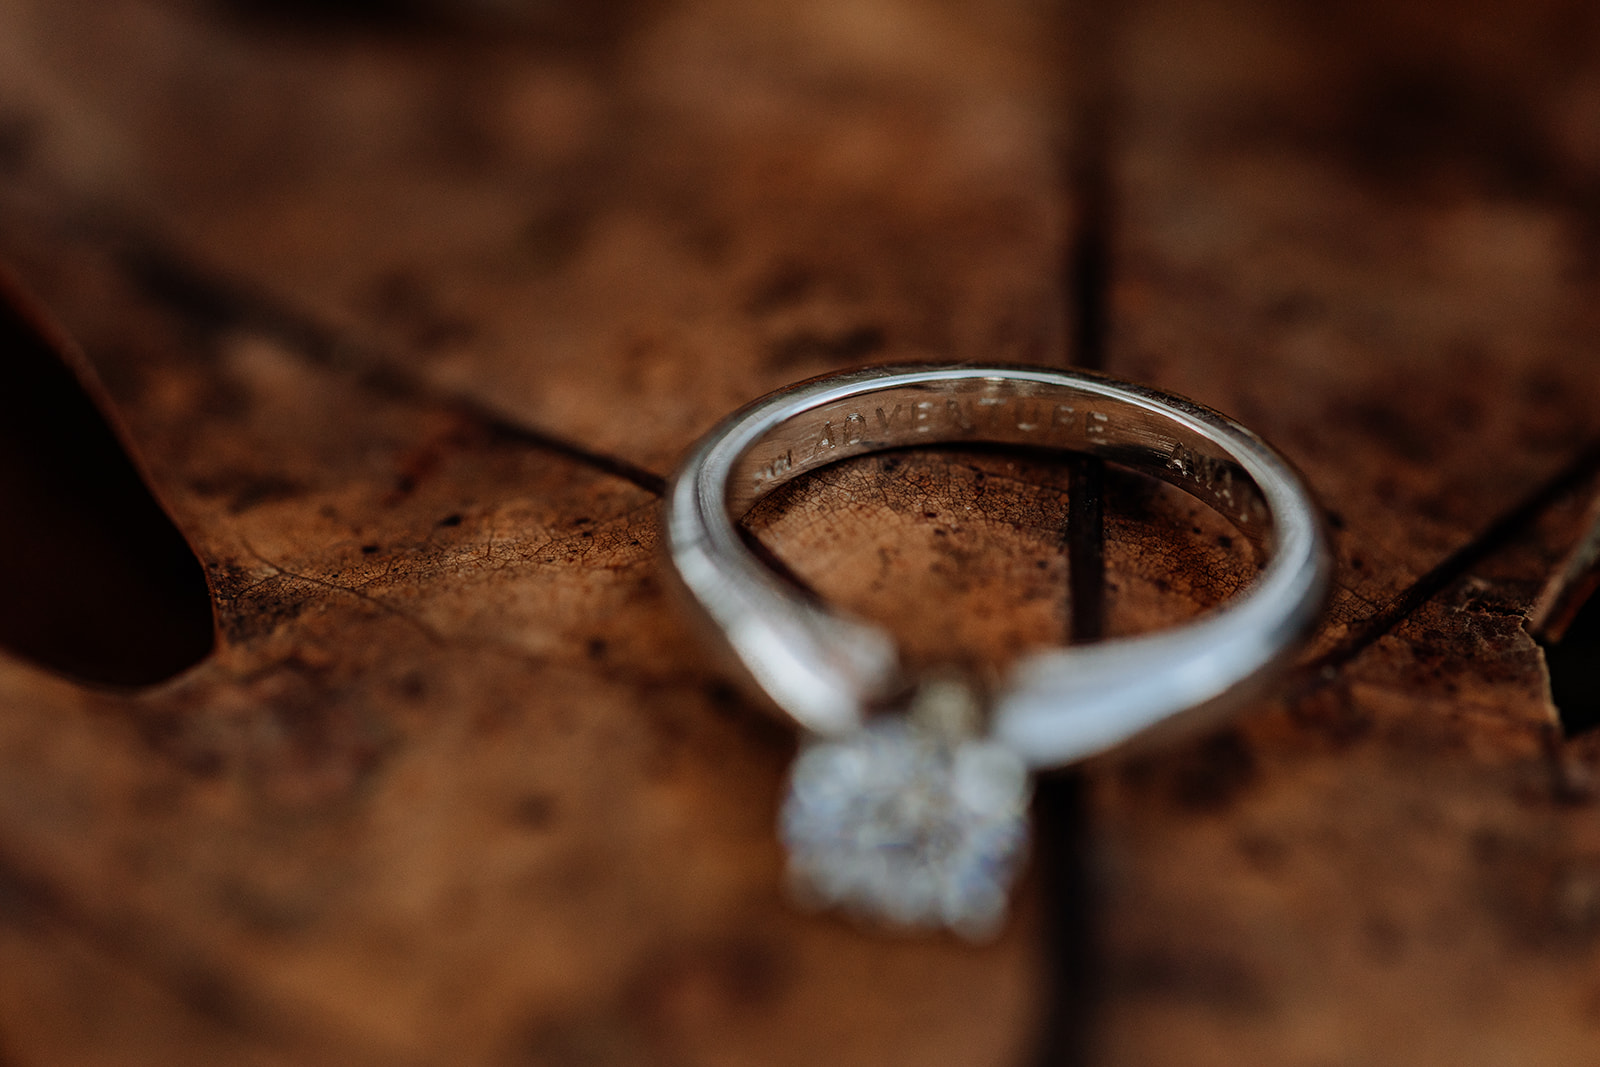 Some engagement rings have small, almost microscopic, details that are important to take notice of and capture. The most common type of details we see are engravings inside of the band.
In the picture above, the engagement ring is engraved with the words “adventure awaits.” This is an element virtually no one would know about, but has meaning for the person wearing it. In this case, we used a wide aperture of f/2.8 and set our focus right on the word “adventure” – this is why the rest of the ring is blurred out (as well as the background). We bring all the attention to the inscription.
Personal stories matter, too
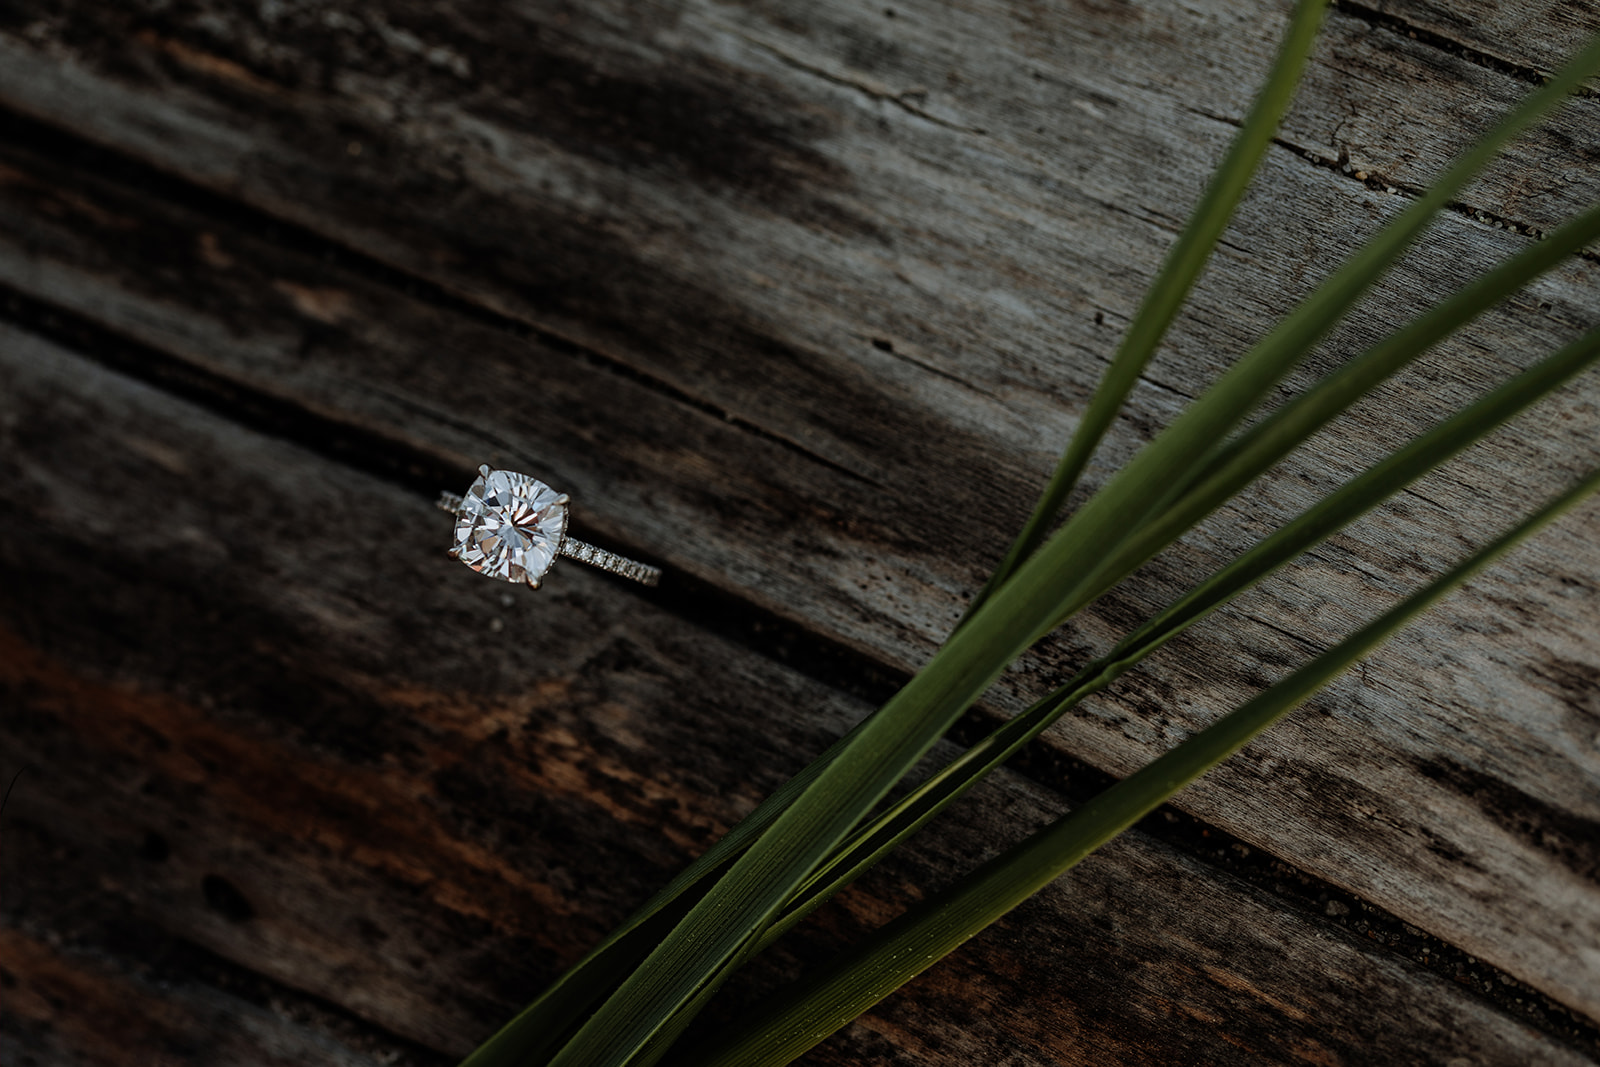 When possible, incorporating personal elements into your engagement ring shots will elevate them heavily for the person who owns the ring. This isn’t always possible (or necessary), but it’s a great touch when it makes sense.
In the photo above, the “personal touch” is pretty inconspicuous – but our choice of location for this photo was very intentional. The engagement ring is wedged into piece of driftwood, on which the couple had gotten engaged some time before. For most viewers, this isn’t something that would be recognized, but for the couple – it adds an extra element of importance and attention.
Step-By-Step: How We Shot This Engagement Ring Photo
 To wrap up this post on engagement ring photography, like we promised – we’re going to give you a step-by-step guided example.
1). Choosing a location
Sometimes, selecting a location for an engagement ring photo is easy. Other times, it takes a little more effort.
This particular picture was taken in downtown Scranton, PA (yes- where The Office takes place!). For anyone remotely familiar with the city, it’s a bit grungy with some pockets of beauty.
Crunched for time, we found a couple of flower boxes around a government building with these vibrant flowers in them. While most of the surroundings were not all that great (drab browns, cement, etc.), all we needed was this little slice of color to make something special.
2). Support the engagement ring
Unless the ring is being placed on a solid surface, it’s important to make sure you ensure the ring will be properly supported. There are a lot of weak flowers out there (this one being one of them). To help counteract this, we physically supported the flower stem and put our hands out underneath the ring in case it would fall.
This is important to us because, again, engagement rings aren’t exactly cheap little trinkets. They are often expensive and mean a lot to people, so we wouldn’t want to drop one from carelessness to just get a shot.
3). Compose the shot
Engagement ring photography will feature the same rules you’d apply to any other type of photo.
We regularly think about the Rule of Thirds and how leading lines can influence the interest in an image.
If you are a photography beginner or just need a refresher, here are a few posts we’ve written that talk about photography composition:
- 101 Digital Photography Tips – A Guide to Taking Great Photos
- How to Take Professional Photos That Are Amazing!
- The Ultimate Guide to Couples Portrait Photography
4). Dial in the settings
Getting the settings just right will allow you to produce a beautiful ring photo.
Our preferred settings for engagement ring pictures (in ideal light) look like this:
- ISO: 100
- Aperture: f/4
- Shutter Speed: 400
If your lens has image stabilization, we recommend keeping this switched on if you are hand holding your camera to help eliminate the effects of camera shake.
If you have a few minutes to set up a shot, you may want to consider adding a tripod like this into the mix to stabilize your camera. You can use a remote shutter release to take really crystal clear photos.
5). Post processing
The act of taking an engagement ring photo is fairly straightforward for us. Often, we love the images right out of camera. But, as is our photographic and artistic style, we like to edit our images to enhance colors and create more depth by manipulating shadows and highlights. This makes for more dramatic and romantic looking ring photos as you have seen throughout this post.
Our approach to editing ring shot photos is very simple. We begin with a Lightroom preset like our own custom presets or the Genesis collection, then make (often pretty minor) tweaks.
Because rings really shine when they are crisp and clear – we sometimes will selectively “polish” the ring with some extra clarity and contrast tools. If you’d like to see more about this process, leave a comment below and we’ll work on a photo editing post showing you exactly how we do it!
Conclusion
We hope this post on engagement ring photography has been helpful for you!
In it we gave you a lot of tips that come from our personal experience photographing many, many rings at this point in our photography career. In practice, taking a great engagement photo is not too difficult when you have a good backdrop and the right lighting – but that is really just like any subject you might be photographing!
As we mentioned, moving to a dedicated macro photography lens really upped our engagement ring photo game. It allowed us to really focus on the ring itself much more to create more intimate, rich, and stunning images as a result.
Leave your questions and thoughts in the comment section below!!