Smoke Bomb Photography – How to Nail Art Portraits
Smoke bomb photography incorporates a simple accessory into portraits to make for some stunning and textured shots. The smoke effect can add some serious drama to a photograph.
While one could argue that it is a look that has been overdone to death – especially when paired with pretty cheesy and on-the-nose subject matter like grungy junkyard portraits – we still find it to be a great tool. The fun factor alone is pretty high!
We’ve also been very happy with the solo portraits and couples portraits we’ve taken that incorporated smoke bombs.
In this post, we’re going to walk you through all you need to know about smoke bomb photography. We will show you how we’ve used smoke to add depth to our images so you can apply the same techniques to capture natural and artistic portraits when you’re in the mood to experiment.
Bring the Necessary Equipment
Before we talk about shooting techniques and other things to consider, we want to quickly highlight the required materials.
From our research, there are a number of different smoke bomb options available for purchase. However, many of them do not seem like they come from particularly reputable sources. If you normally try to do things on a budget, we suggest against looking for the cheapest smoke bombs on the market because they can be hazardous if the quality is suspect (or if they are used inappropriately). Our recommendation in this area are Enola Gaye’s Wire Pull Smoke Grenades.
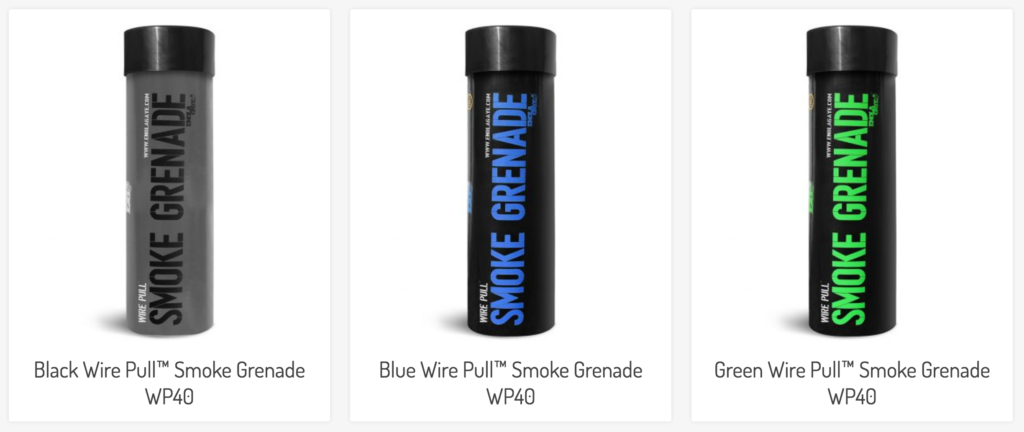 These smoke bombs are primarily designed for sports such as airsoft and paintball, but work just as well for photography. You have many color options as well including:
- Black
- Blue
- Green
- Orange
- Purple
- Red
- White
- Yellow
The one downside of smoke bombs is their cost – roughly ~$10/each.
Because of the steep price tag, you will need to do some preparation and know exactly what type of shot you want to take before igniting as the smoke bombs run for 60-90 seconds before evaporating. In the following sections, we’ll walk you through a real-life shoot where we used just a few smoke bombs to create some great portrait images.
Safety Warning:
Before we go any further, we also want to highlight that smoke bombs can be dangerous. Some types require that you light them with an external flame. The Enola Gaye Wire Pull smoke grenades do help in this area as you simply pull a wire to initiate the smoke release. You may see some sparking even with this method – and as such should keep in mind as it can be flammable. Our suggestion is to really only use them in open environments and away from any dry brush. Always keep a bucket of water available available to put the used cartridges when your done.
General Tips for Using Smoke Bombs for Photography
Before we walk you through one specific example of a shoot where we incorporated smoke bombs, we wanted to just give a few high level tips that will help you use them for photography. These tips are broad enough so they can be applied to virtually any type of shoot you have.
- Plan out your shots before igniting the smoke bomb. Even if you are shooting a single subject, it’s a good idea to do a quick rehearsal of what will happen after the smoke is flowing. If you have any posing directions – it’s a good time to give your subject this information in advanced. You will likely need to make some adjustments as things go along – it’s the nature of working with smoke – but being well prepped will make for better photos in general.
- Shoot when the weather is calm. Smoke can be a difficult effect to incorporate into your photography if there is a lot of wind. It’s not always possible to predict wind patterns – but if you are planning to work with a smoke bomb, we only really suggest using it when the weather is calm enough.
- Smoke can stain clothing. While smoke bombs are pretty obviously flammable, most people would not think they could lead to clothing stains. In particular, colored smoke bombs can adhere to clothing. It’s important to keep this in mind, especially when you are shooting with more expensive clothes (such as a wedding dress) or with an unassuming photography client.
- Avoid high traffic areas. Locations with a lot of people are not the best choice for smoke bomb photography. For example, Times Square in NYC is an area where many people will have the potential to freak out at the sight of smoke. It’s best to avoid these, and instead look for a more isolated location.
- Check if smoke bombs are restricted in your local area. In some jurisdictions, smoke bombs are considered pyrotechnics – so classified in much the same way as fireworks. You may need to check if there are any laws prohibiting the use of these types of things in your area.
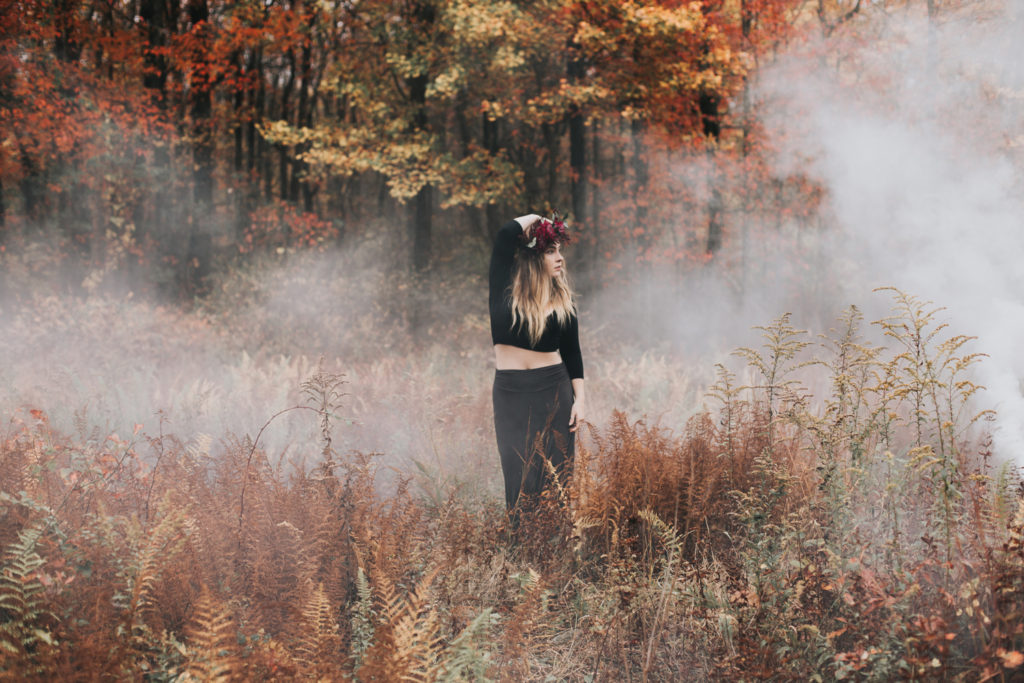
- Use smoke in the background and foreground for different effects. The smoke texture is a great element to incorporate into both the background and foreground of your shots. When it’s in the background, it adds a fairly simple and straightforward look that can resonate throughout the whole image. In the foreground, it can really pull your eye in towards the subject of the photo.
Smoke Bomb Photography Walkthrough – The White Cliffs
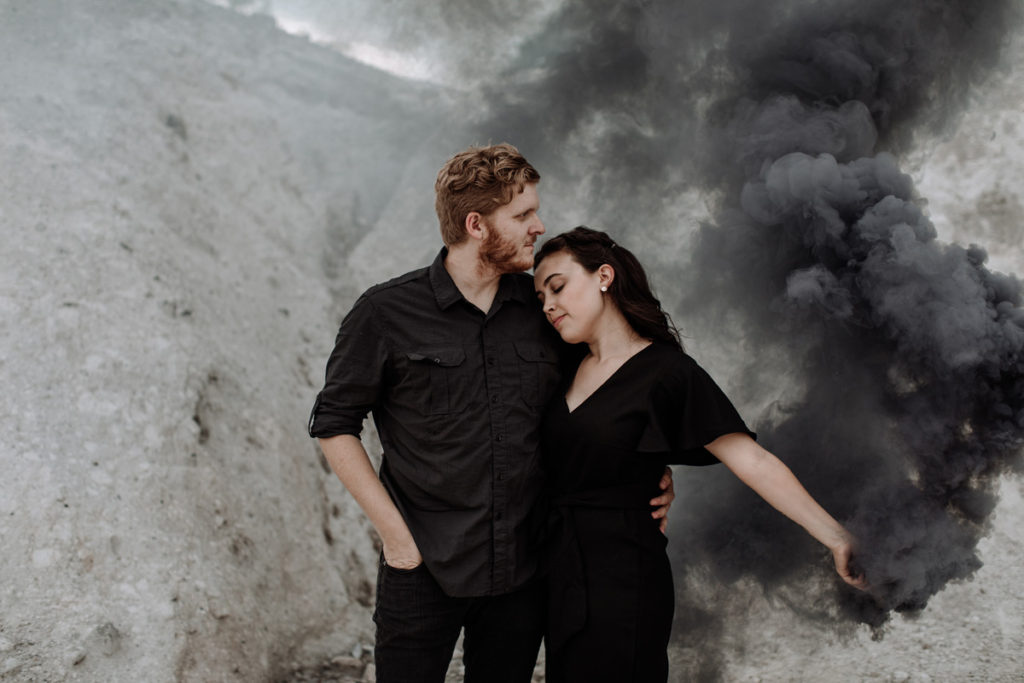
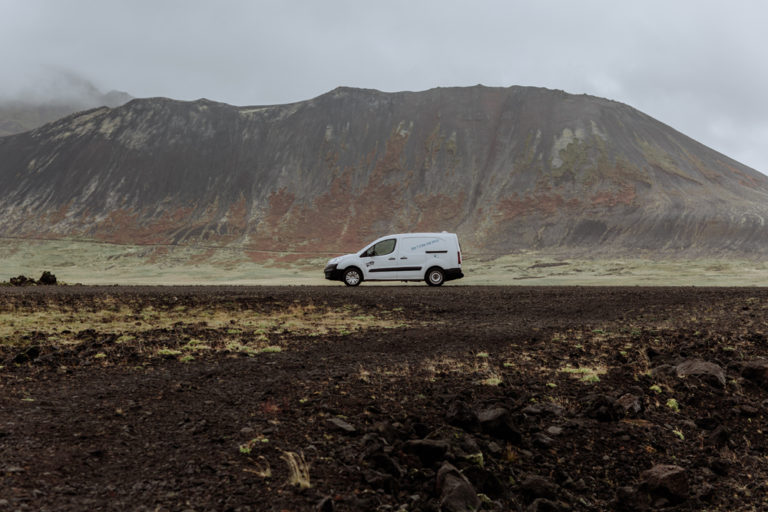
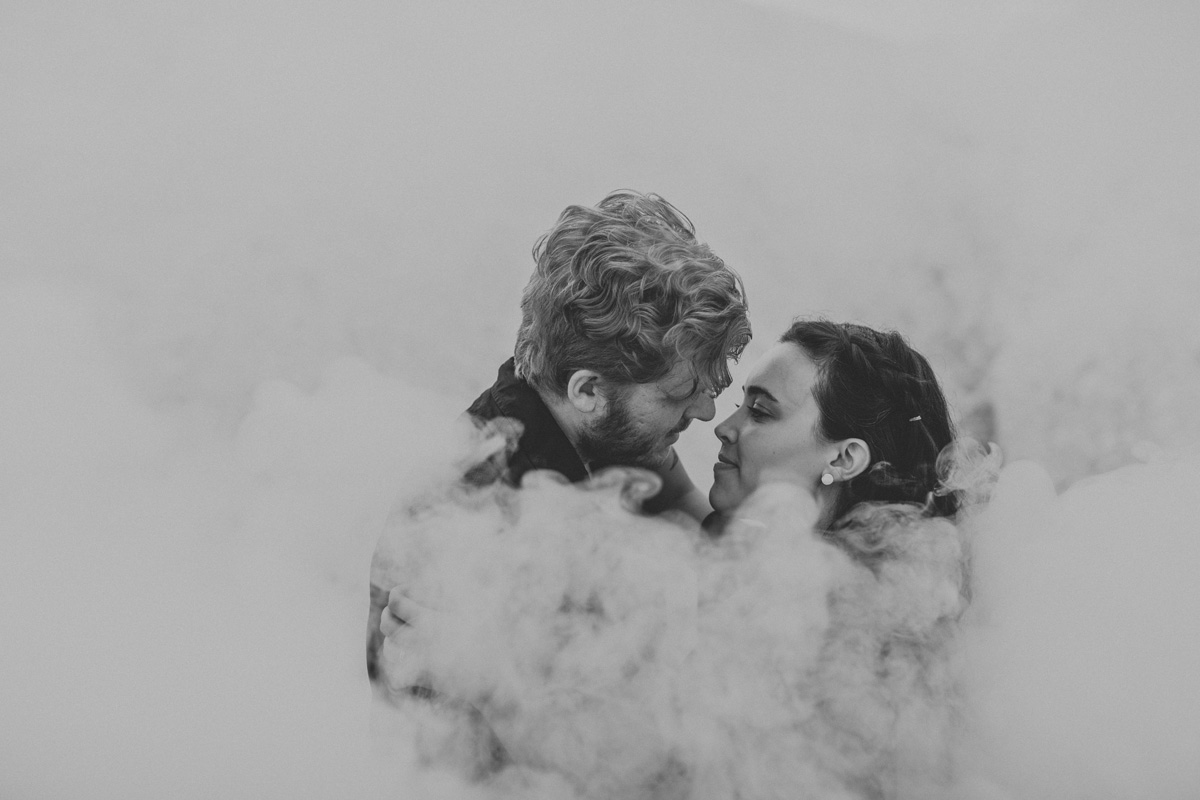
One of our favorite smoke bomb photography experiments to date is from this styled shoot taken at the White Cliffs of Conoy in Lancaster, Pennsylvania. We were invited to come along by our photographer friend Cara – you can check her website out here.
The goal of this styled shoot was really very simple: bring in a couple wearing all black to have them contrast heavily against the predominately white backdrop of the limestone cliffs. The black and white look is very sleek, and would hopefully be a cool way to incorporate smoke without turning into an overdone photo shoot look.
While we did some standard couples photography shots, the smoke bomb portraits were really the highlight. Let’s talk about how we used them to get the beautiful shots we did.
1). We came prepared with the right equipment
 Our choice of smoke bombs (Enola Gaye WP40 Black) and photography gear helped to make this shoot a success. Up to this point, we had only ever used smoke grenades one other time – so they were still relatively new to us. We brought along 3 smoke bombs altogether – because what’s the point to hiking out to a cool location just for one try?
When it came to our photo gear specifically, we were well equipped by having multiple cameras prepped and on hand. The reason for this is because we would be able to quickly shoot with a different lens setup so as to experiment with both tight and wide shots. For sure, you could use a zoom lens just as well, but we have a serious problem with using prime lenses for portraits in particular due to the wide apertures we like to shoot at.
If you’re interested more in our gear choices, feel free to check out our Resources page where we compile all of our equipment for easy reference.
2). We planned our shots
 This photo shoot was actually very easy because we discussed with our models and the other photographer what we all wanted to get from the shots. A lot of our preparations actually came during the mile long hike to this location as we discussed our plans together.
In order to achieve the look we wanted, it was especially important that we aligned the couple so they would be facing with the sun shining on their faces. While we would have probably preferred a Golden Hour shoot, the location didn’t really allow for this as we didn’t want to have to hike back in the dark. Still, with some careful positioning with the light in mind, we were able to make it work very well!
3). We had one person safely ignite the smoke bomb
As there were 3 photographers in total, one of us opted to light the smoke bomb and start waving it around to create the smoke effect around the couple. While this isn’t entirely necessary, we would suggest that you bring someone else along to help assist with the smoke grenade as it does make things a lot easier.
4). We experimented with smoke bomb positioning
 With 3 separate smoke grenades, we were able to use each to experiment with how the smoke was being positioned. Here’s what we did:
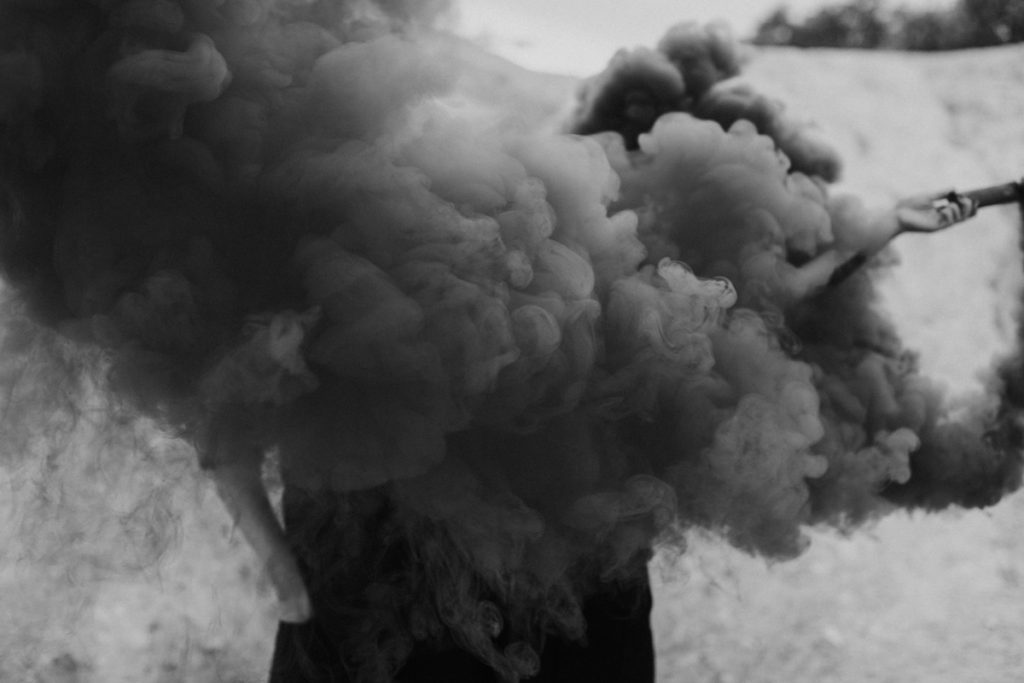
- Bomb #1: An assistant standing to the right side of the frame waved the smoke bomb up-and-down in the direction of the couple and slightly behind them.
- Bomb #2: An assistant (initially out of the frame) ran in circles around the couple bringing the smoke up-and-down.
- Bomb #3: We had the couple hold the smoke bomb itself after it was lit.
Each of these techniques resulted in a really cool effect.
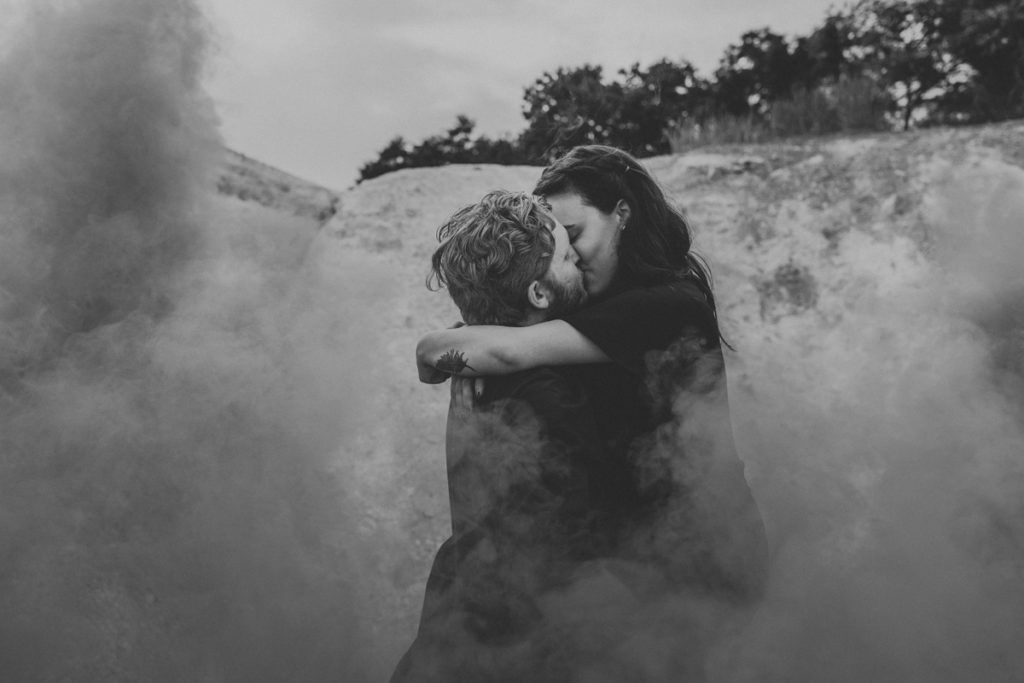
Having a wall of smoke behind or in front of the couple really allowed us to capture some intimacy with the smoke adding a natural effect to our shots. When the couple was holding the smoke bomb, sure – it felt a little more staged – but it’s still a nice way to mix things up and experiment a little bit.
As you can see, it is really simple things that we are doing, and that is maybe one of the most important tips we have about photography.
5). We focused on simple compositions

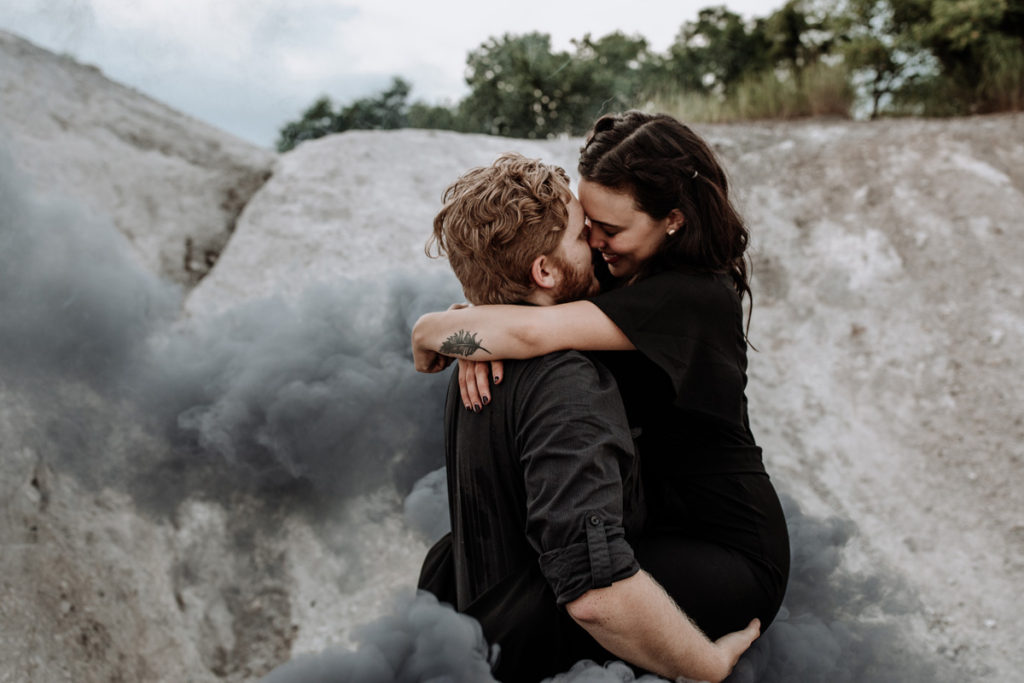
Our approach to photography is always about the subject first.
This is especially true with couples portrait photography, which can be a great way to emphasize their natural chemistry and affection for one another. It’s one of the reasons why our approach to posing is done in a way to convey this, instead of a really stiff and rigid approach.
Smoke bombs, like any other props, are just…props…
They can absolutely compliment a scene.
But they can also serve as distractions if you get too focused on the smoke, and not focused enough on the subject in front of you.
To counter this – we kept our compositions really simple.
Use the Rule of Thirds, put the subject right in the middle of the frame, and use leading lines to add more depth. Much more than this isn’t really necessary, especially when the smoke effect is going to add a lot of intrigue quickly.
6). We accepted the unexpected and ran with it

With all the planning done and smoke bomb lit, all you can really do is go with the flow. Sometimes, the smoke has a mind of it’s own – as does the wind that can easily pick up when you’re least expecting it.
If it’s your first time using one of these things, you might get frustrated as it can be hard to control to perfectly get the shot you want. We definitely got more used to it by the 3rd one, but there is some element you’re never going to be able to control with it.
So, once things get going, be ready to make adjustments. Sometimes just moving to another angle can make things workable. Other times, giving your subjects some directions to reposition works too.
7). Use smoke colors that make sense for your shoot
The one area that some photographers get a little carried away when it comes to smoke bombs is using colored ones when the colors just don’t work.
For this particular shoot we’ve been walking you through, our choice of black smoke was perfect because the entire goal was to have the contrast of black (the couple’s attire and smoke) and white (the limestone cliffs). It gives off a pretty natural yet modern type of look.
With that said, there are plenty of situations where using colored smoke bombs can make sense.
Some couple’s have photo shoots to do a gender reveal for their baby-in-the-making. Using pink or blue in this case makes a lot of sense. We’re sure you could think of other ideas, too!
One thing that we did come to learn later as we edited our photos is that – the smoke (at least the black smoke we used) could be pretty easily adjusted in Lightroom to be virtually any color we wanted. This means: if you’re not totally happy with the color you picked originally, just remember that photo editing can do a lot of wonders for the end result!
Smoke Bomb Alternatives – Safer, Cheaper, Better?
One of the things we really love about smoke bombs in photography is how they can be used to add a natural looking dramatic effect.
Of course, there are downsides – such as safety concerns, pretty high cost if you want to shoot for more than 60 seconds, and they can be pretty challenging to effectively control.
We aren’t saying you shouldn’t try them out, but did want to show you some alternatives that can lead to pretty comparable results.
1). Atmosphere Aerosol
Just like using hair spray, Atmosphere Aerosol is a great fog effect. In general, you won’t want to use it to cover really large spaces like a smoke bomb, but for a little atmospheric haze – it does a great job. It is particularly great for use indoors, where you wouldn’t want to use smoke anyways.
2). Fog Machine
Another alternative is just using a fog machine such as the Chauvet Hurricane 1301 H1301 Pro Smoke Fog Machine Fogger. This is a quality fog machine designed to generate sufficient fog to fill a room. You can control the settings. Unfortunately, there is no battery powered option – so you will need to either shoot indoors or be in an outdoor location near a power outlet. Still, it is a safer alternative and while more expensive up front, can simply be replenished with fog liquid that will last for a number of shoots.
All in all, these are good alternatives, but not entirely replacements for smoke bombs. If you’re a young photographer or pretty weary of using something with “bomb” in the name, they can be great to still get the moody effect you’re liking looking for. Each option does have some limitations, but choose the one that works best for you (or heck – try them all!).