Our First Experience in Commercial Photography: The Movie Tavern
Commercial photography has never been something at the front of our minds. Our photography tends to center around couples and weddings. While we occasionally do other types of shoots, and enjoy landscape photography (especially while we travel), it’s just an entirely different arena for us. We’ve been pretty comfortable with our pricing, booking process, client interactions, and so on – but working on a commercial project is a new beast to conquer.
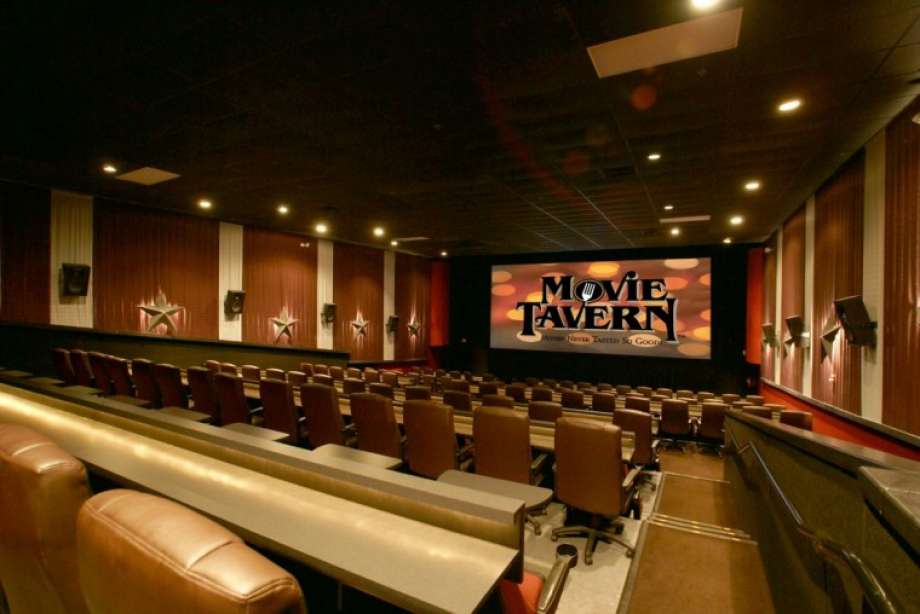
In June 2018, we were contacted by the Vice President of Design & Construction for The Movie Tavern. If you’re unfamiliar, The Movie Tavern is a movie theater chain with locations around the United States. They enable people to have a bite to eat (of more than just popcorn) while watching the movie. They also have a nice bar area for grabbing food without having to see a movie, too.
As you might imagine, when we received the initial email we were both excited and a little nervous.
Throughout this post, we’re going to talk about all aspects of our first experience in the world of commercial photography. We will be discussing this in depth so you can get acquainted with the entire sequence of things we did to secure and complete this project. We are also going to talk about some of the mistakes we made that have turned into positive learning experiences for the future.
Ready?
First Contact
The initial email we received laid out what was being looked for. Amusingly enough, the request was actually to be able to use some pre-existing photos we had on our blog. After asking later in our working relationship, we had discovered that we were found through some Google Searching – we expect due to good SEO efforts to tag our images with relevant keywords for our local area.
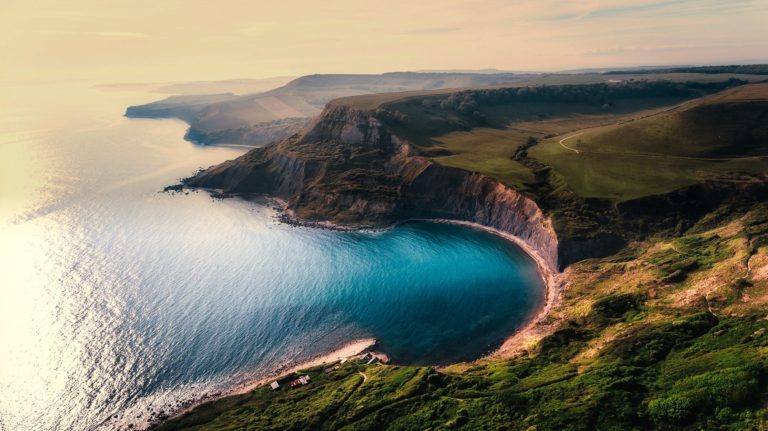
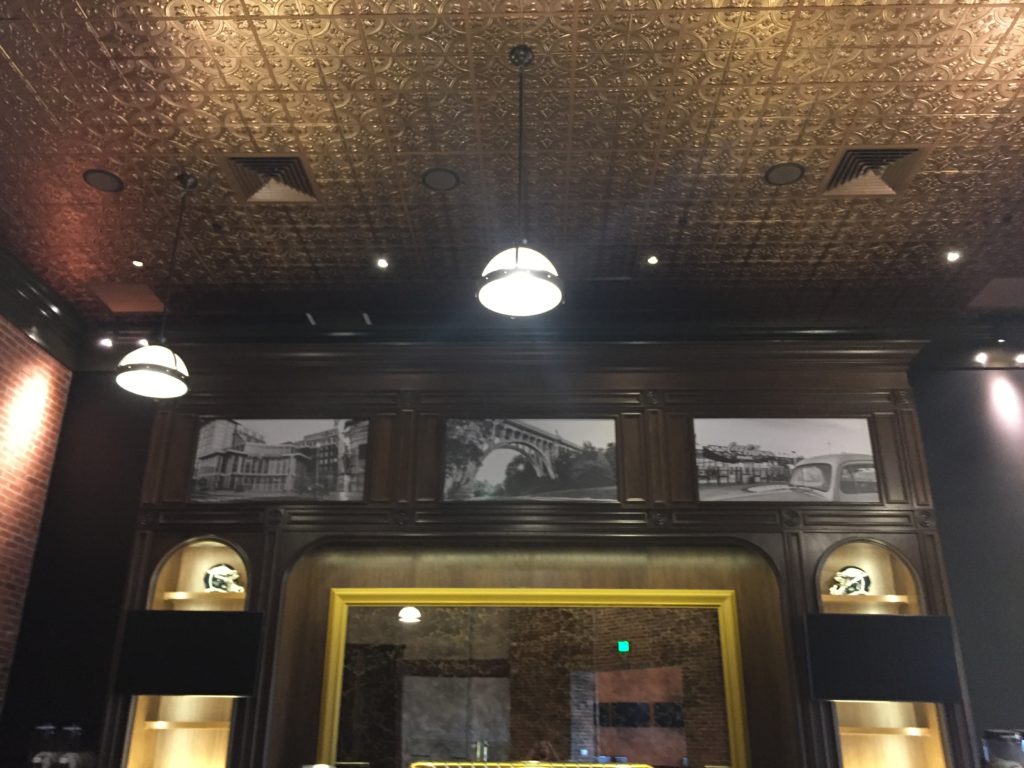
You see, The Movie Tavern was looking into our photography because they were nearing completion of a new location in our area. This had been a project we’d heard about in passing in some local news articles. The specific need was for images to showcase the region to hang above the bar area.
After a few emails back and forth, though, it was determined that The Movie Tavern wanted to take things in a different direction. No longer did they just want images we’ve already taken, but instead they wanted to have new photos taken to capture some landmarks in our area.
Sorting Out the Specific Project Needs
In order to move things forward as an actual booking, we needed to get all the information possible in order to put together a proposal. Via email, this requires being very straightforward regarding what is needed. This included sorting out the expected turnaround times and so on.
The resulting things that were needed to fulfill this project ended up being more than just commercial photography. It turned into a much larger project, to say the least. Here’s what we ended up doing:
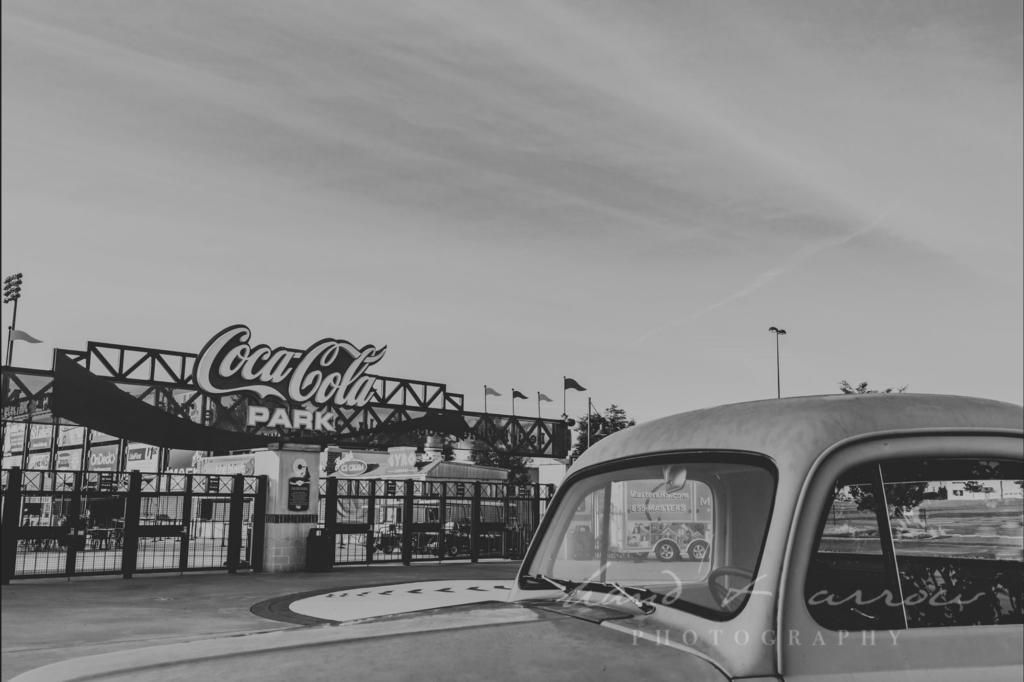
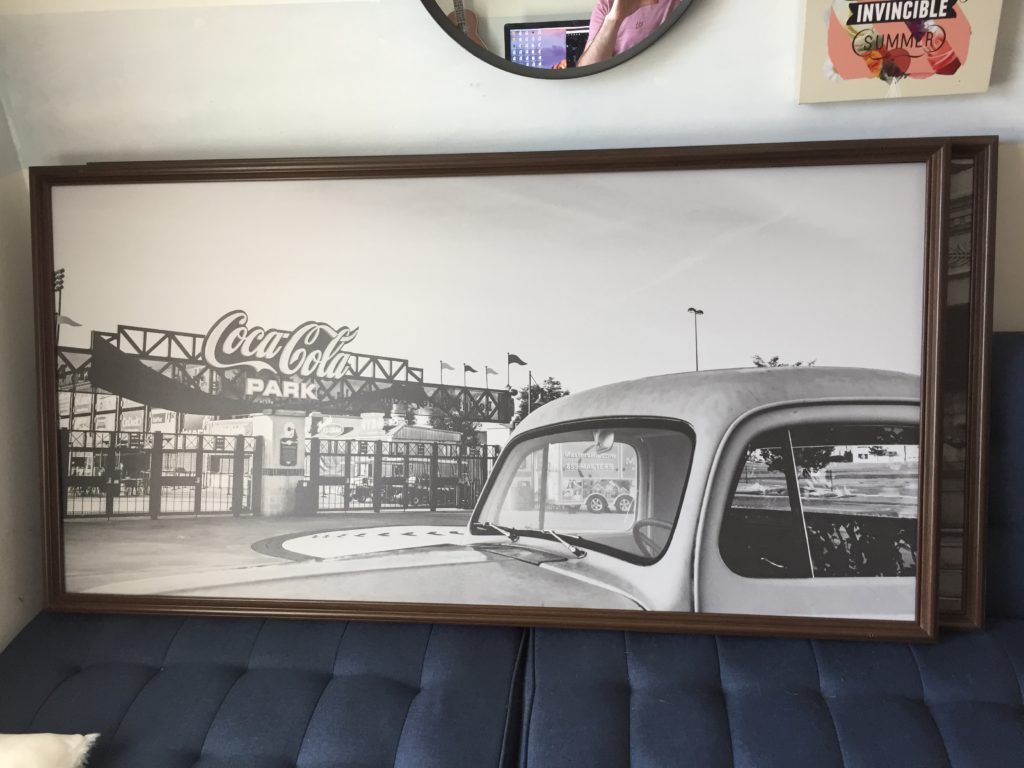
- Take 3 photographs of pre-defined locations. The locations were passed along via the VP doing research and providing sample images and street addresses.
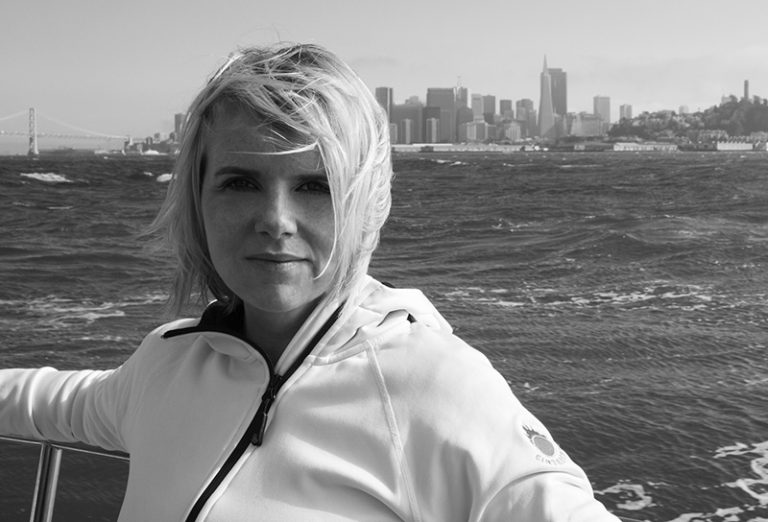
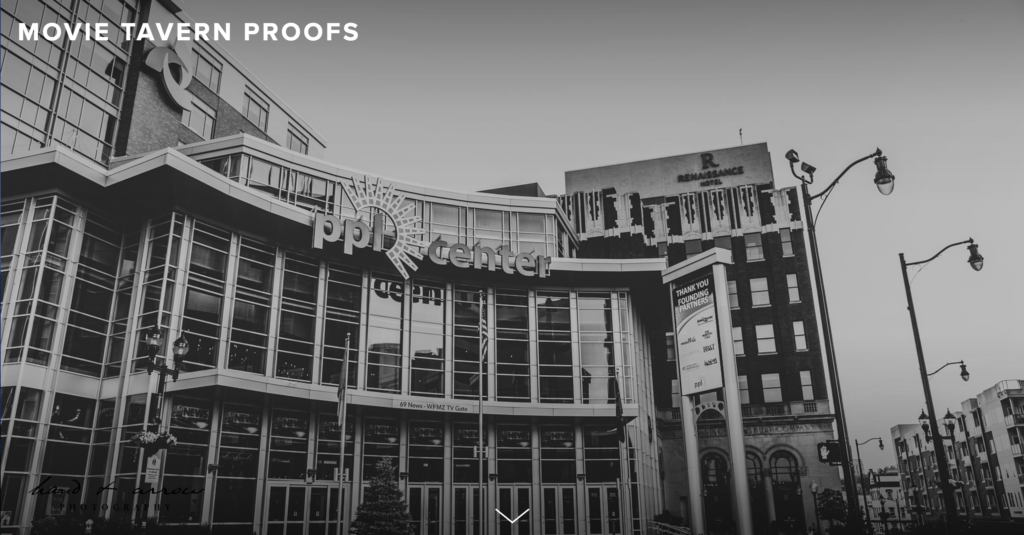
- Edit the images into black-and-white. The black-and-white aesthetic is what would suit the theater bar. It is possible to shoot in B&W in camera, but we always shoot in color and edit to gray scale.
- Provide digital proof gallery. We selected 5 images of each location, making for a total of 15 pictures. We provided these to the VP – who, in coordination with the CEO, made decisions on which images they wanted to use.
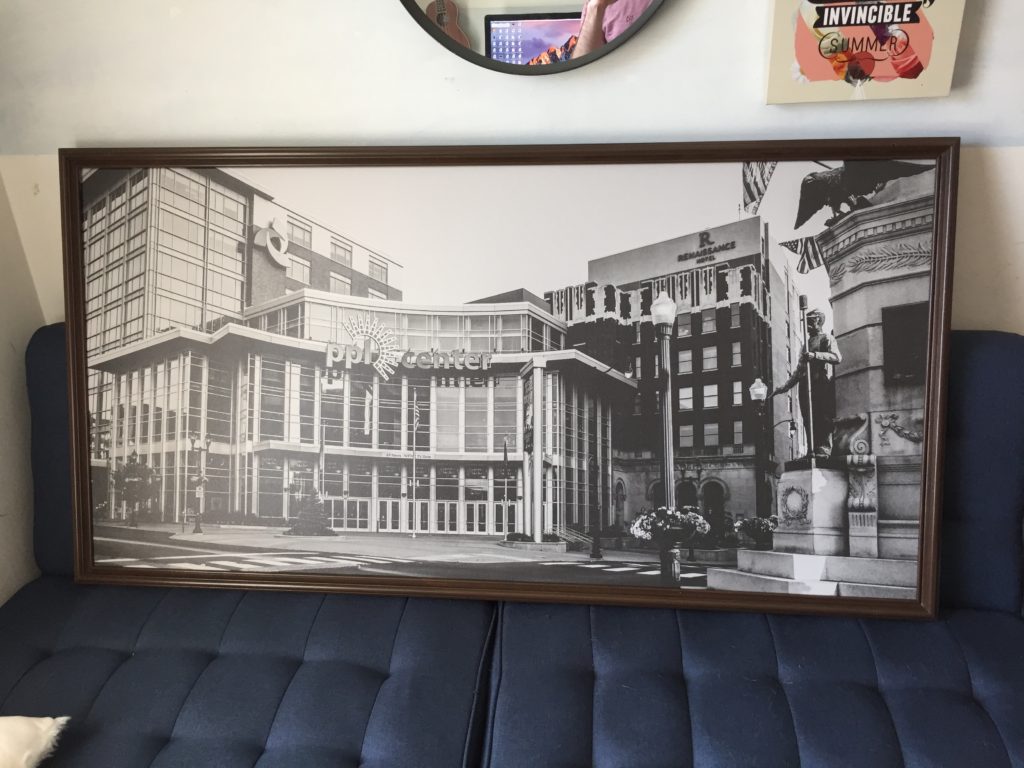
- Have the images printed on custom canvases. The canvas sizes would be determined based on our measurements in frames provided by the theater.
- Install the canvas prints in a custom frame. This requires us buying some bracketing equipment to mount the canvas securely to the frame.
- Install the framed canvas prints above the bar at The Movie Tavern.
As you can see, this is a project that had us not only be commercial photographers.
As we’ll discuss more later in this article, we took on some things we were not entirely comfortable with due to wanting to secure the job. We were able to stay level headed and make things work, though, and that is one of the keys of running a successful business.
Figuring Out What to Charge
Before we could get together a proposal, we needed to step back and sort out what we would charge for this type of project.
Our pricing has been designed around photography weddings and small sessions. Commercial photography is an entirely different world, and it’s difficult to judge exactly how much a particular service is worth. This is especially true when you haven’t done it before.
The price we ended up putting on this entire project was $1,500. This would cover our time, photographs, installation and expenses.
Does this sound too high, too low, or just right to you? We’d be interested to know how you feel about this figure for a first time commercial photography project like this.
Sending Out the Proposal
 Sending out our proposal, which would consist of a contract & invoice structure, was easy enough based on our past experiences.
Using Honeybook, we are able to do all of this and more to keep our projects in order. This is a paid platform that is well worth the cost if you are doing any type of photography for clients – be they commercial organizations like this, or individuals booking a portrait session or wedding. You can read our Honeybook review for more information!
In this area, we were prepared to adapt our current contract verbiage to the specific needs of this project on our own. This is one place where, if it’s your first foray into charging for your services, that consulting a lawyer can be beneficial to making sure your contracts are actually well written, legally binding, and actually protect you as a business owner.
Once everything was prepped, we sent it over. As is normal for us, we always require a 50% retainer payment. In this situation, given our expenses such as for the custom canvas prints, we also required additional payment up front to cover these costs. This is one area we never would budge on as it should be expected when conducting business like this.
Contract Signing
After the proposal was sent, it was a simple waiting game for The Movie Tavern to sign the contract and pay the retainer fee. Once this was done, we got to work!!
Photographing 3 Landmark Sites
The three locations we would set out to photograph were in Allentown, PA. These are:
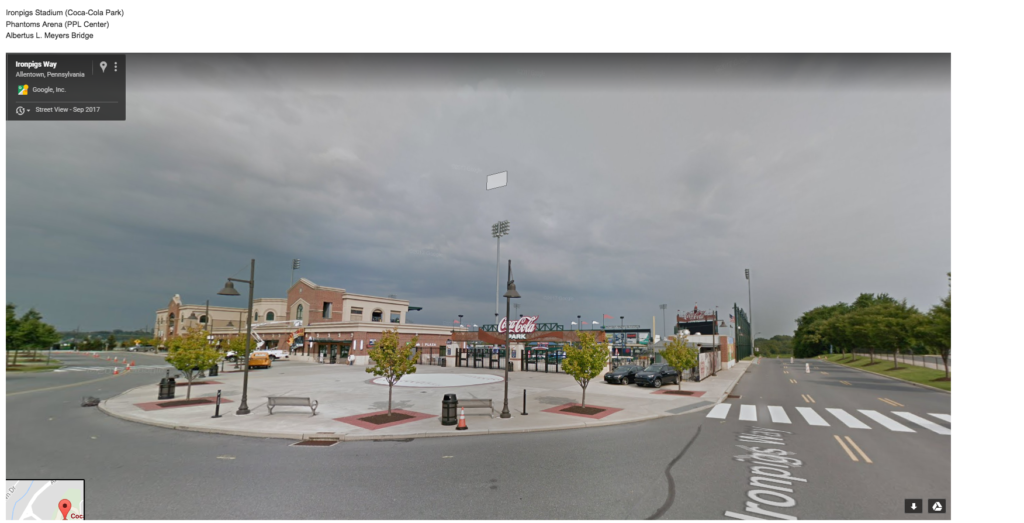
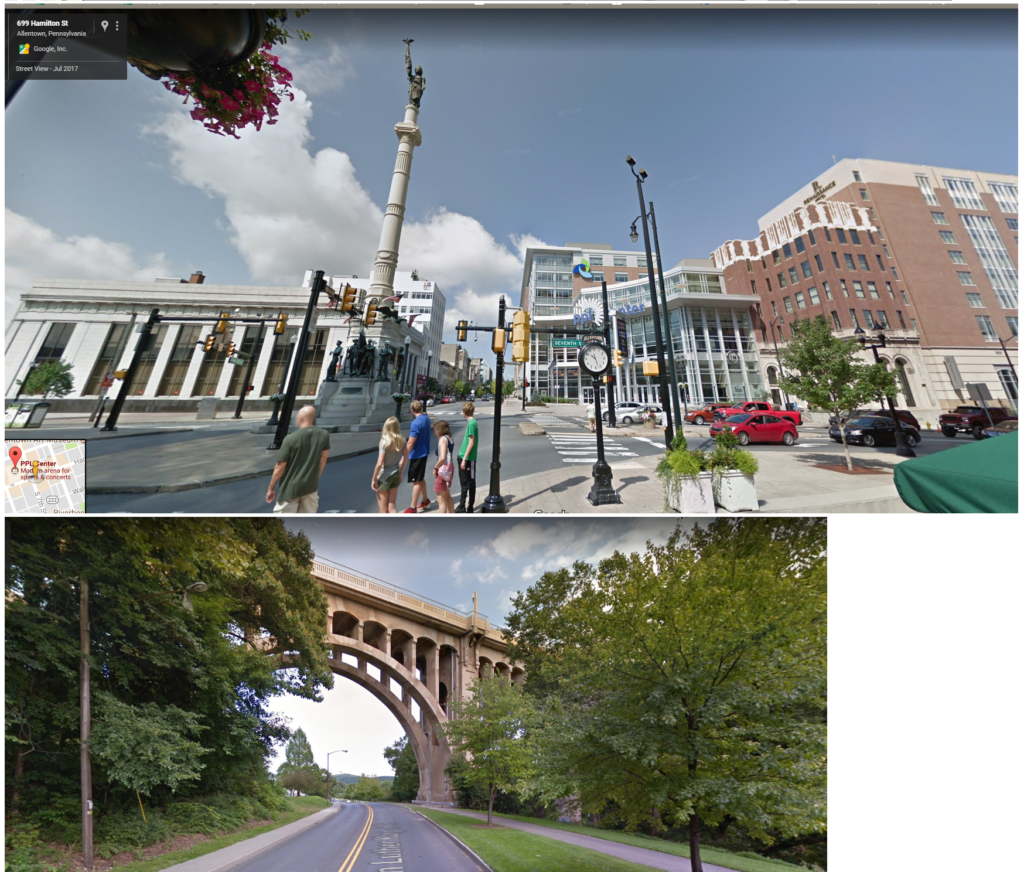
Being from the region, we were familiar with each of these places, so it made getting around and grabbing photos pretty straightforward.
Given the scale of these places, we would have to work with wide angle lenses in order to get the best shots for this project. Our preferred lens ended up being the Canon 16-35mm f/2.8 USM II Lens – one we highly recommend for photographs of environments. For the sake of variety, we did also take some photos with other lenses including the Canon 35mm f/1.4 USM Lens and Canon 50mm f/1.2L USM Lens.
We scheduled time on our calendar to shoot these sites. Unlike wedding days and sessions, it was actually pretty relaxing to be able to go out “any time we wanted” in order to do our job. Of course, if you’re remotely familiar with any of these spots, particularly the PPL Center, they are hubs for crowds of people. Because of this, we decided shooting during the day and evening would probably be less than ideal.
We ended up waking up at 6AM (the day after shooting a wedding, no less) and drove out to get these shots without too many people around. Additionally, we were able to take advantage of the morning’s Golden Hour light.
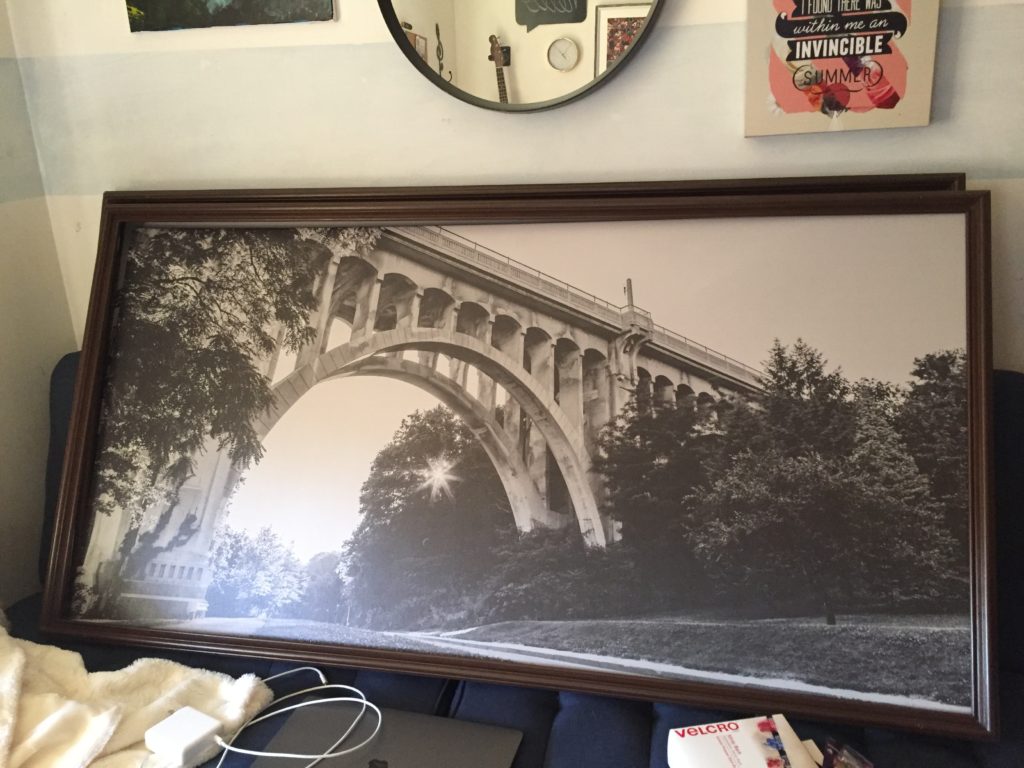
Though we were shooting photos that would ultimately be converted into black-and-white images, Golden Hour is still more ideal because the light is softer, and there is less harshness in the images. This coincides with our photography style in general. Though our images would really just end up being the “slice of life” types of photos you’d expect, we did take artistic liberties where it made sense. An example of this is while shooting the bridge, using a very small aperture (we shot at f/16) to create a lens star flare effect.
Need more photography advice? Check out 101 Digital Photography Tips – our comprehensive guide to photography for beginners.
Editing the Shots
Now that we’ve got our photos, we did a quick cull in Photo Mechanic.
We got our images down to just a handful per location.
We then imported the photos into Lightroom for editing into the B&W style. For this, we used a Tribe Archipelago LXC B&W preset. We were able to tweak this and adjust to better suit our aesthetic style. This preset helped us get a film look without excessive grain that can be found on lesser presets.
If you’re taking on a commercial photography project and want some more preset suggestions, consider using some of these we’ve used in the past:
Since this commercial shoot 6 months ago (from the time of writing this), we’ve created our own presets that we use consistently for all of our shoots. We’ve really been doing a lot to better define our style, and work outside of the bounds of popular presets so as to have a more unique end product.
Sending a Proof Gallery
We prepared 15 fully edited images (5 of each location) for our client to review. The VP + CEO would need to sign off on our work, and decide which photos they would like to have blown up as canvas prints.
In order to streamline this process, sending an online gallery of the images enabled this process to be done easily and remotely. This was really essential as the people we were working with were located in different areas of the country – so even if we’d had wanted to meet in person, it wouldn’t have been possible.
To do this, we used Pixieset – our client gallery service. Pixieset can be used for free, and upgraded to different paid levels. Due to the volume of work we have, we are at the Ultimate pricing level. For this type of commitment, we’ve definitely been very happy with the platform. You can read more about this in our Pixieset review.

Picking Up the Frames
As part of our project, the actual commercial photography was only half of the work we had to do. Once the image selection was finalized, we arranged with the VP to meet as The Movie Tavern location to pick up the frames. These were custom made frames created to fit in defined spaces above the bar area.
Of course, while picking them up, we also took a look at our eventual working space – where the canvas prints would hang.
Ordering the Custom Canvas Prints

With frames on hand, we took measurements to order the custom size canvas prints. No lie, we were a bit stressed out about this part – as we were projecting to need to spend between $500 and $1,000 on these due to the size and estimated costs. The canvas sizes ended up coming out to 58″ x 29″ with a .75″ depth.
Little did we know, this is really a peculiar size. From our research, most online print labs didn’t allow for a size like this. We went as far as to check in with some local printers – but it was the same result.
We were very fortunate to stumble upon CanvasPop at this time. They were the only online canvas print lab we could find that would not only print at this size, but have a reasonable turnaround time that would work within the confines of our project.
While you can read our review of CanvasPop for more details, a quick summary of why it really worked out for this commercial photography printing project:
- They actually could print in our custom size specifications
- Their turnaround time was quick and suitable for our project (~2 weeks to receive our prints)
- The quality was very, very good
- The cost ended up lower than expected due to some CanvasPop coupon codes we found (we talk about this more in our review so you can save up to 50%)
Mounting the Prints to the Frames
The next steps of our commercial photography project were actually a little more foreign to us. Mounting the canvas prints to the frame took a little bit more effort than we were initially expecting. Fortunately, with some careful Youtubing, we were able to find some instructions to help guide us along. After a run to the local hardware store, where we picked up some brackets and screws, we were on our way to mounting the canvas prints.
All in all, while time consuming and a bit stressful because we didn’t want to mess something up, we got them mounted and ready to hang in The Movie Tavern.
Installation at The Movie Tavern
Finally, installation day has come.
We made arrangements with the General Manager of The Movie Tavern location where our canvas prints would hang to get them in place in advance of the opening.
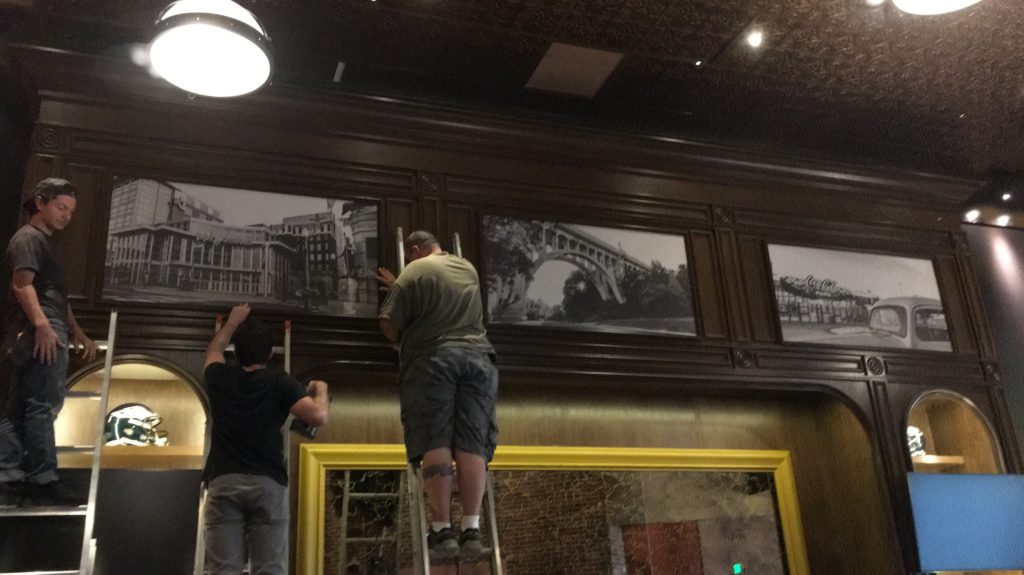
Our install turned out to be a lot more complicated than we had originally expected. When agreeing to get them in place, we were under the impression it would be a simple job. It turned out (and this was realized when we picked up the frames earlier) that these prints would be hanging above the bar area – about 15 feet off the ground. It’s kind of crazy, and a bit of an oversight on our part to not ask about this.
We came to the realization we would not be able to do this job on our own due to the logistics of the space. As a result, we ended up bringing along 2 friends to assist. We were fortunate to have this extra help, as it ended up being an installation that required being rather delicate as most of the bar was already assembled – including large TV’s and glassware everywhere.
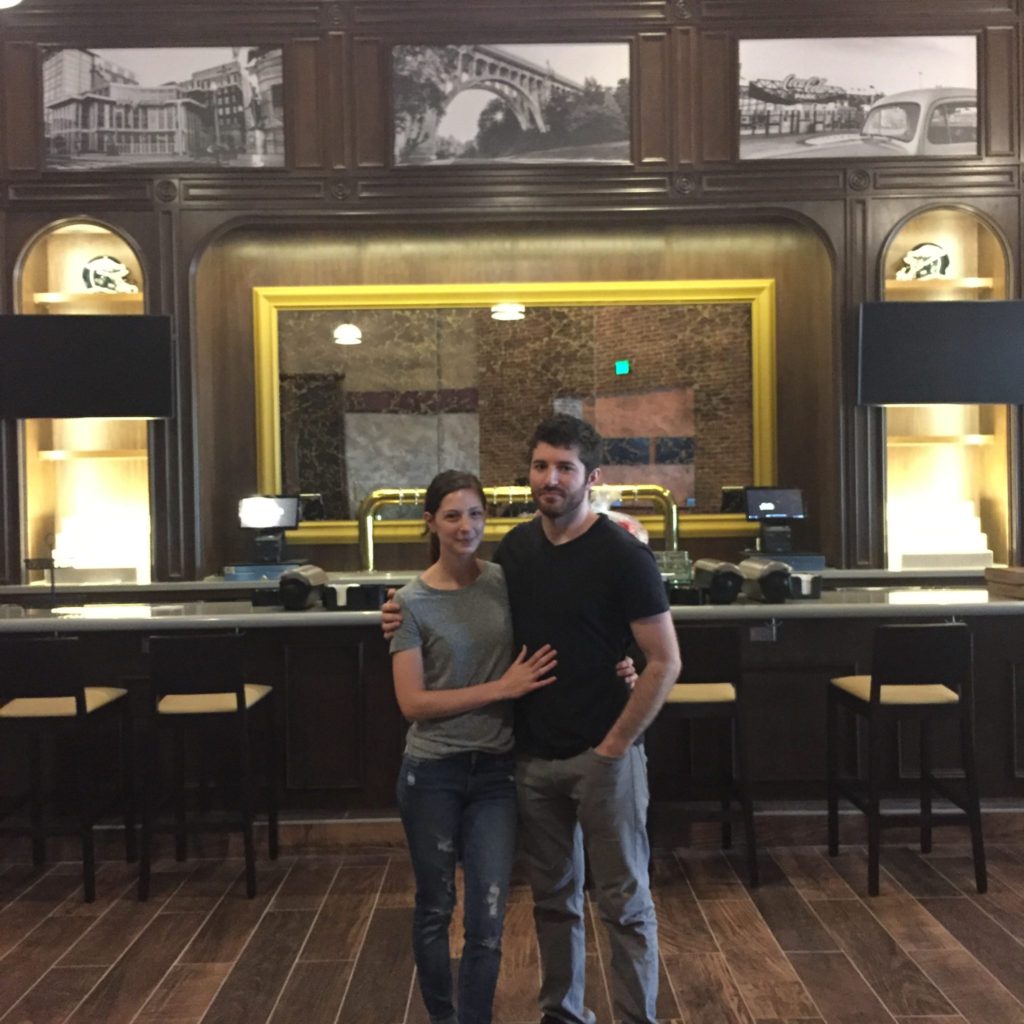
It took around an hour to get the 3 canvas prints installed above the bar. It also took 4 people and 3 ladders to do the job. We have some photos to share of our install & finished work. Sorry for the low quality as these were taken on our phones!!
5 Things We Learned From Our 1st Commercial Photography Project
Our first commercial photography opportunity went on pretty smoothly.
We learned a whole lot in this process, though, and want to share with you some of the takeaways. These are really personal reflections on our own work. No one really wants to admit to things they did wrong, but we hope you find this useful, especially if you are considering taking on commercial photography work now or in the future.
1). Know the limits of your service.
This is probably the biggest mistake we made on this project. We got a little overly excited to think our work would hang in a business. There would be a lot of exposure to our photography. Maybe more important to us, we could feel good to have put these shots together and have them accepted by such a large company.
Immediately, we were definitely comfortable with capturing the images being requested. Taking photos is the basis of our photography business as you could expect.
What we were not entirely comfortable was with ordering these large prints, mounting them to the frame, and installing them 15 feet above the bar. As professionals, we worked through our discomfort and made things work. But, in the future, big installs like this is something we simply won’t do again.
2). Get all the details.
It probably goes without saying, but get all the information about what will be expected for your project. The main area where we should have gotten more info upfront was regarding the height of the install area above the bar.
Our initial impression was that we would be mounting them to a ground level wall (which would have been much easier). In reality, the 15+ foot installation height required hiring additional people to help us out and needing to transport a bunch of 20′ ladders to the work site.
If that sounds like a lot, it is. It is really work meant for a general contractor to do. It was an oversight on our end, and not one we’ll make again.
3). Charge more than you think you’re worth.
One of the hardest parts about doing commercial photography for the first time is actually pricing your efforts. With wedding photography, we know our value and charge $3,000 – $4,000 pretty easily. We’re comfortable with our sales pitch and in defining what our clients would be paying for.
Since this was our first time having to price commercial photo work, our quote of $1,500 was okay, but in retrospect pretty low. After expenses, we made around $800 in revenue. Then of course what we would actually keep after taxes would be pretty low. All things considered, we did about 5-6 hours of work between everything – so we still made out decently for this.
However, a project like this has a lot of liability concerns. If we had messed up the install, for example, it could have been a real problem. Given the stress, liability, commercial image release, and the simple fact we were doing work for a large corporation – we probably could have easily charged 2-3x what we did.
4). Be willing to send additional invoices when costs add up over the initial quote.
One thing we’ve had to learn the hard way is the difference between projected costs and actual costs.
For wedding photography, we know all the expenses that will be required and build them into our package prices.
For commercial photography, things are different – especially when you are doing contractor type installation work after taking the images. In practice, pricing would be much simpler if it was just for the digital images. It gets more complicated when your inexperienced to gauge how much certain equipment and what have you will cost. We spent more than expected on mounting hardware to get the canvas attached to the frame, for example.
We should have been more proactive to make sure our costs were covered.
5). Make sure the work you’re doing is worth it.
The last thing – make sure the work you are doing is worth it to you. While our first experience in commercial photography was worth it for us, it was also very challenging. It was made more difficult due to taking on the work during an already busy season of photography. Meeting the project requirements while also balancing shooting weddings, other sessions, having client meetings, etc. made it much more challenging.
Your Thoughts?
So, now that we’ve shared a lot of detail about our 1st commercial photography project – what do you think?
Share with us in the comments below!